Creating a stunning floral wreath is more than just a craft project; it’s a way to breathe life into your home and express your personal style before a guest even steps through the door.
Whether you are aiming for a lush, romantic vibe or a sleek, modern aesthetic, the secret lies in the layering and the quality of your base.
By mastering a few professional techniques—like staggering your blooms and using the right gauge of floral wire—you can create professional-grade decor for a fraction of the retail price.
In this guide, I’ll walk you through the essential materials, the foundational steps, and 10 unique wreath projects that will transform your space.
The Crafter’s Toolkit: Essential Supplies
Before we get our hands messy, let’s talk gear. I’ve learned the hard way that using the wrong glue or flimsy wire can lead to a wreath-tastrophe in high humidity or wind.
Here is what I keep in my craft bin:
| Tool/Material | Purpose | Pro Tip |
|---|---|---|
| Grapevine Base | Provides a rustic, sturdy foundation. | Soak it in water for 10 minutes if it’s too brittle to work with. |
| Floral Wire (22 gauge) | Secures heavy stems and large ornaments. | Green coated wire blends best with foliage. |
| Hot Glue Gun | Permanent bond for small accents. | Use high-temp glue for outdoor wreaths to prevent melting in sun. |
| Wire Cutters | Cutting faux flower stems and wire. | Never use your good fabric scissors on wire! |
| Floral Tape | Wrapping stems together for a seamless look. | Stretch the tape as you wrap to activate the adhesive. |
| Faux or Dried Florals | The stars of the show. | Look for real touch silk flowers for a high-end look. |
1. The Wildflower Meadow Wreath

There is something so effortlessly beautiful about a wreath that looks like you just gathered a handful of blossoms from a summer field.
For this project, I love using a mix of heights and textures.
To start, take a standard 14-inch grapevine base. Instead of placing your flowers flat against the wood, I want you to angle them outward.
Start with your filler greenery—think eucalyptus or ferns—to create a lush background. Then, tuck in your primary wildflowers like daisies, cornflowers, and poppies.
My Budget Hack: Don’t buy expensive pre-made wildflower bunches. Hit the filler section of the craft store and buy long sprigs of Queen Anne’s Lace or Baby’s Breath.
Snip them into smaller pieces to make the wreath look fuller for half the cost.
2. Modern Minimalist Hoop Wreath
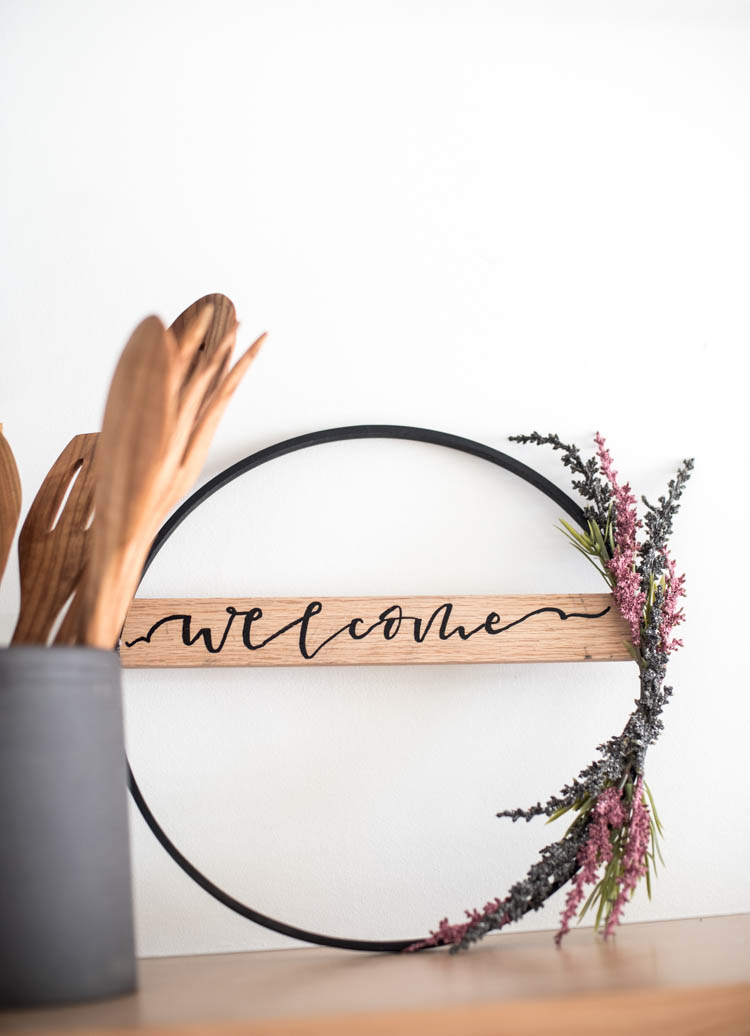
If you prefer a clean, Scandi-inspired look, the hoop wreath is your best friend.
Unlike the grapevine, this uses a thin metal or bamboo hoop, and the less is more rule definitely applies here.
I usually only decorate about 1/3 of the hoop, leaving the rest of the gold or wood exposed.
Use a single, large focal flower—like a King Protea or a large Peony—and offset it to the bottom left. Surround it with a few sprigs of silver dollar eucalyptus.
Material Weakness: Metal hoops can be slippery. To keep your flowers from sliding around the ring, wrap a small section of the hoop in floral tape first.
This gives the wire something to grip onto.
3. Rustic Burlap & Sunflower Wreath
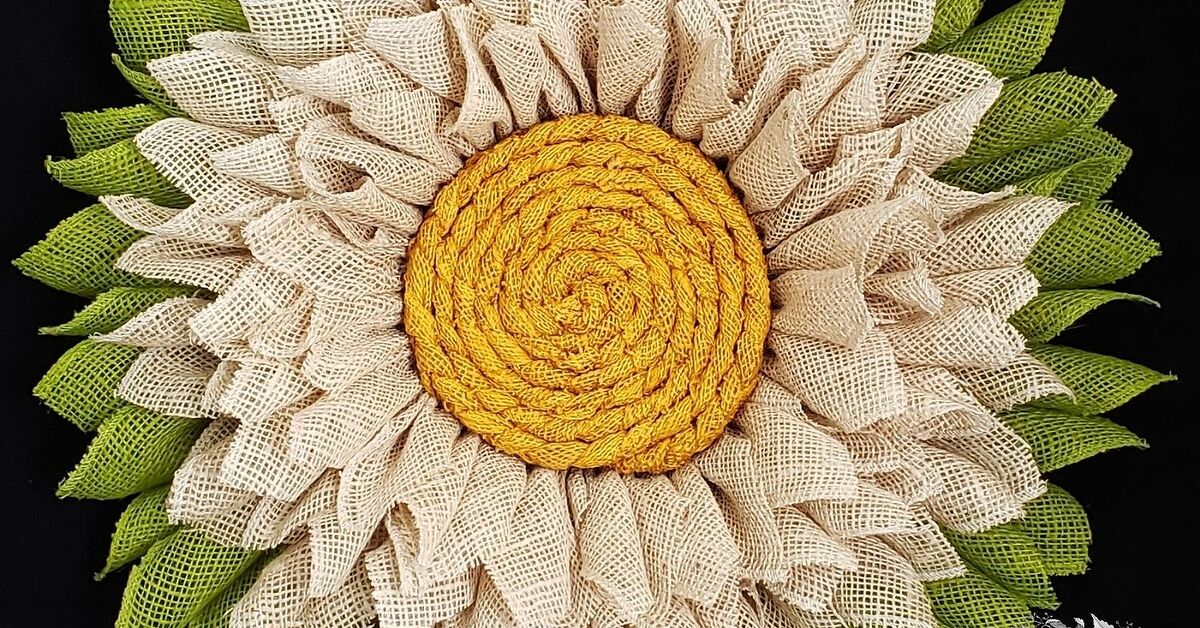
This is a classic for a reason! It’s the ultimate farmhouse decor.
You’ll want a wire wreath frame for this one so you can weave the burlap through the slats.
Create bubbles of burlap by pushing the fabric through the wire frame and securing it with pipe cleaners.
Once you have a fluffy, brown base, hot glue large, vibrant silk sunflowers in a cluster. I like to add a few sprigs of artificial wheat to give it that harvest feel.
Pro Tip: Burlap frays like crazy. To stop this, spray the edges of your burlap ribbon with a bit of clear-coat sealer or hairspray before you start weaving.
4. Monochromatic White Peony Wreath
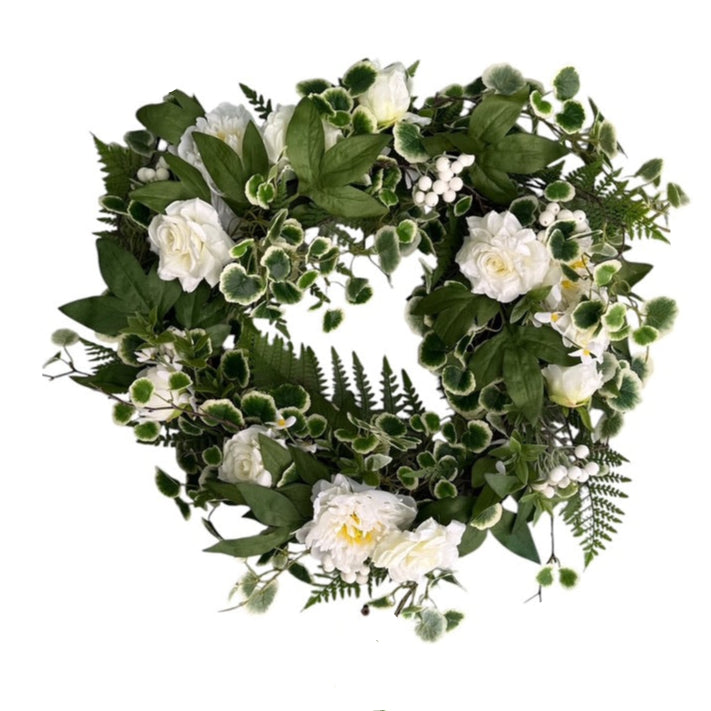
There is nothing more elegant than a monochromatic palette. Using different shades of white, cream, and ivory creates a sophisticated, high-end look that works year-round.
For this, I use a foam wreath base. I find that foam allows you to pack the flowers very tightly together, creating a cloud effect.
Cut the stems of your peonies (or roses) very short—about 2 inches—and dip them in hot glue before poking them into the foam. Cover every square inch so no foam is visible.
5. Upcycled Book Page & Rose Wreath
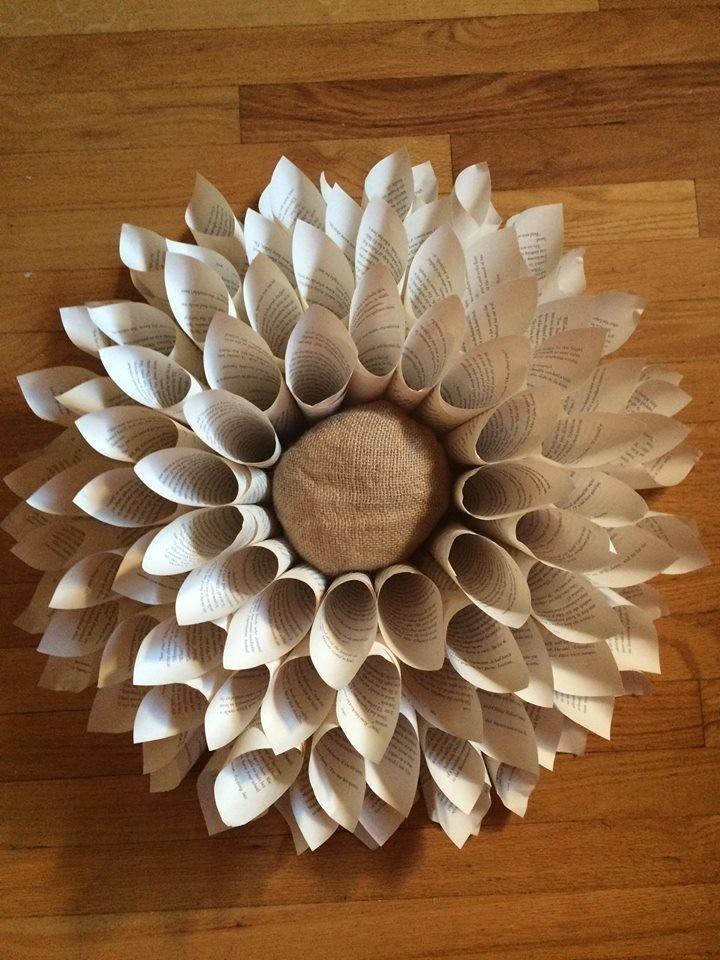
As an upcycling enthusiast, I can’t resist a project that uses old materials. If you have an old book with yellowed pages, you can turn them into stunning, everlasting roses.
Roll strips of paper into cone shapes or scalloped circles to create the petals. Glue them onto a cardboard ring (which you can cut from a shipping box!).
Intersperse these paper roses with a few sprigs of dried lavender.
Crafter’s Warning: This wreath is strictly for indoors! One rainstorm and your hard work will turn into a soggy paper mess.
6. The Succulent Garden Wreath
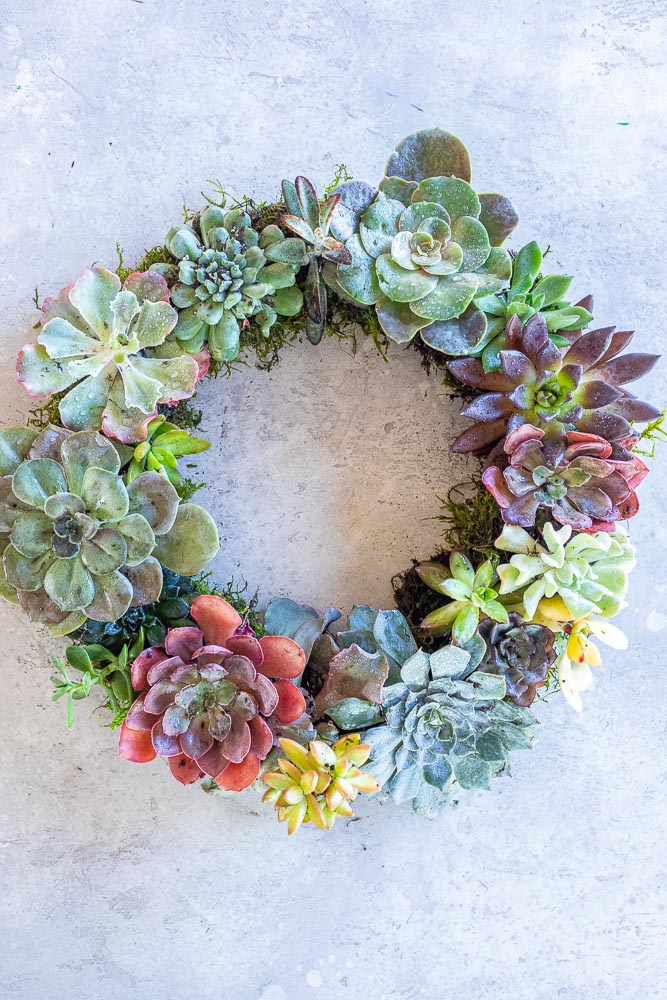
Succulent wreaths are incredibly trendy, but real succulents can be heavy and tricky to keep alive in a vertical position.
That’s why I’m a huge fan of high-quality soft-touch plastic succulents.
Use a moss-covered wreath base for this. The green moss provides the perfect soil-like background.
Use a variety of shapes—rosettes, string of pearls, and spiky aloe-style picks. Group them in clusters of three for the best visual balance.
7. Boho Feather & Dried Flower Wreath
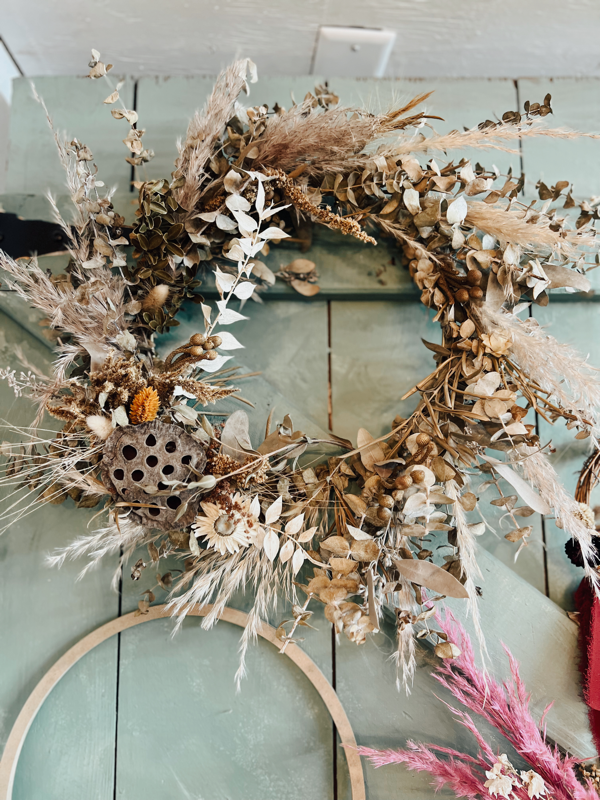
For my bohemian souls, this wreath is all about movement. I love using pampas grass, dried palm spears, and feathers to create a wild silhouette.
Start with a willow wreath base, which is lighter in color than grapevine. Use floral wire to attach long stalks of pampas grass so they flare out horizontally.
Add some dried strawflowers (which keep their color for years!) and a few peacock or ostrich feathers for a touch of whimsy.
8. Vintage Lavender & Herb Wreath

This wreath doesn’t just look good; it smells incredible. I suggest using a mix of dried lavender and faux rosemary or thyme.
The trick here is the bundle method. Instead of attaching one stem at a time, create small bundles of herbs and lavender, wrap the base of the bundle with wire, and then wire the bundle to the frame.
Overlap each bundle like shingles on a roof to hide the wires of the previous one.
9. Seasonal Citrus & Magnolia Wreath

Magnolia leaves are a DIYer’s secret weapon. They have a beautiful waxy green side and a velvety brown underside.
When you mix them with dried orange slices, you get a stunning, organic look.
You can dry your own orange slices in a low-temp oven (200°F) for about 3 hours. Wire the oranges in pairs and tuck them among the large magnolia leaves.
This looks particularly stunning on a dark-colored front door.
10. The Whimsical Fairy Garden Wreath
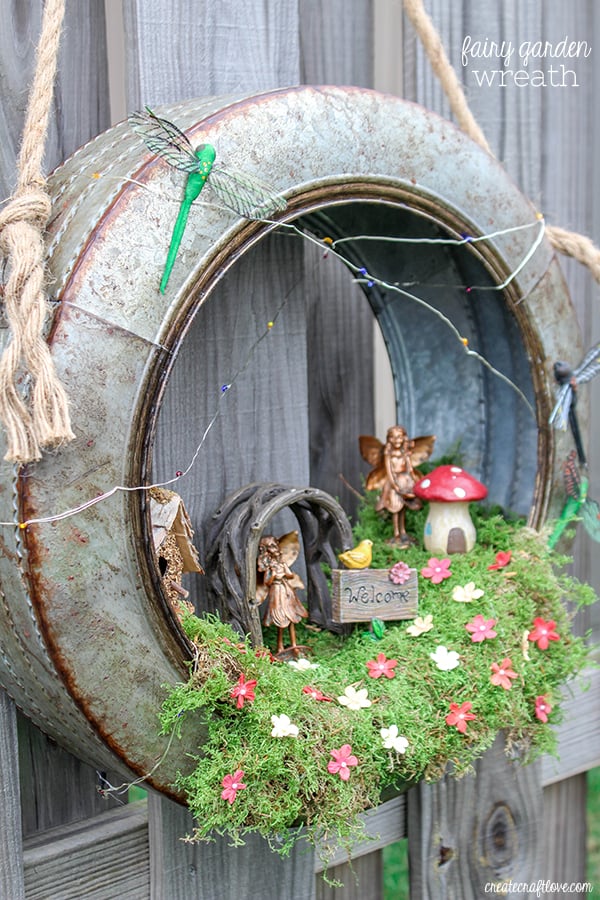
Let’s get a little creative! This is a hit for kids’ rooms or garden parties.
Use a thick moss base and add tiny elements like miniature wooden mushrooms, small silk butterflies, and fairy lights.
I like to use a battery-operated string of LED copper lights. Wrap the lights around the wreath last, hiding the battery pack in a small nest of moss at the bottom.
It adds a magical glow to your entryway at night.
Expert Tips for Wreath Longevity
Making the wreath is only half the battle; keeping it looking great is the other half.
Here are my tried-and-true tips:
-
✨
UV Protection: If your wreath is hanging in direct sunlight, spray it with a UV-resistant clear floral spray. This prevents your bright pink peonies from turning a dull grey within a month.
-
✨
Weight Balance: Always hold your wreath up by its hanger halfway through the process. Wreaths often become bottom-heavy, and you’ll want to adjust the placement of your flowers to ensure it hangs straight.
-
✨
The Shake Test: Once you think you’re finished, give the wreath a gentle shake. If anything wiggles or falls out, it needs more wire or glue. Better it falls off on your table than on your guest’s head!
Frequently Asked Questions
How do I make my wreath look expensive on a budget?
The secret is layering. Don’t just use one type of flower. Mix textures—combine a flat leaf, a spiky filler, and a round focal flower.
Also, avoid the neon-colored plastic flowers at the dollar store; look for muted, natural tones instead.
Can I use hot glue on a grapevine wreath?
Yes, but wire is better for the main structure. Grapevine is oily and textured, so hot glue can sometimes pop off if the temperature changes.
Use wire for the heavy stems and glue for the tiny accent petals.
How do I store my wreaths between seasons?
I highly recommend wreath storage bags or, if you’re on a budget, a large clear trash bag.
Hang the wreath on a hanger inside the bag to prevent the flowers from getting crushed in a box.
What is the best size for a standard front door?
A 14-inch to 18-inch base is standard. Once you add flowers, a 14-inch base usually expands to about 20-22 inches, which is perfect for most doors without looking overwhelming.
Conclusion
Creating a floral wreath is a meditative and rewarding process that allows you to bring the beauty of nature (even the faux kind!) into your home.
Whether you chose the rustic charm of sunflowers or the sleek lines of a modern hoop, remember that there are no mistakes in crafting—only unique design choices.
By using the right foundations, securing your stems properly, and playing with textures, you’ve now got the skills to create a stunning piece of decor that looks like it came straight from a high-end boutique.
Grab your wire cutters and get started—your front door is waiting for its makeover!
Leave a Reply