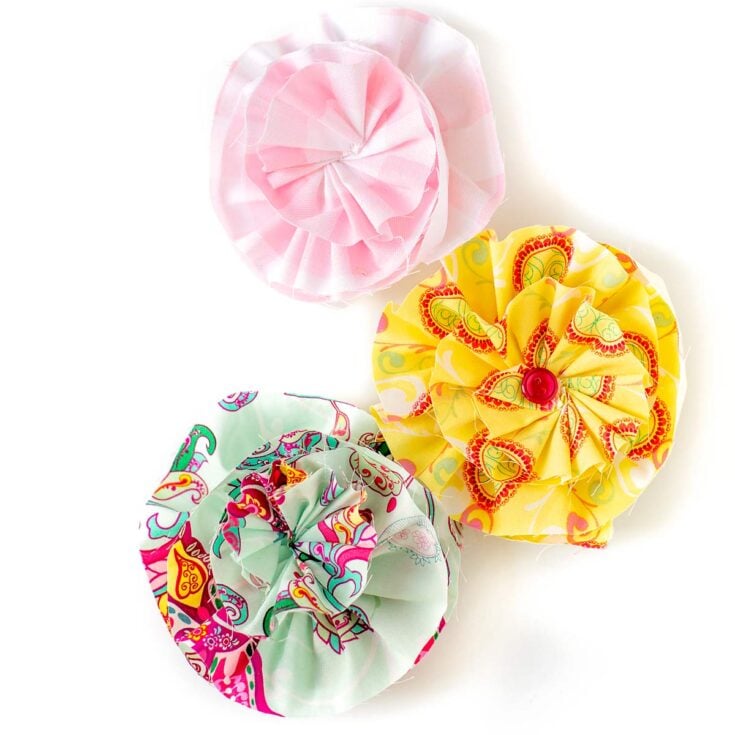
Fabric flowers are one of the most versatile and sustainable DIY projects for home decor enthusiasts. By upcycling scrap fabric, old clothing, or leftover ribbons, you can create everlasting blooms that add texture and color to wreaths, pillows, hair accessories, and table settings.
Whether you are a seasoned sewist or a complete beginner looking for no-sew options, making fabric flowers requires only a few basic tools like scissors, a needle and thread, or a hot glue gun.
Essential Materials for Fabric Flower Crafting
Before diving into the specific styles, it is helpful to have a dedicated workstation. The beauty of fabric flowers lies in the variety of textures you can use.
Recommended Fabric Types
1. The Singed Petal Organza Rose
The singed petal technique uses heat to curl the edges of synthetic fabrics, creating a delicate, realistic appearance. This is perfect for bridal accessories or elegant home accents.
Materials Needed:
- ✦ Synthetic fabric (Organza, Satin, or Polyester)
- ✦ Tea light candle or lighter
- ✦ Tweezers
- ✦ Needle and thread or beads for the center
Step-by-Step Instructions:
- ✧ Cut Circles: Cut 10–15 circles of varying sizes from your fabric. They don’t need to be perfect; slight irregularities add realism.
- ✧ Singing the Edges: Using tweezers, hold the edge of a circle near a candle flame. Do not touch the flame. The heat will cause the edges to melt and curl. Rotate the circle until the entire perimeter is singed.
- ✧ Layering: Stack the circles from largest at the bottom to smallest at the top.
- ✧ Secure: Stitch through the center of the stack. You can add a pearl or a cluster of beads in the middle to hide the stitches and add a touch of elegance.
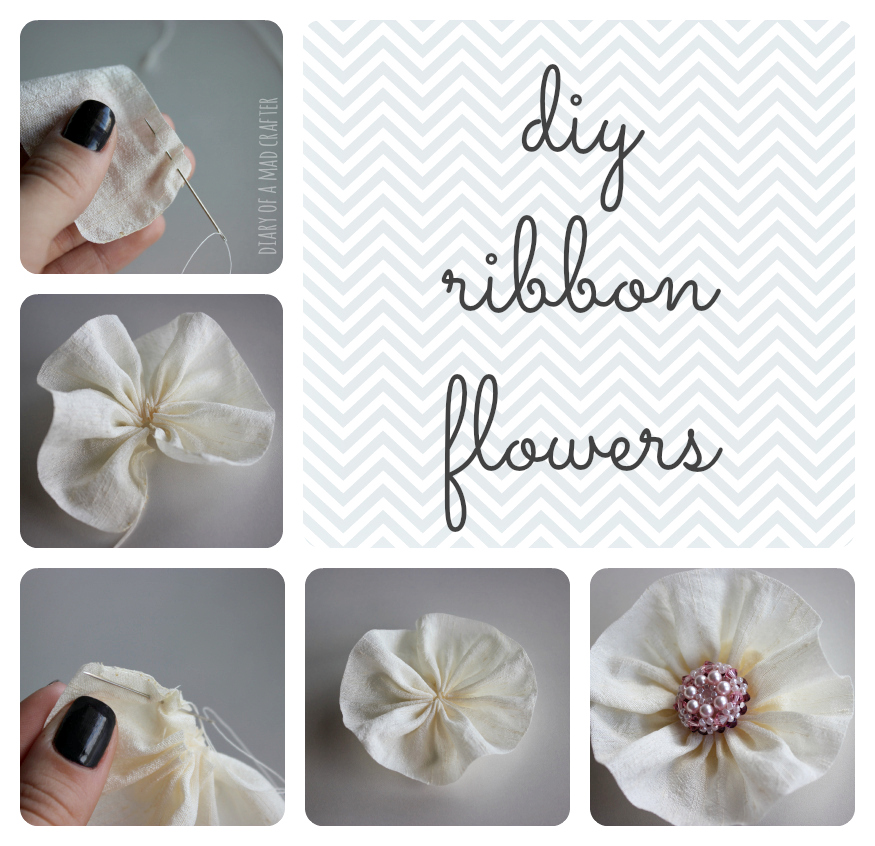
2. The No-Sew Rolled Fabric Rosette
This is the ultimate scrap buster project. It’s fast, requires no sewing, and works beautifully with cotton, linen, or jersey fabrics.
Materials Needed:
- ✦ Fabric strips (1–2 inches wide, 12–18 inches long)
- ✦ Hot glue gun
- ✦ Felt circle for the base
Step-by-Step Instructions:
- ✧ The Core: Knot one end of your fabric strip. This will be the center of your rose. Glue it to the middle of your felt circle.
- ✧ Twist and Wrap: Twist the fabric strip away from the center and wrap it around the knot.
- ✧ Glue as You Go: Every half-turn, apply a small dot of hot glue to the base to secure the fabric.
- ✧ Finish: Once you reach the end of the strip, tuck the tail underneath the flower and glue it firmly. Trim any excess felt from the base.
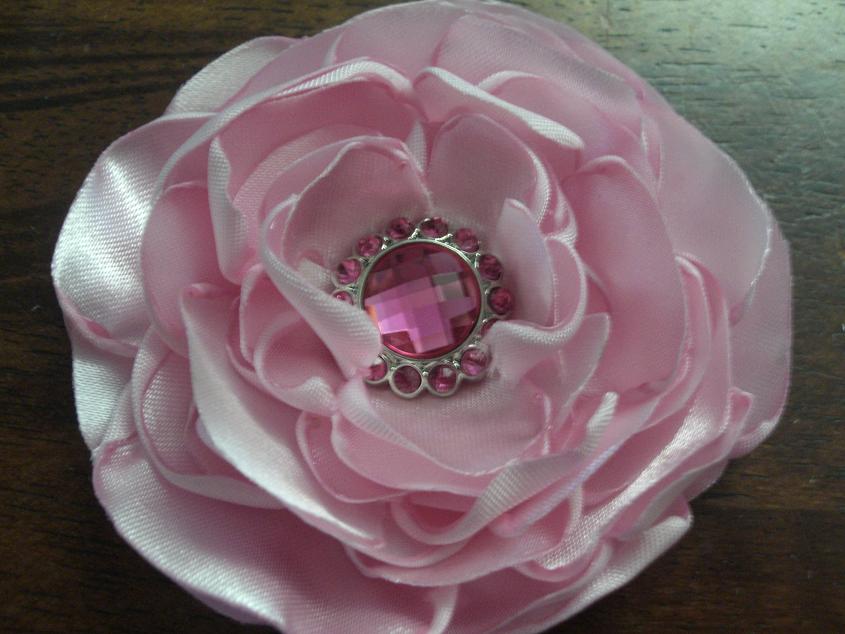
3. The Classic Gathered Peony
The gathered method creates a full, ruffled flower that looks excellent on throw pillows or as a gift topper.
Materials Needed:
- ✦ Long strip of lightweight cotton (3 inches wide, 24 inches long)
- ✦ Needle and heavy-duty thread
- ✦ Button for the center
Step-by-Step Instructions:
- ✧ Fold and Press: Fold your fabric strip in half lengthwise (wrong sides together) and press it with an iron.
- ✧ Basting Stitch: Sew a long running stitch (basting stitch) along the raw edges of the folded strip.
- ✧ Gather: Pull the thread tails to bunch the fabric together. It will begin to curl into a circular shape.
- ✧ Coil: Roll the gathered strip into a spiral, keeping the stitched edge at the bottom.
- ✧ Secure: Use a needle and thread to stitch through the bottom layers to hold the shape. Sew a decorative button in the center.
4. The Folded Kanzashi Style Flower
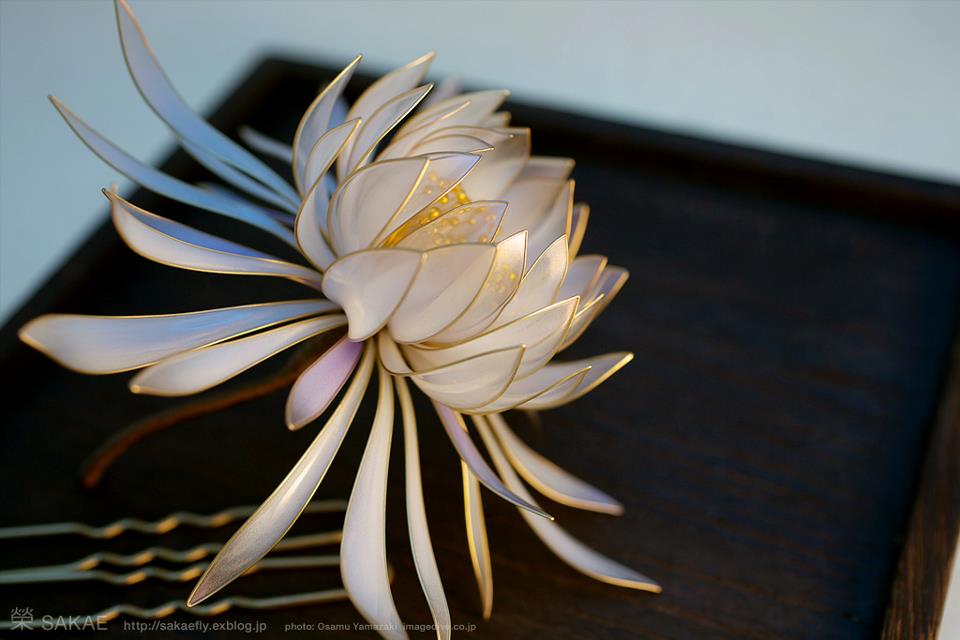
Inspired by traditional Japanese hair ornaments, these flowers are made from folded squares of fabric to create pointed or rounded petals.
Materials Needed:
- ✦ 5–6 squares of fabric (3×3 inches)
- ✦ Needle and thread
- ✦ Glue gun
Step-by-Step Instructions:
- ✧ Fold Triangle: Fold a square in half diagonally to form a triangle.
- ✧ Fold Again: Fold the corners of the triangle down to the center point to create a smaller square.
- ✧ The Petal Shape: Fold the entire piece in half so the raw edges meet at the back.
- ✧ Stringing: Run a needle and thread through the base of the petal. Repeat for all squares.
- ✧ Connect: Pull the thread tight to bring the petals into a circle and tie off.
5. The Upcycled Denim Scrap Daisy
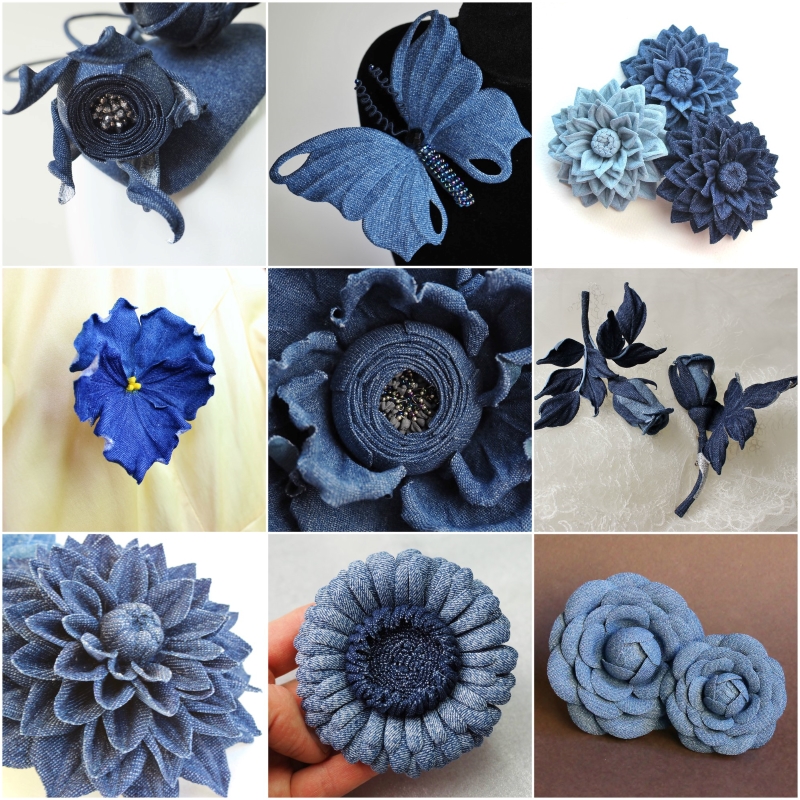
Denim is a sturdy material that gives flowers a modern, rustic edge. This project is ideal for using the legs of old jeans.
Materials Needed:
- ✦ Denim scraps
- ✦ Sharp fabric scissors
- ✦ Fabric glue
Step-by-Step Instructions:
- ✧ Cut Petals: Cut 8–10 teardrop-shaped petals from the denim.
- ✧ Fraying (Optional): Use your fingernails or a needle to pull a few threads from the edges of the petals for a shabby chic look.
- ✧ The Base: Cut a small denim circle.
- ✧ Assembly: Glue the petals around the edge of the circle, overlapping them slightly.
- ✧ Centerpiece: Use a yellow felt circle or a copper button for the center to mimic a daisy.
6. The Scalloped Felt Bloom
Felt is the easiest material for beginners because it doesn’t fray and provides great structural integrity.
Materials Needed:
- ✦ Felt sheets
- ✦ Pinking shears or scalloped scissors
- ✦ Hot glue
Step-by-Step Instructions:
- ✧ Cut Strips: Cut a strip of felt 1.5 inches wide. Use scalloped scissors on one long edge.
- ✧ Fringe (Optional): You can also cut vertical slits halfway down the strip for a mums look.
- ✧ Roll: Start rolling the strip tightly from one end.
- ✧ Glue: Apply glue along the straight bottom edge as you roll. The scalloped edge will bloom outward.
7. The Tulle Puff Flower
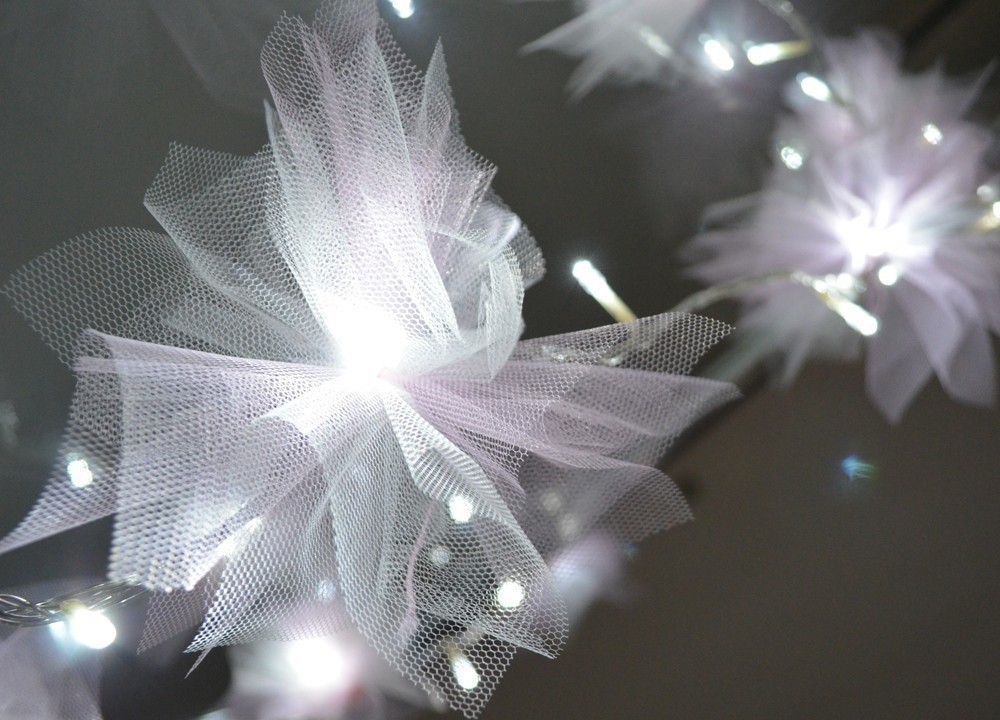
These are airy, whimsical, and perfect for party decorations or headbands.
Materials Needed:
- ✦ Tulle (spool or yardage)
- ✦ Cardboard donut or a large fork
- ✦ Scissors
Step-by-Step Instructions:
- ✧ Wrap: Wrap the tulle around a piece of cardboard or your fingers about 20–30 times.
- ✧ Tie: Slide the tulle off and tie a tight string around the middle of the bundle.
- ✧ Cut Loops: Cut the loops on both ends.
- ✧ Fluff: Shake the flower and trim the edges to create a perfect sphere or puff.
8. The Ribbon Loop Chrysanthemum
If you have leftover ribbon from gift wrapping, this is the perfect way to use it.
Materials Needed:
- ✦ Grosgrain or satin ribbon
- ✦ Felt base
- ✦ Glue gun
Step-by-Step Instructions:
- ✧ Create Loops: Cut the ribbon into 3-inch pieces. Fold each piece in half and glue the ends together to form a loop.
- ✧ Layer 1: Glue the loops around the outer edge of a felt circle.
- ✧ Layer 2: Glue a second row of loops inside the first row, staggering them to cover the gaps.
- ✧ Center: Fill the center with a large rhinestone or a cluster of small ribbon loops.
9. The Burlap Country Rose
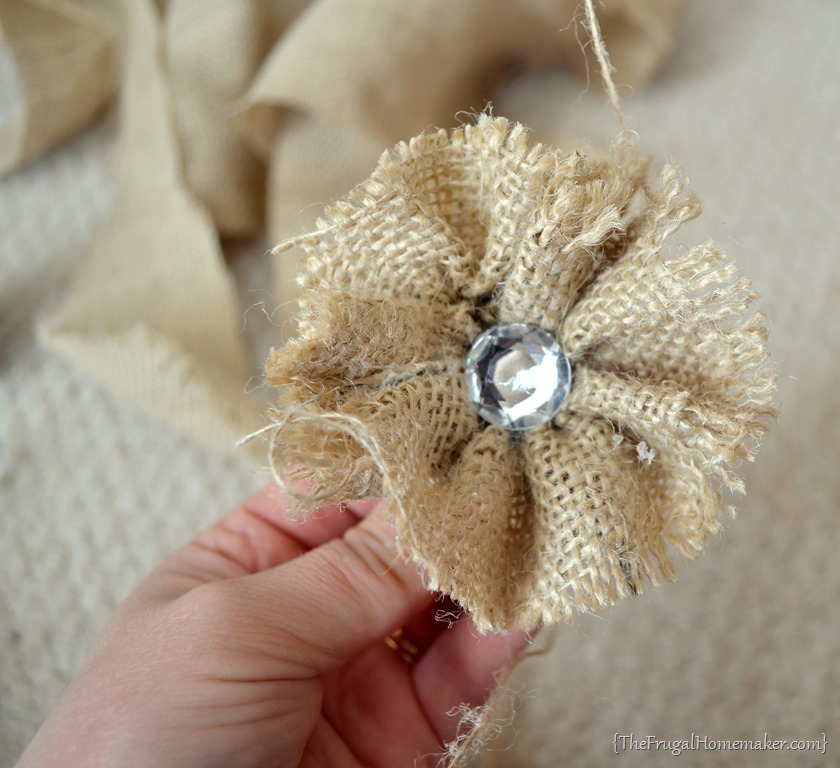
Burlap flowers are a staple for farmhouse decor and rustic weddings.
Materials Needed:
- ✦ Burlap ribbon (wired or unwired)
- ✦ Hot glue
- ✦ Twine
Step-by-Step Instructions:
- ✧ Fold the Edge: Fold the top corner of the burlap strip down.
- ✧ Roll and Fold: Roll the center tightly, then begin folding the burlap backward as you wrap it around the center.
- ✧ Create Petals: The fold-back motion creates the angular petals characteristic of a rose.
- ✧ Secure: Tie the base with twine and glue the end of the ribbon to the bottom.
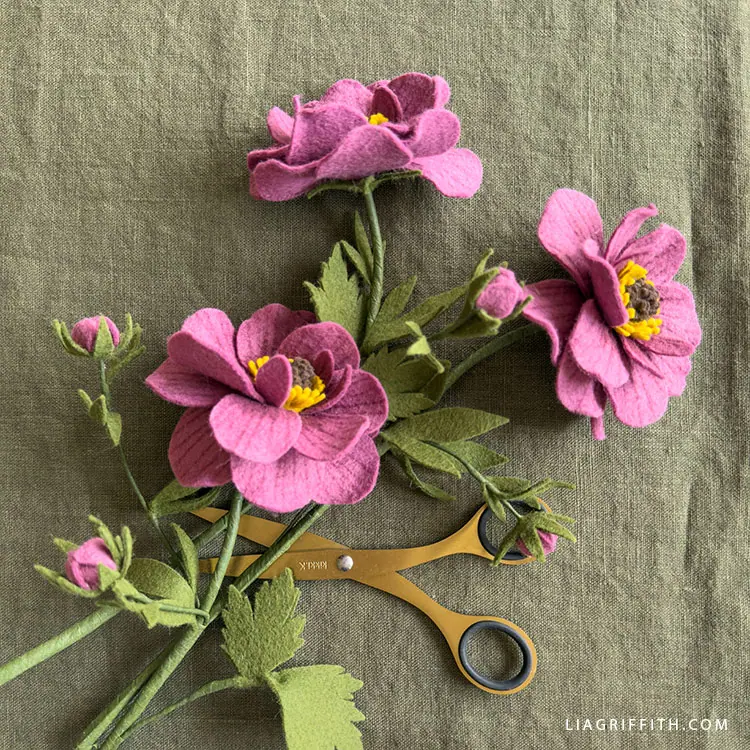
10. The Multi-Layered Organza Lily
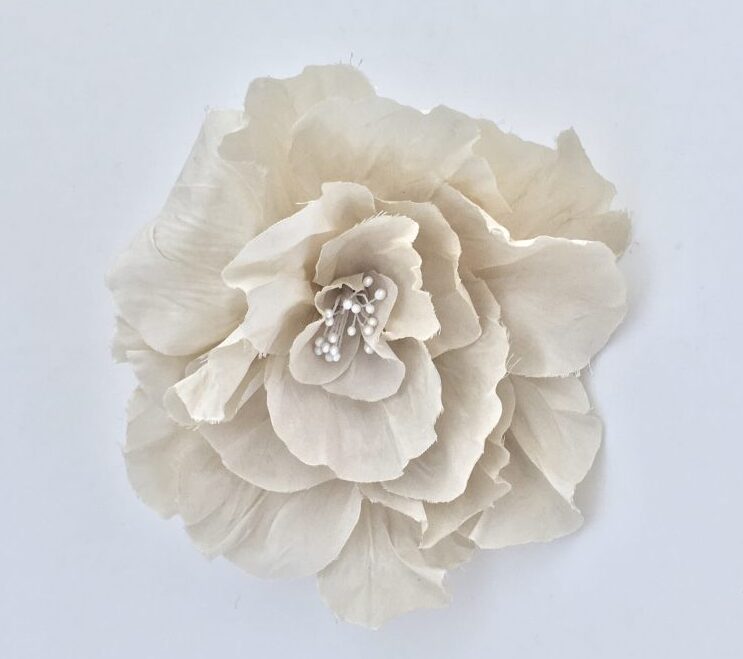
This style uses different shades of the same color to create depth and a high-end look.
Materials Needed:
- ✦ Three shades of organza (e.g., light pink, medium pink, dark pink)
- ✦ Stamen wires (available at craft stores)
- ✦ Floral tape
Step-by-Step Instructions:
- ✧ Template: Cut a 5-petal flower shape template from paper.
- ✧ Cut Fabric: Cut two shapes from each shade of organza.
- ✧ Singing: Lightly singe the edges of each petal layer.
- ✧ Stacking: Stack the layers from darkest to lightest.
- ✧ Stamen: Poke a small hole through the center, insert the craft stamens, and wrap the bottom with floral tape to create a stem.
Tips for Professional-Looking Fabric Flowers
- ✦ Mix Textures: Don’t be afraid to combine denim with lace or felt with silk. The contrast makes the flowers look more artisanal.
- ✦ Use Fabric Stiffener: If your fabric is too floppy, spray it with a bit of fabric stiffener or hairspray before cutting.
- ✦ Embellish the Centers: The center of the flower is where you can add personality. Consider using vintage buttons, old earrings, sequins, or even dried coffee beans.
- ✦ Sharp Tools: Always use dedicated fabric scissors. Dull blades will chew the fabric, especially delicate materials like organza.
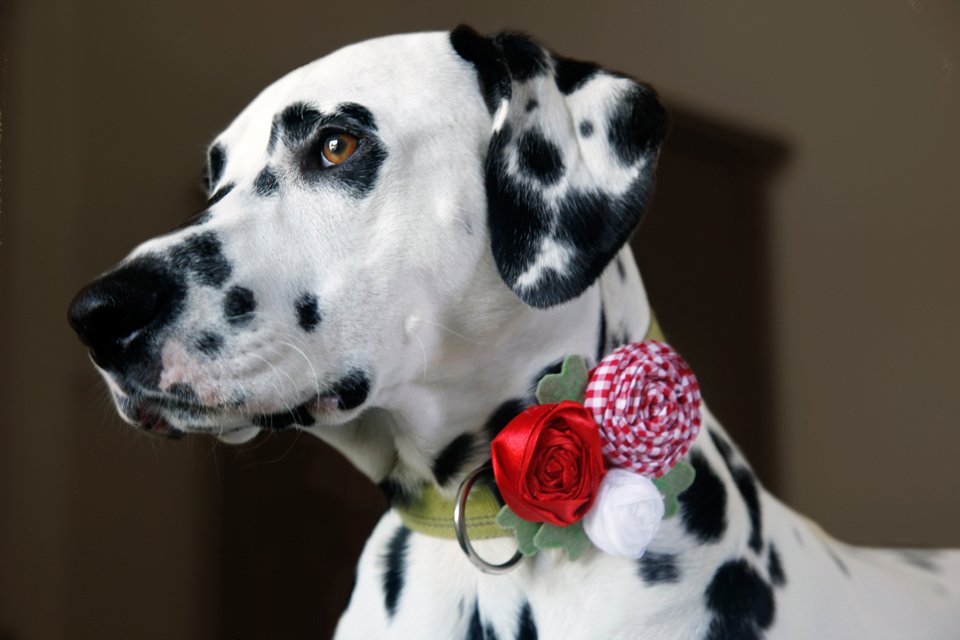
Creative Ways to Use Your Fabric Flowers
- ✧ Wall Art: Glue a variety of fabric flowers onto a canvas or inside a shadow box for 3D floral art.
- ✧ Curtain Tie-Backs: Attach a large fabric rose to a piece of ribbon to tie back your curtains.
- ✧ Wreaths: Cover a foam or grapevine wreath form with dozens of felt or burlap flowers for a seasonal display.
- ✧ Fashion Accents: Add a pin backing to your flowers to create brooches for coats, hats, or bags.
Frequently Asked Questions (FAQ)
What is the best glue for fabric flowers?
A hot glue gun is the most popular choice because it sets instantly. However, for items that will be washed (like clothing), it is better to use a permanent fabric glue or to sew the flower together.
How do I prevent fabric from fraying?
You can use pinking shears to cut the edges, apply a thin layer of Fray Check (a liquid sealant), or use the singeing method for synthetic fabrics. Felt and jersey are also great options as they naturally do not fray.
Can I make fabric flowers without a sewing machine?
Absolutely. Most fabric flower designs are small-scale and are actually easier to make using hand-stitching or hot glue rather than a machine.
How do I clean fabric flowers?
Fabric flowers can collect dust. The best way to clean them is to use a hair dryer on a cool and low setting to blow off the dust. For sturdier fabrics like cotton or denim, you can lightly spot clean with a damp cloth.
Conclusion
Making easy fabric flowers is a rewarding way to practice upcycling while creating beautiful, lasting decor. From the delicate, heat-curled petals of an organza lily to the rugged charm of a denim daisy, there is a style for every aesthetic.
By mastering these ten techniques, you can transform simple scraps into a blooming garden of possibilities. Grab your scissors, heat up your glue gun, and start crafting your own custom floral arrangements today!
Leave a Reply