Spring is the ultimate season for renewal, making it the perfect time to engage children in creative, colorful, and educational activities.
Crafting during these months not only helps develop fine motor skills and hand-eye coordination but also encourages kids to observe the changing world around them—from blooming flowers to the return of busy insects.
Whether you are looking for rainy-day activities or ways to decorate your home for the season, these 15 spring-themed projects offer a mix of upcycling, nature-based art, and vibrant sensory play suitable for toddlers through pre-teens.
1. Upcycled Egg Carton Spring Flowers
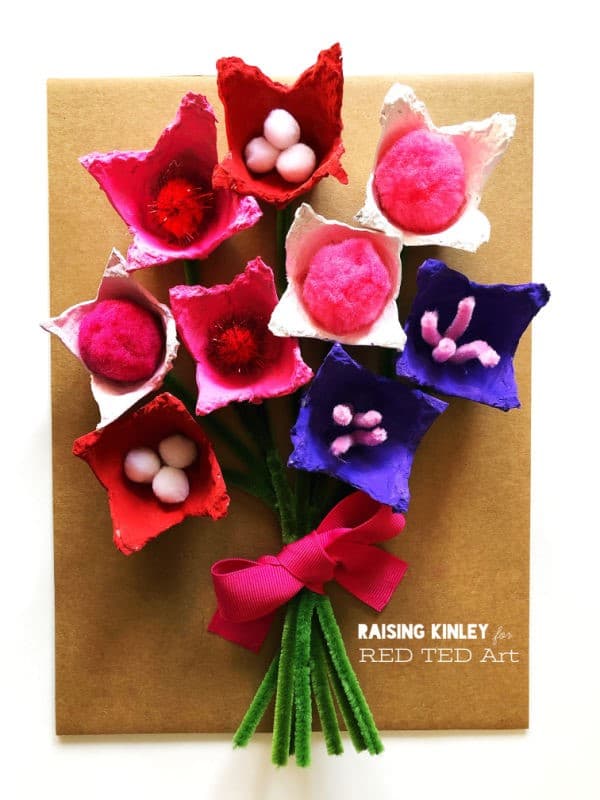
Transforming trash into treasure is a core tenet of sustainable crafting.
Egg cartons are the perfect shape for flower petals, and this project allows kids to experiment with bold colors and textures.
Materials:
- Cardboard egg cartons, acrylic or washable paint, green pipe cleaners, buttons or pom-poms, and glue.
Instructions:
- 1. Cut the individual cups out of the egg carton. Trim the edges to create rounded or pointed petals.
- 2. Have your child paint the cups in bright spring hues like lavender, yellow, and pink.
- 3. Once dry, poke a small hole in the bottom and thread a green pipe cleaner through to act as the stem.
- 4. Glue a button or pom-pom in the center to represent the pollen-heavy middle.
Best For: Preschoolers and Kindergarteners.
2. Vibrant Coffee Filter Butterflies
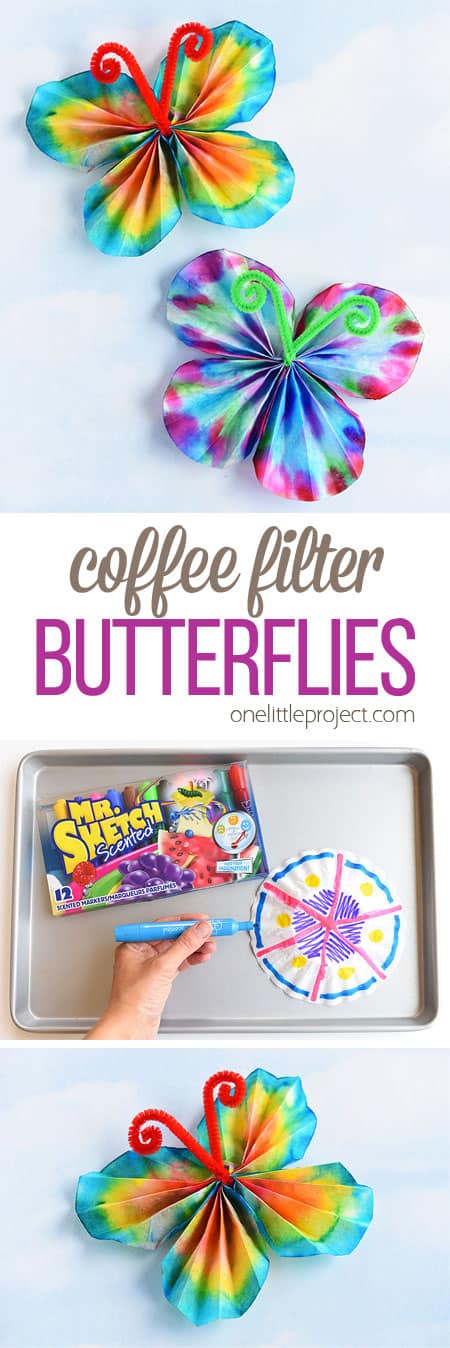
This classic craft teaches children about color mixing and chromatography in a simple, visual way.
The result is a delicate, translucent butterfly that looks stunning when taped to a sunny window.
Materials:
- White coffee filters, washable markers, a spray bottle with water, and clothespins.
Instructions:
- 1. Flatten the coffee filter and have the child draw patterns using washable markers.
- 2. Once colored, lightly mist the filter with water. Watch as the colors bleed and blend together.
- 3. Once dry, fold the filter accordion-style and pinch it in the middle with a clothespin.
- 4. Fan out the wings and add pipe cleaner antennae to the clothespin.
Best For: All ages; toddlers love the water spraying part!
3. Paper Plate Sunflowers with Real Seeds
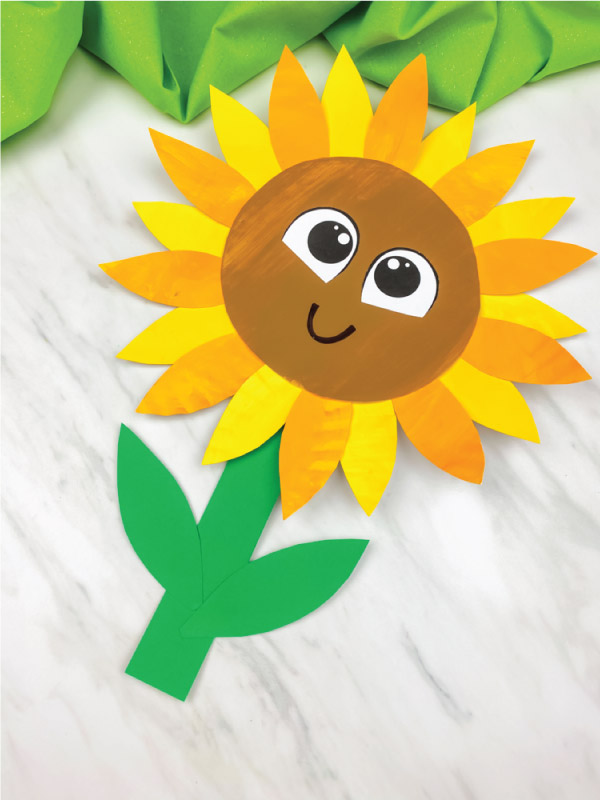
Sunflowers are the icons of sunny weather. This craft incorporates a sensory element by using real sunflower seeds (or dried beans) to create the textured center of the flower.
Materials:
- Paper plates, yellow paint, brown paint (or glue and sunflower seeds), and green construction paper.
Instructions:
- 1. Paint the outer rim of the paper plate bright yellow.
- 2. For the center, you can either paint it brown or apply a thick layer of glue and press real sunflower seeds into it.
- 3. Cut large leaf shapes from green paper and attach them to the back.
Skill Focus: Sensory exploration and pattern recognition.
4. Rainbow Ribbon Windsocks
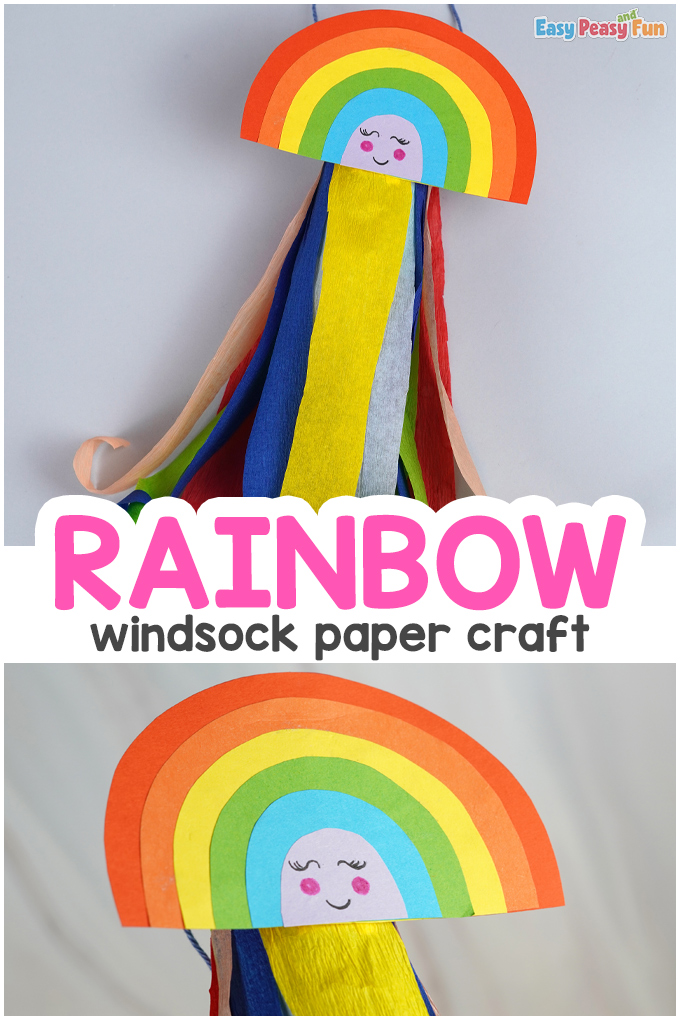
Spring often brings breezy days. These windsocks are a great way to see the wind while adding a splash of color to your porch or garden.
Materials:
- Recycled tin cans or cardstock cylinders, ribbons in rainbow colors, glue, and string.
Instructions:
- 1. If using a tin can, ensure the edges are sanded smooth.
- 2. Decorate the cylinder with paint or stickers.
- 3. Glue long strips of colorful ribbon around the bottom interior rim.
- 4. Attach a string to the top for hanging.
Alternative: Use crepe paper streamers for a more lightweight, indoor version.
5. Painted Rock Garden Markers
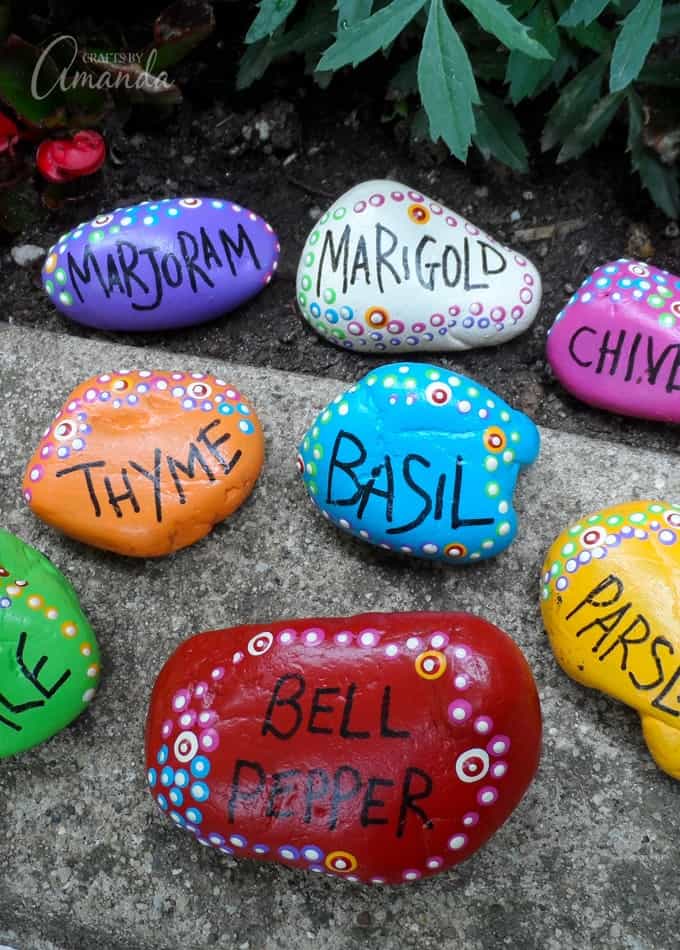
Get the kids involved in the garden by having them create functional art.
These rocks help identify where seeds have been planted while adding personality to the soil.
Materials:
- Smooth river rocks, outdoor acrylic paint, and waterproof sealant (like Mod Podge Outdoor).
Instructions:
- 1. Clean the rocks thoroughly.
- 2. Paint them to look like the vegetables or flowers you are planting—think a red rock for tomatoes or a green one for cucumbers.
- 3. Once the paint is dry, write the name of the plant on the rock.
- 4. Apply a sealant to protect the art from rain.
Best For: School-aged children who can write or draw specific shapes.
6. Toilet Paper Roll Busy Bees
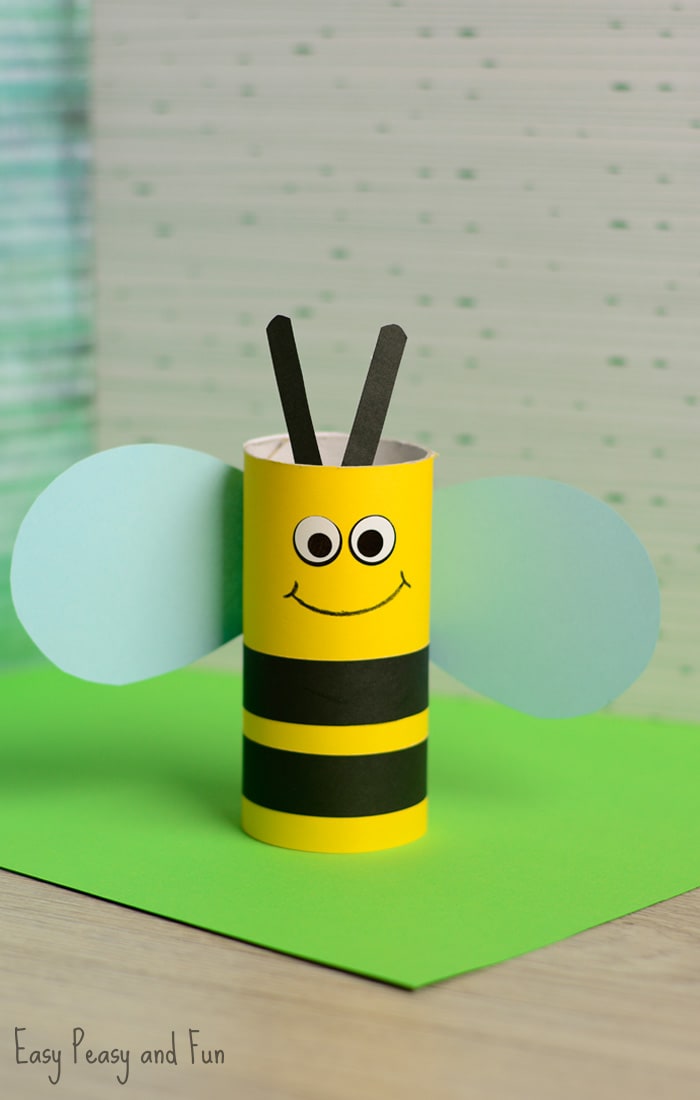
Upcycling cardboard tubes is a staple of kid-friendly DIY.
These bees are a great jumping-off point for a conversation about the importance of pollinators in the spring.
Materials:
- Cardboard tubes, yellow and black paint (or construction paper), googly eyes, and wax paper (for wings).
Instructions:
- 1. Wrap or paint the tube with alternating yellow and black stripes.
- 2. Cut wing shapes out of wax paper or vellum to give them a translucent look.
- 3. Glue on googly eyes and use a small piece of black pipe cleaner for the stinger.
Educational Tip: Pair this craft with a book about how bees help flowers grow.
7. Pressed Flower Glass Bookmarks
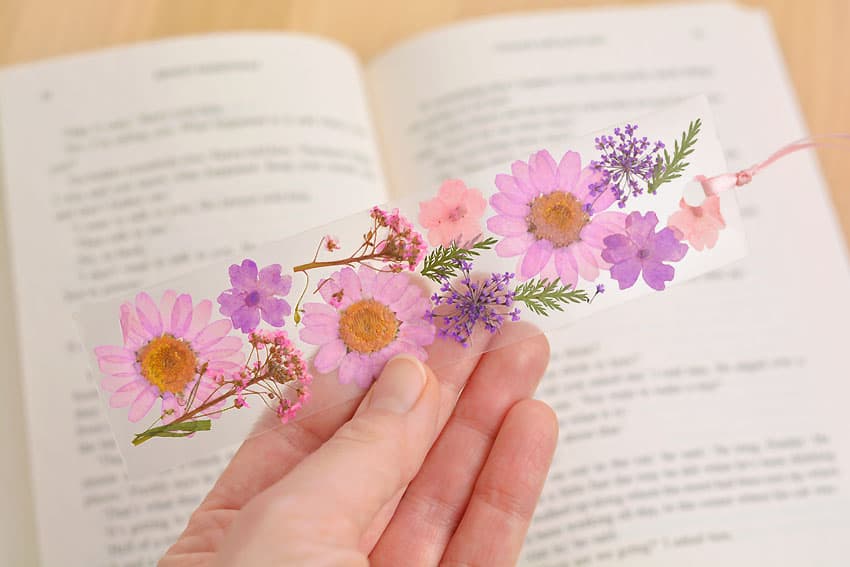
This craft encourages kids to go outside and forage for fallen petals and small leaves, fostering a connection with nature.
Materials:
- Clear contact paper or laminating sheets, dried/pressed flowers, and tassels.
Instructions:
- 1. Go on a nature walk and collect small, flat flowers.
- 2. Press them between heavy books for a few days.
- 3. Cut two identical strips of contact paper. Place the flowers on the sticky side of one strip, then seal it with the second strip.
- 4. Punch a hole at the top and add a colorful tassel.
Best For: Older kids who can handle delicate petals.
8. Tissue Paper Suncatcher Kites
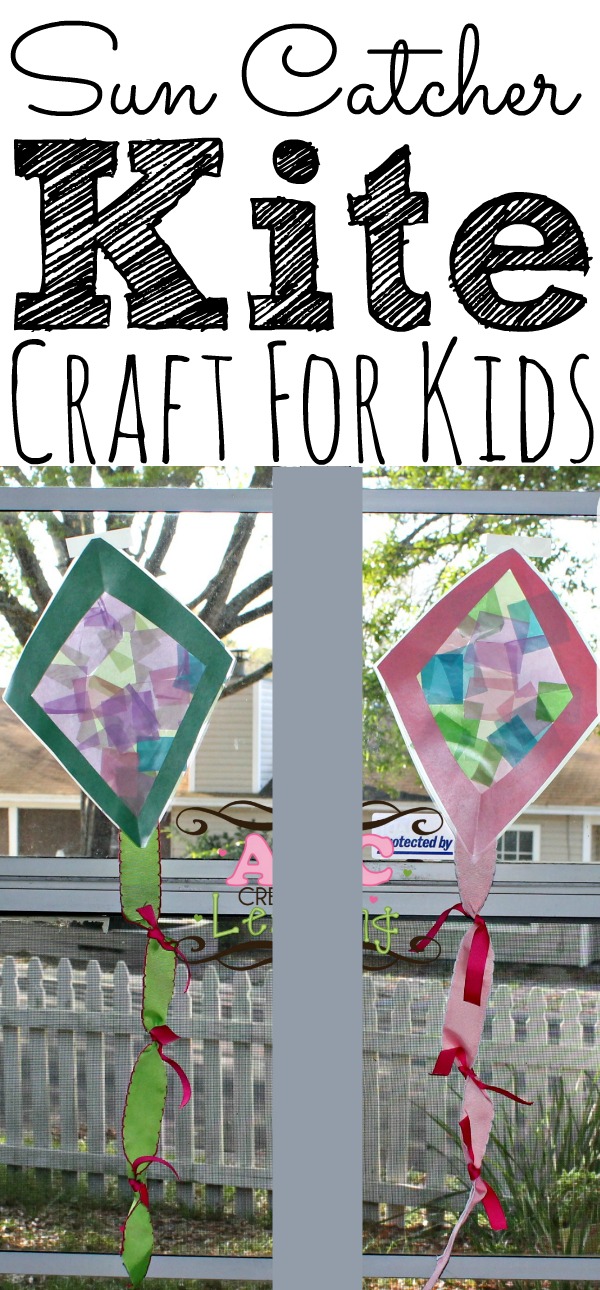
Bring the colors of the rainbow inside with these stained glass kites.
When the spring sun hits them, they cast beautiful colors across the room.
Materials:
- Black construction paper (for the frame), multi-colored tissue paper, and clear contact paper.
Instructions:
- 1. Cut a diamond shape out of black paper, then cut out the center to leave a thin frame.
- 2. Place the frame on a piece of contact paper.
- 3. Have the child fill the center with torn bits of colorful tissue paper.
- 4. Seal with another piece of contact paper, trim the edges, and add a string tail with little bows.
9. Handprint Lilies
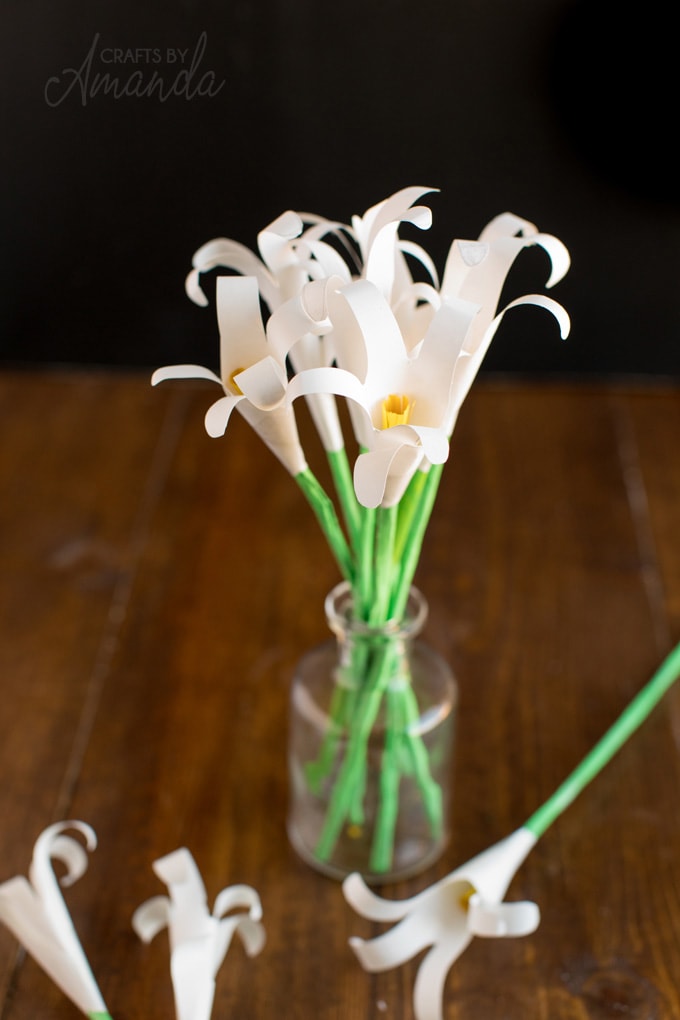
Handprint crafts are cherished keepsakes. These lilies make excellent Mother’s Day gifts or Easter decorations.
Materials:
- White or pink construction paper, yellow pipe cleaners, and tape.
Instructions:
- 1. Trace the child’s hand on the paper and cut it out.
- 2. Roll the handprint into a cone shape with the fingers curling outward (use a pencil to curl the petals).
- 3. Insert a yellow pipe cleaner into the center to act as the stamen and tape it at the base.
Why it works: It’s a personalized gift that captures the child’s size at a specific moment in time.
10. Fork-Painted Tulips
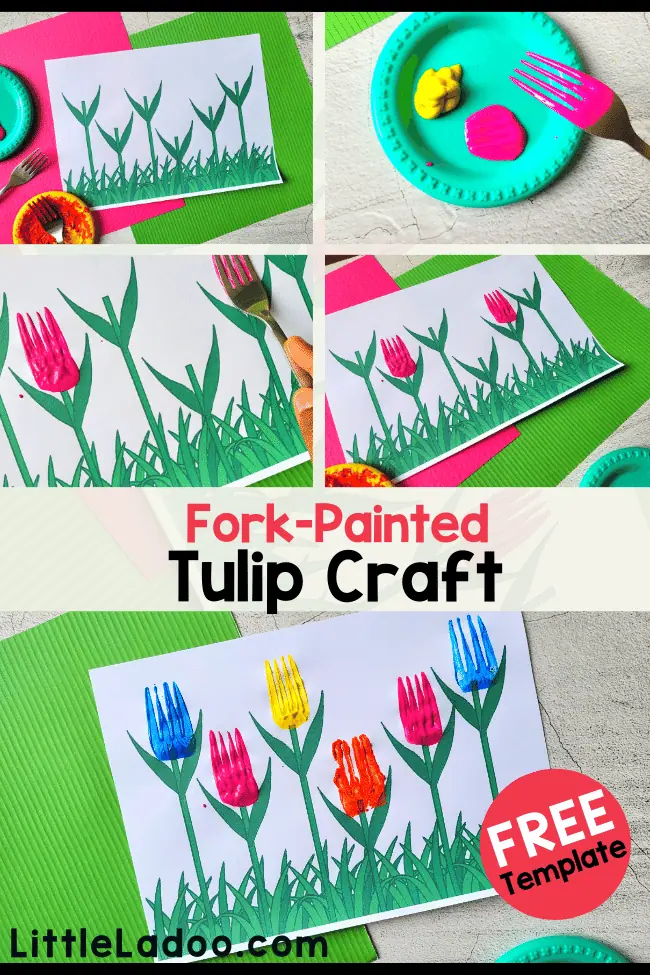
Who says you need a paintbrush to make art?
Using kitchen utensils creates unique textures that perfectly mimic the shape of a tulip.
Materials:
- Plastic forks, tempera paint, and green markers.
Instructions:
- 1. Dip the back of a plastic fork into thick paint.
- 2. Press it onto the paper to create the tulip head. The tines of the fork create the natural ridges found in flower petals.
- 3. Draw a simple green stem and leaf underneath.
Best For: Toddlers who are still mastering their grip.
11. Bubble Wrap Beehives
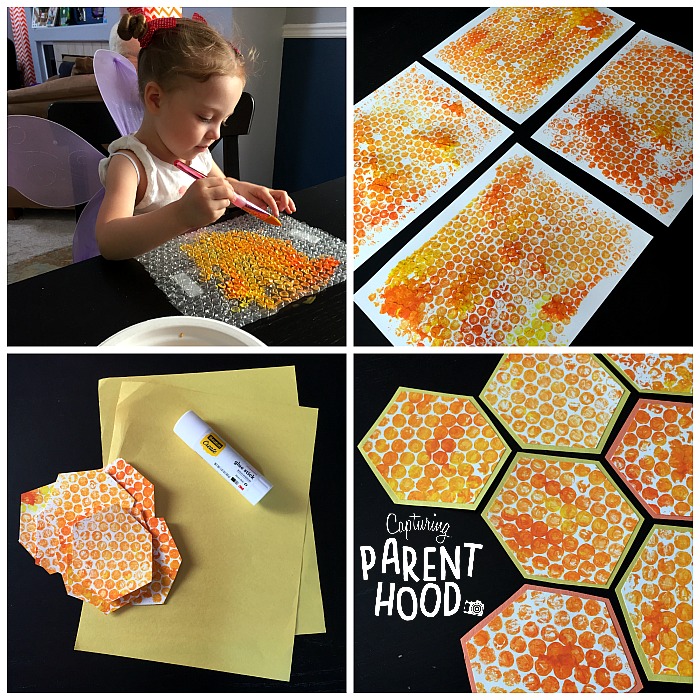
Bubble wrap is an incredible tool for printmaking.
The hexagonal pattern of the bubbles looks remarkably like a honeycomb.
Materials:
- Bubble wrap, yellow paint, white paper, and black markers.
Instructions:
- 1. Paint a square of bubble wrap with bright yellow paint.
- 2. Press it onto a sheet of white paper like a stamp.
- 3. Once dry, cut the yellow textured paper into a beehive shape.
- 4. Kids can then draw little thumbprint bees flying around the hive.
12. Eggshell Seed Starters

This project combines crafting with a science experiment.
Using eggshells as planters is a biodegradable way to start a spring garden.
Materials:
- Cleaned eggshell halves, egg carton (for stability), potting soil, and quick-growing seeds (like grass or beans).
Instructions:
- 1. Gently rinse out eggshells.
- 2. Have the kids draw funny faces on the shells with permanent markers.
- 3. Fill with soil and plant the seeds. Keep them in the egg carton on a sunny windowsill.
- 4. As the hair (grass) grows, kids can even give their egg-people haircuts!
13. Paper Chain Caterpillars
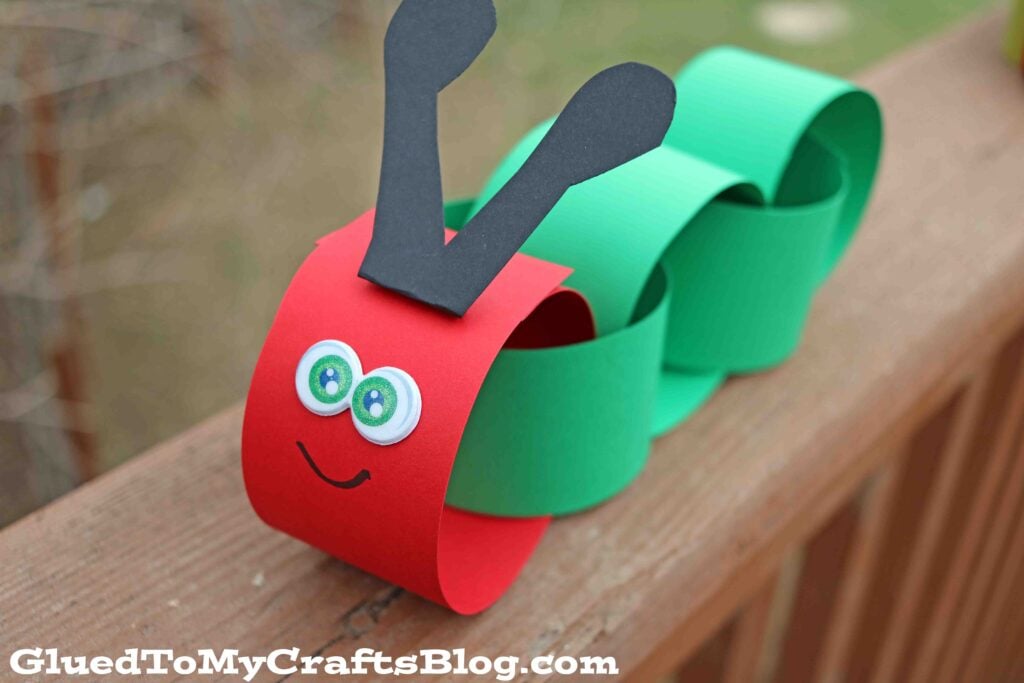
This craft is excellent for practicing counting and pattern-making.
It’s a 3D decoration that can hang from a bookshelf or ceiling.
Materials:
- Green and red construction paper, glue or staples, and markers.
Instructions:
- 1. Cut the paper into strips.
- 2. Create a chain by looping the strips through one another.
- 3. Use a red loop for the head and green loops for the body.
- 4. Add antennae and a face to the red loop.
Variation: Use different shades of green to create a gradient effect.
14. Fluffy Pom-Pom Chicks
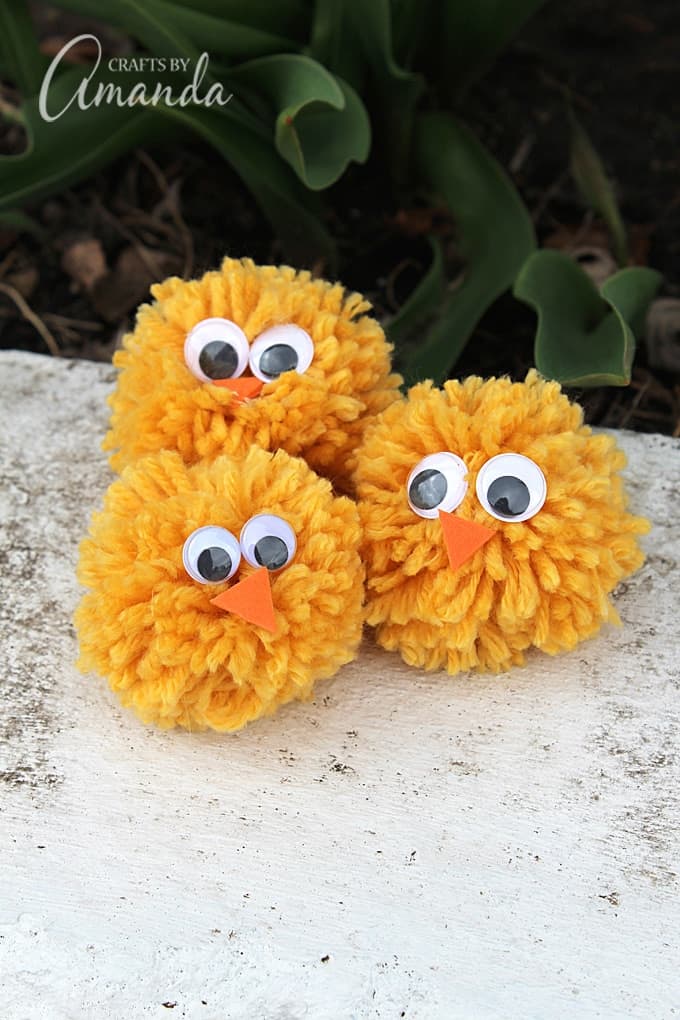
These tactile little creatures are incredibly cute and easy to assemble.
They are perfect for sensory-seeking children.
Materials:
- Large yellow pom-poms, orange felt, googly eyes, and glue.
Instructions:
- 1. Glue two pom-poms together (one for the head, one for the body).
- 2. Cut a small triangle out of orange felt for the beak and two heart shapes for the feet.
- 3. Attach the eyes and beak to the top pom-pom.
Usage: These make great additions to an Easter basket.
15. Nature’s Paintbrushes
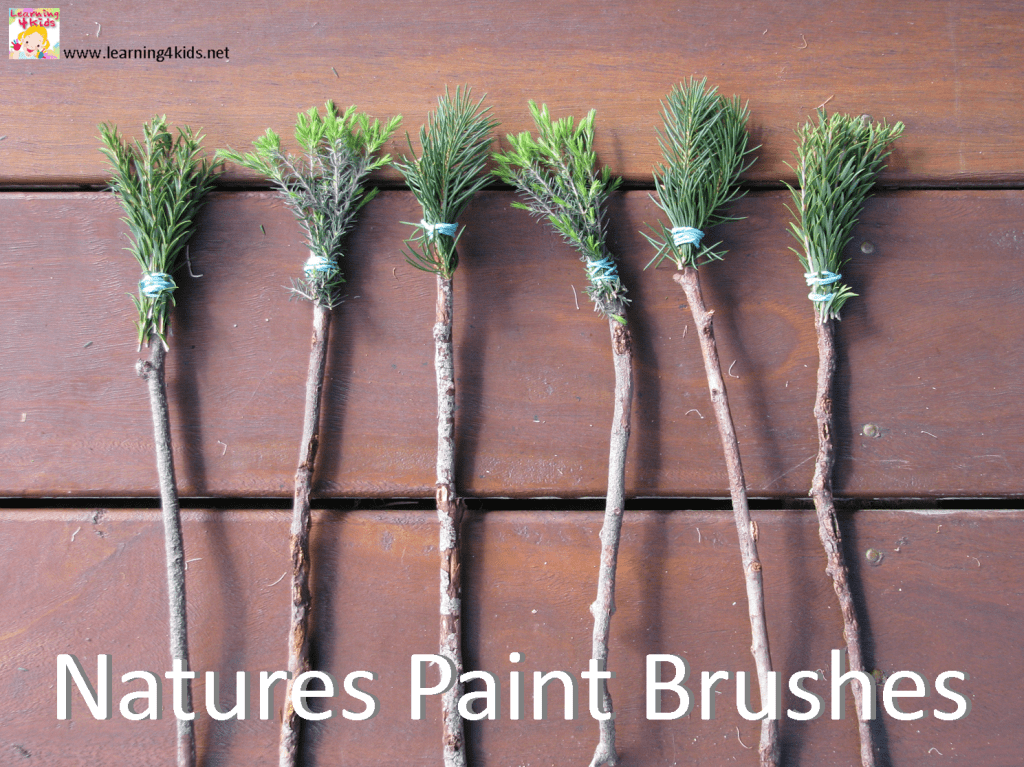
Before starting this craft, take the kids on a supply hunt in the backyard or a local park to find natural materials.
Materials:
- Twigs, evergreen sprigs, dried grass, leaves, and rubber bands.
Instructions:
- 1. Use a sturdy twig as the handle.
- 2. Bundle different natural materials (like pine needles or flat leaves) at the end of the twig and secure them with a rubber band.
- 3. Have the children dip their nature brushes into paint to see the different textures each plant creates.
Learning Outcome: Exploration of natural textures and organic patterns.
Essential Spring Crafting Supplies
| Category | Items to Stock Up On |
|---|---|
| Adhesives | Glue sticks, school glue, clear tape, low-temp glue gun (for adults) |
| Bases | Paper plates, coffee filters, construction paper, cardboard tubes |
| Coloring | Washable markers, tempera paint, watercolor sets, crayons |
| Embellishments | Pipe cleaners, googly eyes, pom-poms, ribbons, buttons |
| Nature | River rocks, twigs, dried flowers, seeds, eggshells |
Tips for a Successful Crafting Session
- ✓Embrace the Mess: Spring crafts often involve paint and water. Lay down a reusable plastic tablecloth or old newspapers to make cleanup easier.
- ✓Age-Appropriate Supervision: While many of these crafts are simple, tasks involving scissors or hot glue should always be handled or closely supervised by an adult.
- ✓Focus on Process, Not Perfection: The goal of spring crafting is to explore the season. If a caterpillar has 20 legs or a flower is blue instead of yellow, celebrate the child’s unique vision!
- ✓Incorporate Outdoor Time: Whenever possible, start the craft with a walk outside. Finding the inspiration in nature makes the indoor crafting time more meaningful.
FAQ
Q: What are the best crafts for toddlers who still put things in their mouths?
A: Stick to edible-safe or non-toxic options. The Fork-Painted Tulips using yogurt dyed with food coloring is a great alternative. Avoid small beads, buttons, or googly eyes; use markers to draw eyes instead.
Q: How can I make these crafts more educational?
A: Use the crafts as a bridge to science. While making the Eggshell Planters, talk about what plants need to grow (sun, water, soil). While making the Coffee Filter Butterflies, discuss the life cycle of a caterpillar.
Q: We live in an apartment with no garden. Can we still do the nature crafts?
A: Absolutely! A local park or even the sidewalk can provide treasures like interesting leaves, fallen petals, or unique stones. You can also use store-bought dried flowers for the bookmarks.
Conclusion
Spring is a season of curiosity and color, providing endless inspiration for young artists.
By using a mix of household recyclables and natural elements, you can create a world of fun and colorful projects that celebrate the return of the sun.
From the textured prints of bubble wrap beehives to the delicate beauty of pressed flower bookmarks, these activities offer more than just a way to pass the time—they create lasting memories and a deeper appreciation for the environment.
Grab your glue sticks and paintbrushes, and let your child’s creativity bloom this spring!
Leave a Reply