Spring is the ultimate season for rejuvenation, making it the perfect time to clear off the craft table and invite the vibrant colors of nature indoors.
Engaging in spring art projects helps children develop fine motor skills, encourages sensory exploration, and fosters a deep appreciation for the changing environment.
Whether you are a parent looking for a weekend activity or a teacher planning a classroom mural, these projects use accessible materials—often upcycled from around the house—to turn simple afternoons into creative adventures.
1. Upcycled Egg Carton Spring Blooms
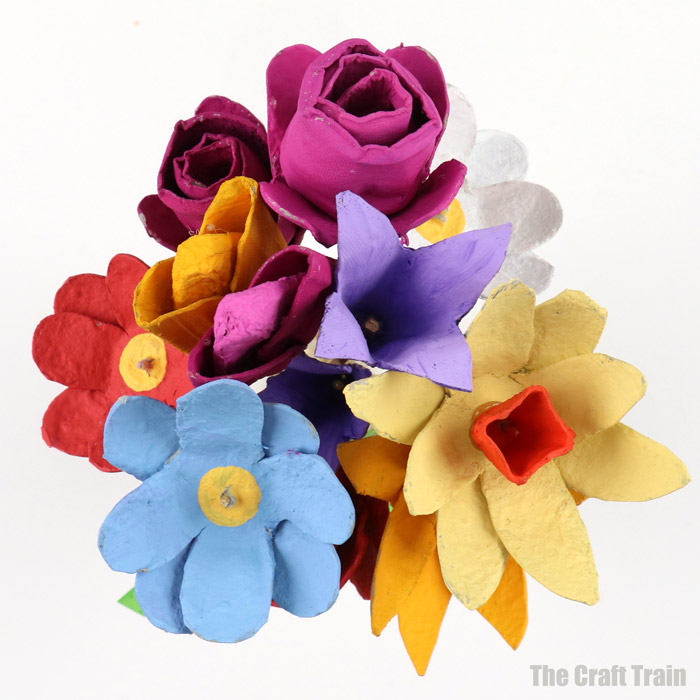
Transforming trash into treasure is a core pillar of sustainable crafting.
Egg cartons have a unique geometry that mimics the natural petals of spring flowers like daffodils and tulips. This project teaches kids about shapes and textures while providing a permanent bouquet that never wilts.
Materials Needed:
- ✧ Cardboard egg cartons
- ✧ Washable acrylic paint
- ✧ Pipe cleaners (green)
- ✧ Safety scissors and glue
Steps:
1 Cut: Help your child cut out the individual “cups” from the egg carton. Trim the edges to create rounded or pointed petals.
2 Paint: Use bright spring colors like lavender, sunny yellow, and petal pink. Let them dry completely.
3 Assemble: Poke a small hole in the bottom of the cup and thread a green pipe cleaner through, twisting the end to secure it as the stem.
4 Display: Place them in a mason jar for a beautiful centerpiece.
2. Chromatic Coffee Filter Butterflies

This project is a fantastic introduction to the science of solubility and color mixing.
Because coffee filters are highly absorbent, kids can watch colors “travel” and blend, creating a beautiful tie-dye effect that mimics the intricate patterns of butterfly wings.
Materials Needed:
- ✧ White coffee filters
- ✧ Washable markers
- ✧ Spray bottle with water
- ✧ Clothespins and chenille stems
Steps:
1 Color: Flatten the coffee filter and draw bold patterns with markers.
2 Mist: Lightly spray the filter with water. Watch as the colors bleed together.
3 Dry: Let the filters dry on a tray.
4 Pinch: Once dry, accordion-fold the filter and clip the center with a clothespin. Add pipe cleaner antennae to complete the butterfly.
3. Pressed Flower Suncatchers
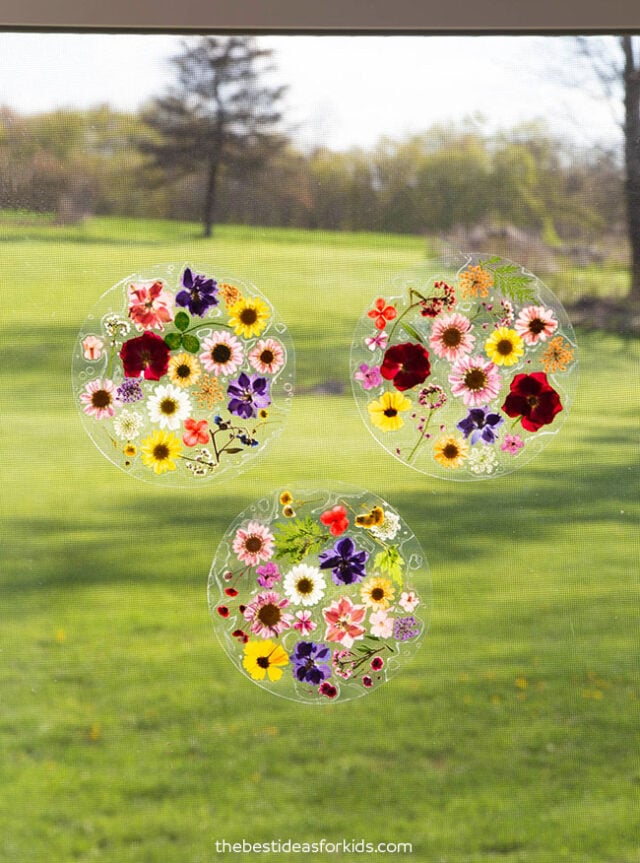
There is no better way to celebrate spring than by using real botanical elements.
These suncatchers act as “stained glass” for your windows, capturing the delicate beauty of spring blossoms.
Materials Needed:
- ✧ Clear contact paper or self-adhesive laminate
- ✧ Pressed flowers and leaves
- ✧ Construction paper (for the frame)
- ✧ Scissors
Steps:
1 Prep: Go on a nature walk and collect small flowers. Press them in a heavy book for 24 hours if possible.
2 Frame: Cut a shape (like a heart or circle) out of the center of a piece of construction paper.
3 Stick: Place a piece of contact paper over the hole.
4 Design: Have the child arrange the flowers onto the sticky surface.
5 Seal: Place another layer of contact paper on top to seal the botanical specimens in place.
4. Fork-Painted Dandelions and Tulips
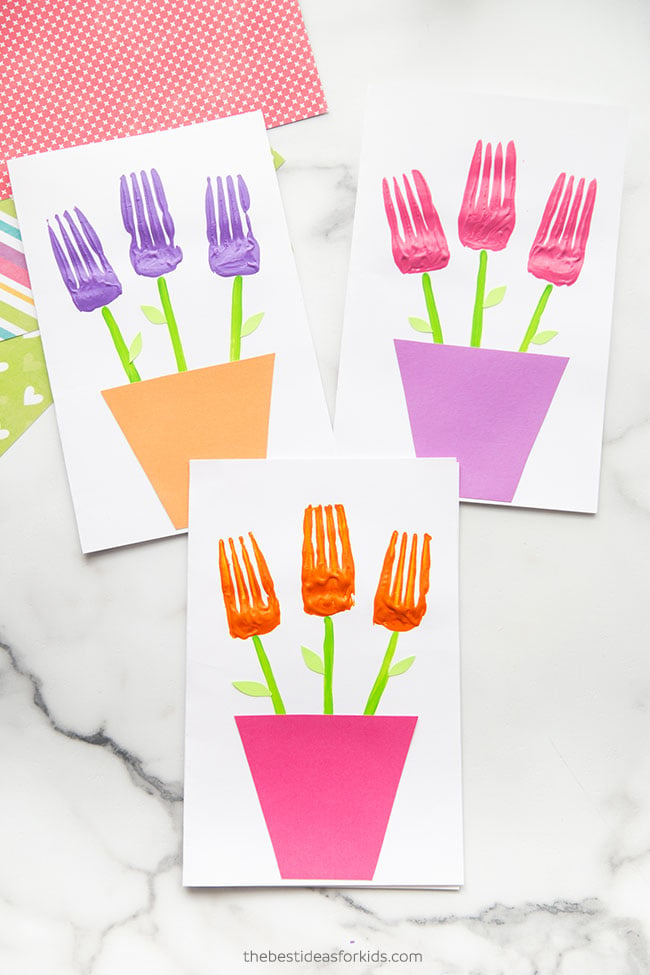
Sometimes the best art tools aren’t brushes—they are found in the kitchen.
Using a plastic or metal fork creates a repetitive, textured pattern that perfectly replicates the “spiky” look of a dandelion or the structured petals of a tulip.
Materials Needed:
- ✧ Acrylic or tempera paint
- ✧ Forks
- ✧ Heavy cardstock
- ✧ Green markers
Steps:
1 Dip: Dip the back of the fork tines into yellow or white paint.
2 Stamp: Press the fork onto the paper in a circular pattern to create a dandelion puff, or straight up for a tulip.
3 Detail: Use a marker or a brush to add stems and leaves once the “petals” are dry.
5. Cardboard Tube Nature Binoculars
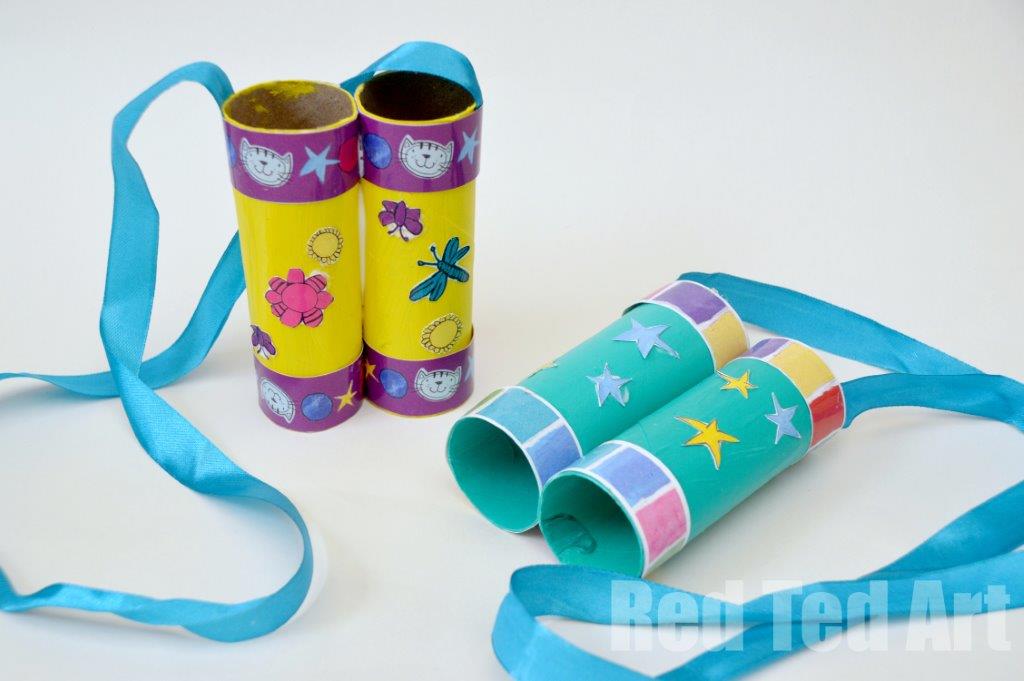
Encourage “backyard birding” with this classic upcycling project.
These binoculars don’t just look cool; they serve as a tool to help children focus their vision on specific natural details, like a budding leaf or a nesting bird.
Materials Needed:
- ✧ Two empty toilet paper rolls
- ✧ Washi tape or construction paper
- ✧ Yarn or string
- ✧ Glue
Steps:
1 Join: Glue or tape two cardboard tubes side-by-side.
2 Decorate: Wrap them in green or brown paper to “camouflage” them, or go wild with spring-themed stickers.
3 Attach: Punch a hole on the outside of each tube and tie a length of yarn so the child can wear them around their neck.
6. Bubble Wrap Print Rain Clouds
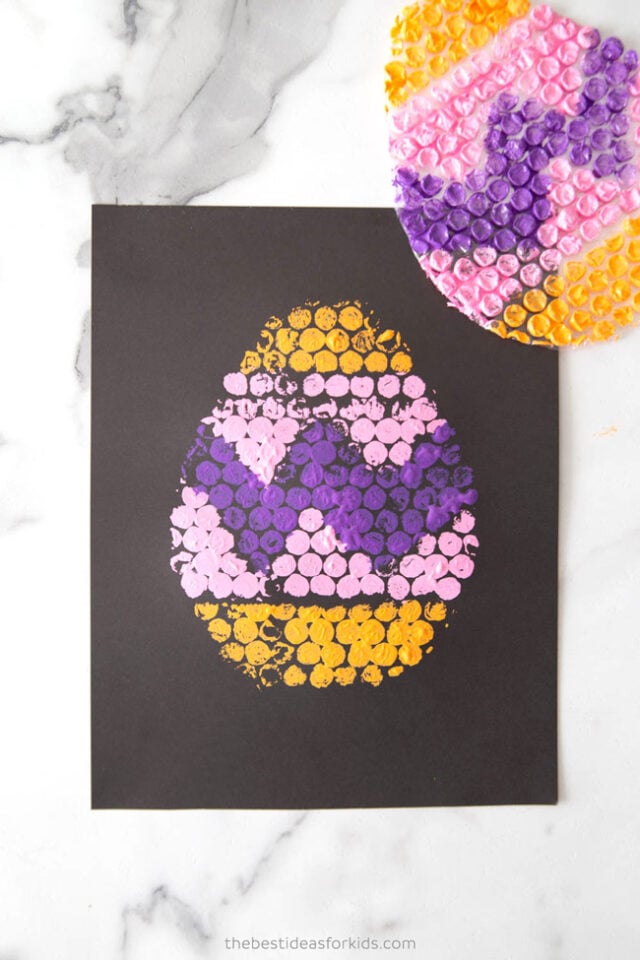
Spring is famous for its “April showers.”
This sensory art project uses the texture of bubble wrap to create a “bubbly” rain effect that is both visually interesting and fun to touch.
Materials Needed:
- ✧ Bubble wrap scraps
- ✧ Blue and white paint
- ✧ Construction paper
- ✧ Cotton balls
Steps:
1 Paint: Apply blue paint directly onto the bubbles of the wrap.
2 Press: Flip the bubble wrap onto the paper to create “raindrops.”
3 Cloud: Glue fluffy cotton balls at the top of the page to represent the rain clouds.
7. Handprint Paper Lilies
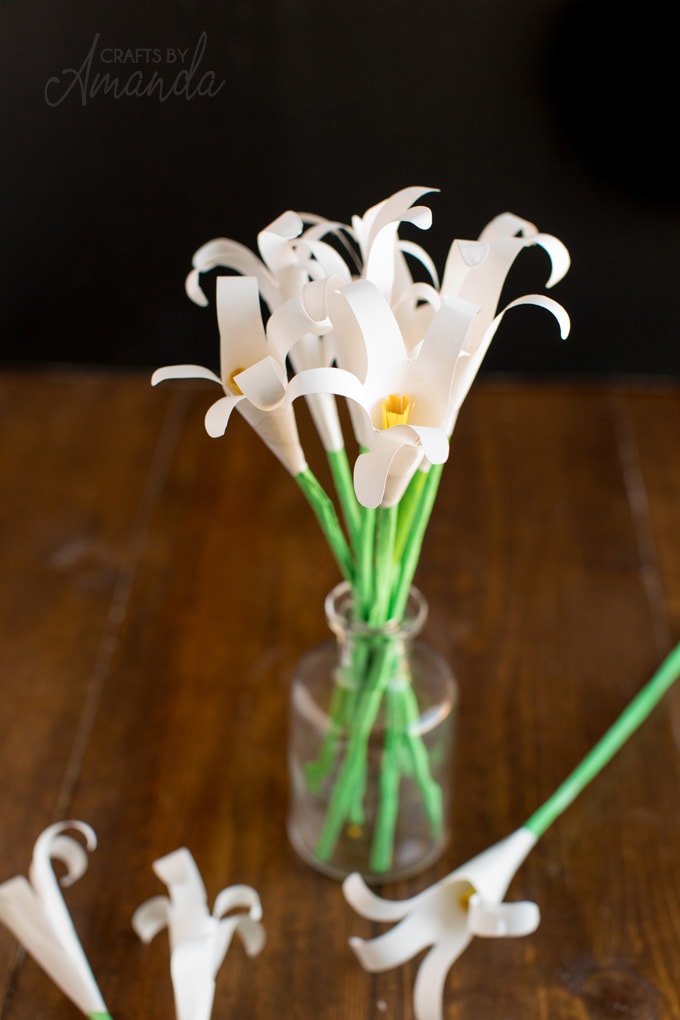
Personalized art projects make the best keepsakes.
By using a child’s handprint as the template, you create a flower that captures a moment in time as they grow.
Materials Needed:
- ✧ White and yellow construction paper
- ✧ Pencils
- ✧ Green pipe cleaners
- ✧ Tape
Steps:
1 Trace: Trace the child’s hand on white paper and cut it out.
2 Curl: Use a pencil to curl the “fingers” (petals) outward.
3 Stamen: Roll a small strip of yellow paper and tape it to the end of a pipe cleaner.
4 Wrap: Wrap the handprint around the pipe cleaner and secure it with tape at the base.
8. Rock Painted Ladybugs
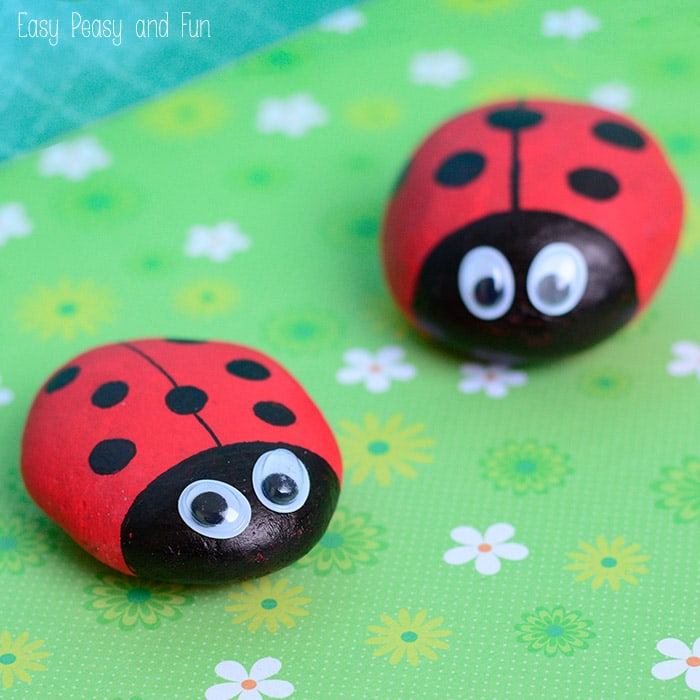
Rock painting is a durable outdoor craft.
These little ladybugs can be “hidden” around the garden for a fun scavenger hunt later in the day.
Materials Needed:
- ✧ Smooth river stones
- ✧ Red and black acrylic paint
- ✧ Outdoor sealant (optional)
Steps:
1 Base: Paint the entire rock red.
2 Details: Once dry, paint a black line down the center and add a black semi-circle at the front for the head.
3 Dots: Use the end of a paintbrush to dab on black spots.
9. Paper Plate Bird Nests
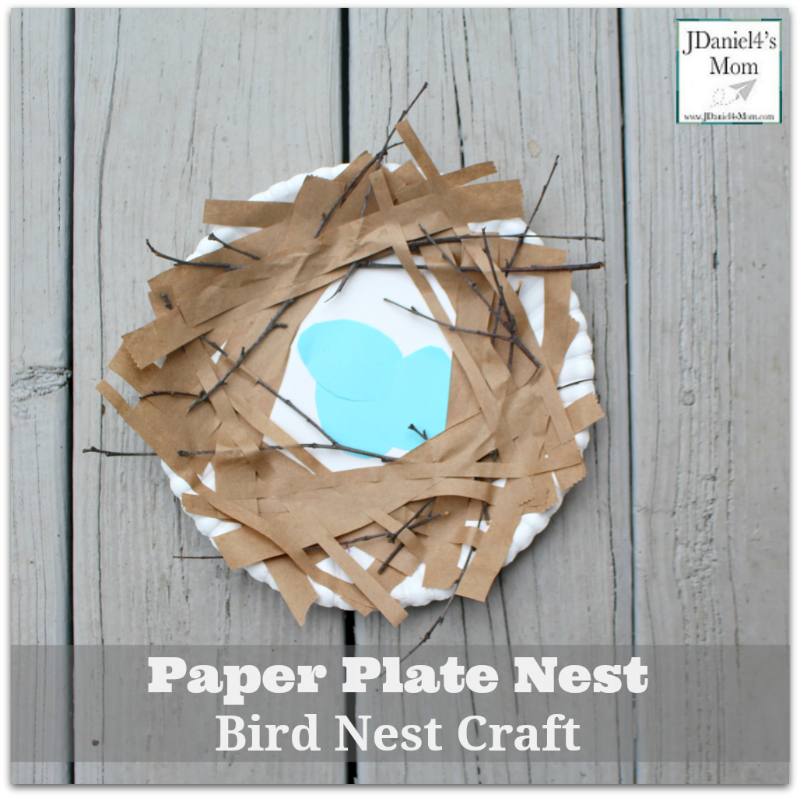
This project introduces kids to the concept of animal habitats.
It’s a multi-textured craft that uses shredded materials to mimic the way birds actually build nests.
Materials Needed:
- ✧ Paper plates (cut in half)
- ✧ Shredded brown paper or dried grass
- ✧ Blue construction paper (for eggs)
- ✧ Glue
Steps:
1 Pocket: Staple two halves of a paper plate together to create a pocket.
2 Nest: Glue shredded paper or “nesting material” to the front of the plate.
3 Eggs: Cut small oval “eggs” out of blue paper and tuck them into the nest.
10. Fingerprint Cherry Blossom Trees
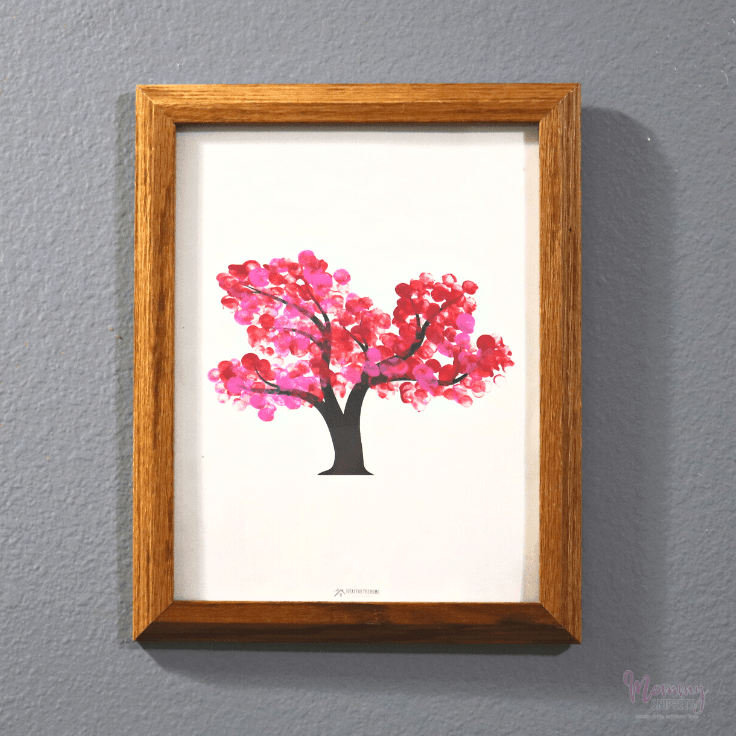
Cherry blossoms are the iconic heralds of spring.
This project is great for younger toddlers who are still mastering their pincer grasp and enjoy the tactile sensation of finger painting.
Materials Needed:
- ✧ Brown paint or markers
- ✧ Pink and white tempera paint
- ✧ Heavy paper
Steps:
1 Trunk: Draw or paint a simple brown tree trunk with many branches.
2 Blossoms: Have the child dip their fingertip into pink paint and “dot” blossoms all over the branches.
3 Depth: Add a few white dots to create highlights and depth in the flowers.
11. Recycled Plastic Bottle Planters
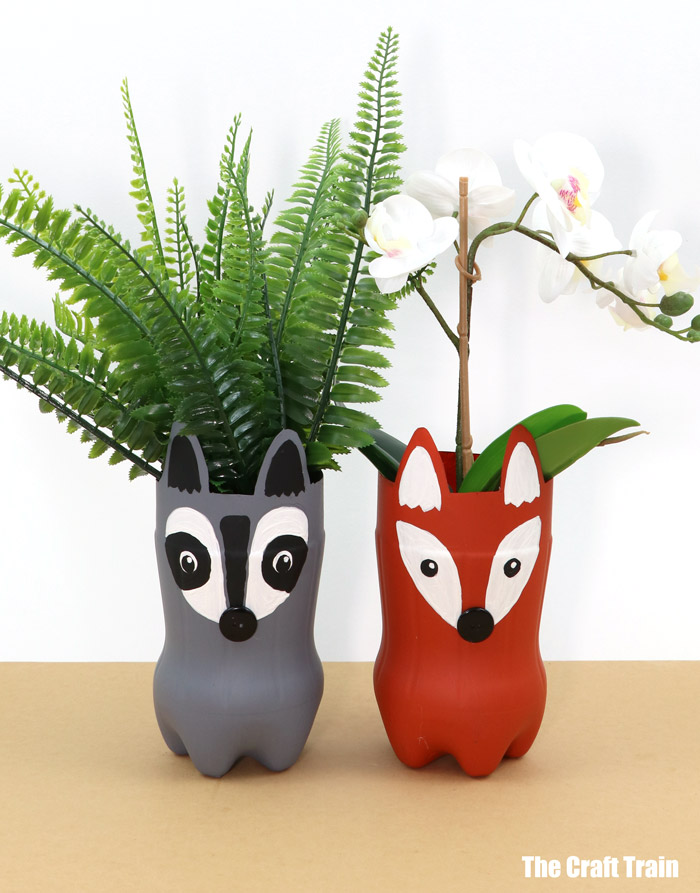
Combine art with gardening.
This project teaches children about the lifecycle of plants while giving a second life to single-use plastics.
Materials Needed:
- ✧ Empty plastic soda or water bottles
- ✧ Acrylic paint
- ✧ Potting soil and seeds (marigolds or herbs work well)
Steps:
1 Cut: Cut the bottom third of a plastic bottle off.
2 Paint: Paint the outside to look like a cat, a bunny, or a colorful pattern.
3 Plant: Add drainage holes in the bottom, fill with soil, and plant your seeds.
12. Rainbow Windsocks
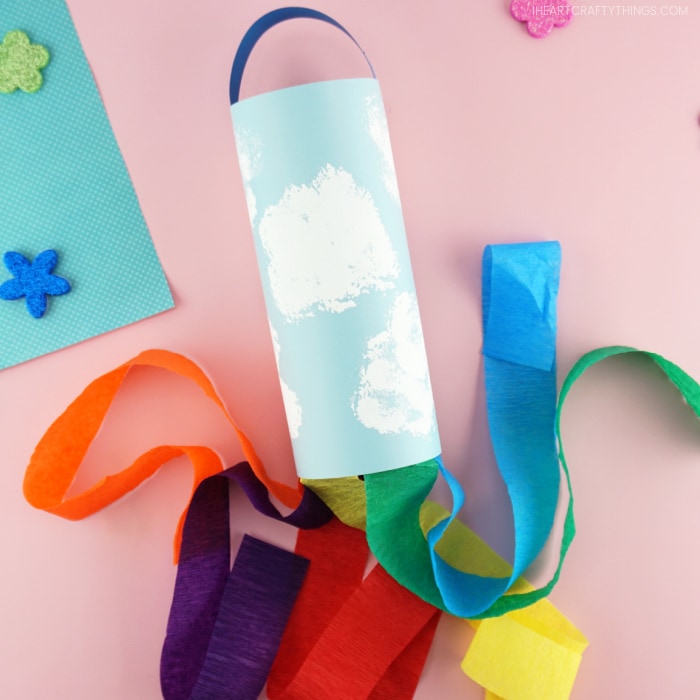
Spring often brings breezy days.
A rainbow windsock is a high-visibility craft that kids can hang outside to see the wind in action.
Materials Needed:
- ✧ Blue cardstock or a recycled tin can
- ✧ Crepe paper streamers in rainbow colors
- ✧ Glue or staples
- ✧ String
Steps:
1 Cylinder: Roll the cardstock into a tube and secure it.
2 Streamers: Glue long strips of colorful crepe paper to the bottom rim.
3 Hanger: Attach a string to the top and hang it from a porch or tree branch.
13. Sponge-Painted Spring Chicks
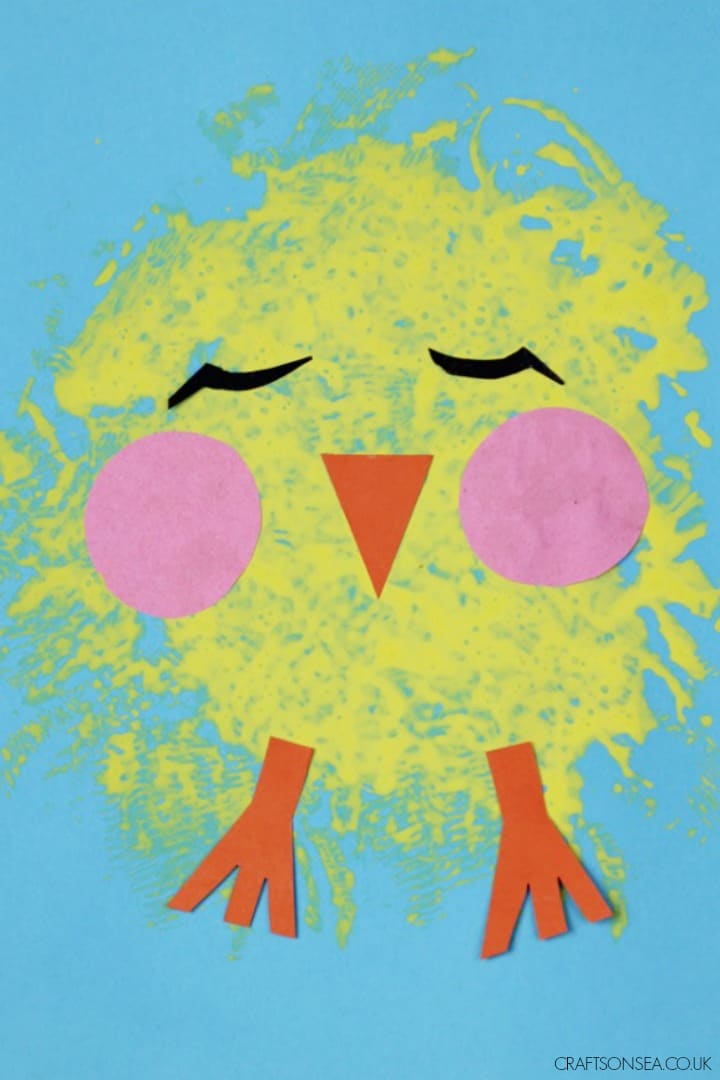
Sponges create a soft, “fuzzy” texture that is perfect for depicting baby animals like chicks or ducklings.
Materials Needed:
- ✧ Kitchen sponges (cut into circles)
- ✧ Yellow paint
- ✧ Googly eyes
- ✧ Orange construction paper (for beaks)
Steps:
1 Stamp: Dip the circular sponge in yellow paint and press it onto paper.
2 Face: Once dry, glue on googly eyes and a small triangle for the beak.
3 Feet: Draw simple stick feet with an orange marker.
14. Seed Paper Hearts
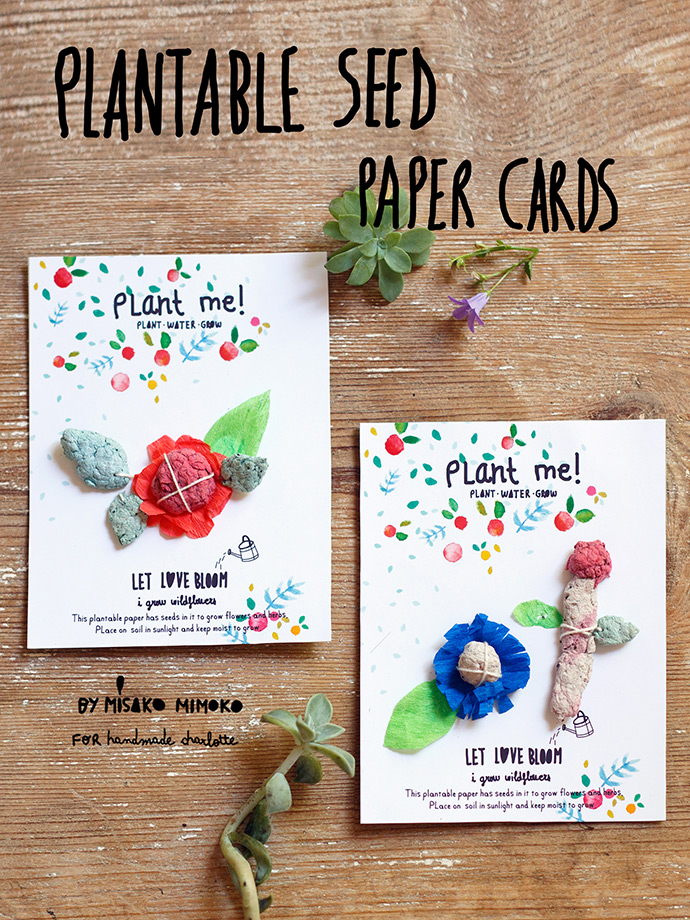
This is a “gift that grows.”
By blending recycled paper into a pulp and adding wildflower seeds, kids can create art that they can actually plant in the soil.
Materials Needed:
- ✧ Scrap paper (non-glossy)
- ✧ Blender and water
- ✧ Wildflower seeds
- ✧ Cookie cutters
Steps:
1 Pulp: Blend soaked paper scraps with water until it reaches a mushy consistency.
2 Mix: Stir in the seeds (do not blend them!).
3 Mold: Press the pulp into cookie cutters on a towel to drain.
4 Dry: Once dry, you have plantable art!
15. Clothespin Dragonflies
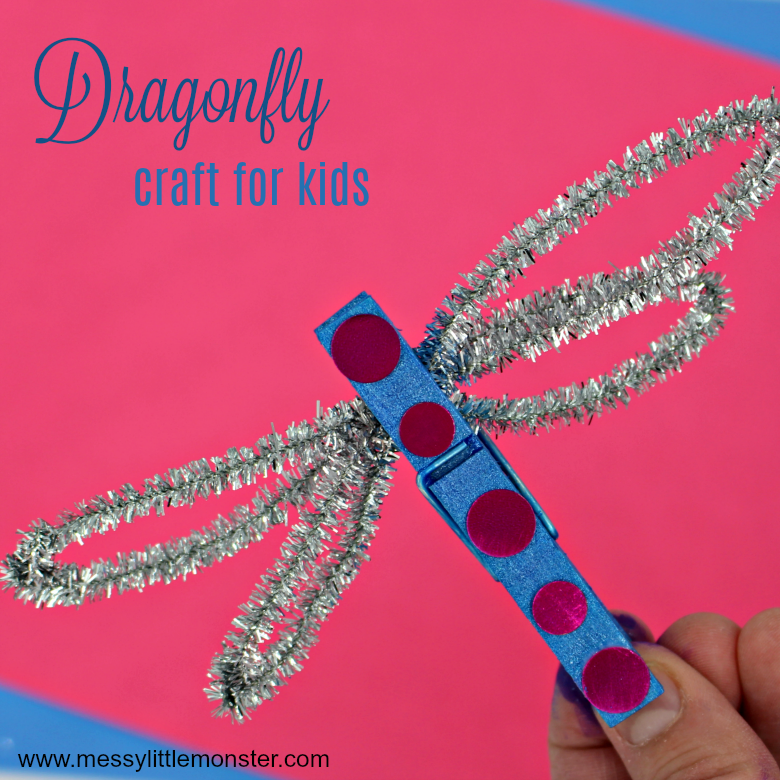
Dragonflies are a sign that the weather is warming up.
This project uses basic wooden clothespins and turns them into shimmering garden insects.
Materials Needed:
- ✧ Wooden clothespins
- ✧ Glitter or metallic paint
- ✧ Pipe cleaners or stiff ribbon (for wings)
- ✧ Glue
Steps:
1 Body: Paint the clothespin with bright, shimmering colors.
2 Wings: Bend a pipe cleaner into two figure-eight shapes and clip them into the clothespin’s “mouth” or glue them to the back.
3 Eyes: Add two tiny dots of paint for eyes.
Project Summary Table: Age & Mess Level
| Project Idea | Best Age Group | Mess Level (1-5) | Main Skill Developed |
|---|---|---|---|
| Egg Carton Flowers | 4-8 years | 3 | Upcycling & Cutting |
| Coffee Filter Butterflies | 3-7 years | 2 | Color Theory |
| Pressed Flower Suncatchers | 5-10 years | 1 | Nature Appreciation |
| Fork-Painted Dandelions | 2-5 years | 4 | Sensory Textures |
| Nature Binoculars | 3-6 years | 2 | Observation Skills |
| Seed Paper Hearts | 6-12 years | 5 | Environmental Science |
| Rock Ladybugs | 4-10 years | 3 | Precision Painting |
Frequently Asked Questions
What are the best paints for kids’ spring crafts?
For most projects, washable tempera paint is the best choice for younger children because it cleans up easily from skin and clothes.
For projects that will be placed outside, like the Rock Ladybugs or Plastic Bottle Planters, acrylic paint is better because it is water-resistant once dry.
How can I make these projects more eco-friendly?
Focus on “found” materials. Instead of buying new plastic glitter, use dried flower petals or colorful sand.
Replace plastic googly eyes with buttons or simply draw the eyes on with a marker. Always prioritize cardboard, paper, and metal over plastic when upcycling.
My child is a toddler; which project is easiest?
The Fingerprint Cherry Blossom Tree and Fork-Painted Dandelions are excellent for toddlers.
They don’t require complex scissor skills and allow the child to explore the sensation of paint while still producing a recognizable and beautiful result.
Conclusion
Spring is a season of curiosity and growth.
By engaging children in these art projects, you aren’t just filling an afternoon; you are helping them observe the world more closely.
From the way a coffee filter absorbs water to the way a seed paper heart sprouts into a flower, these activities bridge the gap between creative play and real-world learning. Gather your supplies, head outside for some inspiration, and let your child’s creativity bloom alongside the season.
Leave a Reply