Spring is the season of renewal, making it the perfect time to engage preschoolers in creative play that mirrors the blooming world around them.
Crafting with young children (ages 3 to 5) is less about the finished masterpiece and more about sensory exploration, fine motor development, and color recognition.
By using simple materials like paper plates, coffee filters, and recycled egg cartons, you can provide hours of educational entertainment that celebrates the arrival of warmer weather.
1. Vibrant Paper Plate Sunflowers
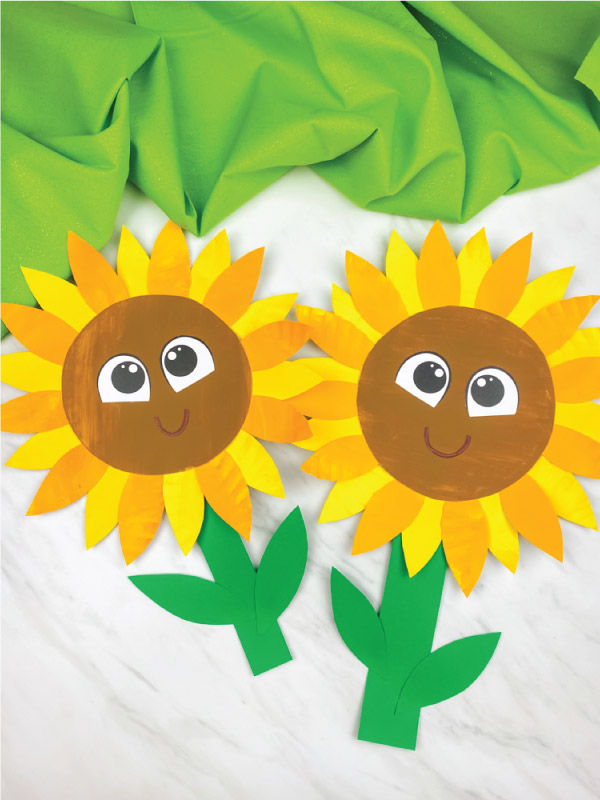
Paper plate sunflowers are a classic spring craft that helps preschoolers practice their snipping skills with safety scissors.
These bright, cheerful flowers make excellent classroom or playroom decorations.
Materials Needed:
Yellow paper plates (or white ones to paint), brown construction paper, glue, and scissors.
The Process:
- Step 1: Have the child paint a paper plate bright yellow if it isn’t already colored.
- Step 2: Once dry, help the child cut small slits all the way around the edge of the plate to create petals.
- Step 3: Cut a circle out of brown construction paper or use real dried sunflower seeds.
- Step 4: Glue the brown circle or seeds into the center of the plate.
- Step 5: Attach a large green popsicle stick to the back to act as a stem.
2. Recycled Egg Carton Blossoms
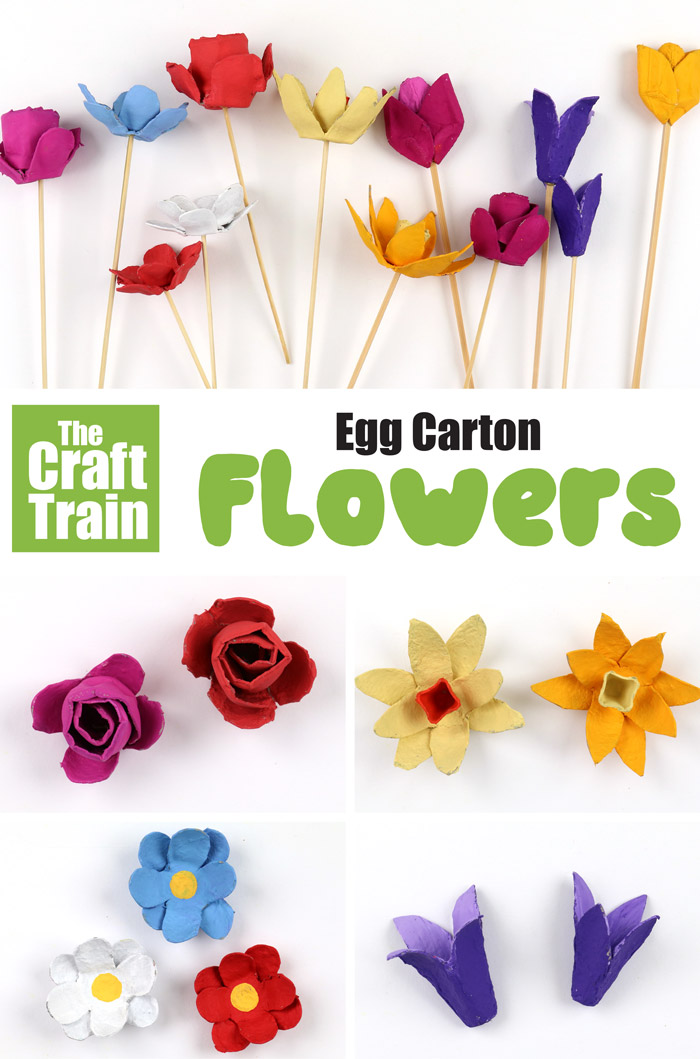
Upcycling is a fantastic way to teach children about sustainability.
Transforming a cardboard egg carton into a bouquet of flowers is a tactile experience that involves painting and assembly.
The Process:
Step 1: Cut the individual cups out of a cardboard egg carton.
Step 2: Let the preschooler paint each cup a different spring color—think lavender, pink, and sky blue.
Step 3: Once the paint is dry, poke a small hole in the bottom of the cup and thread a green pipe cleaner through it, securing it with a knot or a bead.
Step 4: These flowers look wonderful gathered in a small mason jar.
3. Magical Coffee Filter Butterflies
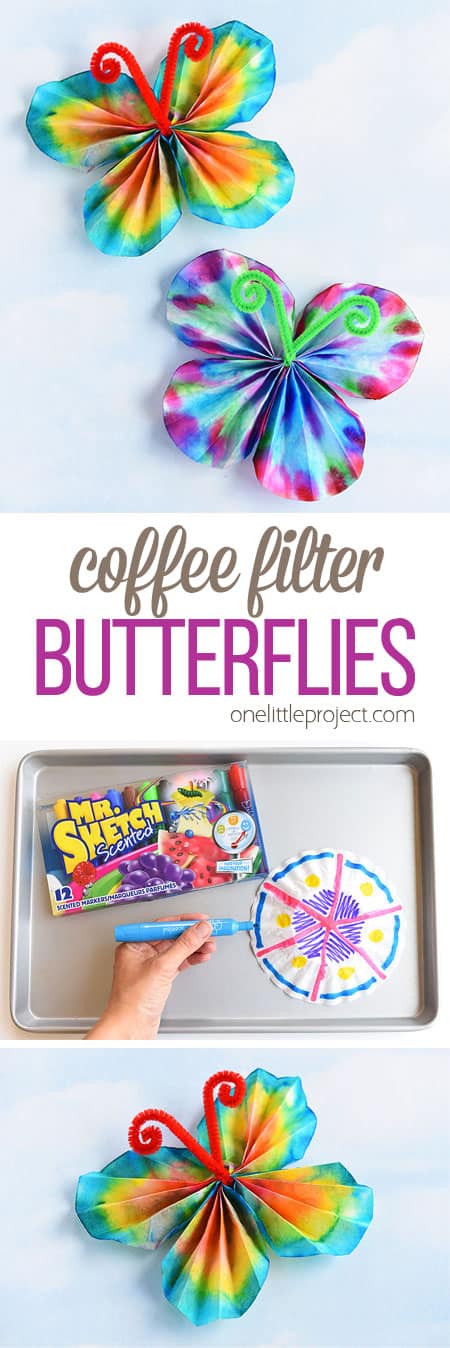
This craft introduces children to the concept of solubility and color mixing.
It is a mesmerizing process that feels like a science experiment and an art project rolled into one.
Materials Needed:
White coffee filters, washable markers, a spray bottle with water, and clothespins.
The Process:
- Step 1: Have the child flatten the coffee filter and draw designs using washable markers.
- Step 2: Lightly mist the filter with water. Watch as the colors bleed and blend together to create a tie-dye effect.
- Step 3: Once dry, pinch the center of the filter and clip it with a wooden clothespin.
- Step 4: Add pipe cleaner antennae to the top of the clothespin to complete the butterfly.
4. Sweet Handprint Lilies
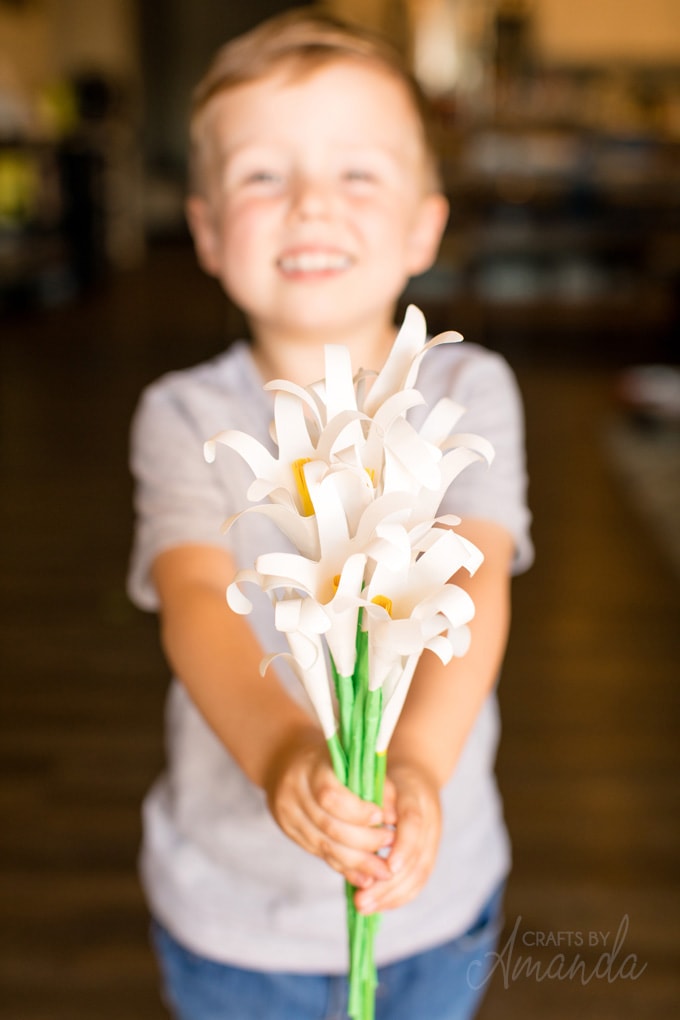
Handprint crafts are beloved by parents because they capture a moment in time.
These lilies are elegant and surprisingly easy for little hands to assemble with a bit of guidance.
The Process:
Step 1: Trace the child’s hand on white or pink construction paper and cut it out.
Step 2: Roll the handprint into a cone shape with the fingers curling outward (you can use a pencil to help curl the paper).
Step 3: Insert a yellow pipe cleaner into the center to act as the stamen.
Step 4: These make a sentimental gift for Mother’s Day or Easter.
5. Textured Bubble Wrap Beehives
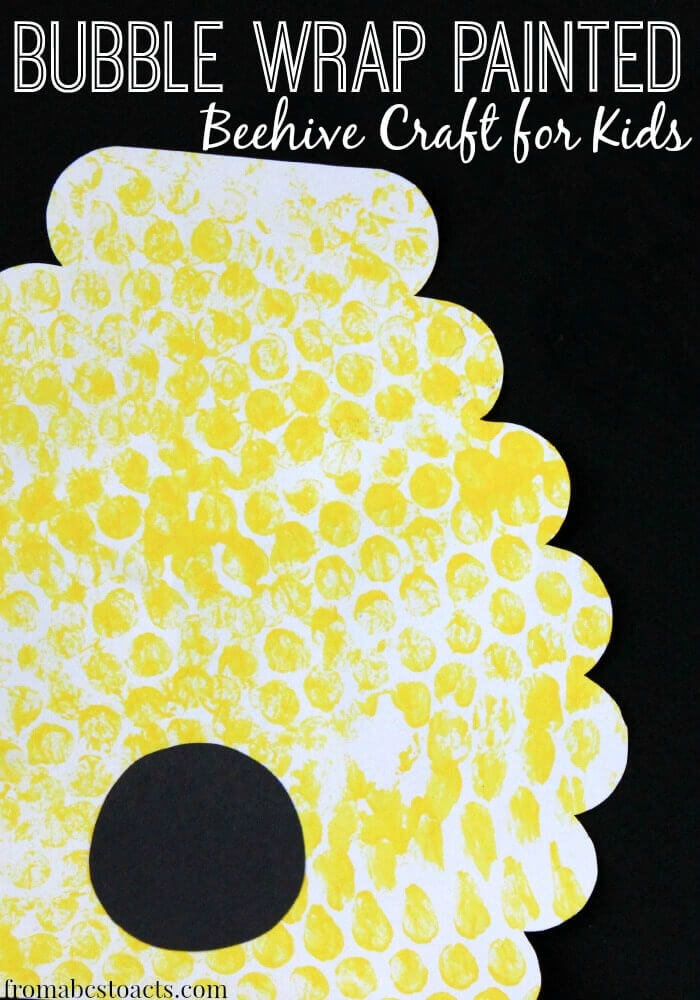
Using bubble wrap as a stamp is a fantastic sensory activity.
The hexagonal pattern of the bubbles perfectly mimics the look of a honeycomb.
The Process:
Step 1: Cut a piece of bubble wrap into an oval shape.
Step 2: Have the child paint the bubbly side with yellow tempera paint.
Step 3: Press the painted side onto a piece of white cardstock.
Step 4: Once the print is dry, the child can use their thumbprints in black and yellow paint to create bees buzzing around the hive.
6. Whimsical Fork Painted Dandelions
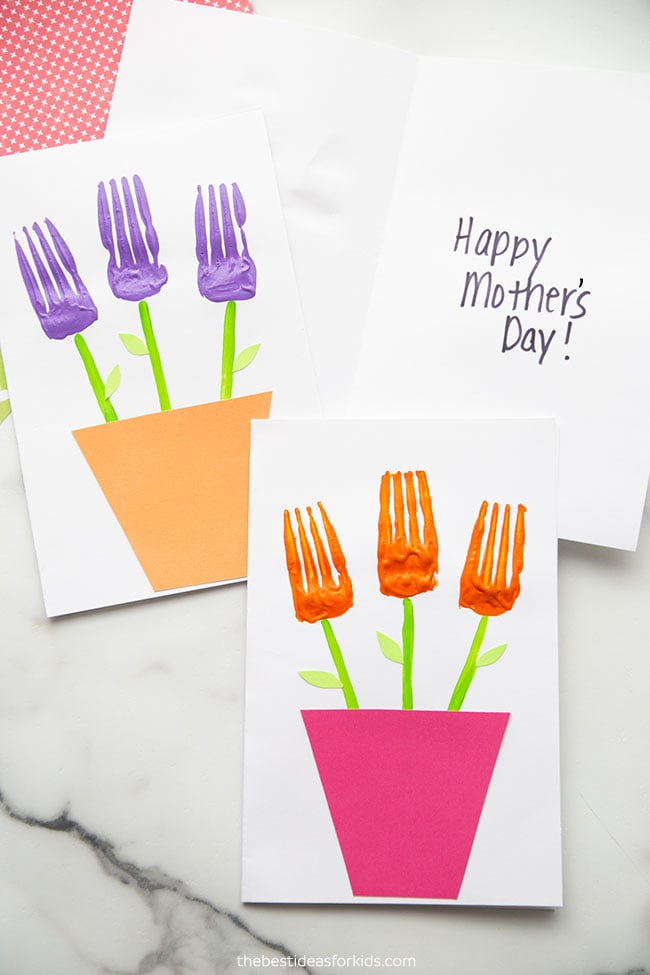
Who says you need a paintbrush to make art?
Using a plastic fork creates a unique texture that perfectly replicates the wispy petals of a dandelion or a zinnia.
The Process:
Step 1: Dip the back of a plastic fork into bright paint (yellow, white, or purple).
Step 2: Press the fork in a circular pattern on a piece of paper, radiating out from a central point.
Step 3: This technique is excellent for children who are still developing the grip required for traditional brushes.
7. Nature Walk Binoculars
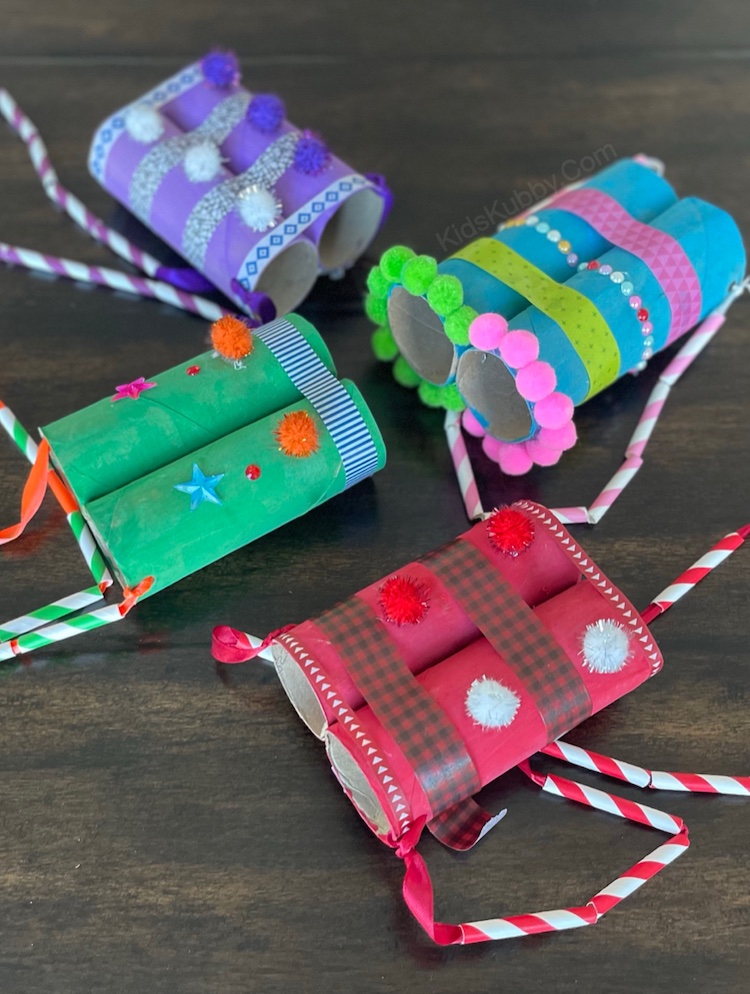
Spring is the best time for a nature scavenger hunt.
These binoculars encourage children to get outside and observe the changing environment.
The Process:
Step 1: Tape or glue two toilet paper rolls together side-by-side.
Step 2: Let the preschooler decorate them with stickers, markers, or bits of green tissue paper.
Step 3: Punch a hole on each side and attach a piece of yarn (ensure it is a breakaway string for safety).
Step 4: Take them outside to look for birds, buds, and bugs.
8. Fluffy Paper Plate Rainbows
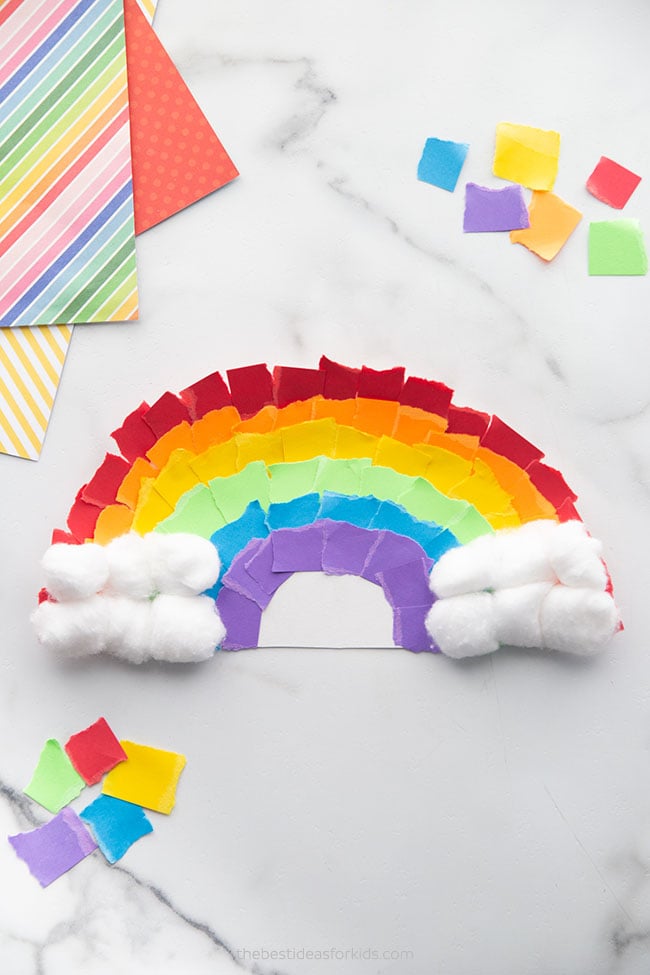
This craft is excellent for practicing color sorting and fine motor coordination.
It results in a beautiful, 3D hanging decoration.
The Process:
- Step 1: Cut a paper plate in half.
- Step 2: Have the child glue strips of colorful construction paper (red, orange, yellow, green, blue, purple) to the flat edge of the plate.
- Step 3: On the curved part of the plate, have the child glue cotton balls to represent a fluffy white cloud.
- Step 4: Hang it near a window to catch the spring light.
9. Polka Dot Rock Ladybugs

Rock painting is a durable craft that can be used to decorate a garden or a windowsill.
It’s a great way to talk about the helpful bugs found in spring gardens.
The Process:
Step 1: Find smooth, flat stones.
Step 2: Paint the entire stone red.
Step 3: Once dry, use black paint or a permanent marker to draw a line down the middle and add black dots.
Step 4: Use googly eyes or white paint for the eyes.
Step 5: These pet ladybugs are always a hit with toddlers.
10. Layered Cupcake Liner Daisies
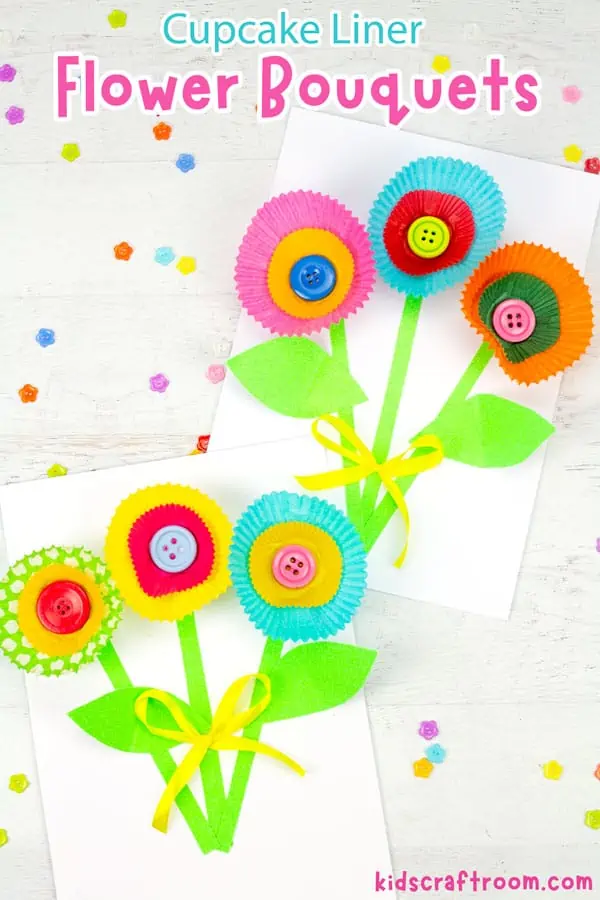
Cupcake liners come in various colors and patterns, making them a versatile craft supply.
Layering them adds depth and visual interest.
The Process:
Step 1: Flatten two or three cupcake liners of different sizes and colors.
Step 2: Glue them one on top of the other.
Step 3: In the center, glue a button, a pom-pom, or a circle of yellow paper.
Step 4: Glue the finished flower onto a piece of blue paper and draw on a green stem and leaves.
11. Upcycled CD Snails
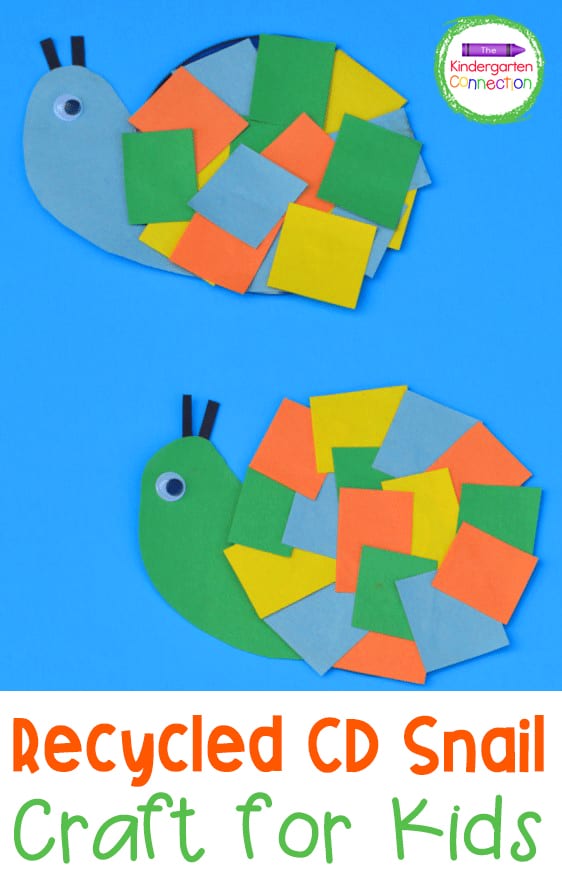
If you have old, scratched CDs lying around, they make the perfect shiny shells for garden snails.
The Process:
Step 1: Cut a C shape out of construction paper to serve as the snail’s body.
Step 2: Glue the CD onto the center of the body.
Step 3: Let the child decorate the CD with sequins or glitter glue.
Step 4: Add googly eyes to the head end of the paper body to bring the character to life.
12. Plastic Bottle Cap Flowers
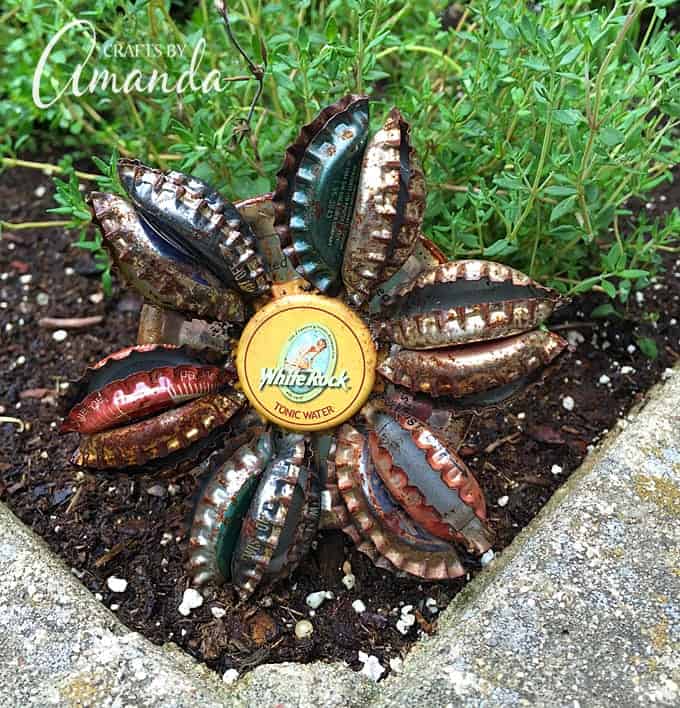
This mosaic-style craft is great for hand-eye coordination.
It teaches children how to arrange shapes to create a larger image.
The Process:
Step 1: Collect colorful plastic caps from milk jugs and water bottles.
Step 2: On a piece of sturdy cardboard, have the child arrange the caps in a circle to form petals, with one cap in the center of a different color.
Step 3: Glue them down firmly.
Step 4: Use a green ribbon or a stick for the stem.
13. Clothespin Dragonflies
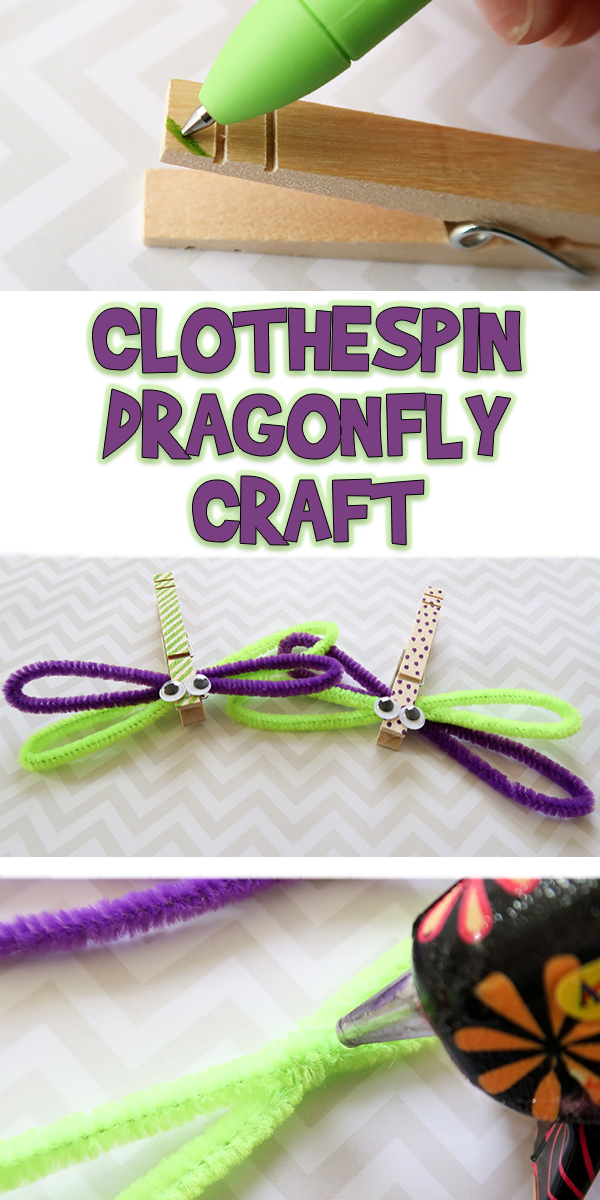
Dragonflies are a sign that spring is in full swing.
This craft uses basic household items to create a fun toy.
The Process:
Step 1: Paint a wooden clothespin a bright color.
Step 2: For the wings, take a pipe cleaner and bend it into two loops (like a figure eight) and clip it into the clothespin.
Step 3: Add googly eyes to the head end of the pin.
Step 4: These can be clipped onto curtains or indoor plants.
14. Grass Head Growing People
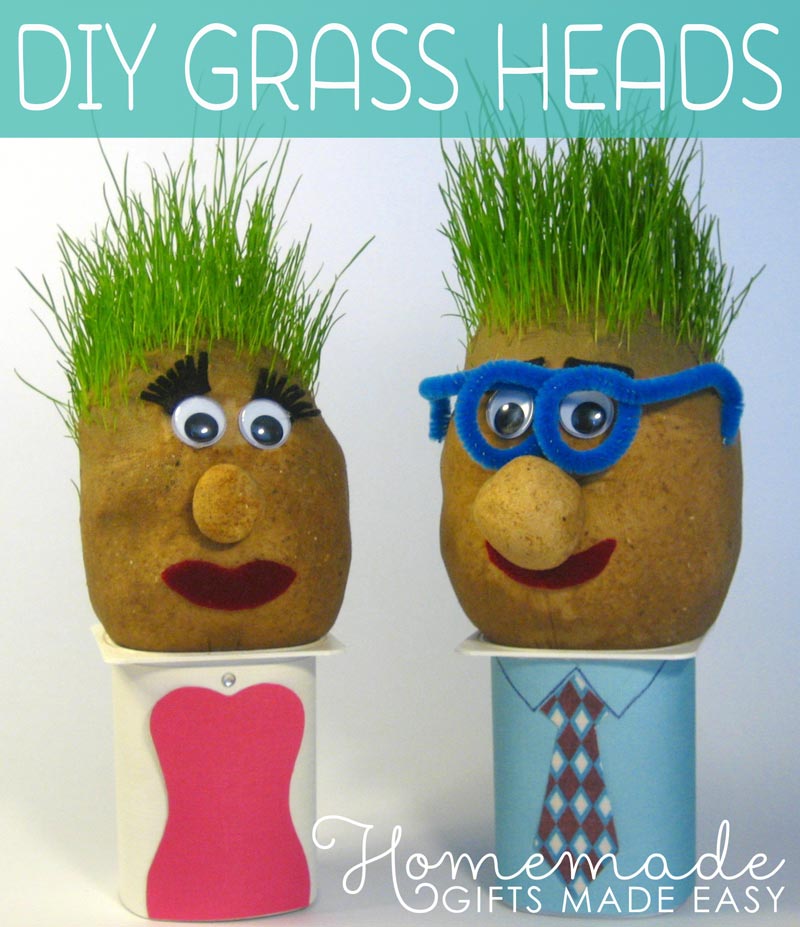
This is a living craft that teaches preschoolers about the life cycle of plants.
It combines art with basic biology.
The Process:
- Step 1: Decorate a plastic or paper cup with a face using permanent markers.
- Step 2: Fill the cup with potting soil.
- Step 3: Sprinkle grass seeds on top and cover with a thin layer of soil.
- Step 4: Water it regularly.
- Step 5: In about a week, the person will start to grow green hair that the child can eventually trim with safety scissors.
15. Fingerprint Cherry Blossoms
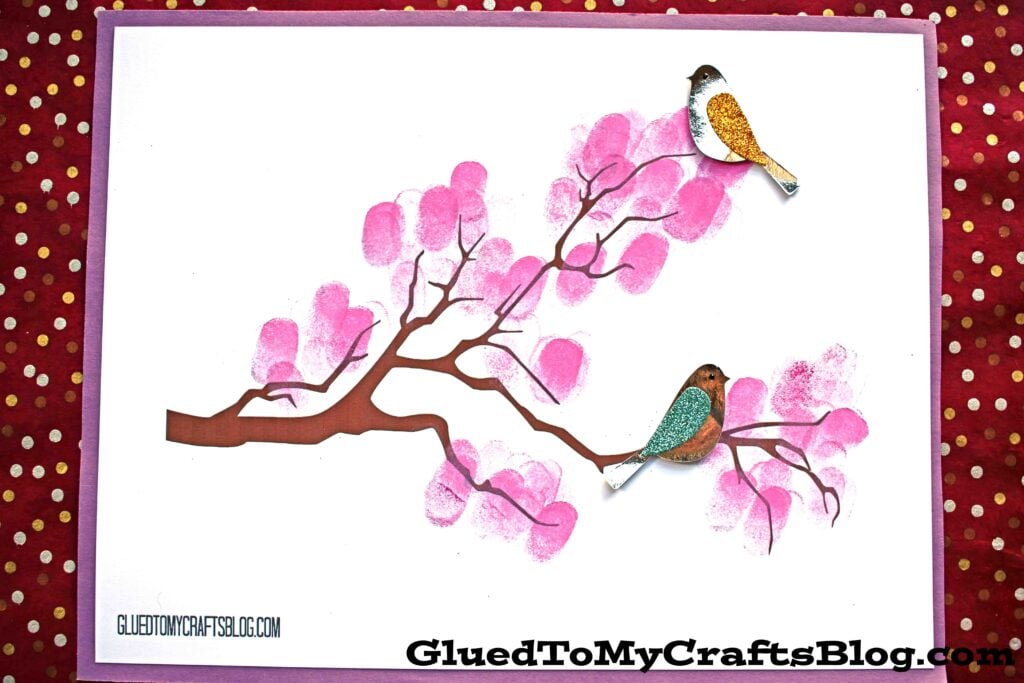
Cherry blossoms are iconic spring symbols.
This project allows children to get their hands messy in a controlled and creative way.
The Process:
Step 1: Draw or paint a simple brown tree trunk with branches on a piece of paper.
Step 2: Have the child dip their fingertip into light pink paint and stamp blossoms all over the branches.
Step 3: This is a wonderful way to practice point and press motor skills.
Essential Supplies for Preschool Spring Crafts
To make your crafting session go smoothly, it is helpful to have a dedicated art bin.
Here are the essentials for the projects listed above:
Tips for Crafting with Preschoolers
Working with children under five requires a different approach than crafting with older kids.
Here are some expert tips to ensure a positive experience:
-
✓
Focus on the Process: At this age, the act of painting, gluing, and touching materials is more important than the final product. If their ladybug has 20 eyes, let it be! -
✓
Prepare the Space: Use a plastic tablecloth or old newspapers to cover your work surface. Preschoolers are notoriously messy, and a stress-free cleanup makes the process more enjoyable for the adult. -
✓
Give Limited Choices: Instead of asking What color do you want?, ask Do you want the red or the blue? This prevents choice paralysis and keeps the project moving. -
✓
Incorporate Nature: Whenever possible, take the craft outside or use items found in nature (like sticks, stones, or leaves). This builds a connection between their art and the world around them.
How Upcycling Enhances Spring Crafts
Upcycling isn’t just about saving money; it’s about teaching resourcefulness.
When a child sees a trash item like an egg carton or a bottle cap turned into a beautiful flower, it changes how they perceive the objects in their environment.
It encourages outside-the-box thinking and problem-solving.
Furthermore, many recycled materials offer unique textures (like the ridges in a tin can or the cardboard of an egg carton) that provide excellent sensory feedback for developing hands.
Frequently Asked Questions
Q: What is the best glue for preschoolers?
A: Washable white school glue is the safest and most versatile. For heavier items like bottle caps or CDs, a glue stick may not be strong enough, so tacky glue or a low-temp glue gun (operated by an adult) is recommended.
Q: How can I make painting less messy?
A: Try no-mess painting by putting paper and dollops of paint inside a gallon-sized Ziploc bag. Seal it tightly and let the child squish the paint around from the outside.
Q: My child has a short attention span. How can I keep them engaged?
A: Break the craft into stages. Paint the materials in the morning, let them dry during nap time, and do the assembly in the afternoon. Keeping sessions to 15-20 minutes is ideal for this age group.
Conclusion
Spring crafting with preschoolers is a joyful way to celebrate the season while building essential developmental skills.
Whether you are transforming a simple paper plate into a glowing sunflower or watching grass hair sprout from a decorated cup, these activities foster curiosity and creativity.
Remember that the goal is to spend quality time together and explore the vibrant colors and textures of the season.
Grab your glue sticks, head outside for some inspiration, and let your little one’s imagination bloom!
Leave a Reply