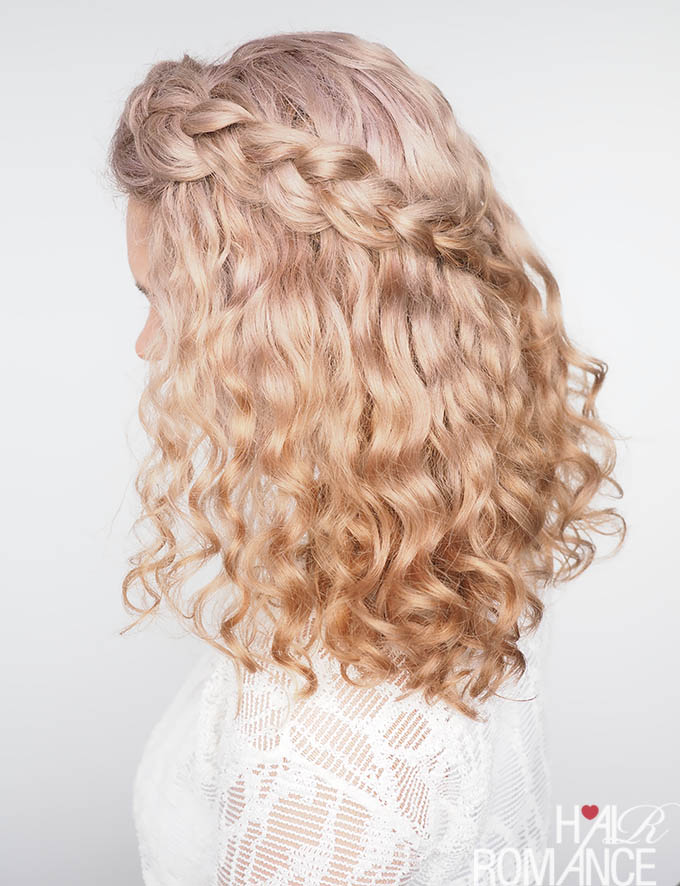
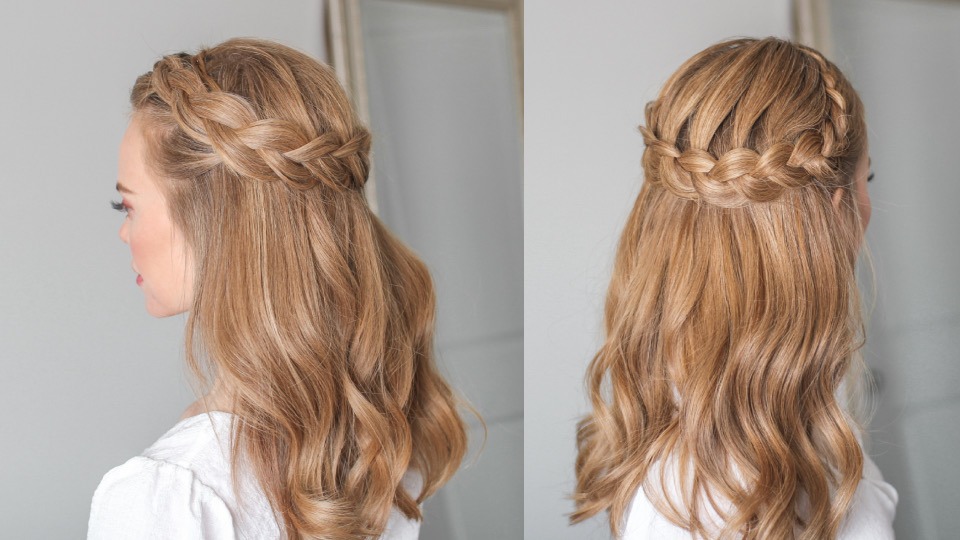
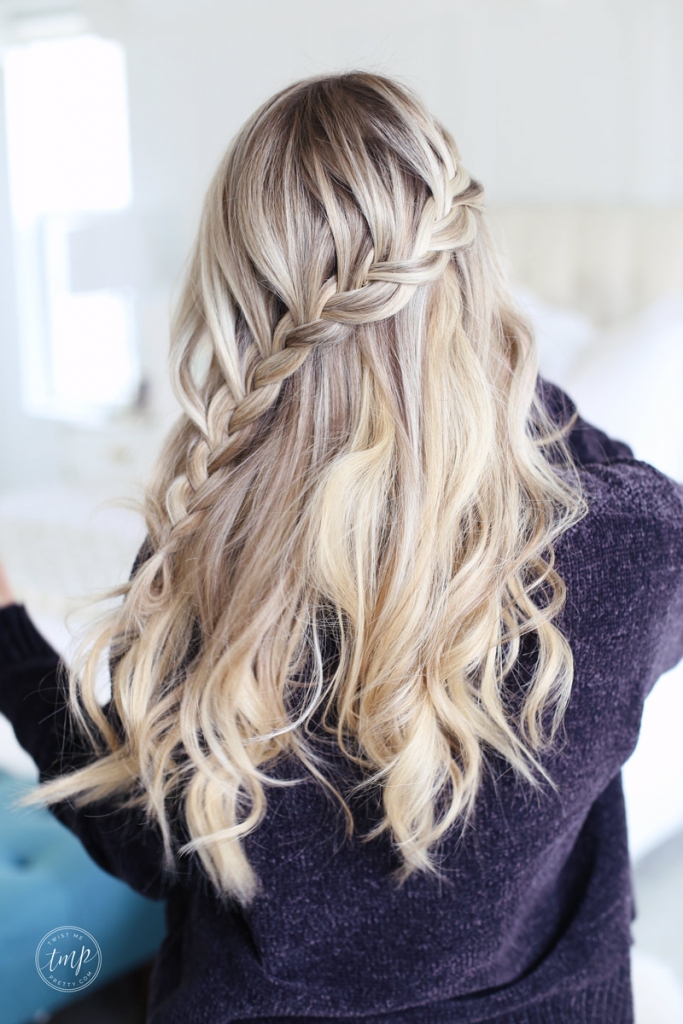
The half-up side braid is the ultimate cool girl hairstyle, blending the effortless bohemian vibe of loose waves with the polished structure of a braid.
This versatile look works for everything from a casual day at the office to a formal wedding, making it a staple for anyone looking to upgrade their hair game without spending hours in front of the mirror.
By pulling hair away from the face on just one side, you highlight your facial features while maintaining the length and volume of your hair in the back.
Essential Tools and Products for Braid Success
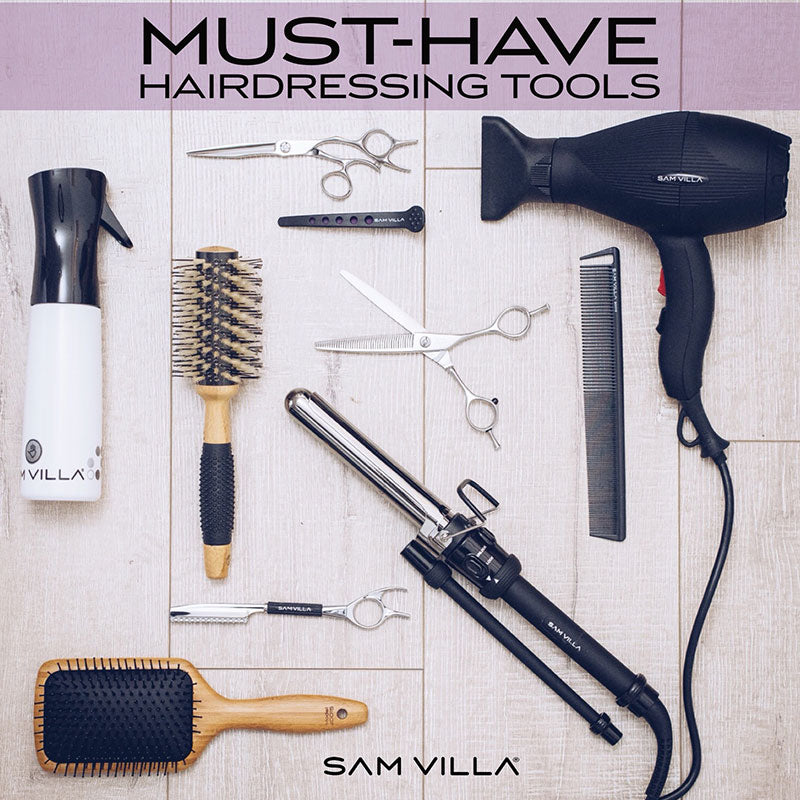
Before you begin your tutorial, it is crucial to have the right kit.
Unlike a simple ponytail, a half-up side braid requires specific textures to hold the weave in place and prevent slipping, especially if you have fine or silky hair.
| Tool/Product | Purpose | Why It’s Necessary |
|---|---|---|
| Texturizing Spray | Adds grit to the hair | Prevents the braid from unraveling and adds volume. |
| Clear Elastic Bands | Secures the end of the braid | Blends seamlessly into the hair for a professional look. |
| Tail Comb | Sectioning | Creates clean, crisp parts for a polished finish. |
| Bobby Pins | Anchoring | Secures the braid to the back of the head discreetly. |
| Dry Shampoo | Oil absorption | Provides extra lift at the roots and makes hair easier to grip. |
| Hairspray | Finishing | Locks the style in place against wind and humidity. |
Mastering the Foundation: Step-by-Step Classic Side Braid Tutorial
To achieve the perfect half-up side braid, follow this foundational method.
Once you master this, the variations listed later in this article will be much easier to execute.
● Step 1: Prep and Texture
Start with dry hair. If your hair is freshly washed and slippery, spray a generous amount of dry shampoo or sea salt spray throughout the mid-lengths. This creates the necessary friction.
If you want a romantic look, use a 1.25-inch curling iron to add loose waves before you start braiding.
● Step 2: Create a Deep Side Part
Using your tail comb, create a deep side part. The braid will begin on the side with less hair (the narrow side).
This creates a beautiful asymmetrical silhouette that opens up your face.
● Step 3: Sectioning the Braid Area
Pick up a three-inch section of hair near the temple on the side you just parted. Divide this into three equal strands.
Ensure the rest of your hair is brushed back and out of the way.
● Step 4: The Braiding Process
Begin a traditional three-strand braid, or for more security, a French braid where you pull in small sections of hair from the hairline as you move toward the back of your head.
Keep the tension firm but not tight.
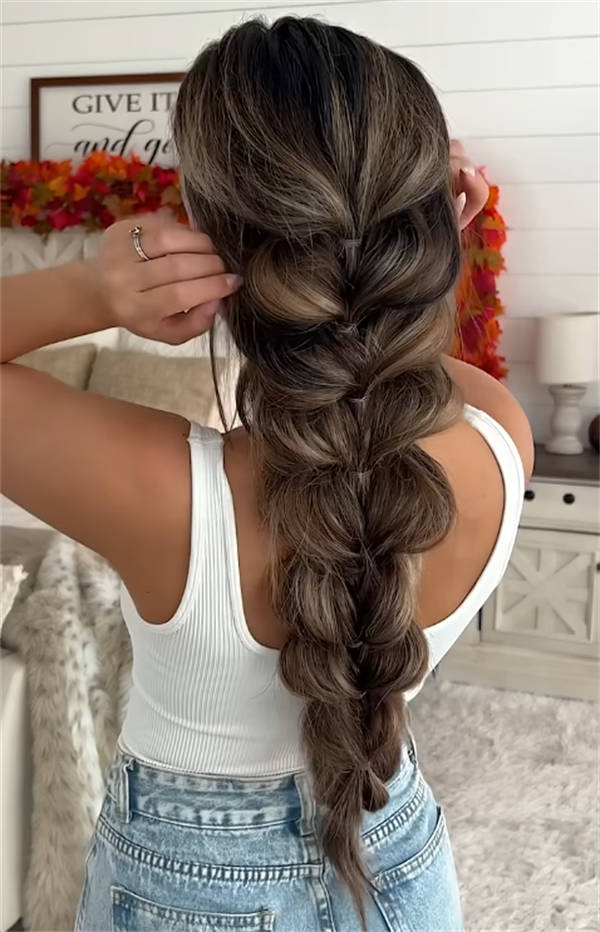
● Step 5: The Pancake Technique
This is the secret to a professional-looking DIY braid. Once you reach the back of your head, secure the braid temporarily with a clip.
Starting from the bottom of the braid, gently tug at the outer loops of each weave. This pancakes the braid, making it look twice as thick and wonderfully lived-in.
● Step 6: Securing the Style
Bring the end of the braid to the center-back of your head. Lift a small top layer of the unbraided hair and pin the braid underneath it using two bobby pins in an X shape.
Drop the top layer back down to hide the pins.
10 Creative Half Up Side Braid Styles to Try
Now that you have the basic technique down, here are 10 specific styles and variations you can use to customize your look for any occasion.
-
● 1. The Boho Fishtail Side Braid
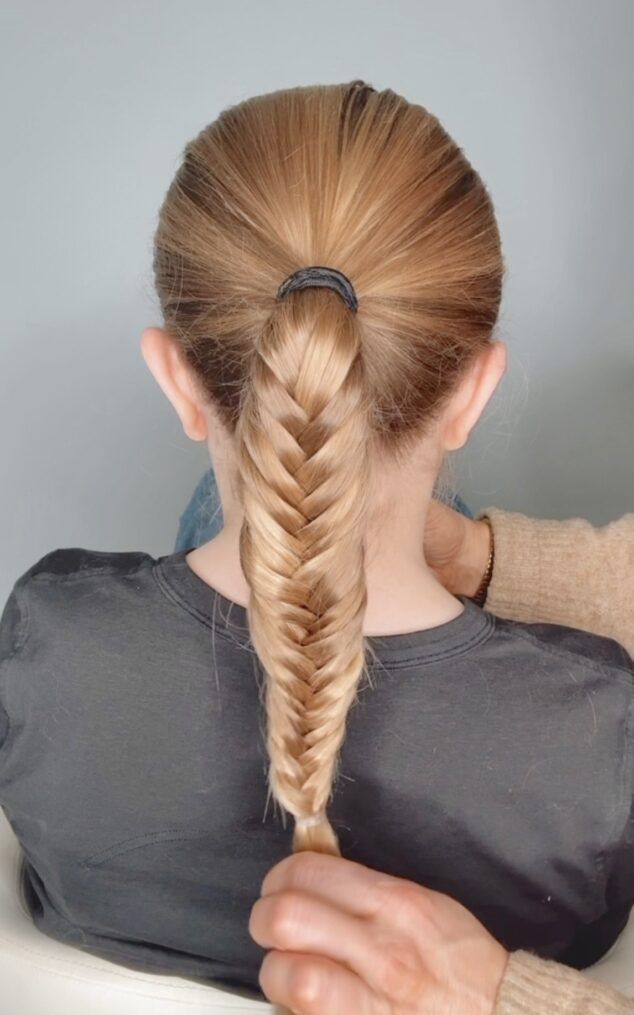
Instead of a standard three-strand braid, use the fishtail technique. Divide your side section into two halves and cross small slivers from the outside of one section to the inside of the other.
This creates a much more intricate, mermaid aesthetic. It takes longer but offers a high-authority fashion look that is perfect for festivals.
-
● 2. The Dutch Inside-Out Side Braid
A Dutch braid is essentially a French braid in reverse. Instead of crossing strands over the middle, you cross them under.
This results in a braid that sits on top of the hair rather than being embedded in it. It provides a 3D effect that is particularly striking on highlighted or multi-tonal hair.
-
● 3. The Double Twist Side Accent
If you struggle with braiding, the twist is your best friend. Take two sections of hair and twist them individually toward your face, then wrap them around each other away from your face.
This rope effect is sleek, modern, and takes less than two minutes to complete.
-
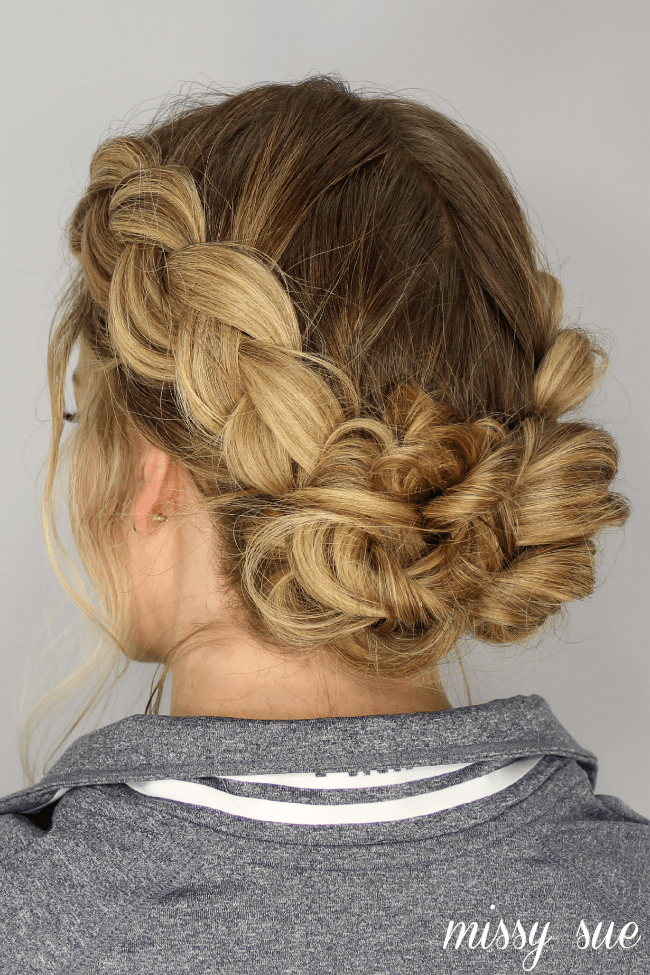
● 4. The Romantic Rose Braid
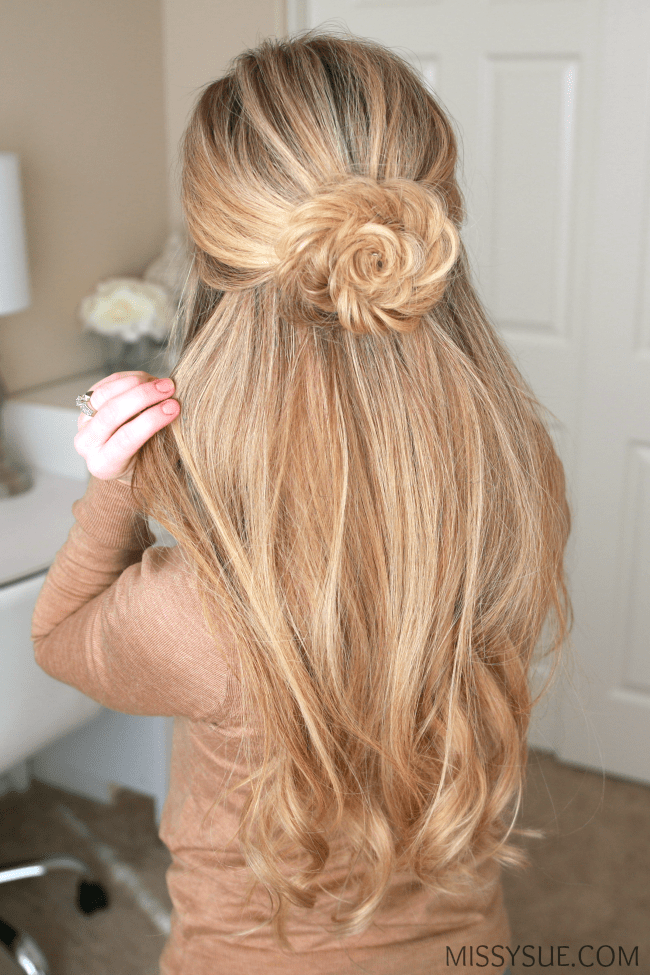
Braid a thin section on the side and wrap it into a small coil at the back of your head, pinning it flat. This creates a rose shape.
It is a stunning choice for bridesmaids or date nights. Ensure you pancake the braid heavily before coiling to give the petals volume.
-
● 5. The Bubble Braid Side Variation
The bubble braid is the biggest trend on social media right now. Instead of weaving, use tiny clear elastics every two inches down a side ponytail.
Pull at the hair between the elastics to create bubbles. It’s edgy, youthful, and incredibly easy for beginners who haven’t mastered traditional braiding.
-
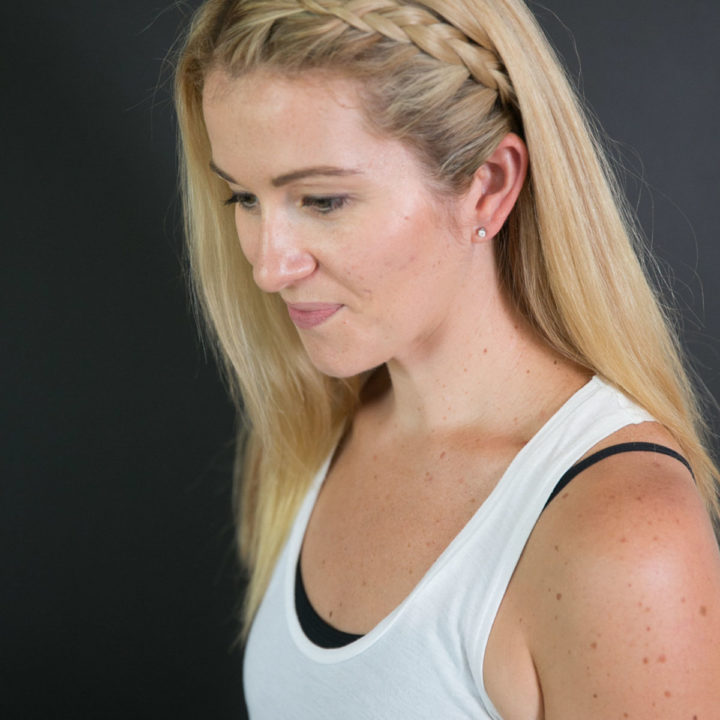
● 6. The French Lace Braid
A lace braid is a French braid where you only add new hair from one side (the hairline). This keeps the braid sitting right along the edge of your face like a delicate headband.
It’s an elegant way to keep bangs or flyaways out of your eyes while leaving the rest of your hair flowing.
-
● 7. The Messy Textured Pancake Braid
This style prioritizes volume over neatness. After braiding, use a texturizing powder on the braid itself.
Pull the loops out until they almost look like they are falling apart. This undone look is the height of effortless chic and works best on second-day hair.
-
● 8. The Ribbon-Intertwined Braid
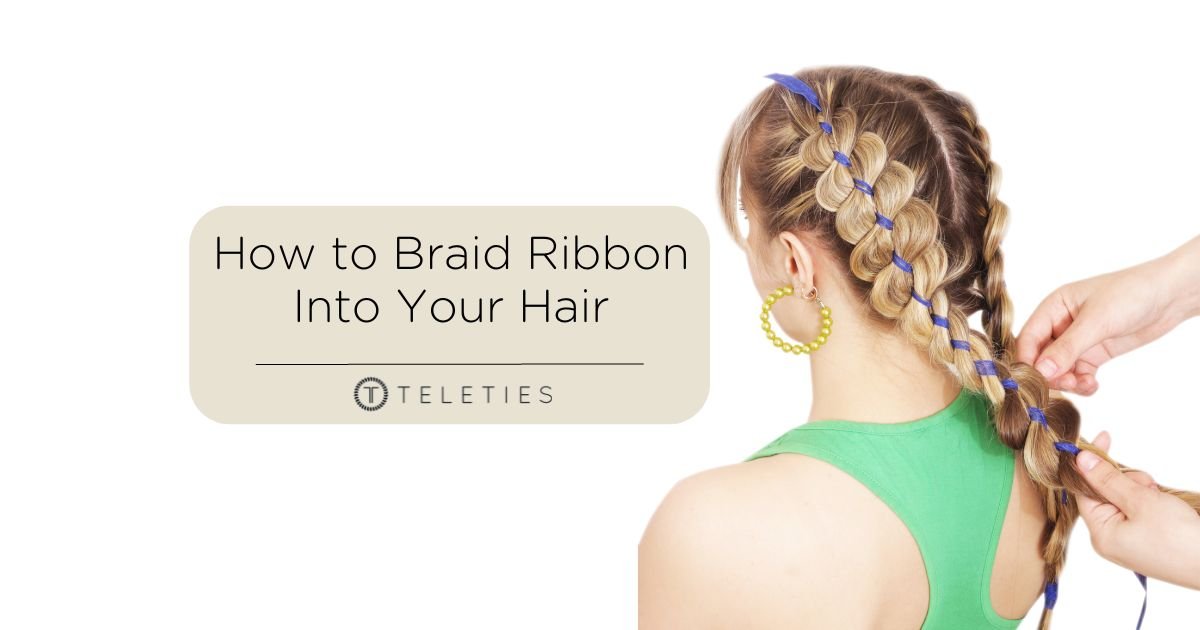
Upcycle a piece of silk ribbon or lace from your craft bin. Tie it to one of your three strands at the start of the braid and weave it through.
This adds a pop of color and a DIY craft element to your hairstyle, making it unique to your outfit.
-
● 9. The Micro Side Braid
Sometimes less is more. Instead of a thick section, take a very thin half-inch section and create a tight, tiny braid.
This hidden detail is a favorite in 90s-inspired fashion and adds a subtle bit of interest to straight, sleek hair without the bulk of a larger braid.
-
● 10. The Waterfall Side Hybrid
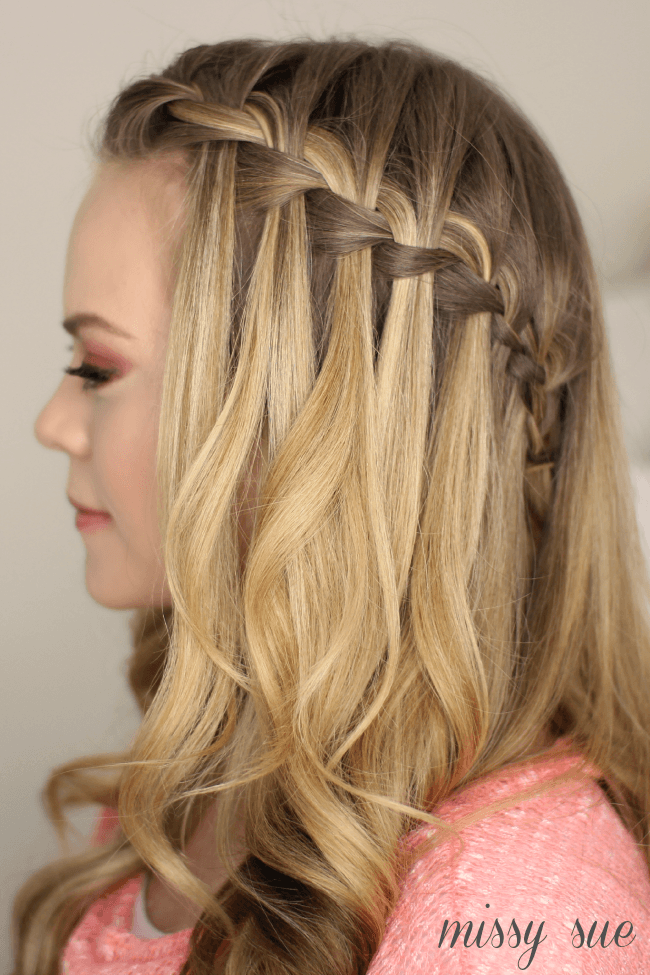
In this version, as you braid along the side, you drop the bottom strand and pick up a new one from the top.
This creates a waterfall effect where the braid appears to be floating across the hair. It is technically challenging but produces a stunning, ethereal result.
Tips for Making Your Style Last All Day
To ensure your DIY masterpiece doesn’t fall flat by lunchtime, consider these professional tips:
- ● Avoid Silky Hair: If your hair is too clean, the braid will slide out. Use a dry texture spray before you start.
- ● The X Pinning Method: Always use two bobby pins and cross them over each other. This creates a locking mechanism that prevents the braid from sliding.
- ● Directional Spraying: When applying hairspray, spray from the bottom up. This supports the weight of the hair and maintains volume.
- ● Don’t Over-Condition: If you know you are going to braid your hair, skip the heavy hair masks in the shower, as they make the hair too slippery to hold a shape.
Frequently Asked Questions (FAQ)
Can I do a half-up side braid on short hair?
Yes! As long as you have enough length to reach the back of your head (around a chin-length bob), you can do a side braid.
You may need to use more bobby pins along the length of the braid to keep shorter layers from popping out.
How do I hide the hair tie at the end of the braid?
The best way is to use a clear poly-band elastic.
Alternatively, you can take a small sliver of hair from the tail of the braid, wrap it around the elastic, and tuck the end into the band or secure it with a small pin.
My braids always look thin. How can I make them look thicker?
The pancaking technique is key. Also, try applying a volumizing mousse to damp hair and blow-drying it before you start.
This expands the hair shaft, giving you more bulk to work with when braiding.
Is this style suitable for curly hair?
Absolutely! Curly hair actually holds braids better than straight hair because of the natural texture.
Just be careful not to brush your curls out before braiding, or you may end up with frizz. Use your fingers to section the hair instead of a comb.
Conclusion
The easy half-up side braid is more than just a hairstyle; it’s a versatile tool in your beauty arsenal that combines the best of DIY craftiness with high-fashion aesthetics.
Whether you choose the intricate fishtail or the simple twist, the key to success lies in the preparation and the pancaking finish.
By following this guide and experimenting with the 10 variations provided, you can create a customized look that reflects your personal style while keeping your hair functional and beautiful.
Grab your comb and elastics—it’s time to start braiding!
Leave a Reply