A well-planned garden path does more than guide your steps from the patio to the vegetable garden; it establishes the visual flow of your entire outdoor space. By choosing simple, accessible materials, you can construct a durable walkway that complements your home’s architecture without hiring a professional landscaping crew. The key lies in selecting materials that harmonize with your existing landscape while addressing practical needs like drainage, soil stability, and foot traffic frequency.
1. Rustic Gravel and Wood Sleeper Walkways
Combining heavy timber sleepers with loose gravel creates a highly textured, grounded look that fits beautifully into cottage, rustic, or woodland gardens. The wood sleepers act as sturdy steps and structural anchors, while the gravel fills the gaps to provide excellent drainage and a satisfying crunch underfoot.
This combination is exceptionally forgiving on uneven terrain. The timbers can be slightly terraced to handle gentle slopes, preventing the gravel from shifting downhill over time.
Gravel Size and Stability Comparison
| Gravel Type | Average Size | Foot Comfort | Stability Level | Best Use Case |
|---|---|---|---|---|
| Pea Gravel | 3/8 inch | High (rounded edges) | Medium (rolls slightly) | Casual, low-traffic side paths |
| Crushed Granite | 1/4 to 1/2 inch | Medium (angular edges) | High (locks together) | Main walkways, sloped areas |
| River Pebbles | 1 to 2 inches | Low (uneven surface) | Low (shifts easily) | Decorative borders, water features |
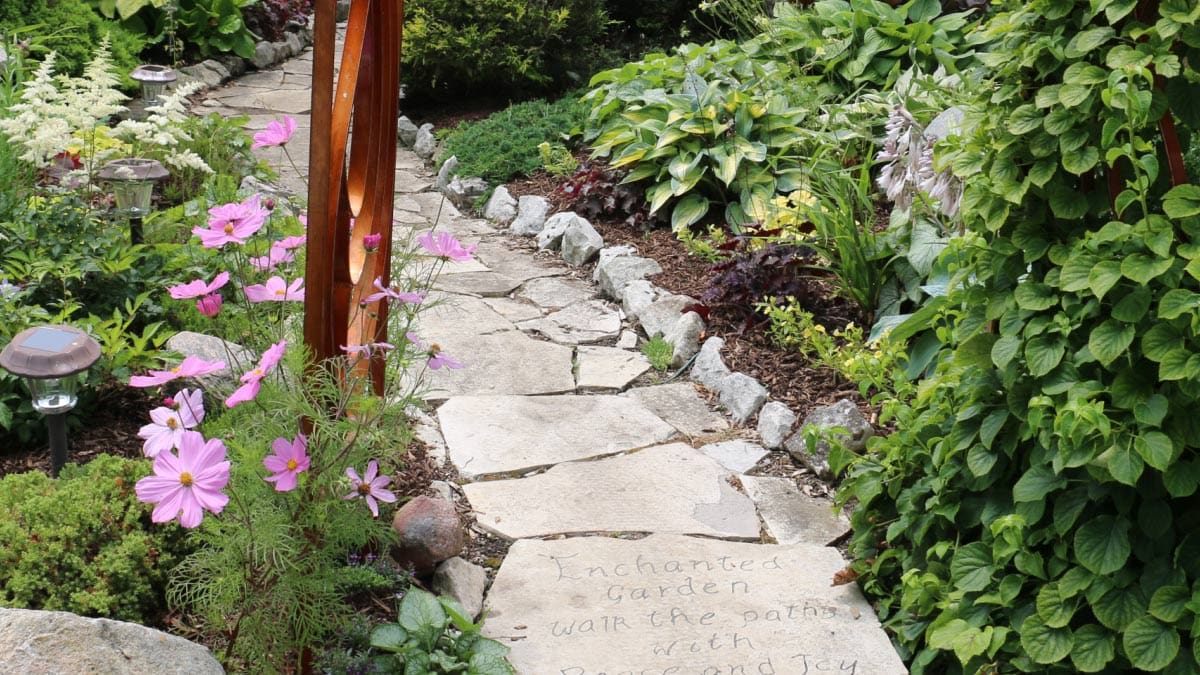
2. Natural Flagstone and Moss Paths
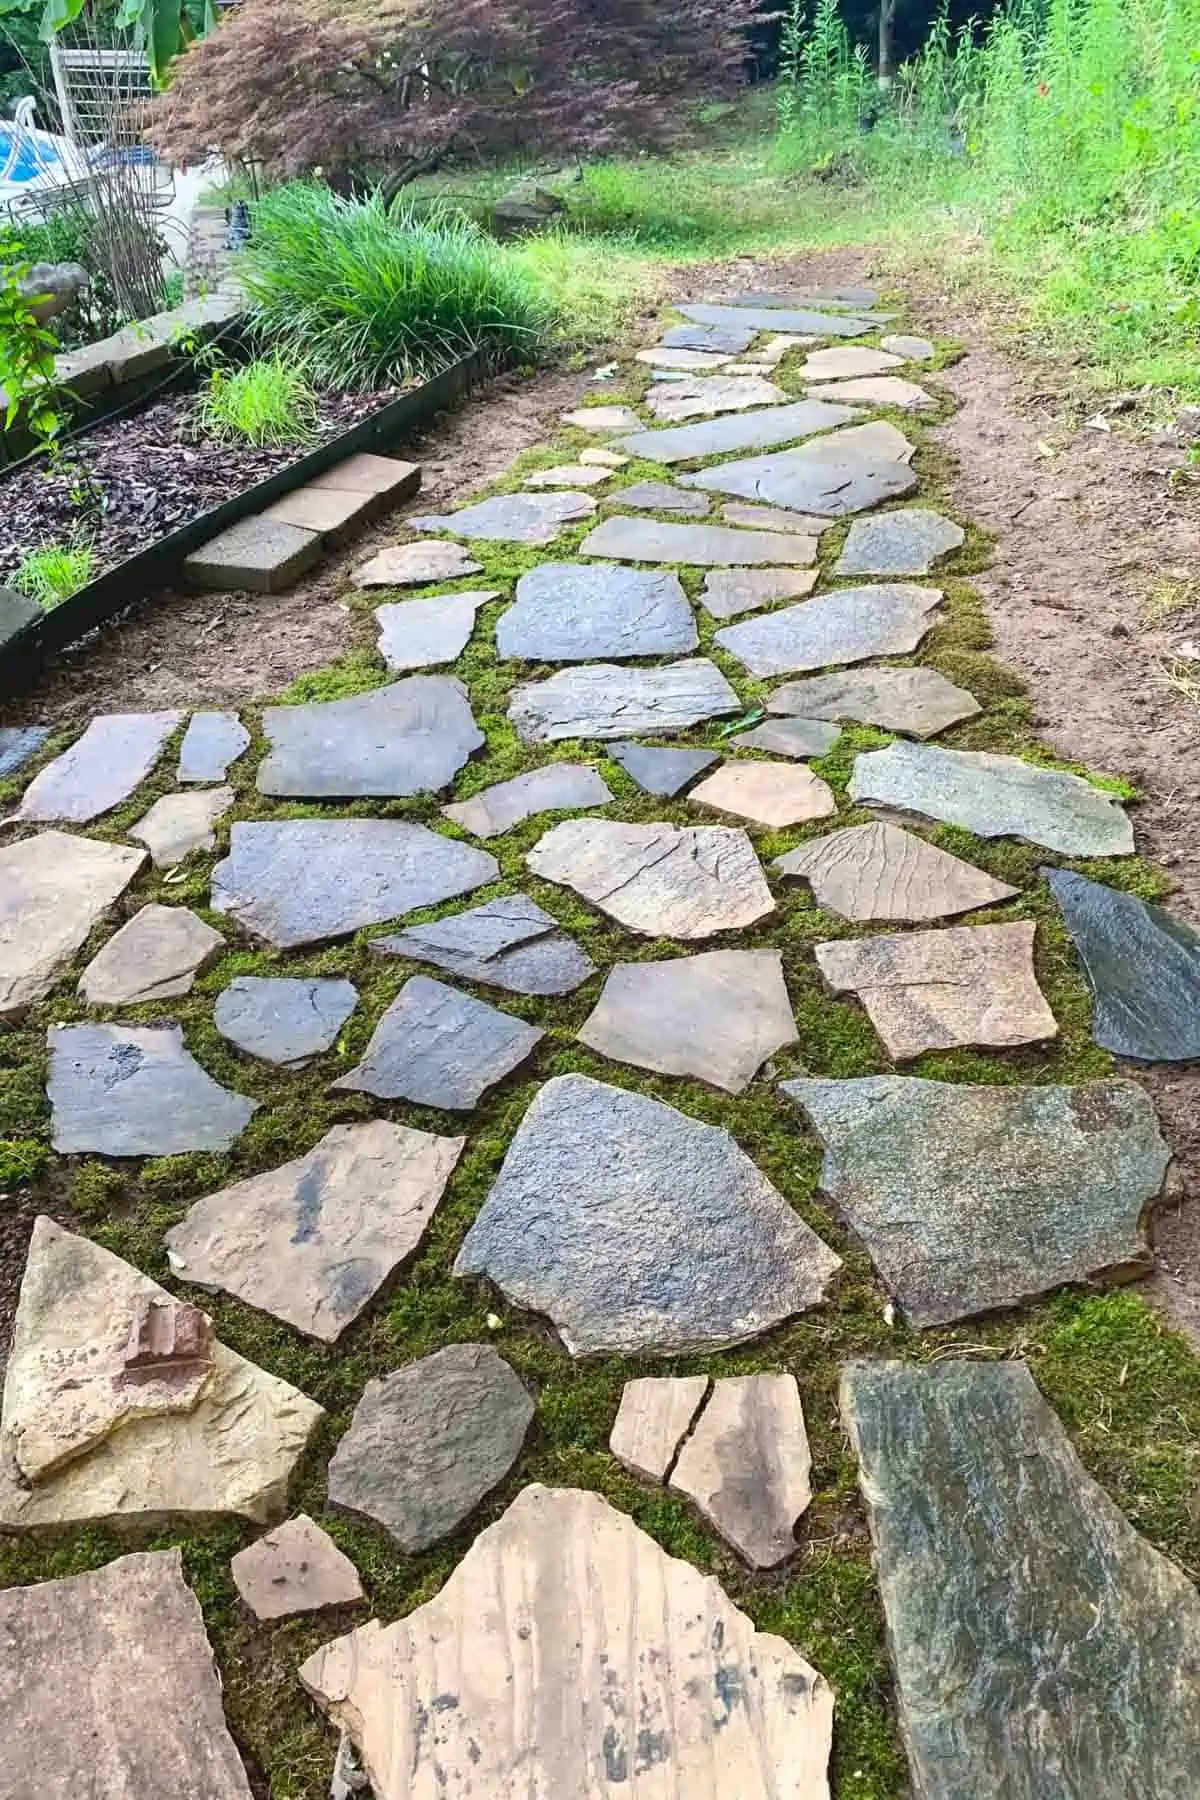
Flagstone offers an organic, timeless appeal with its irregular shapes and rich, earthy tones. By spacing the stones slightly apart and encouraging moss or low-growing ground cover to grow in the joints, you create a path that looks as though it has been part of the landscape for decades.
This style works exceptionally well in shaded garden areas where grass struggles to grow. The stone provides a dry, stable surface, while the shade-loving moss softens the hard edges of the rock.
Mistake-Avoidance Note: To prevent flagstones from wobbling or cracking under weight, ensure your sub-base is perfectly level. Laying a two-inch bed of coarse sand beneath the stones allows you to wiggle each individual slab until it sits completely flush with its neighbors.
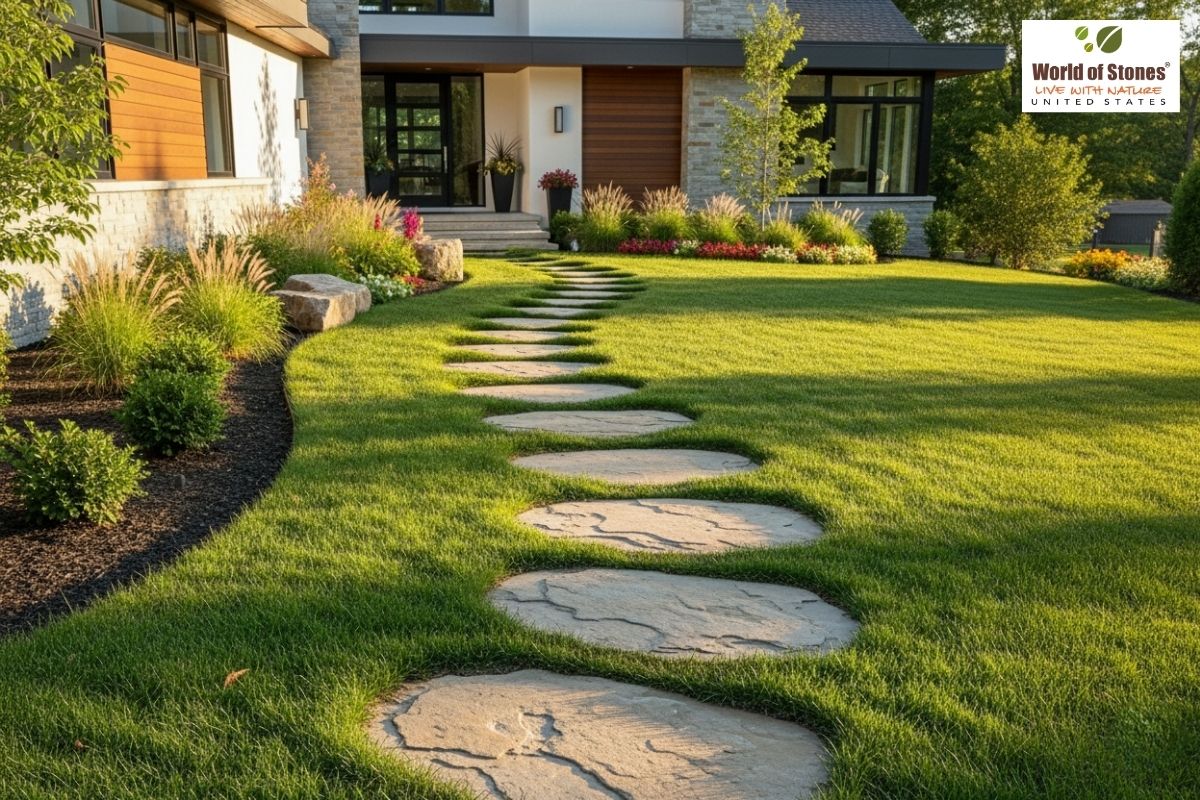
3. Slate Stepping Stones and Bark Mulch

For a budget-friendly project that can be completed in a single afternoon, pairing dark slate stepping stones with rich bark mulch is an excellent choice. The dark, clean lines of slate contrast beautifully with the warm, organic texture of wood mulch, making your garden beds pop.
This path style is highly adaptable. If you decide to change your garden layout next season, the stones can be lifted and relocated with minimal effort, and the mulch will naturally decompose to enrich the surrounding soil.
Material Selection Guide
- The Base: Use a double layer of heavy-duty woven landscape fabric beneath the mulch to keep weeds from pushing through.
- The Slate: Opt for stones at least 1.5 inches thick. Thinner slate pieces are prone to snapping when stepped on by active feet or run over by wheelbarrows.
- The Mulch: Choose triple-shredded hardwood mulch. It mats together tightly, preventing it from blowing away in high winds or washing out during heavy rainstorms.
4. Traditional Brick Herringbone Pathways
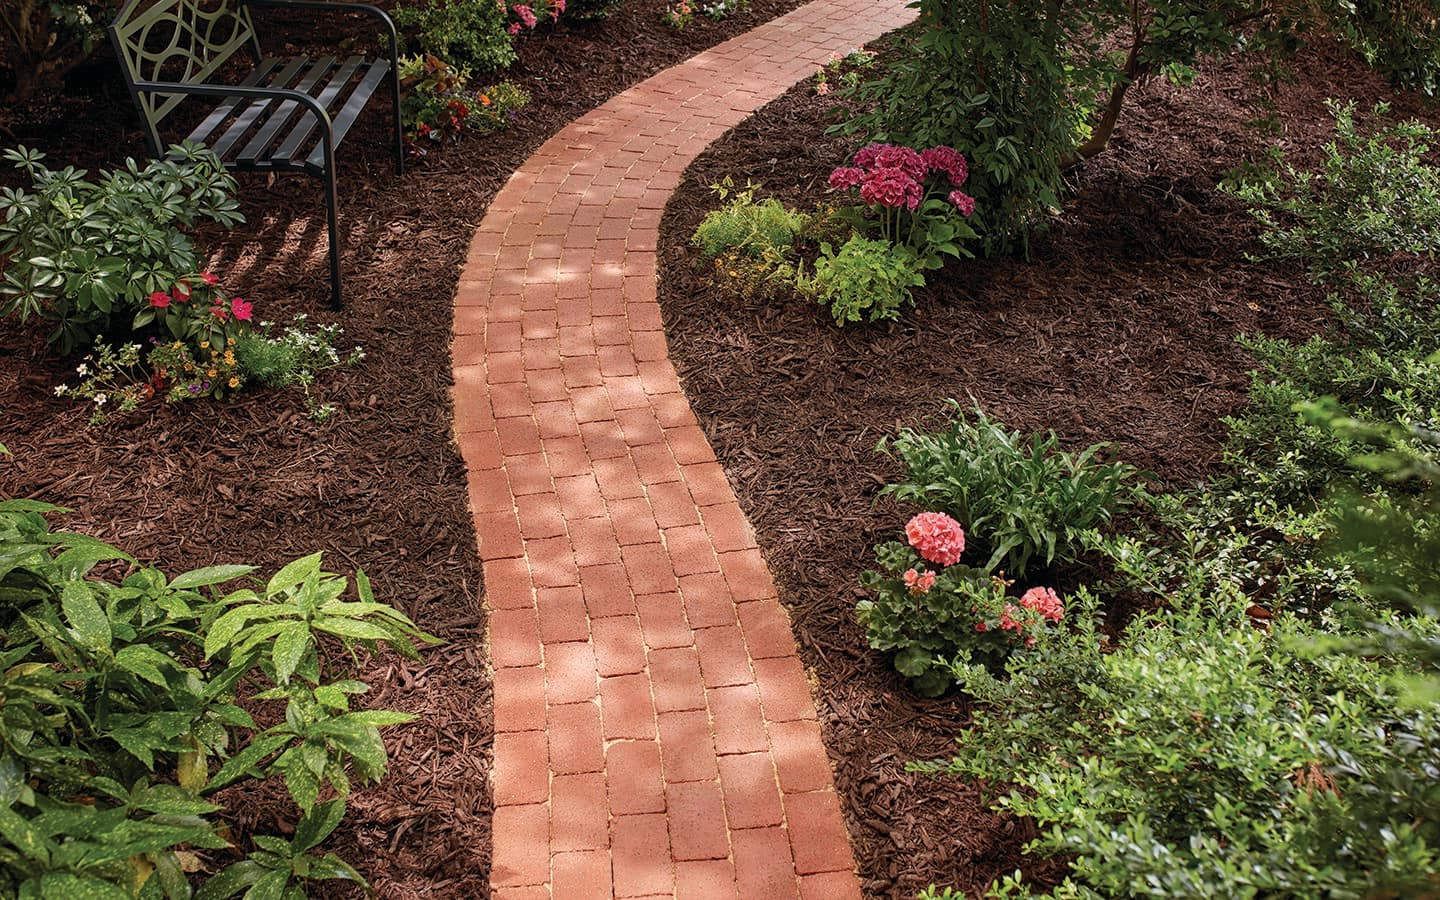
Bricks bring a sense of structure, order, and classic warmth to a garden. A herringbone pattern is particularly striking, offering a historic, European estate feel that guides the eye forward.
Using reclaimed or wire-cut bricks adds instant character, showing off subtle color variations from deep terracotta to dusty orange. Because bricks are uniform in size, they are ideal for creating straight, formal pathways or neat, geometric garden borders.
Styling Suggestions for Brick Paths
- The Soldier Course: Frame your herringbone pattern with a border of upright bricks (known as a soldier course) to lock the pattern in place and create a clean, tailored edge.
- Polymeric Sand: Fill the joints with polymeric sand instead of regular play sand. Once misted with water, it hardens to lock the bricks together and prevent pesky weeds from colonizing the cracks.
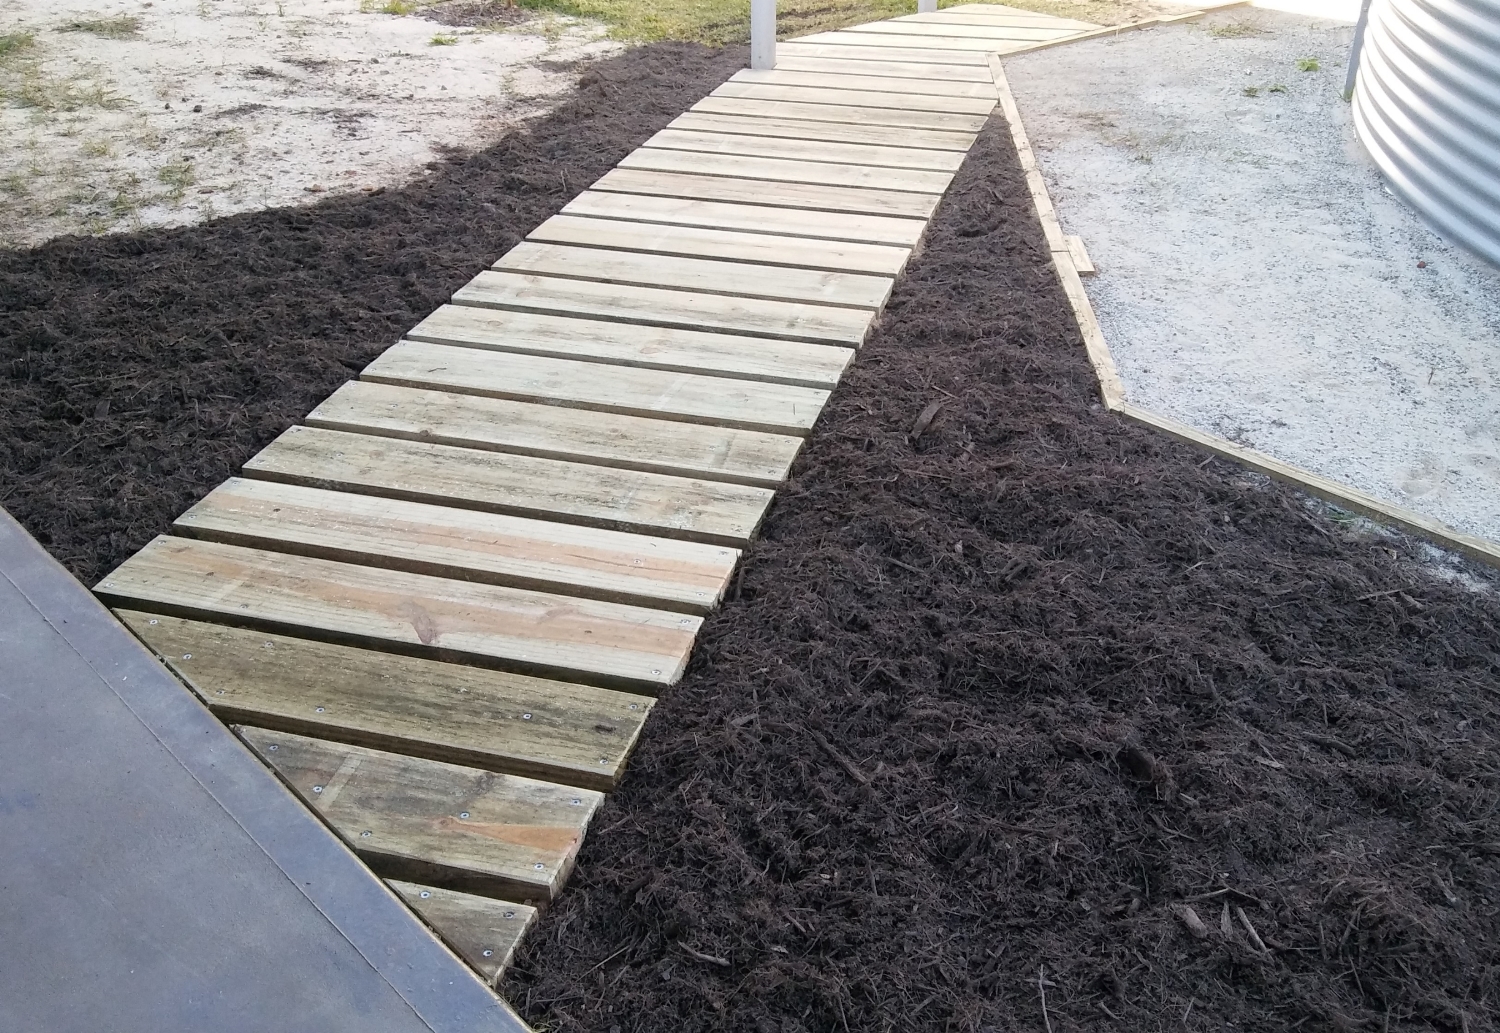
5. Reclaimed Pallet Wood Boardwalks
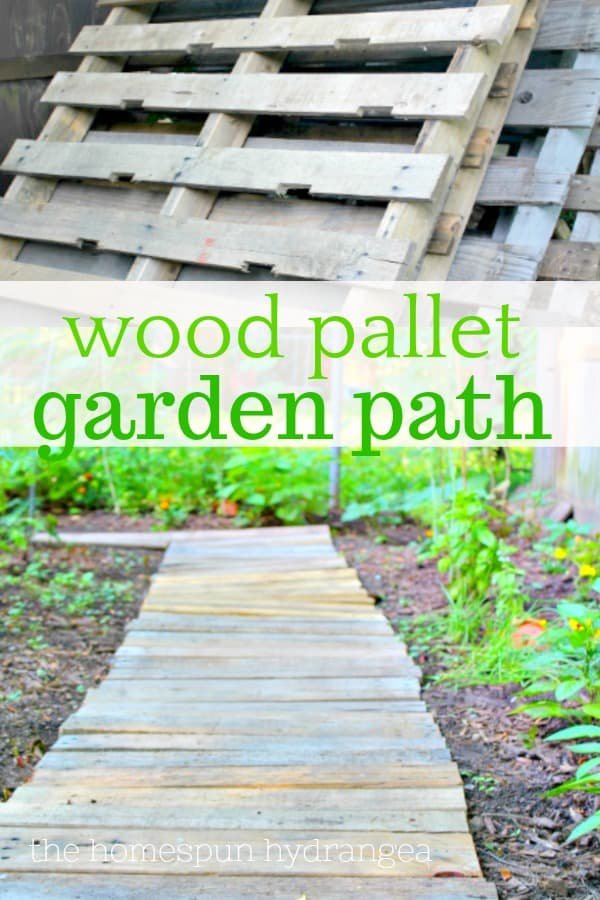
If your garden has a damp, muddy zone where standing water makes traditional paths impractical, a low-profile wooden boardwalk is a smart solution. Utilizing reclaimed pallet wood or cedar slats allows you to elevate your feet above the damp earth while adding a charming, coastal, or forest-trail aesthetic to your yard.
Because the wood is raised off the ground on runners, air can circulate underneath, which helps dry out the soil and extends the lifespan of the timber.
Durability Checklist for Wood Boardwalks
-
Ground Contact: Ensure the support runners (the wood touching the soil) are rated for ground-contact pressure treatment. -
Pre-Treatment: Coat the pallet slats with a high-quality exterior wood sealer or oil-based stain to protect against rot and UV damage. -
Fasteners: Use deck screws made of stainless steel or coated polymer to prevent unsightly rust streaks from staining the wood. -
Traction: Apply a non-slip grit additive to your wood sealer, or attach thin wire mesh over the slats if the path is located in a permanently damp, shady area.
6. Handcrafted River Rock and Pebble Mosaics
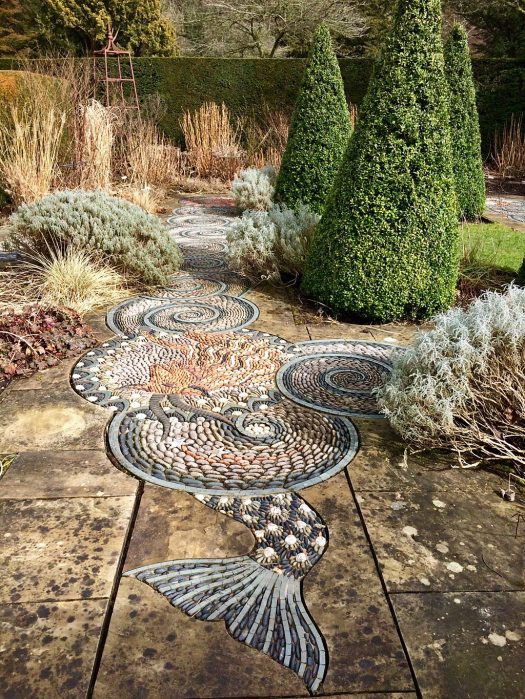
For those who view the garden as a canvas, a pebble mosaic path turns a simple walkway into a functional work of art. By arranging smooth, water-worn river rocks on their edges in a bed of wet mortar, you can create intricate swirls, geometric patterns, or flowing waves.
This style is highly tactile and visually arresting, making it a perfect choice for entryways, small courtyard gardens, or quiet meditation corners.
Mosaic Base Layer
4 inches of compacted gravel
↓
Middle Layer
2 inches of dry-pack mortar mix
↓
Top Layer
Hand-set river pebbles (set on edge)
7. Cast Concrete Leaf Stepping Stones
Using large, heavily veined leaves from your own garden—such as rhubarb, hosta, or gunnera—as molds for concrete stepping stones creates a whimsical, highly personalized path. Each stone captures the intricate, organic texture of the leaf, resulting in a durable walkway that feels entirely at home in a lush, green border.
These stepping stones can be tucked into existing garden beds, allowing you to step among your plants to weed or harvest without compacting the surrounding soil.
Quick Styling Tip: Once the concrete has fully cured, you can apply a dilute concrete stain in shades of mossy green, slate gray, or earthy brown to highlight the leaf veins and help the stones blend seamlessly into the surrounding foliage.
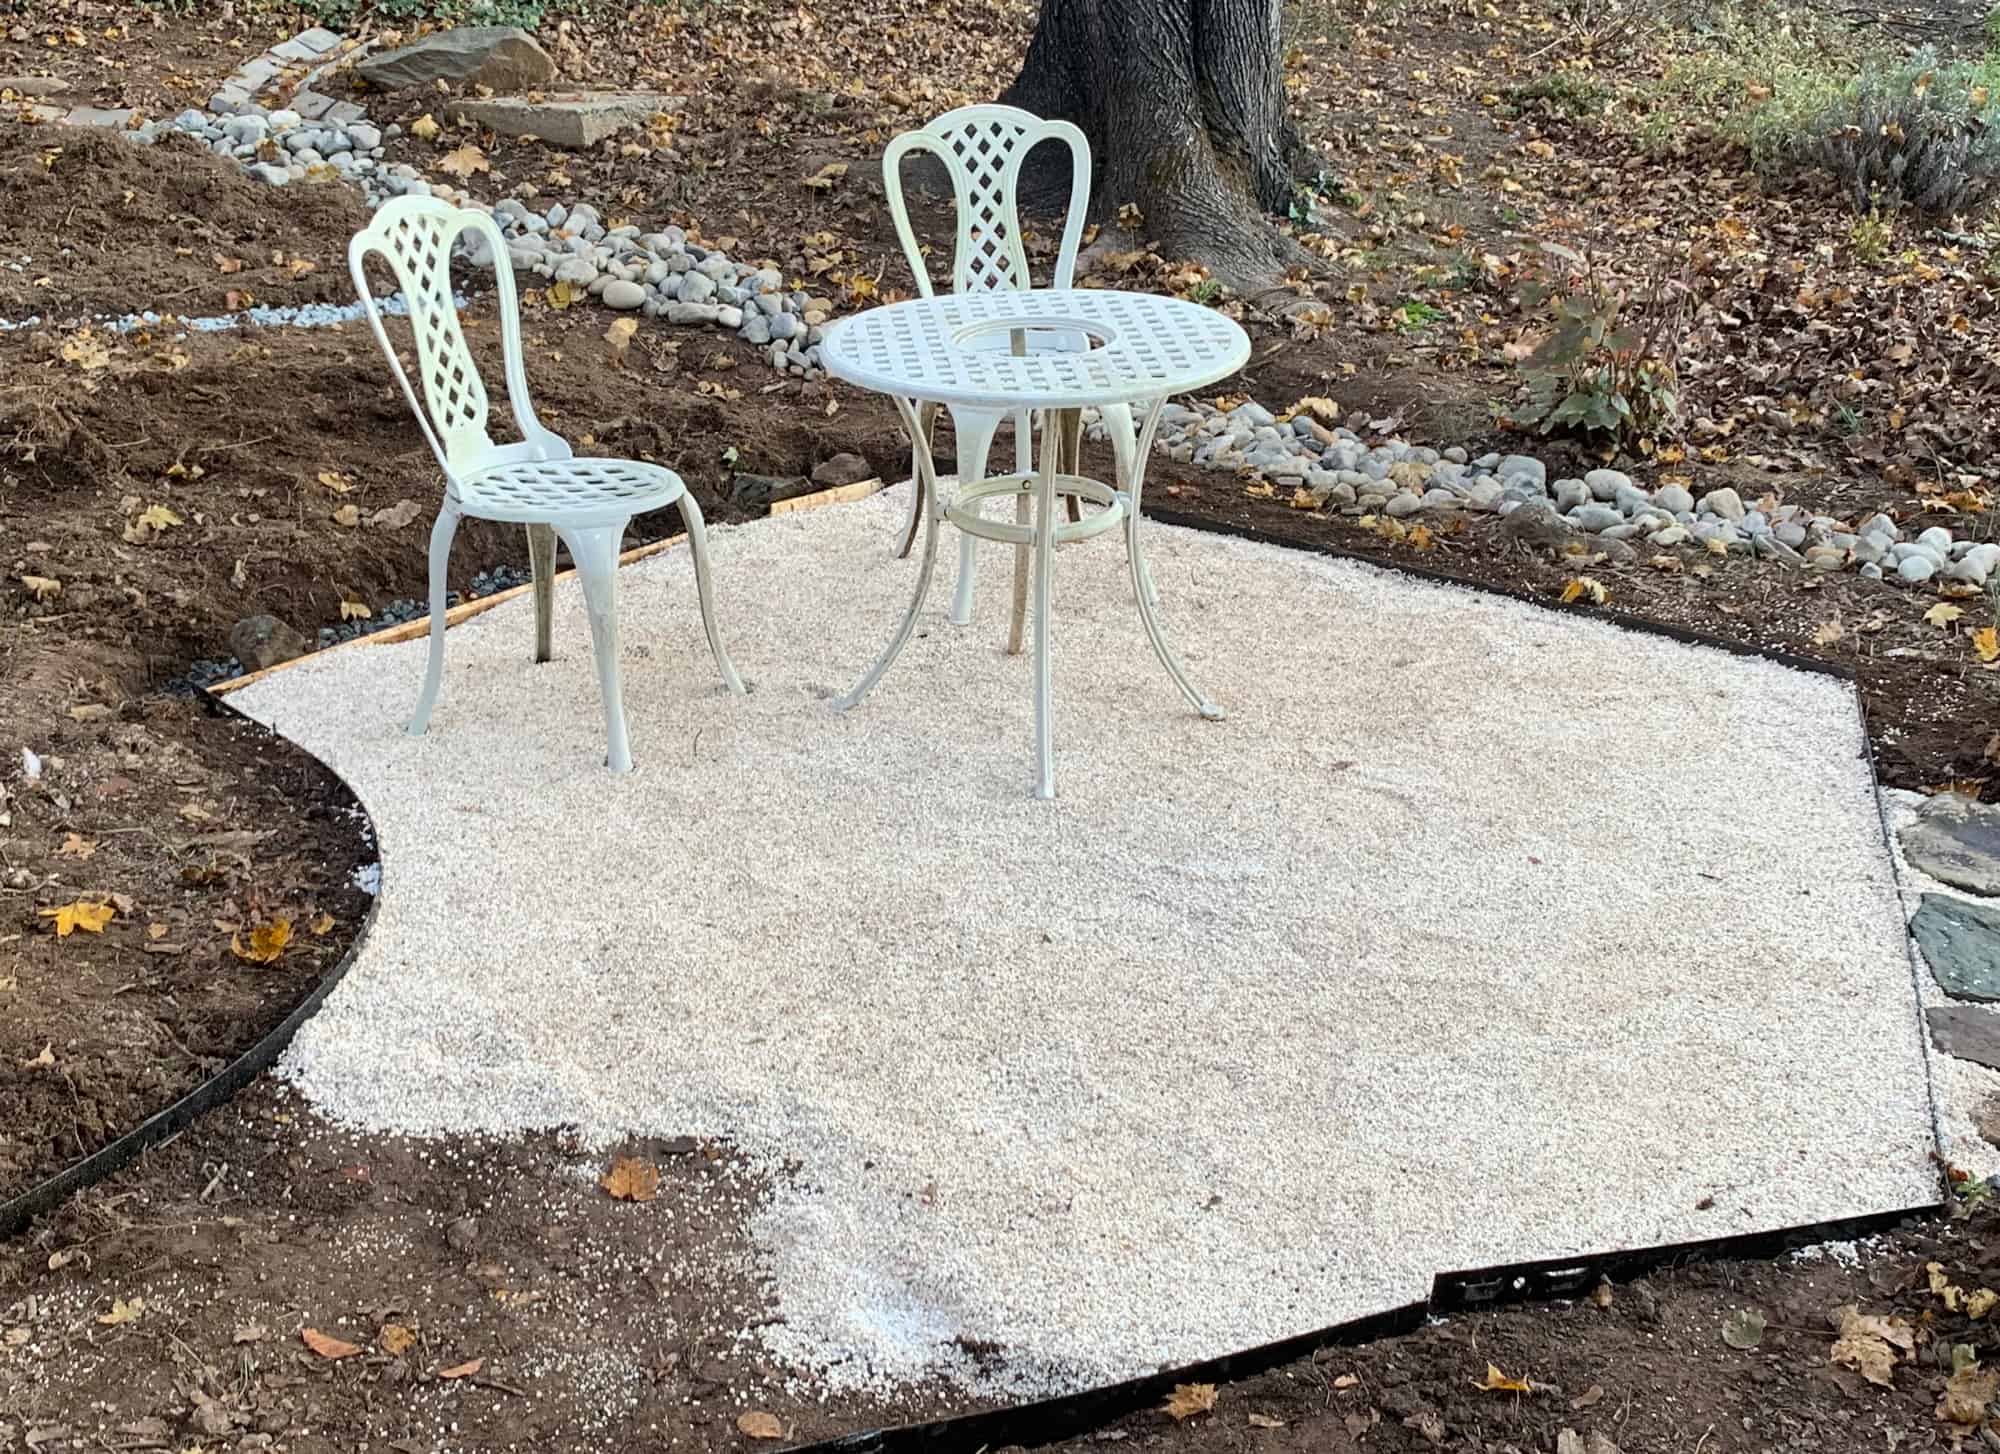
8. Decomposed Granite with Sleek Metal Edging
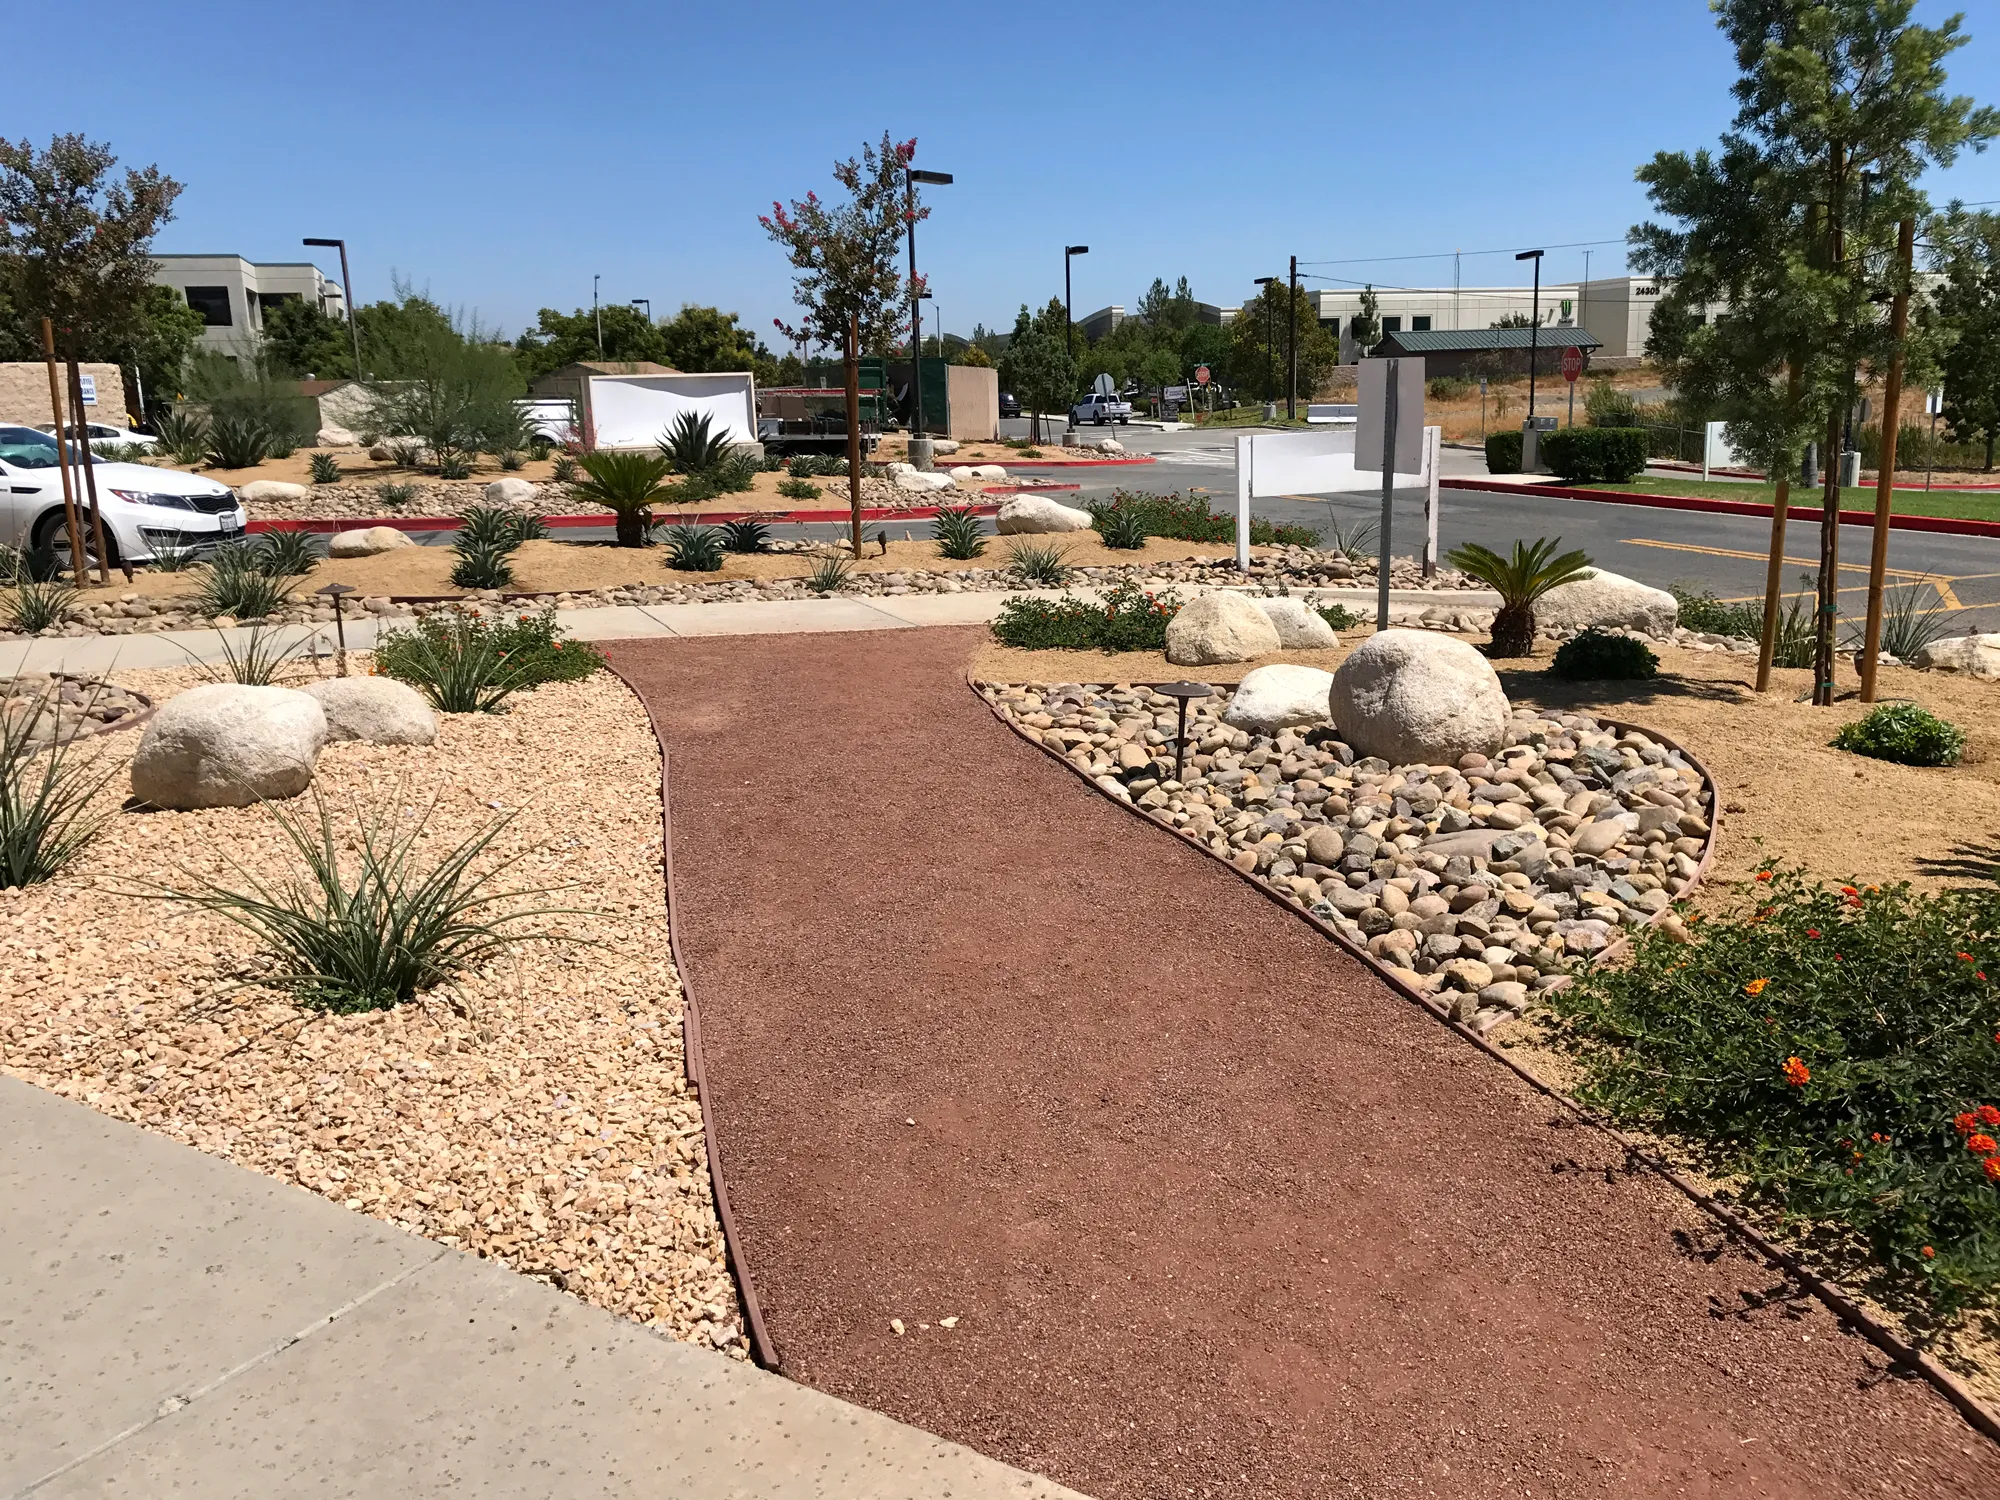
Decomposed granite (often called DG) is a favorite of modern landscape designers. It offers a clean, minimalist look with a firm, stable surface that is easy to walk on and highly accessible for strollers or wheelbarrows.
Pairing DG with slim steel or aluminum edging keeps the material tightly contained, creating crisp, sharp lines that define the boundaries between your lawn, garden beds, and walkway.
Maintenance Checklist for Decomposed Granite
- Weed Control: Spritz any stray weeds with horticultural vinegar to keep the surface pristine without damaging the compacted granite.
- Compaction: Run a heavy lawn roller or hand tamper over the path after heavy rains to keep the surface firm and prevent loose dust.
- Erosion Control: Mix a liquid stabilizer into the DG during installation to glue the tiny granite particles together, reducing washouts on gentle slopes.
9. Sliced Tree Log Paths

Using cross-sections of fallen trees—often called wood slices or log rounds—creates a cozy, natural path that feels like a walk through a deep forest. The concentric growth rings of the wood provide gorgeous visual interest, and no two steps are exactly alike.
This path style is highly sustainable, especially if you can source logs from a local tree service or from your own property cleanup.
Wood Treatment Guide
To keep your wood slices from rotting quickly in contact with damp soil, soak the rounds in a non-toxic wood preservative before laying them. Digging a shallow trench and filling it with a thick layer of fast-draining pea gravel beneath the wood slices will keep them out of standing water and significantly extend their lifespan.
10. Cobblestone and Creeping Thyme Pathways
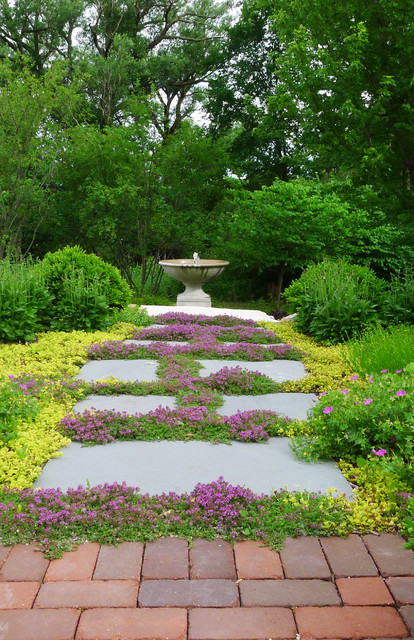
A cobblestone path interspersed with creeping thyme offers a delightful sensory experience. Every time you step on the path, your feet gently bruise the herbal foliage, releasing a sweet, earthy fragrance into the air.
The rugged, uneven texture of cobblestones pairs beautifully with the soft, flowering cushions of thyme, creating a romantic cottage garden look.
Best Low-Growing Herbs for Foot Traffic
- Creeping Thyme (Thymus serpyllum): Extremely drought-tolerant, produces tiny pink or purple flowers in summer, and handles moderate foot traffic.
- Roman Chamomile (Chamaemelum nobile): Offers a sweet, apple-like scent and soft, fern-like foliage that thrives in sunny spots.
- Corsican Mint (Mentha requienii): Best for damp, shady pathways; releases a bright, peppermint aroma when stepped on.
11. Coastal Crushed Oyster Shell Paths
Commonly found in coastal regions, crushed oyster shells offer a bright, reflective pathway material that glows beautifully in the evening light. The shells pack down over time to form a stable, flat surface that drains incredibly well.
As the shells break down, they slowly release calcium into the surrounding soil, which can be highly beneficial for nearby acid-sensitive plants.
Design Note: The bright white and soft gray tones of crushed shells provide a stunning contrast against deep green foliage, dark mulch, or colorful coastal plantings like lavender, ornamental grasses, and hydrangeas.
12. Precast Concrete Paver and Grass Grids

For a clean, contemporary aesthetic, spacing large, square precast concrete pavers in a grid pattern with lush green grass growing between them is a striking choice. This design blends the clean lines of modern hardscaping with the soft, living texture of a lawn.
This layout is highly effective for transitioning between a formal patio area and a casual backyard lawn, maintaining a sense of open space while providing a clear, solid walking surface.
Paver Spacing Guide
To ensure a comfortable, natural stride, space the center of each paver approximately 24 inches apart. This matches the average human step, allowing you and your guests to walk comfortably along the path without having to awkwardly adjust your stride to stay on the stones.
Frequently Asked Questions
What is the cheapest material for a DIY garden path?
Mulch and wood chips are generally the most budget-friendly materials, especially if you can source them for free from local arborists or utility companies. Gravel and decomposed granite are also highly affordable, durable options that offer excellent value for the cost.
How do I prevent weeds from growing through my garden path?
The most effective defense is a high-quality, woven landscape fabric laid beneath your path material. For loose materials like gravel or mulch, maintaining a depth of at least three inches will block sunlight from reaching dormant weed seeds in the soil.
Do I need to dig a trench for every garden path?
While some paths (like brick or flagstone) require digging a shallow trench to create a stable, level sub-base, others can be laid directly on top of the ground. Stepping stones set into mulch or grass require very little digging—just enough to recess the stones so they sit flush with the surrounding ground level.
How wide should a standard garden path be?
For a main walkway where two people can walk side-by-side, aim for a width of 36 to 48 inches. For casual garden paths, secondary walkways, or side-yard access, a width of 18 to 24 inches is sufficient and creates a more intimate, cozy feel.
Designing your own garden path is an incredibly rewarding project that instantly elevates the structure and beauty of your outdoor living space. By matching the right materials to your garden’s natural light, soil conditions, and overall style, you can create a gorgeous, functional walkway that will welcome you into your garden for years to come.
Leave a Reply