
Finding your place in a favorite book should feel just as special as the story itself. While dog-earing pages gets the job done, crafting custom bookmarks adds a personal touch to your reading routine. These twelve practical, visually stunning DIY bookmark projects use simple craft supplies you likely already have at home, allowing you to match your bookmark to your current read or create thoughtful gifts for fellow bibliophiles.
Pressed Flower Resin Bookmarks
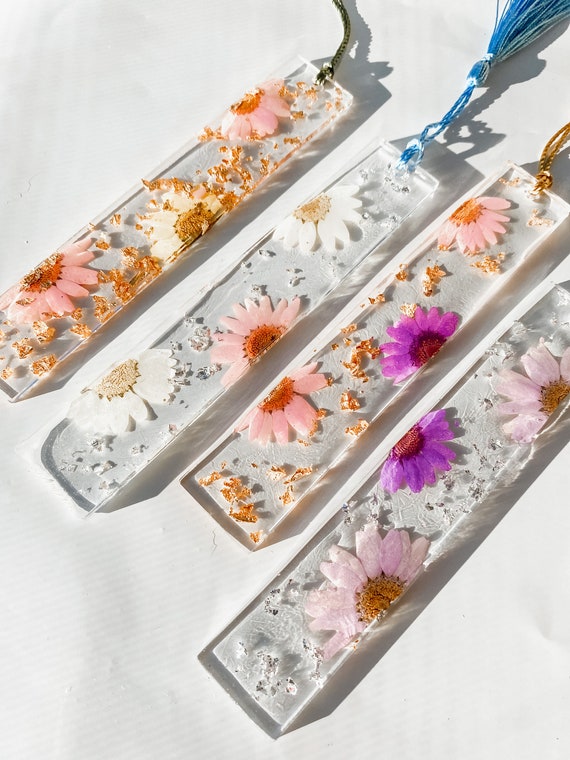
Clear resin preserves the delicate beauty of dried botanicals, creating a durable, glass-like bookmark that looks incredibly elegant resting against printed text. You can collect small wildflowers, clover leaves, or fern fronds from your garden, press them flat inside a heavy book, and suspend them in crystal-clear resin. Adding a touch of gold leaf flake elevates the design, giving it a vintage, celestial aesthetic.
Choosing Your Resin Type
When working with resin for bookmarks, you have two primary options. Each has distinct advantages depending on your patience level and workspace setup.
| Resin Type | Cure Time | Thickness & Durability | Best For |
|---|---|---|---|
| UV Resin | 2–5 minutes (under UV light) | Thin, slightly flexible | Quick projects, single-day crafting |
| Epoxy Resin | 24–48 hours (air cure) | Thick, rigid, glass-like | Batch crafting, embedding thicker flowers |
Pro Tip: Always use tweezers to place your pressed flowers into the resin mold. This prevents air bubbles from trapping beneath the petals and keeps your placement precise.
Leather Corner Bookmarks
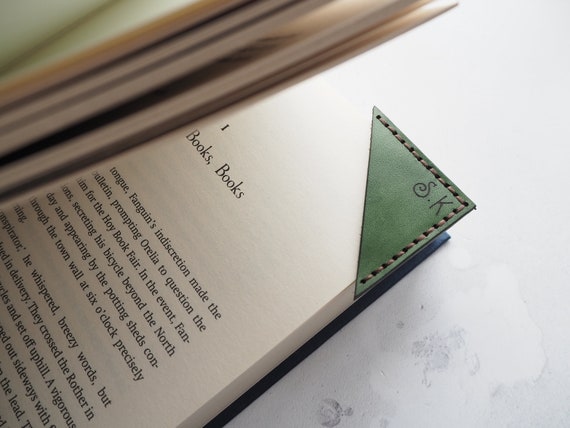
For a sleek, minimalist aesthetic, a leather corner bookmark slips easily over the corner of your page without adding bulk to the book’s spine. This style is highly durable and ages beautifully, developing a rich patina over years of reading. You can use genuine leather scraps, vegetable-tanned leather, or high-quality faux leather.
Material & Styling Suggestions
-
✦
Stitching Details: Use contrasting waxed thread (such as cream thread on dark brown leather) to highlight the hand-stitched edges. -
✦
Personalization: Use a metal stamping kit to press your initials, a favorite short quote, or a small literary symbol into the leather surface. -
✦
Edge Finishing: Apply a thin coat of gum tragacanth or edge paint to give the cut leather edges a smooth, professional, store-bought finish.
Embroidered Felt Corner Bookmarks
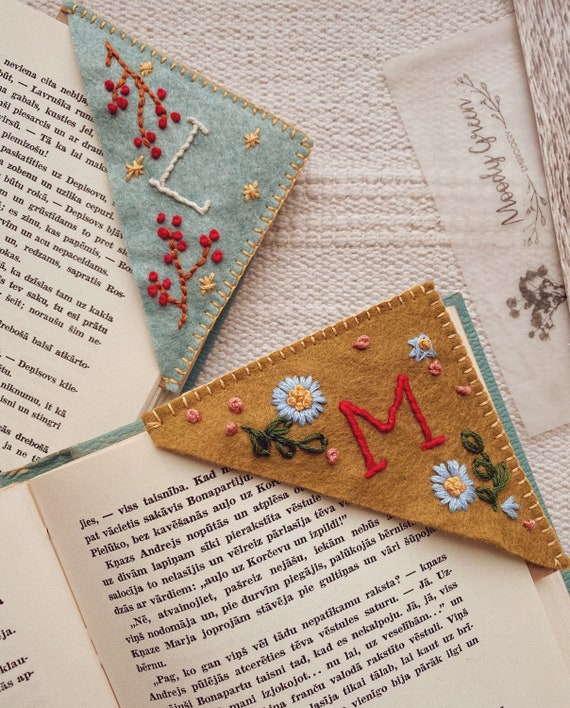
Soft, textured, and incredibly cozy, embroidered felt bookmarks bring a warm, handmade charm to your reading nook. Because felt does not fray, it is exceptionally easy to work with. You can stitch simple floral patterns, initials, or tiny landscapes onto a triangular sleeve that hugs the corner of your page.
Stitching Guide for Beginners
-
✦
French Knots: Ideal for creating the centers of small flowers or mimicking a starry night sky. -
✦
Lazy Daisy Stitch: The easiest way to form delicate, realistic flower petals with embroidery floss. -
✦
Blanket Stitch: Use this classic stitch along the open edges of the corner bookmark to join the front and back pieces securely while adding a decorative border.
Mistake-Avoidance Note: Avoid using thick, heavy wool felt for both the front and back of the bookmark. Thick layers can warp the pages of your book or strain the binding. Opt for thin, high-quality stiffened felt for the backing piece to keep the profile slim.
Velvet Ribbon and Metal Charm Bookmarks
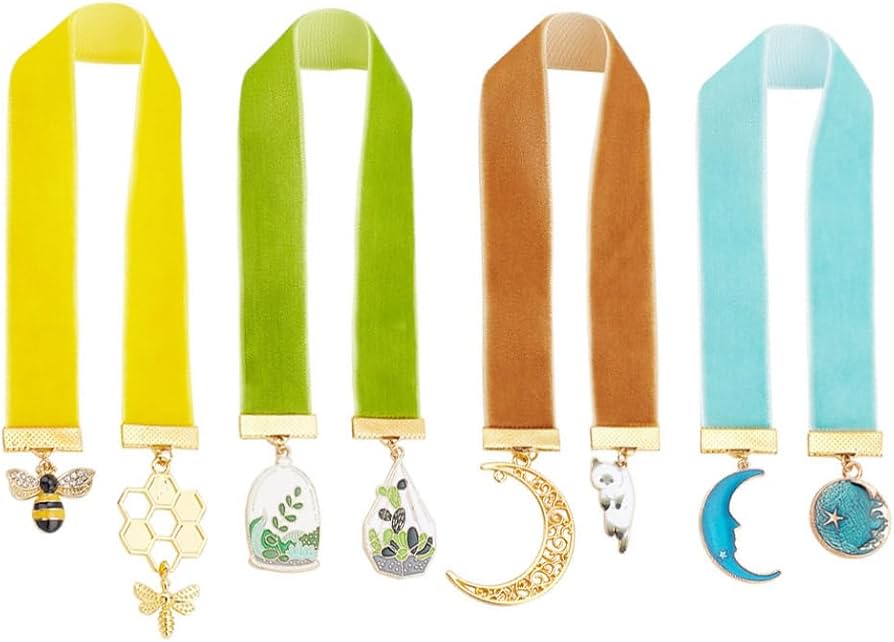
This style brings old-world library elegance to your modern reading collection. A rich, jewel-toned velvet ribbon sits inside the pages, while beautiful metal charms drape over the top and bottom of the book’s spine. It is a sophisticated option that requires minimal crafting time but delivers high visual impact.
Matching Ribbon Colors to Book Genres
-
✦
Deep Emerald & Gold Charms: Excellent for classic literature, historical fiction, or high fantasy. -
✦
Dusty Rose & Silver Charms: A beautiful pairing for romance novels and lighthearted contemporary reads. -
✦
Midnight Blue & Bronze Stars: Fits mystery, sci-fi, or gothic fiction perfectly.
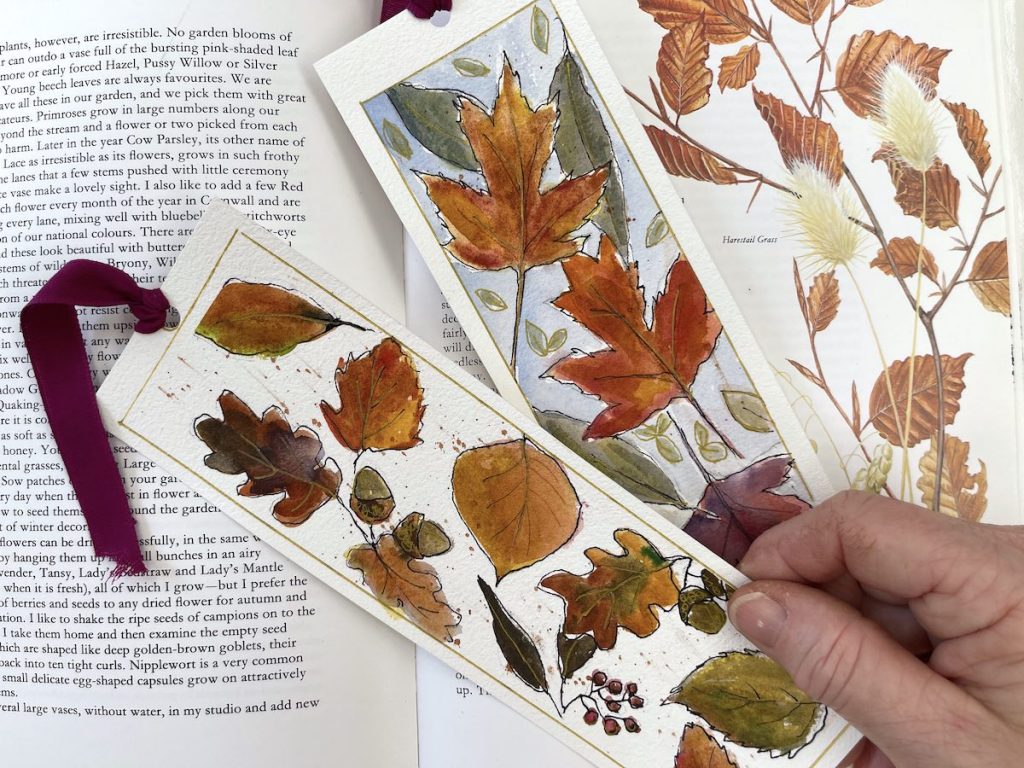
Watercolor Paper Bookmarks
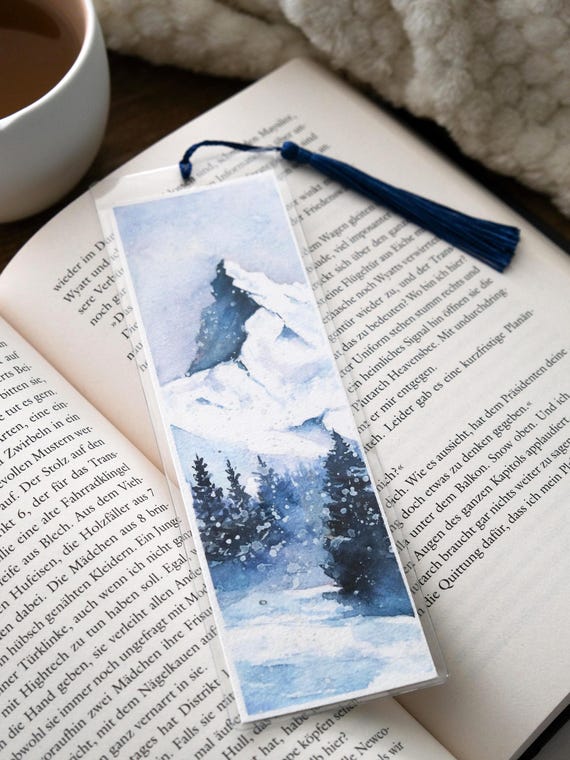
If you enjoy painting, heavy watercolor paper serves as the perfect canvas for miniature works of art. You can experiment with color bleeding, salt textures, or precise ink-and-wash illustrations. Because these are made on paper, they remain perfectly flat and gentle on your book pages.
Budget Note & Protection Tips
Watercolor paper can warp when wet. To keep your bookmarks perfectly flat and protect the paint from transferring to your book pages, follow this simple checklist:
-
Use cold-press watercolor paper with a weight of at least 140lb (300 gsm). -
Tape the edges of the paper down to a hard surface using painter’s tape before painting to prevent warping. -
Once dry, seal the artwork with a matte or satin archival fixative spray. -
Punch a clean hole at the top and thread a silk tassel through to complete the look.
Elastic Band Planner Bookmarks
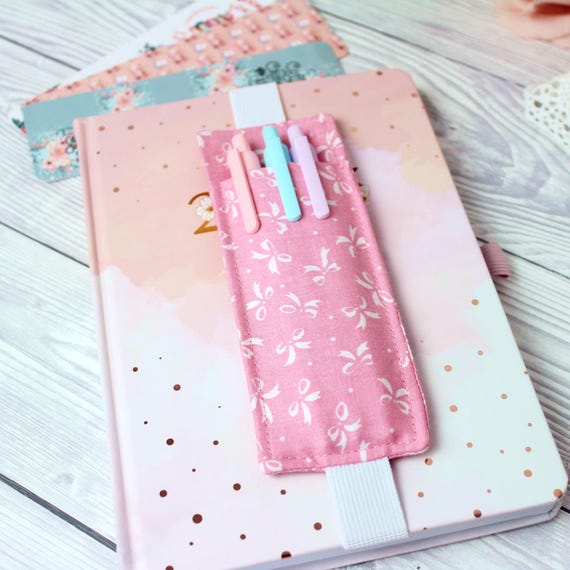
If you read on the go, travel with a journal, or use a daily planner, standard bookmarks can easily slip out and lose your place. An elastic band bookmark wraps entirely around the book, keeping it securely closed while marking your exact page. You can embellish the elastic with a flat fabric bow, a leather tab, or a decorative button.
Measurement Guide for a Perfect Fit
To ensure your elastic band fits comfortably around a variety of book sizes without being too tight or too loose, refer to these general measurements before cutting your elastic:
-
✦
Standard Paperback / Novel: Cut the elastic to 16 inches (40 cm). -
✦
Large Hardcover / Textbook: Cut the elastic to 18.5 inches (47 cm). -
✦
A5 Journal / Planner: Cut the elastic to 15 inches (38 cm).
Origami Paper Corner Bookmarks
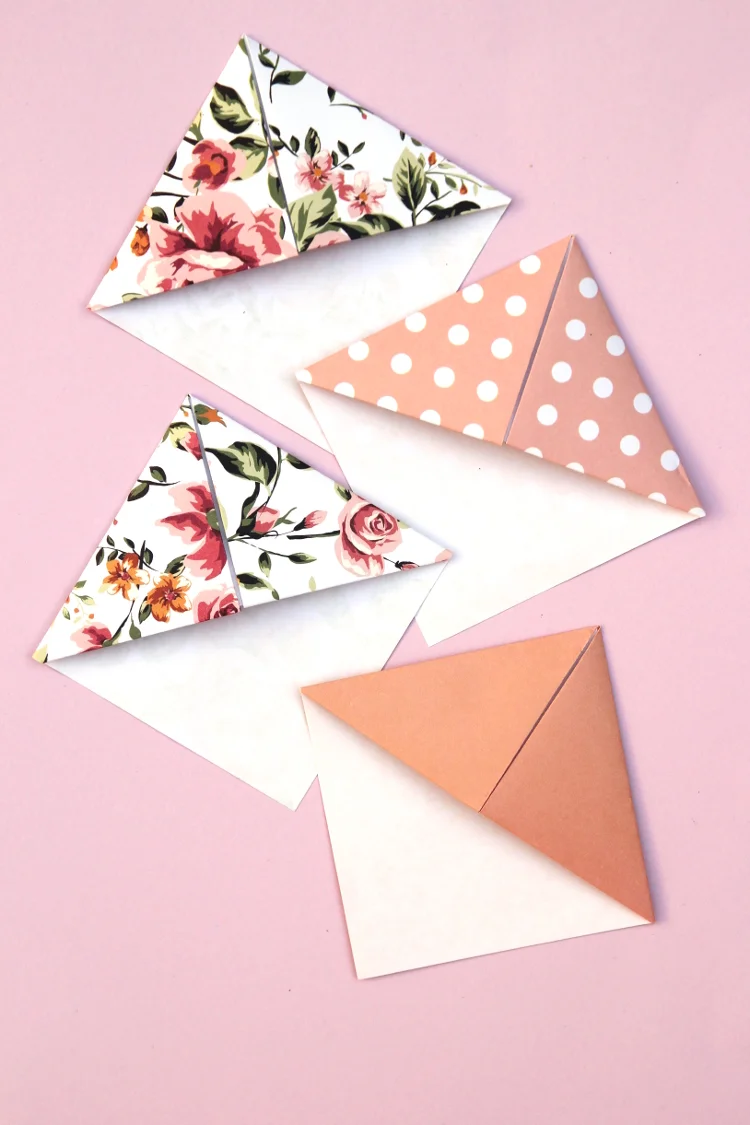
Origami bookmarks are incredibly satisfying to make because they require no glue, sewing, or specialized tools—just a single square of beautiful paper. By using patterned origami paper, Japanese chiyogami paper, or even pages from an old damaged book, you can create a geometric sleeve that sits neatly on the corner of your page.
Paper Weight Recommendations
The success of an origami bookmark relies heavily on the paper you choose.
-
✦
Standard Origami Paper (60-80 gsm): The absolute best choice. It folds crisply, holds its shape, and remains thin enough to protect your book’s binding. -
✦
Scrapbook Paper (120-150 gsm): Can be used, but the folds will be bulkier. You may need to crease the edges with a bone folder to keep them flat. -
✦
Cardstock (200+ gsm): Too thick. It will crack along the fold lines and create a bulky wedge that damages book pages.
Boho Macrame Cord Bookmarks
Bring a touch of bohemian texture to your bookshelf with a flat-woven macrame bookmark. Using soft cotton cord, you can create beautiful geometric patterns using basic knots like the square knot and the larks head knot. The bottom of the bookmark is brushed out into a soft, luxurious fringe.
Styling Tip for a Fluffy Fringe
To get a perfectly smooth, full fringe at the bottom of your macrame bookmark, brush out the cotton cords using a fine-tooth metal comb (like a pet grooming comb). Once brushed flat, use a sharp pair of fabric shears to trim the fringe into a clean, straight line or a sharp V-shape. Spraying the fringe with a light coat of fabric stiffener or hairspray will keep it looking neat and prevent it from tangling over time.
Pressed Leaf Laminate Bookmarks
Celebrate the changing seasons by preserving colorful autumn leaves, delicate ferns, or bright green spring foliage. Laminating these natural treasures keeps them vibrant and protects them from crumbling over time. This is a wonderful weekend project to do after a peaceful nature walk.
Mistake-Avoidance Note: Ensure your leaves are completely dry and pressed flat before laminating. Any remaining moisture trapped inside the plastic laminate will cause the leaf to turn brown, decay, and mold over time. Press your leaves between heavy books for at least one to two weeks before sealing them.
Patterned Fabric Scrap Bookmarks
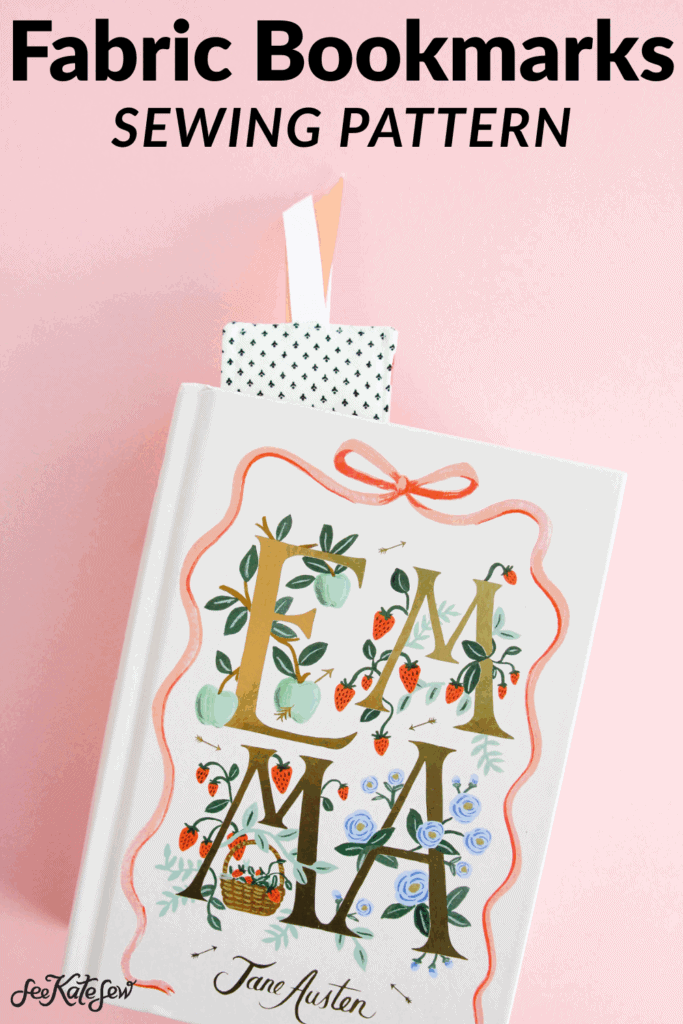
If you have a collection of beautiful fabric scraps left over from sewing projects, this is the ultimate way to upcycle them. By fusing fabric to a stiff stabilizer, you can create soft, flexible fabric scrap bookmarks with gorgeous patterns. You can finish the edges with a sewing machine or keep it entirely no-sew.
Fabric Bookmark Construction Options
-
✦
The Sewn Method: Sandwich a piece of heavy double-sided fusible interfacing between two pieces of patterned cotton fabric. Iron them together to bond, then sew a decorative straight stitch or zig-zag stitch around the perimeter to prevent fraying. -
✦
The No-Sew Method: Use pinking shears to cut the edges of your fused fabric sandwich. The zig-zag cut naturally prevents the cotton threads from fraying, giving you a clean, rustic look without touching a sewing machine.
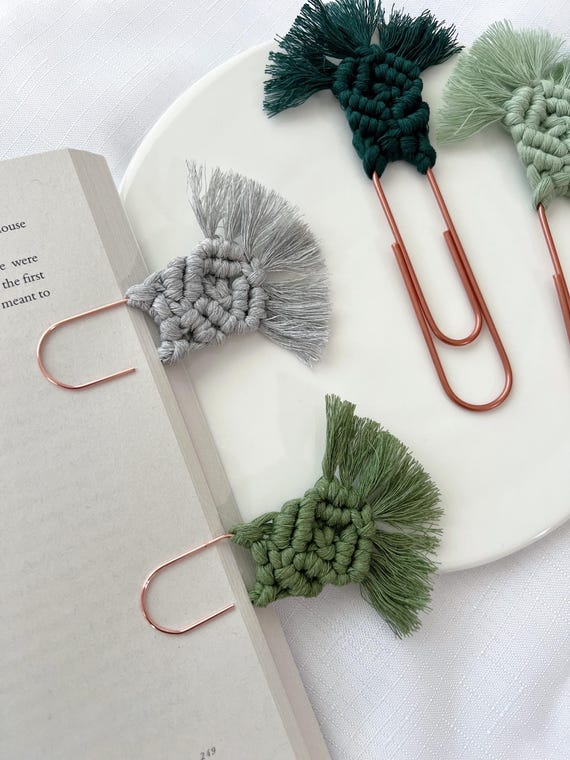
Beaded Wire Paperclip Bookmarks
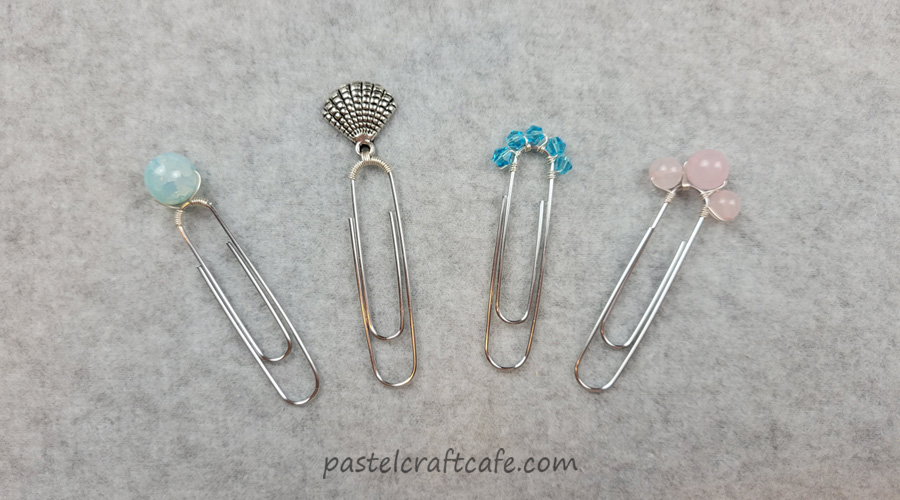
Elegant and jewelry-like, these bookmarks use oversized, heavy-duty paperclips as a base. By wrapping jewelry wire around the top loop of the clip and threading on colorful glass beads, crystals, or metal charms, you create a gorgeous decorative element that peeks out from the top of your closed book.
Recommended Tools & Materials
-
✦
Oversized Paperclips: Look for 3-inch (75mm) smooth metal paperclips in gold, silver, or rose gold. -
✦
Jewelry Wire: 24-gauge or 26-gauge wire is flexible enough to wrap easily but strong enough to hold beads securely. -
✦
Beads: Glass seed beads, freshwater pearls, or small gemstone beads add a touch of sophistication. -
✦
Pliers: Round-nose pliers and wire cutters are essential for securing the wire ends neatly so they do not snag your book pages.
Painted Wooden Bookmarks
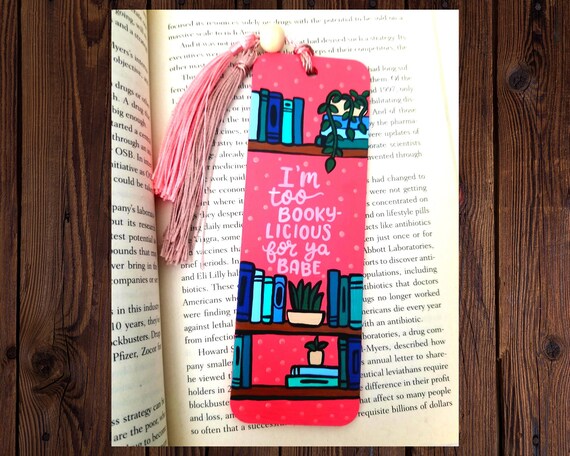
Wooden bookmarks offer a sturdy, rigid alternative to paper and fabric. You can purchase thin blank wood slats online or at your local craft store, or even upcycle clean wooden paint stirrers. The smooth wood surface is perfect for acrylic paint, wood burning (pyrography), or hand-lettering your favorite literary quotes.
Sealing Your Wooden Bookmark
Because wood can absorb moisture and paint can transfer under pressure, sealing your finished design is crucial. Apply two thin coats of a clear, non-sticky sealer like Mod Podge, polyurethane, or a clear acrylic spray. Let the sealer cure completely for at least 48 hours before placing the bookmark inside a book to ensure it won’t stick to the pages.
Frequently Asked Questions
How do I prevent my DIY bookmarks from damaging book pages?
To protect your books, always prioritize a slim profile. Avoid using thick embellishments like large plastic buttons, heavy metal charms inside the pages, or thick cardboard. Ensure all glues, paints, and sealants are completely dry and cured so they do not transfer residue or stick to the paper.
What is the best paper weight for handmade bookmarks?
If you are making paper-based bookmarks, use cardstock or watercolor paper with a weight between 110lb (300 gsm) and 140lb (370 gsm). Standard printer paper is too flimsy, while heavy chipboard can strain the book’s spine.
Can I make pressed flower bookmarks without resin?
Yes. If you want a simpler, kid-friendly alternative to resin, you can place your pressed flowers onto heavy cardstock and seal them using clear self-adhesive laminating sheets or packing tape. This gives you a flat, protected bookmark without the mixing and curing time of resin.
Whether you prefer the sleek look of stitched leather, the natural beauty of pressed botanicals, or the cozy texture of embroidered felt, creating your own bookmarks elevates the simple act of reading. These projects allow you to express your personal style, experiment with new craft mediums, and ensure you never lose your place in a great story again. Happy crafting, and happy reading!
Leave a Reply