Handmade Mother’s Day cards are more than just paper and glue; they are cherished keepsakes that capture a moment in a child’s development. For kids, creating a card is an act of love that fosters fine motor skills, color recognition, and emotional expression. The best Mother’s Day card ideas for children are those that balance simplicity with a wow factor, using common household items like buttons, paint, and paper scraps to create something truly professional-looking.
To get started, you don’t need an expensive craft kit. Most of these projects rely on a basic set of supplies that you likely already have in your craft bin.
Essential Supplies for Kid-Friendly Card Making
1. Fingerprint Dandelion Card

This card is a sentimental favorite because it uses the child’s actual fingerprints to create the seeds of a dandelion. It is perfect for toddlers and preschoolers who love getting their hands a little messy.
How to make it:
- 1 Draw a simple green stem and a small circular center on a piece of white cardstock.
- 2 Have the child dip their index finger into white or light yellow paint.
- 3 Press the finger repeatedly around the center to create the dandelion poof.
- 4 Add a few stray fingerprints flying away in the wind.
- 5 Write “Mom, I’d pick you every time” at the bottom.
2. Handprint Flower Bouquet
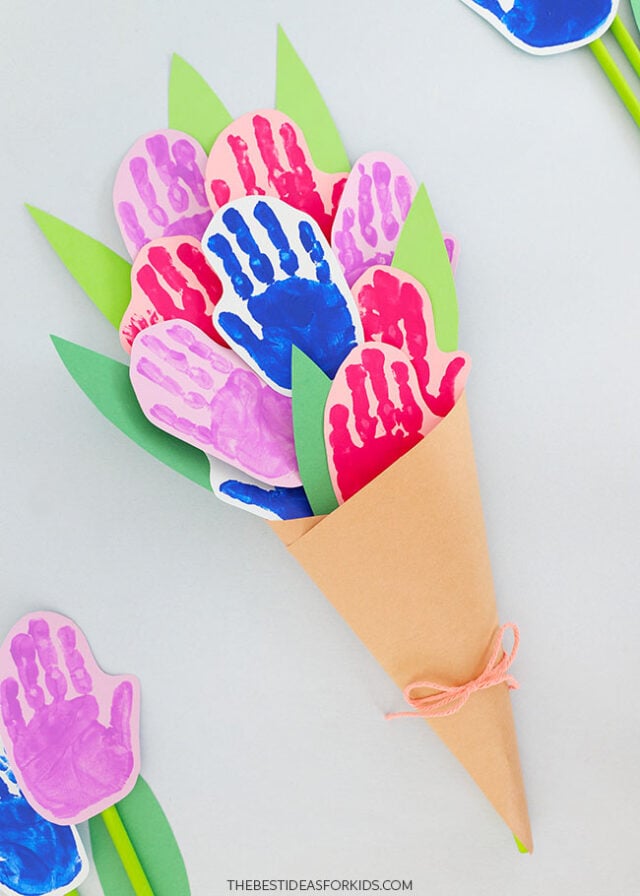
Nothing says “Mother’s Day” quite like a handprint craft. This project turns a child’s hand into a vibrant bouquet of flowers that Mom will want to frame.
How to make it:
- 1 Trace the child’s hand on several different colors of construction paper and cut them out.
- 2 Glue green pipe cleaners or paper strips to the card to act as stems.
- 3 Attach the paper hands to the top of the stems.
- 4 Tie a real piece of ribbon around the stems to bunch the bouquet together.
3. Button Flower Garden
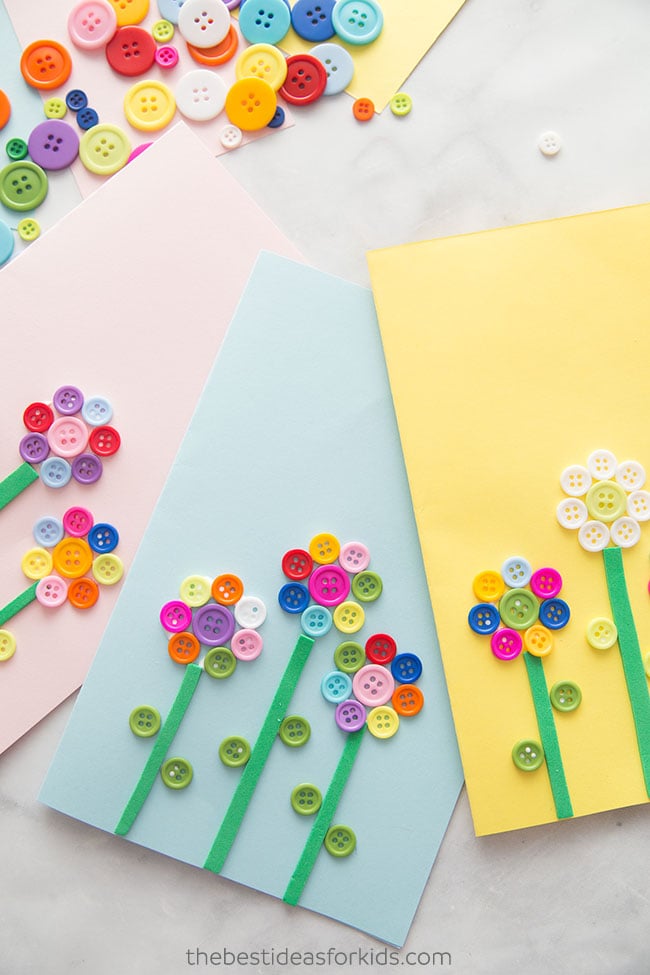
If you have a jar of mismatched buttons, this is the perfect upcycling project. It creates a beautiful, tactile 3D effect that looks very high-end.
How to make it:
- 1 Draw several stems and leaves on the front of a folded card.
- 2 Let the child choose buttons of various sizes and colors.
- 3 Use a strong glue (or glue dots) to stick the buttons at the top of each stem.
- 4 For extra detail, stack a smaller button on top of a larger one for the flower center.
4. 3D Paper Heart Pop-Up
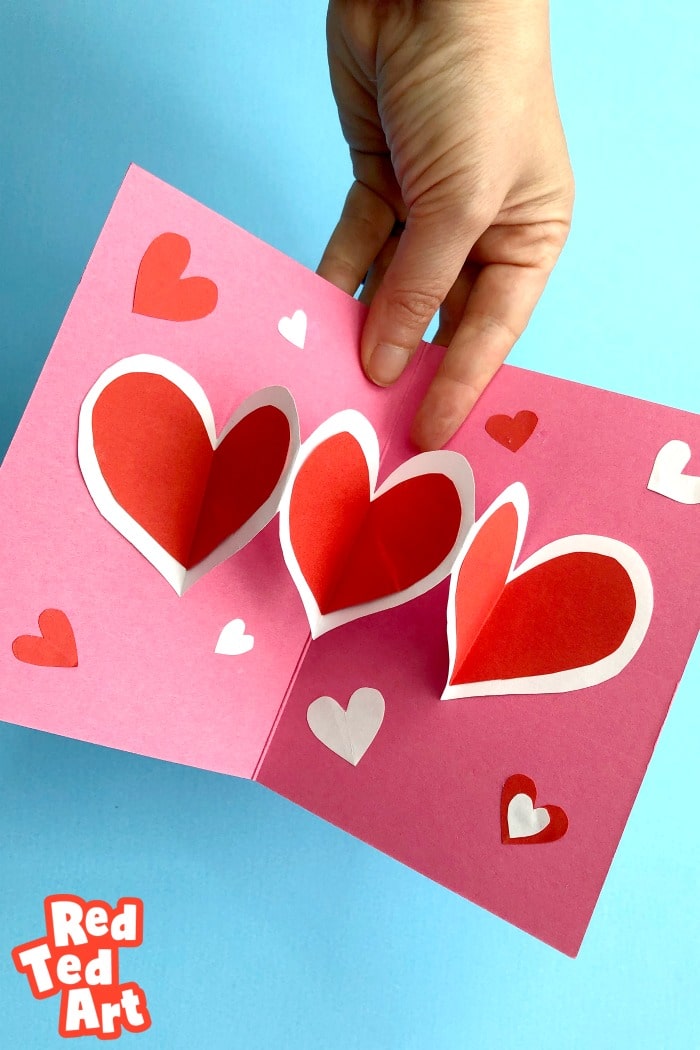
Pop-up cards look complicated but are surprisingly easy for school-aged children to master. This design features a blooming heart when the card is opened.
How to make it:
- 1 Fold a piece of cardstock in half.
- 2 Cut out several identical hearts from red or pink paper.
- 3 Fold each heart in half vertically.
- 4 Glue the back of one half of a heart to the back of the next heart’s half, creating a fan effect.
- 5 Glue the two end pieces to the inside crease of the card.
5. Washi Tape Masterpiece
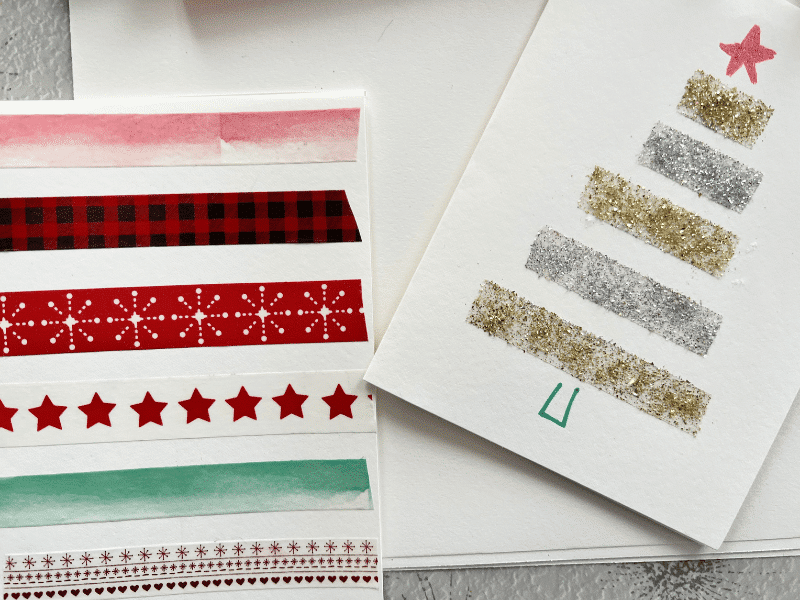
Washi tape is excellent for kids because it’s repositionable and comes in endless patterns. This is a low-mess option for busy afternoons.
How to make it:
- 1 Cut a heart shape out of a scrap piece of paper to use as a stencil.
- 2 Lightly tape the stencil to the center of the card.
- 3 Have the child layer strips of washi tape across the stencil, extending onto the card.
- 4 Carefully peel back the stencil to reveal a clean, white heart surrounded by colorful patterns.
6. Cupcake Liner Flowers
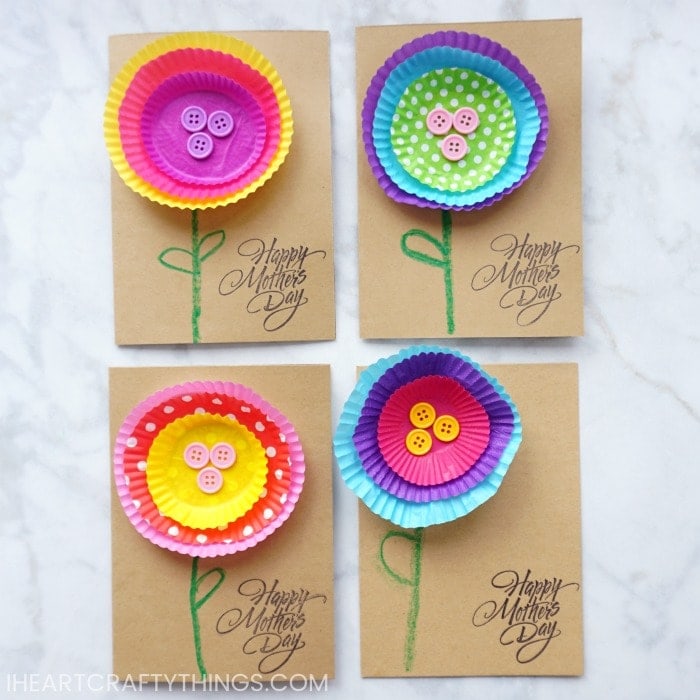
Cupcake liners provide instant texture and a perfect circular shape for flowers. This is a great way to use up leftover party supplies.
How to make it:
- 1 Flatten two or three cupcake liners.
- 2 Glue them onto the cardstock.
- 3 For a 3D effect, glue a smaller, ruffled liner inside a larger, flattened one.
- 4 Add a button or a pom-pom to the center.
- 5 Draw green stems and leaves with a marker.
7. “I Love You to Pieces” Suncatcher Card
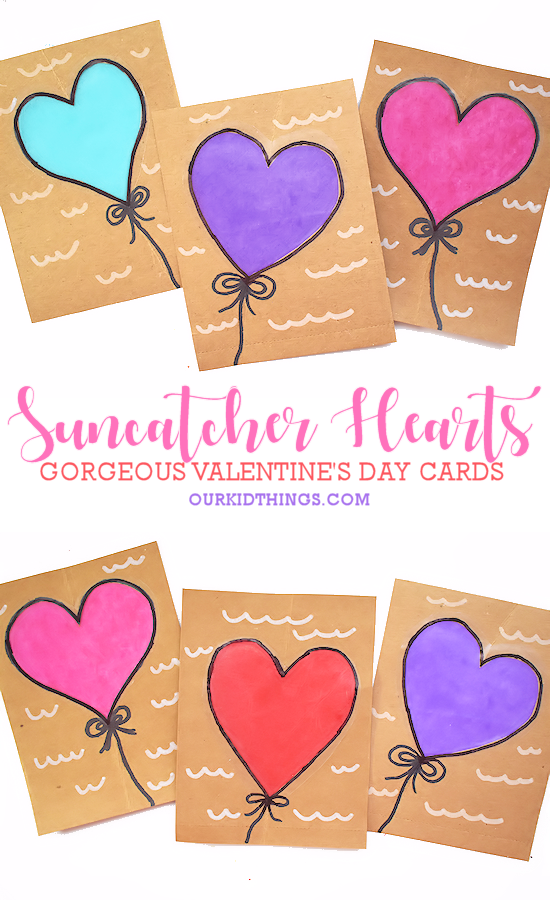
This card doubles as a window decoration. It uses tissue paper scraps to create a stained-glass effect.
How to make it:
- 1 Cut a large heart shape out of the front of a folded card.
- 2 Tape a piece of clear contact paper over the hole from the inside.
- 3 Have the child press small squares of colorful tissue paper onto the sticky surface.
- 4 Cover the back with another piece of contact paper or cardstock with a matching hole to seal it.
8. Footprint Butterfly Card
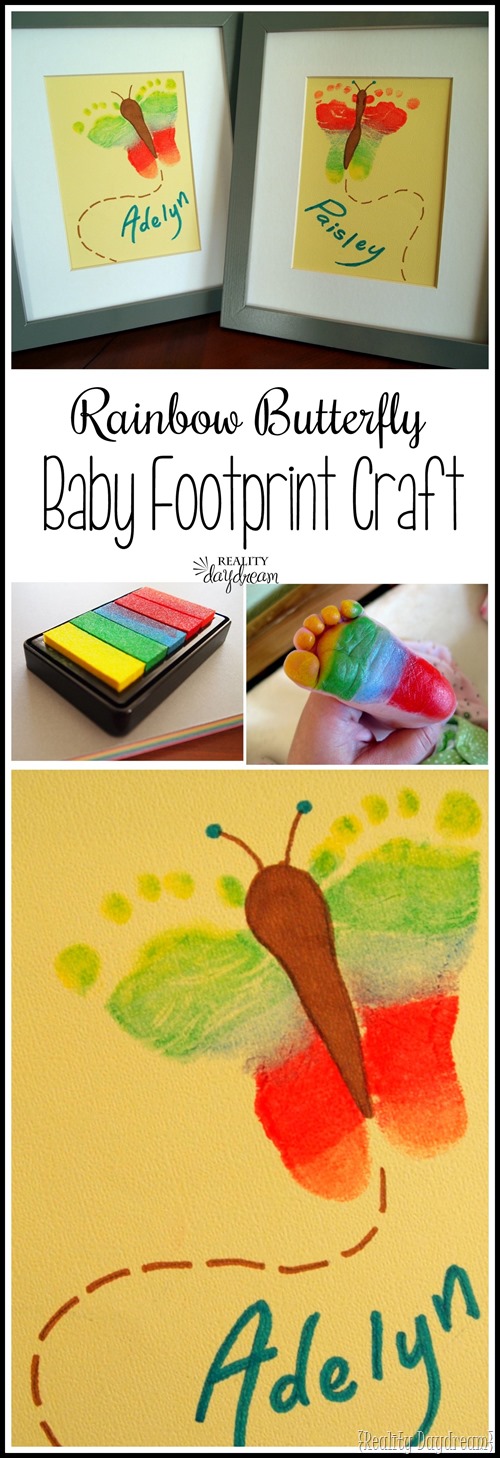
This is an adorable keepsake for babies and infants (with a little help from an adult). The feet form the wings of a butterfly.
How to make it:
- 1 Paint the bottom of the child’s feet with washable paint.
- 2 Press the left foot on the right side and the right foot on the left side (crossing them slightly at the heels) to create wings.
- 3 Once dry, draw a butterfly body and antennae in the center.
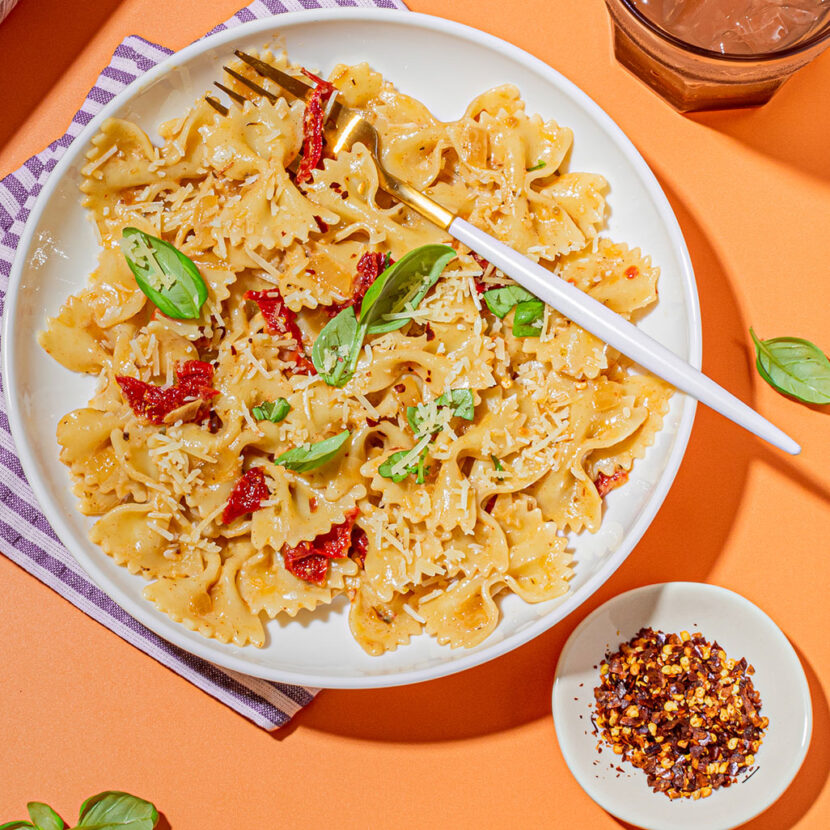
9. Pasta Shell Flowers
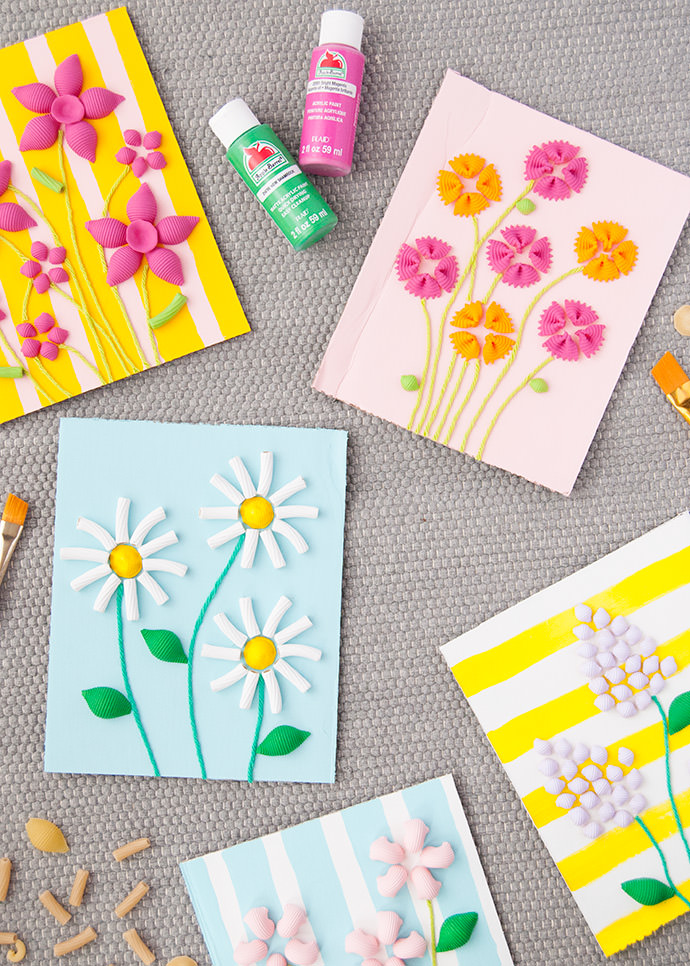
Dry pasta is a staple in kid’s crafts. Bowtie pasta makes perfect butterflies, while shell or penne pasta makes excellent flower petals.
How to make it:
- 1 Paint dry pasta shells in bright colors and let them dry.
- 2 Glue the shells in a circle on the card to form petals.
- 3 Use a yellow pom-pom or a different pasta shape for the center.
- 4 Write “Mom, you help me bloom!”
10. String Art Heart
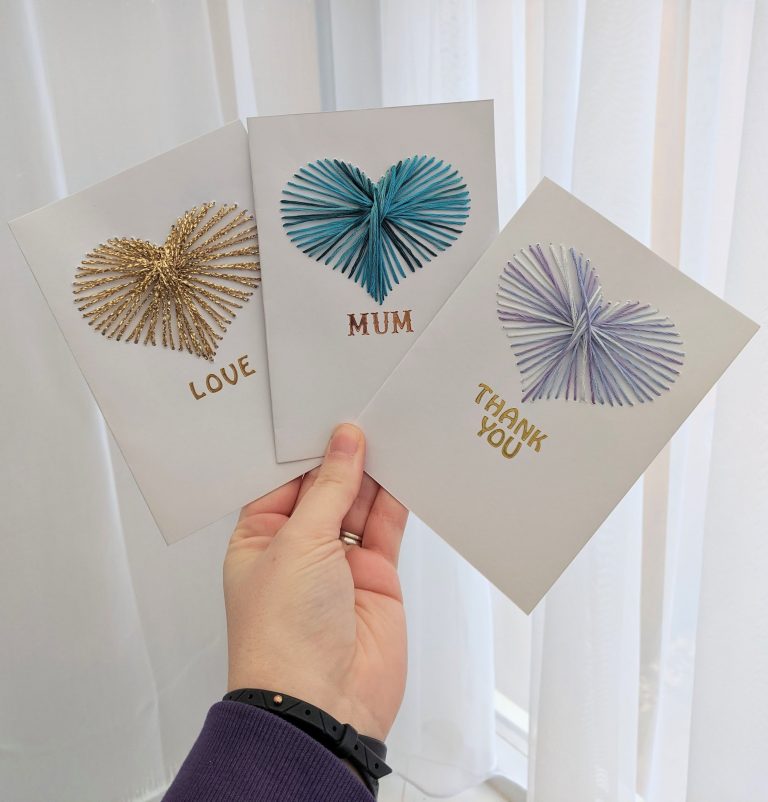
For older kids (ages 7+), string art is a great way to practice patterns and steady hand movements.
How to make it:
- 1 Lightly draw a heart on the card.
- 2 Use a large needle or a thumbtack to poke holes along the outline of the heart (space them about 1cm apart).
- 3 Have the child weave colorful embroidery floss through the holes in a random pattern to fill the heart.
11. Watercolor Resist Card
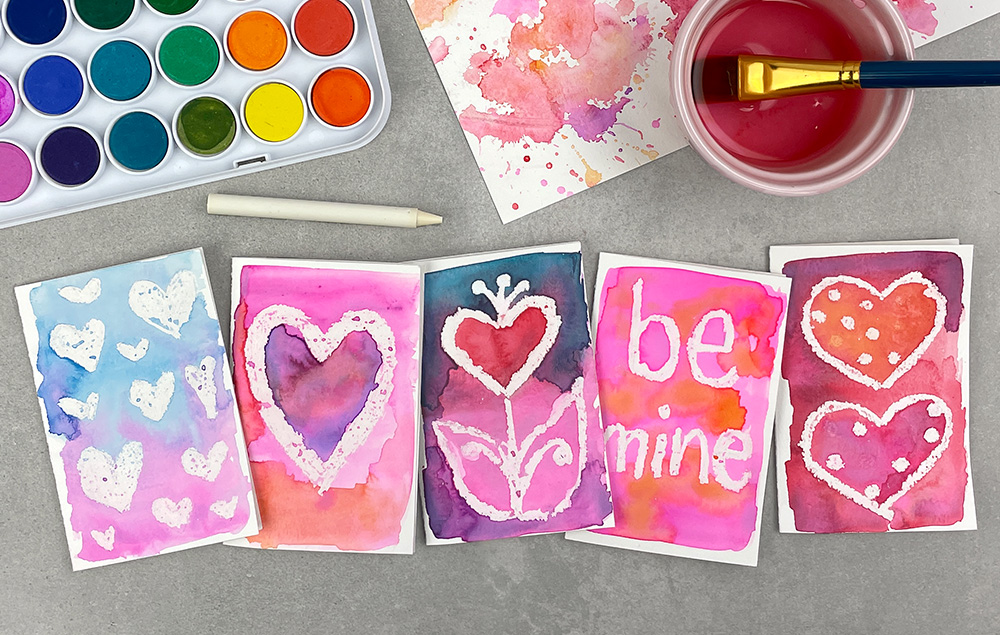
This technique feels like magic to kids. The wax from a crayon resists the watercolor paint, revealing a hidden message.
How to make it:
- 1 Use a white crayon to write “MOM” or draw hearts on white cardstock.
- 2 Have the child paint over the entire paper with watercolor paints.
- 3 The white crayon marks will stay white while the rest of the paper absorbs the color.
12. Pom-Pom Caterpillar Card
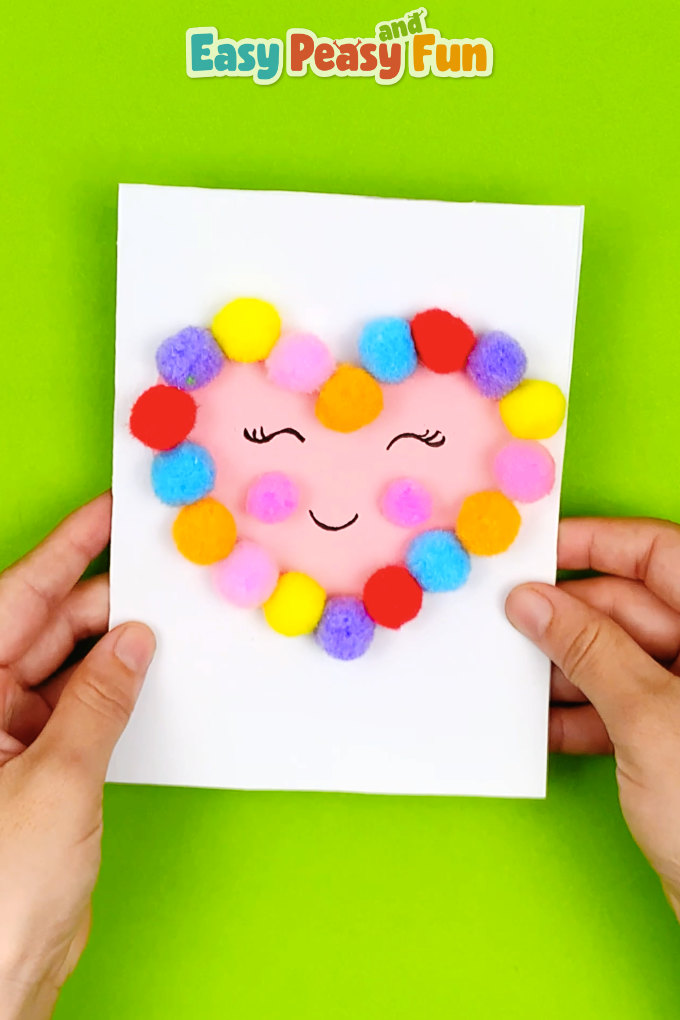
If Mom is a bookworm or just loves cute critters, this pom-pom caterpillar is a winner.
How to make it:
- 1 Glue a line of 5-6 small pom-poms in a wavy shape across the card.
- 2 Add tiny googly eyes to the front pom-pom.
- 3 Draw little legs and antennae.
- 4 Write “I’m crawling by to say Happy Mother’s Day!”
13. Origami Tulip Card
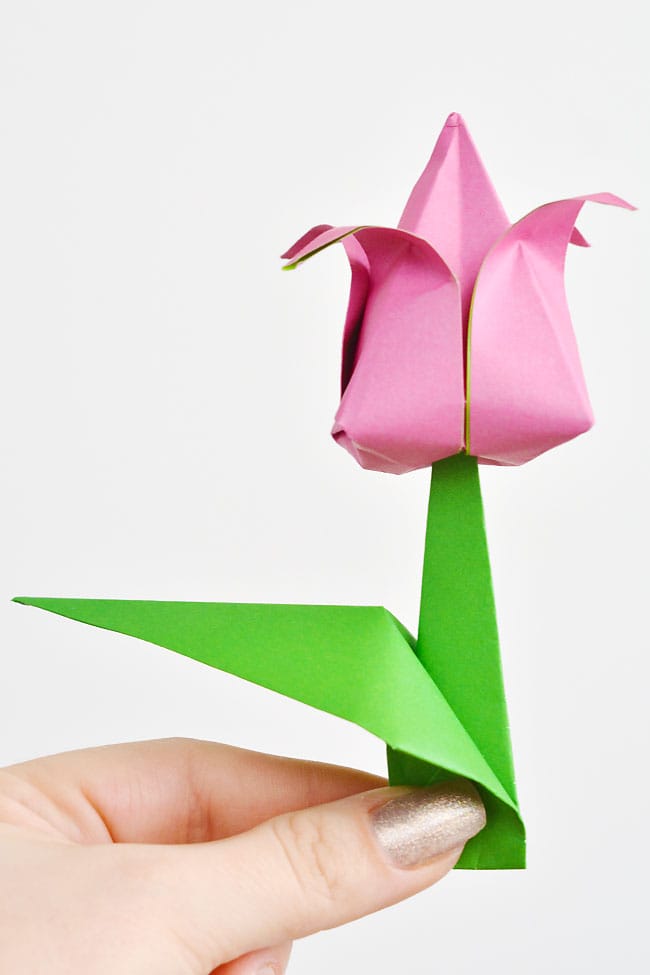
Origami is a wonderful way to introduce basic geometry to kids while making something beautiful.
How to make it:
- 1 Use a square piece of paper. Fold it diagonally to make a triangle.
- 2 Fold the two bottom corners up at an angle to create petals.
- 3 Glue the tulip head onto the card and draw a stem.
14. “Mom, You’re Tea-riffic” Card
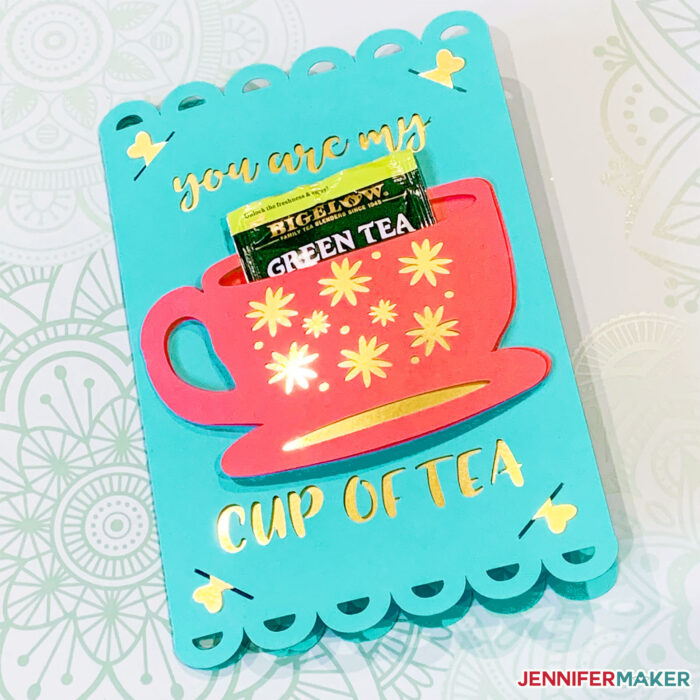
This card includes a small gift—a tea bag for Mom to enjoy during her me time.
How to make it:
- 1 Cut a teapot or teacup shape out of patterned paper.
- 2 Glue only the edges of the cup to the card, leaving the top open to create a pocket.
- 3 Slide a packaged tea bag into the pocket.
- 4 Write the punny message: “Mom, you are tea-riffic!”
15. Doily Lace Heart
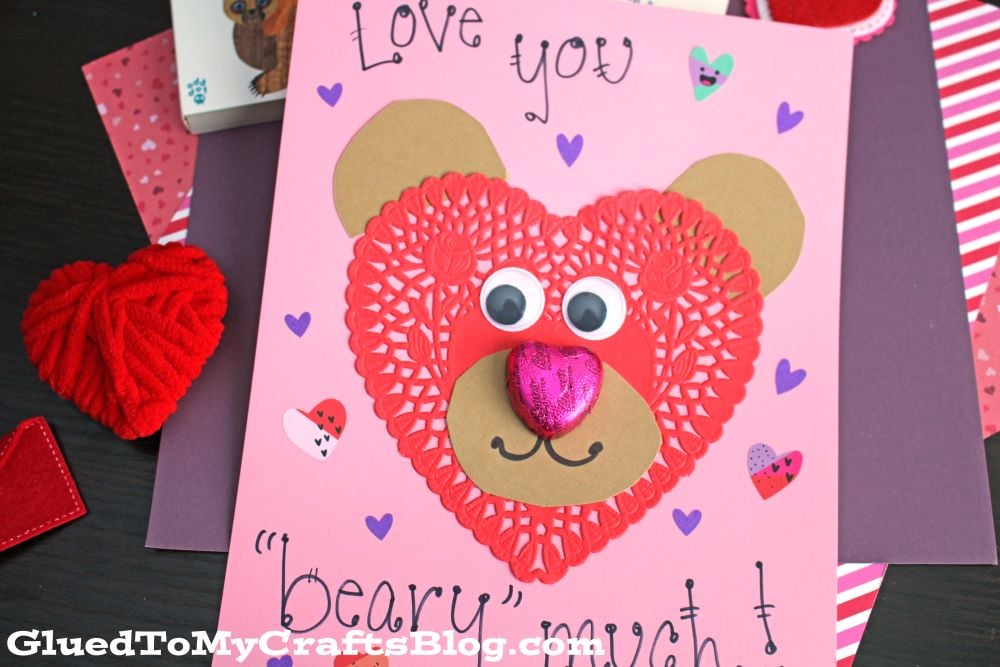
Paper doilies add an instant touch of vintage elegance to a card without any extra effort.
How to make it:
- 1 Fold a white paper doily into a heart shape or cut a heart out of the center of the lace.
- 2 Glue it onto a dark-colored cardstock (like navy or burgundy) so the lace pattern pops.
- 3 Place a photo of the child in the center of the doily.
16. Scrabble Tile Message
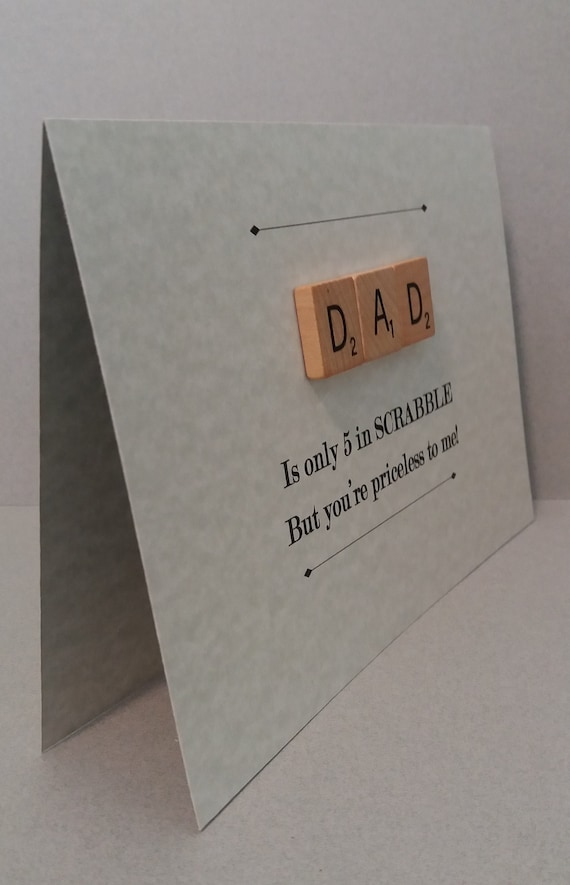
If you have an old Scrabble game with missing pieces, use the remaining tiles to spell out a message.
How to make it:
- 1 Find the letters to spell “MOM”, “MOTHER”, or the child’s name.
- 2 Glue the tiles onto the card in a straight line or a crossword style.
- 3 This adds a nice weight and a maker feel to the card.
17. Photo Frame Card
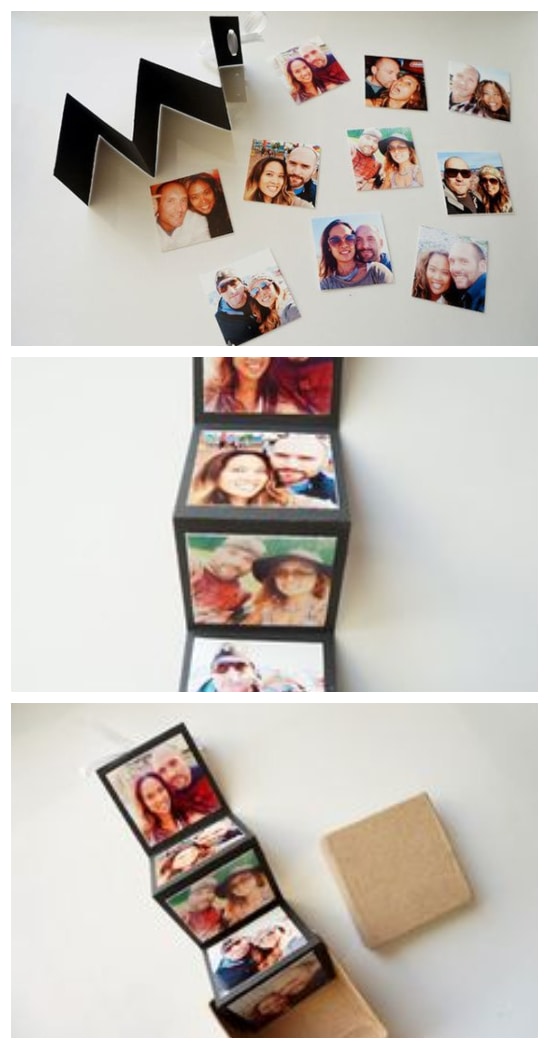
Mom always loves a new photo. This card serves as both a greeting and a frame.
How to make it:
- 1 Cut a window in the front of the card.
- 2 Tape a photo of the child behind the window.
- 3 Decorate the frame around the photo with glitter, stickers, or drawings.
18. Fingerprint Family Tree
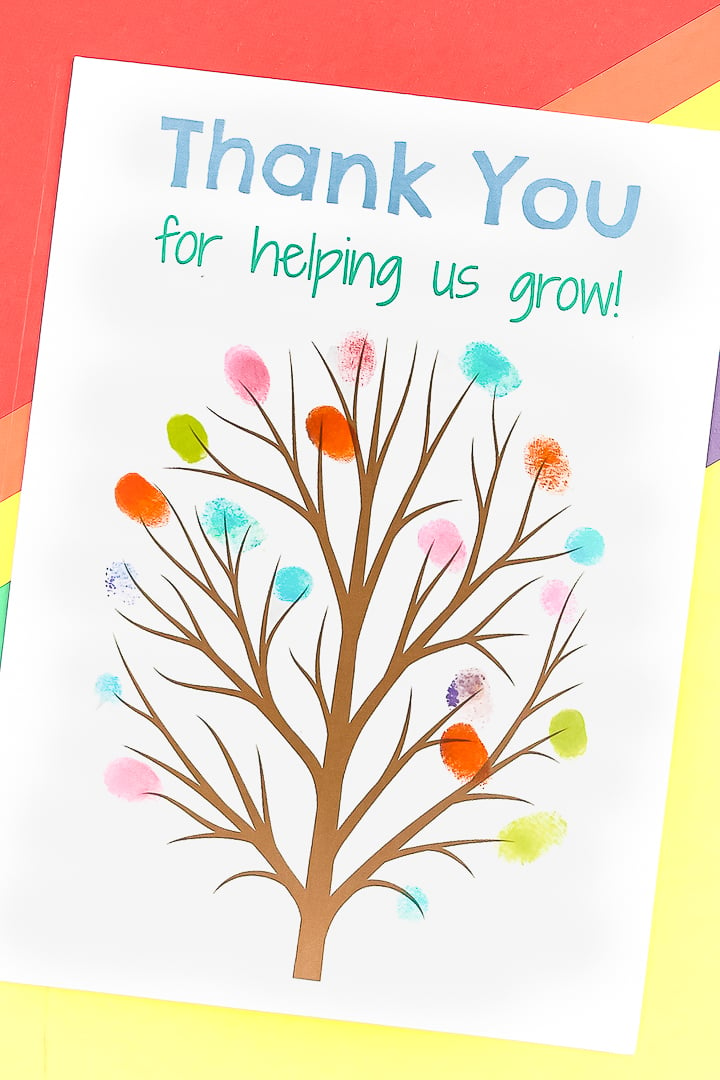
This card celebrates the whole family. It’s a great project for siblings to work on together.
How to make it:
- 1 Draw a bare tree with many branches.
- 2 Each family member dips their finger in paint and adds leaves to the branches.
- 3 Use different shades of green or even pink for a cherry blossom effect.
19. Abstract Splatter Art
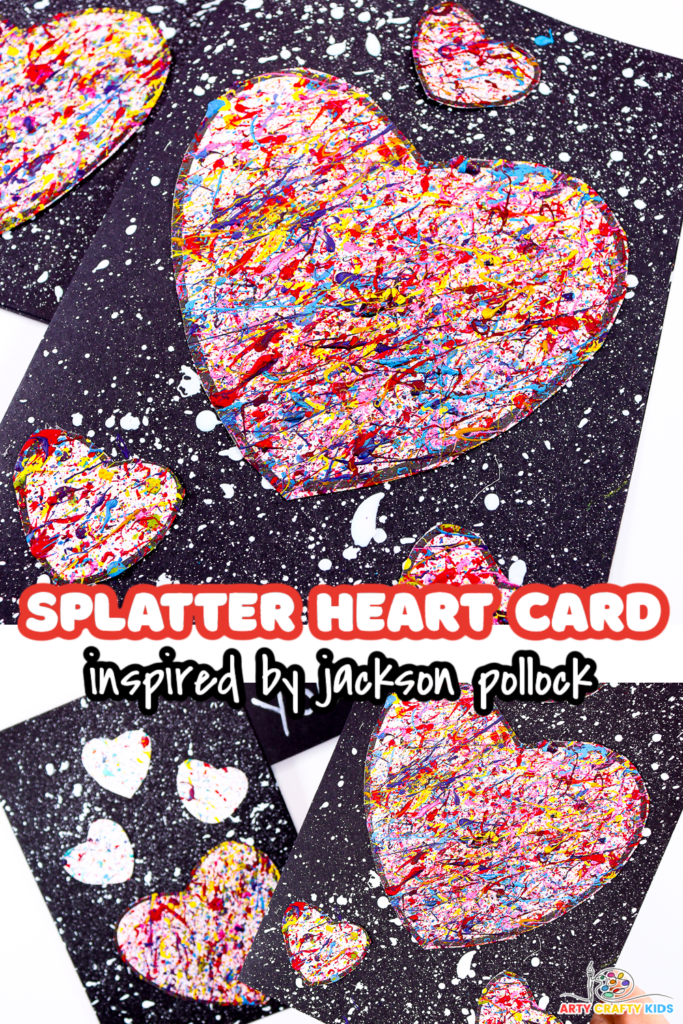
For the mini-Picasso, splatter art is fun and creates a modern, energetic design.
How to make it:
- 1 Place the card inside a cardboard box to contain the mess.
- 2 Dip a toothbrush or paintbrush into watered-down acrylic paint.
- 3 Flick the bristles to splatter paint across the card.
- 4 Once dry, write a bold “HAPPY MOTHER’S DAY” in black marker over the top.
20. “You Are My Sunshine” Pasta Sun
This bright and cheery card uses penne or rotini pasta to create sunbeams.
How to make it:
- 1 Paint a large yellow circle in the center of the card.
- 2 Glue dry pasta pieces radiating out from the circle like sunbeams.
- 3 Paint the pasta yellow or gold.
- 4 Write “You are my sunshine!”
Tips for Crafting with Kids
- Embrace the Mess: Handmade cards aren’t supposed to be perfect. A smudge or a crooked line is what makes it authentic.
- Preparation is Key: Have all materials cut and ready before inviting the child to sit down. Their attention span is short!
- Use Washable Materials: Always opt for washable glue and paint to ensure the art stays on the paper and not on your furniture.
Frequently Asked Questions
What is the best age for kids to start making Mother’s Day cards? Children as young as 12–18 months can participate by making handprints or fingerprints with non-toxic, washable paint. By age 3 or 4, they can begin using safety scissors and glue sticks with supervision.
How can I make a card look professional if my child is very young? The stencil method (like the Washi Tape idea) or using high-quality cardstock instead of thin construction paper can make a toddler’s art look like a gallery piece.
What should I write inside a Mother’s Day card? If the child is too young to write, ask them: “What is your favorite thing about Mom?” and transcribe their answer exactly. These kid-isms are often the most cherished part of the card.
Conclusion
Making a Mother’s Day card is a wonderful tradition that allows children to slow down and think about why they appreciate their moms, grandmas, or maternal figures. Whether it’s a simple fingerprint dandelion or a more complex string art heart, the effort and love put into the project are what truly matter.
This year, skip the store-bought aisle and dive into the craft bin—the resulting smile on Mom’s face will be well worth the glitter on the floor!
Leave a Reply