Upcycling glass jars into creative flower vases is one of the most cost-effective and rewarding ways to elevate your home decor.
By transforming a simple utility item like a mason jar into a centerpiece, you combine sustainability with personal expression.
Whether you prefer the rustic charm of a farmhouse kitchen or the sleek lines of modern minimalism, a mason jar serves as the perfect blank canvas.
This guide provides a comprehensive walkthrough of the best techniques, from chalk painting and distressing to advanced decoupage and mercury glass finishes.
Essential Supplies for Mason Jar Upcycling
Before diving into specific projects, it is helpful to have a crafter’s toolkit ready.
Depending on the style you choose, your materials will vary, but these are the foundational items for most mason jar vase projects.
| Category | Recommended Items | Purpose |
|---|---|---|
| Preparation | Rubbing alcohol, lint-free cloth | Cleaning the glass for better paint adhesion |
| Paints | Chalk paint, acrylics, spray paint | Providing the base color and texture |
| Adhesives | Mod Podge, hot glue gun, E6000 | Securing decorations, lace, or twine |
| Finishing | Matte or glossy sealant, sandpaper | Protecting the paint and creating textures |
| Embellishments | Jute twine, lace, ribbons, charms | Adding the final aesthetic touches |
1. The Distressed Farmhouse Chalk Paint Vase

The farmhouse aesthetic remains a timeless favorite for DIY enthusiasts.
This project focuses on a shabby chic look characterized by matte finishes and intentional wear.
Description:
Chalk paint is the secret ingredient here because it adheres beautifully to glass without requiring a primer.
To achieve this look, apply two thick coats of chalk paint (white, sage green, or duck egg blue work best).
Once the paint is completely dry, use a medium-grit sandpaper to lightly buff the raised areas of the jar—specifically the Mason lettering and the rim. This exposes the glass underneath, giving it a vintage, lived-in feel.
Step-by-Step:
- ✓Clean the jar with rubbing alcohol.
- ✓Apply the first coat of chalk paint and let it dry for 2 hours.
- ✓Apply a second coat for full opacity.
- ✓Once dry, sand the raised edges.
- ✓Seal with a matte clear coat to prevent further chipping.
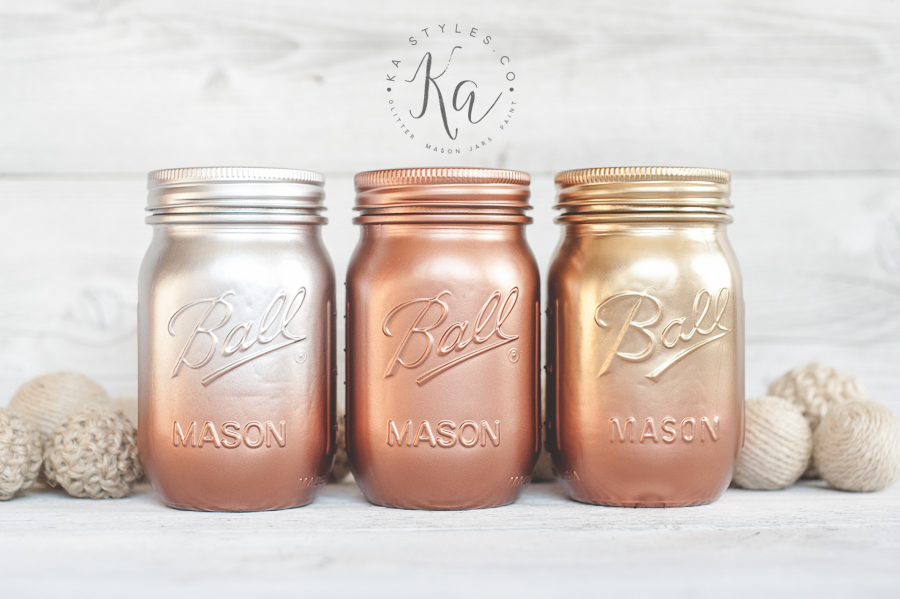
2. Elegant Gold Leaf Accented Vase
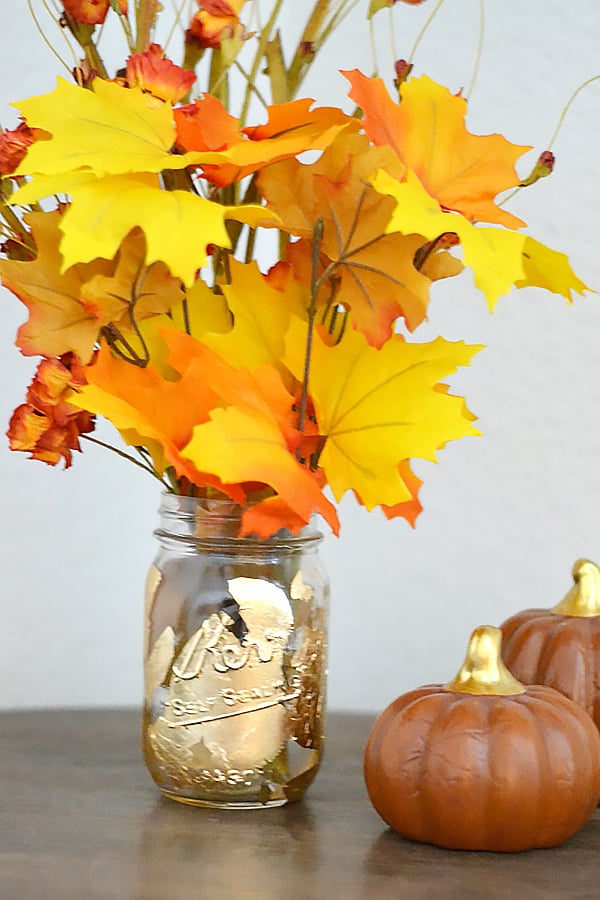
If your home decor leans more toward modern glam, adding metallic leafing is an excellent way to make a cheap jar look like a high-end boutique find.
Description:
Gold leafing adds a reflective, luxurious texture that paint alone cannot replicate.
You can choose to cover the entire bottom half of the jar for a dipped look or apply the leafing in organic, speckled patterns.
This project requires size (a specific gold leaf adhesive) and delicate handling of the metal sheets.
Key Tips:
- ★Apply the adhesive where you want the gold to stick.
- ★Wait until the adhesive becomes tacky (usually 15 minutes) before applying the leaf.
- ★Use a soft, dry brush to whisk away excess flakes.
3. Rustic Twine-Wrapped Mason Jar
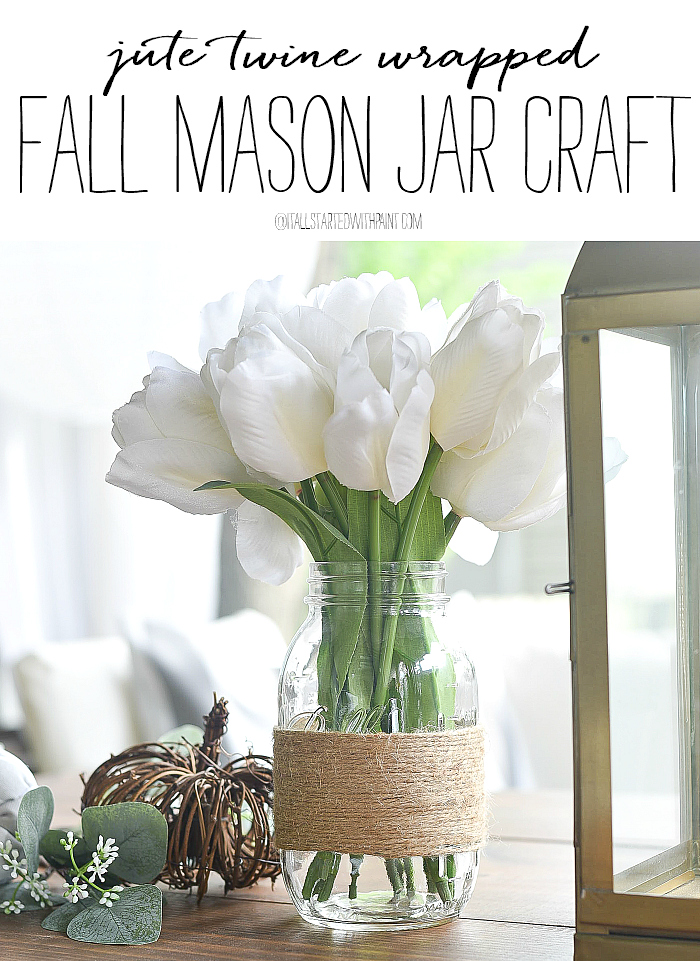
For those who love organic textures, wrapping a jar in jute twine or hemp cord creates a warm, tactile vase that pairs perfectly with wildflowers or dried lavender.
Description:
This project is highly meditative and beginner-friendly.
You can choose to wrap the entire jar from top to bottom or just create a central band of texture.
The key is using a hot glue gun to secure the starting and ending points of the twine. For a more intricate look, you can alternate between different thicknesses of rope or incorporate colored baker’s twine.
Design Idea:
- ★Leave the top inch of the jar clear and wrap the rest.
- ★This allows the water and stems to be partially visible, creating a beautiful contrast between the glass and the rough fiber.
4. Frosted Sea Glass Effect Vase
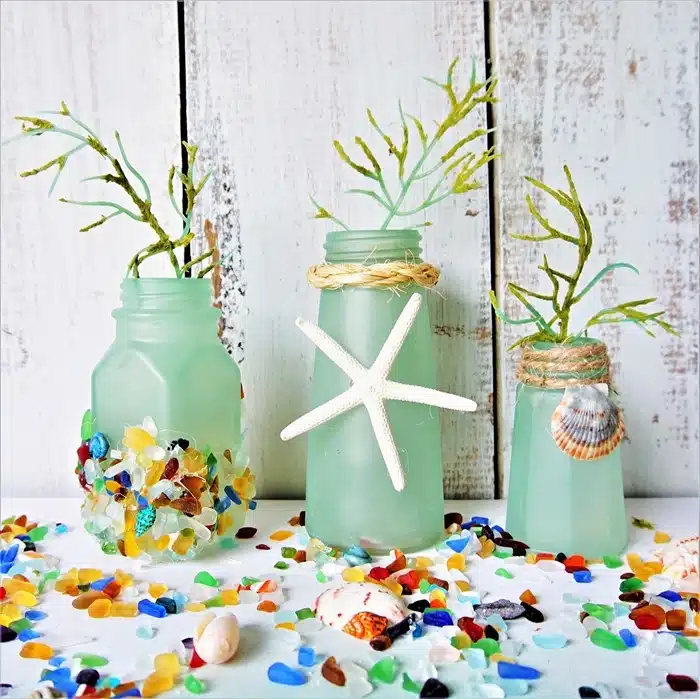
Transform a clear jar into a piece of found beach treasure using specialized frosting sprays.
This look is perfect for coastal-themed rooms or breezy summer patios.
Description:
Sea glass paint creates a translucent, matte finish that mimics glass tumbled by the ocean.
Unlike solid paint, this finish allows light to pass through, making the vase glow when placed near a window.
Application Technique:
- ✓Hold the spray can at least 12 inches away and apply very thin, even mists.
- ✓If you apply too much at once, the paint will drip and ruin the frosted illusion.
- ✓Two or three light coats are better than one heavy one.
5. Boho Macramé Layered Vase
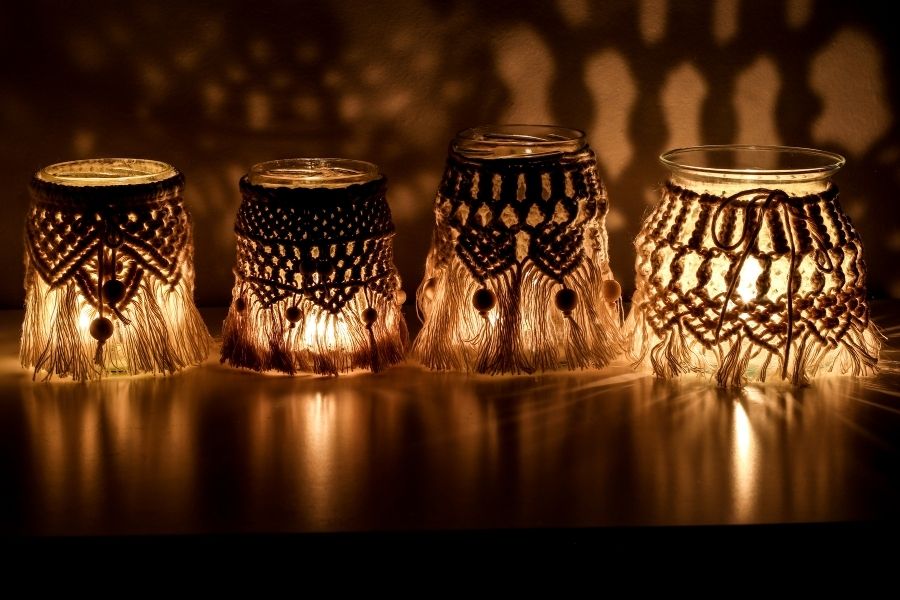
Integrating fiber arts into your glassware adds a bohemian, handcrafted touch.
This project involves creating a sleeve for your mason jar using basic macramé knots.
Description:
You don’t need to be a master of macramé to pull this off.
A simple series of square knots or spiral hitches around the neck of the jar can create a beautiful fringe that drapes down the sides.
Use a 3mm cotton cord for the best scale relative to the jar size.
Why it works:
- ★The soft cotton cord provides a beautiful contrast to the hard glass.
- ★The patterns of the knots cast interesting shadows when the sun hits the vase.
6. Hand-Painted Gingham or Plaid Vase
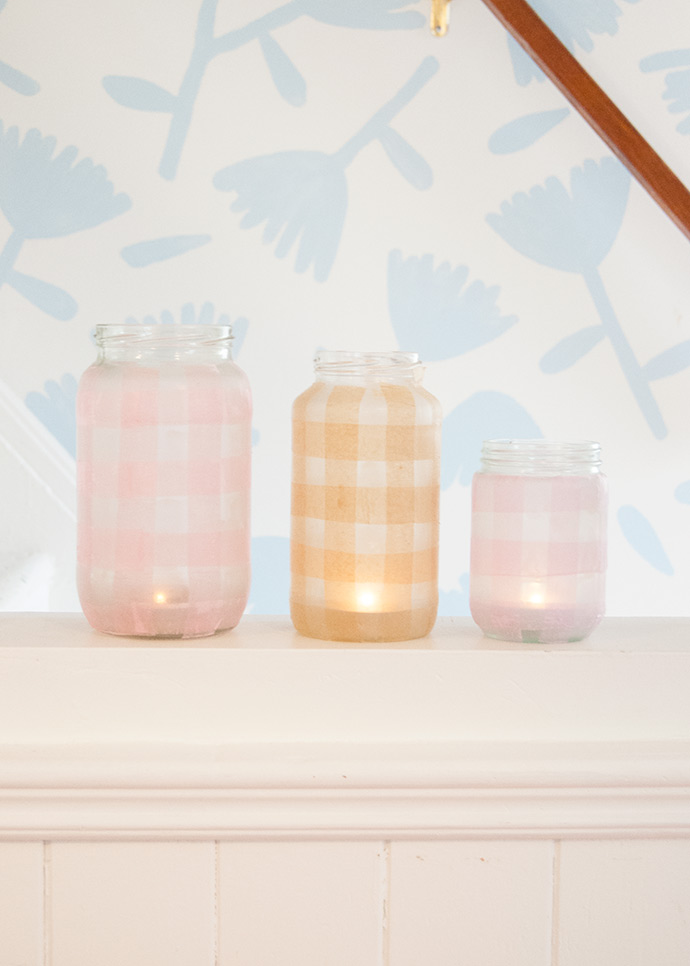
For a preppy or traditional look, painting a gingham pattern onto a mason jar is a fun challenge that yields professional-looking results.
Description:
This project relies heavily on painter’s tape and patience.
By layering horizontal and vertical stripes of varying paint transparency, you can create the overlap effect that defines gingham.
Pro Tip:
- ★Use a pouncing motion with a sponge brush rather than a traditional brush stroke.
- ★This keeps the paint from seeping under the tape and ensures crisp, clean lines for your pattern.
7. Decoupage Pressed Flower Vase
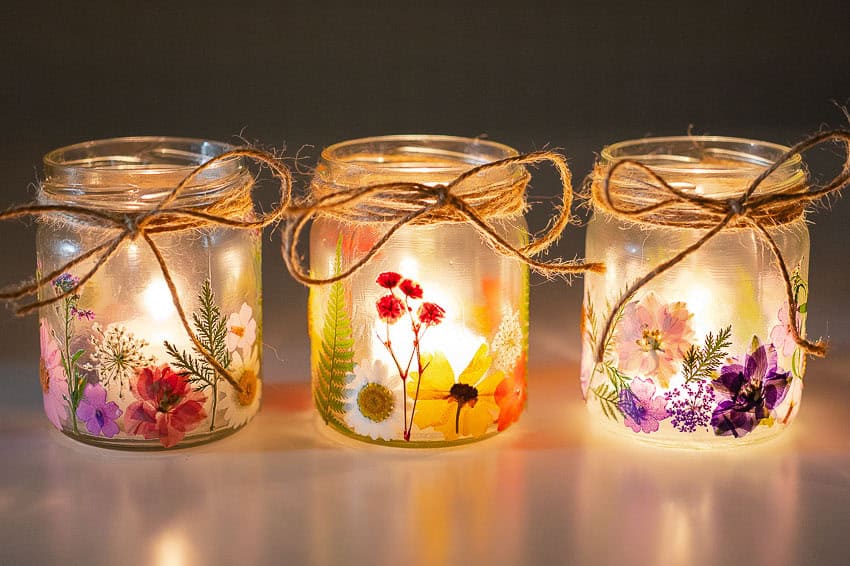
Bring the garden directly onto the glass by using real pressed flowers and decoupage medium.
This creates a delicate, ethereal look that is perfect for spring decor.
Description:
Using Mod Podge, you can adhere thin, dried flowers directly to the surface of the jar.
This works best on clear jars or jars painted in a very light cream color.
Once the flowers are set, a top coat of decoupage medium protects them from moisture and peeling.
Materials Needed:
- ✓Flattened, dried petals (pansies and ferns work great).
- ✓Matte Mod Podge.
- ✓A flat-bristled brush.
8. Faux Mercury Glass Finish
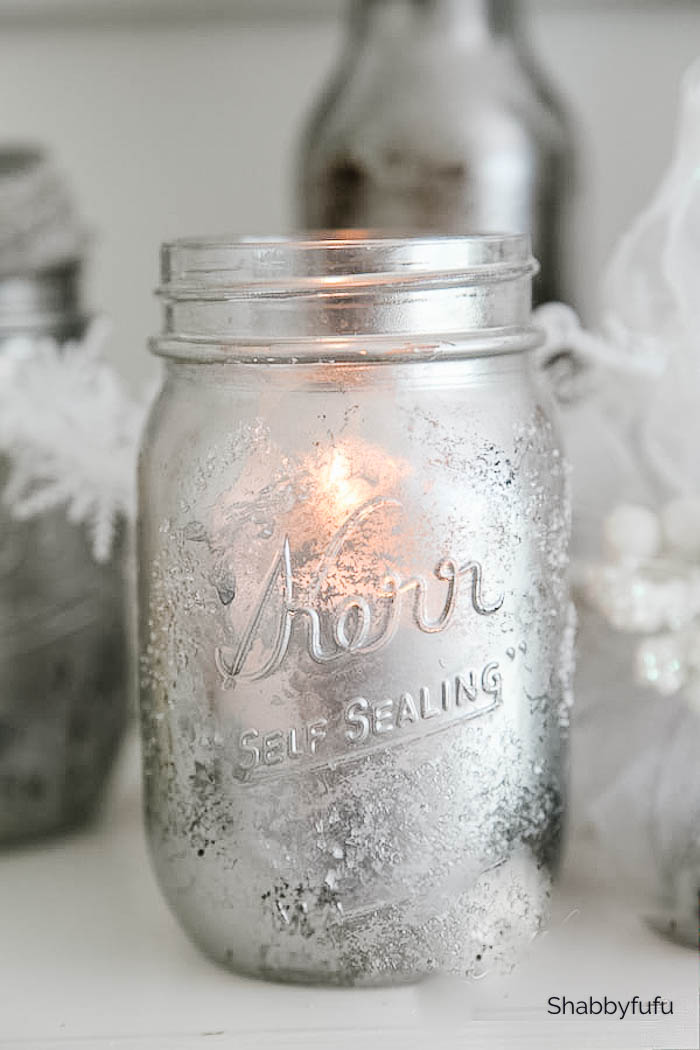
Mercury glass (or silvered glass) has a mottled, metallic finish that looks incredibly expensive.
You can recreate this vintage look using mirror effect spray paint and a vinegar-water solution.
Description:
The process involves spraying the inside of the jar with mirror paint and then misting it with a mixture of half water and half vinegar.
The vinegar prevents the paint from adhering perfectly, creating small bubbles and breaks in the silver.
When dry, you blot the inside to reveal a distressed, antique silver finish.
Warning:
- ★Because you are painting the inside, these jars should only be used for dried flowers or with a smaller plastic insert to hold water, as the water may eventually lift the faux finish.
9. Modern Ombré Spray Paint Vase
Ombré—the gradual blending of one color hue to another—is a staple of modern design.
It is easily achieved on a mason jar using two or three shades of spray paint.
Description:
Start with the lightest color at the top and the darkest at the bottom.
The magic happens in the middle where the two sprays overlap.
This technique is excellent for creating a set of three vases in varying shades of the same color family (e.g., navy, royal blue, and sky blue).
Execution:
- ✓Keep your wrist moving in a fluid, horizontal motion.
- ✓Do not stop the spray while pointing at the jar, as this causes hot spots or paint buildup.
10. Floating Wall-Mounted Sconce Vase
Sometimes the best way to display a vase is to take it off the table and put it on the wall.
This project combines woodworking with upcycling.
Description:
This project involves mounting a mason jar to a reclaimed wood plank using a stainless steel hose clamp.
The wood acts as a frame, and the jar serves as the vessel.
These are popular for entryways or as live wall art in a hallway.
Assembly Steps:
- ✓Stain or paint a small wooden board.
- ✓Drill a hole in the hose clamp and screw it into the wood.
- ✓Slide the jar into the clamp and tighten it with a screwdriver.
- ✓Add a sawtooth hanger to the back of the wood.
How to Properly Prepare and Finish Your Mason Jar
To ensure your DIY vase lasts for years, you must follow proper preparation and finishing protocols.
Skipping these steps often leads to peeling paint or water damage.
The Cleaning Phase
Glass is non-porous and often has an invisible oily residue from manufacturing or handling.
Always wash your jars with warm, soapy water first. Once dry, wipe the entire exterior with a cotton ball soaked in isopropyl alcohol.
Avoid touching the glass with your bare fingers after this step, as your skin oils can interfere with paint adhesion.
Sealing for Durability
If you plan to use your vase for real flowers, water spills are inevitable.
Use a polycrylic protective finish rather than a standard wax.
Polycrylic is water-based, won’t yellow over time, and provides a hard shell that protects your artwork from moisture.
Frequently Asked Questions (FAQ)
Q: Can I wash my painted mason jar in the dishwasher?
A: No. Even if you use multi-surface paint, the high heat and intense water pressure of a dishwasher will likely peel or chip the design. Always hand-wash the inside and wipe the outside with a damp cloth.
Q: What is the best paint for glass?
A: For a matte, rustic look, chalk paint is best. For a glossy, permanent finish, look for enamel acrylics specifically labeled for glass or ceramics.
Q: How do I prevent the paint from scratching off?
A: Proper curing is key. Most paints feel dry to the touch in an hour, but they take 21 to 30 days to fully cure (reach maximum hardness). Handle your jars gently during this period.
Q: Can I use these jars for candles instead of flowers?
A: Yes, but ensure the paint you used is non-flammable and applied only to the exterior. If you used flammable materials like lace or twine, keep the flame well below the rim of the jar.
Conclusion
The humble mason jar is perhaps the most versatile tool in a crafter’s arsenal.
By applying simple techniques like distressing, gold leafing, or macramé, you can transform a piece of trash into a high-authority decor element.
Whether you are creating a centerpiece for a wedding or a simple accent for your bedside table, these DIY flower vases offer a perfect blend of functionality and style.
Remember that the beauty of upcycling lies in the imperfections—so don’t be afraid to experiment with colors, textures, and heights to create a floral display that is uniquely yours.
Leave a Reply