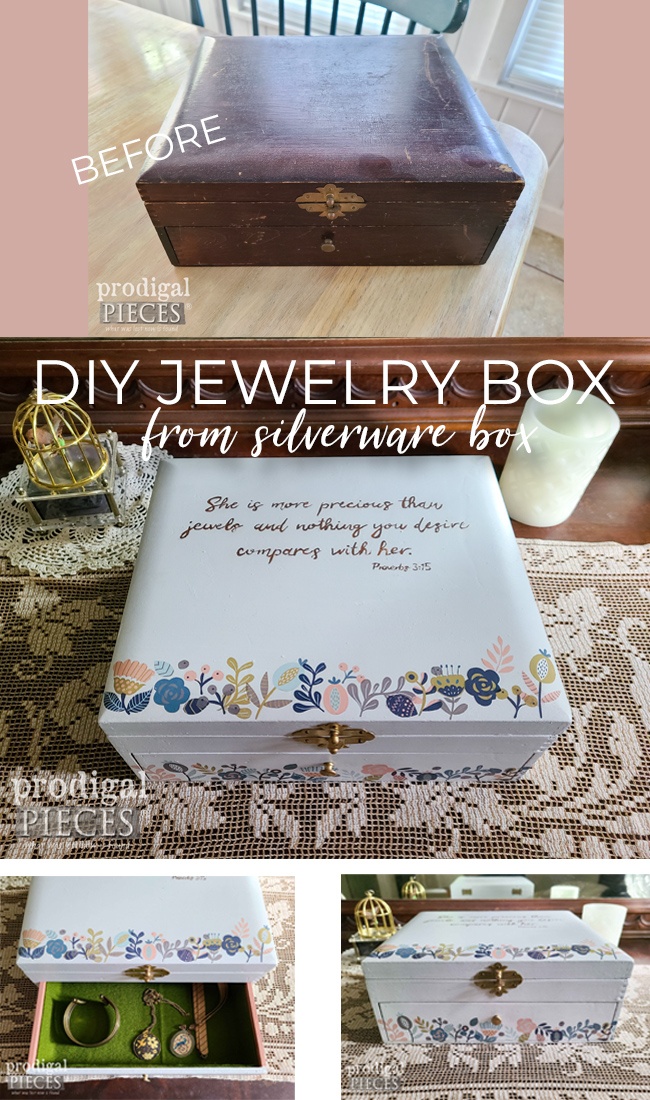
Turn empty duct tape rolls into a chic, functional jewelry box with this simple upcycling craft.
Using basic supplies like fabric, paint, and glue, you’ll create organized storage for rings, earrings, and necklaces in under an hour.
Perfect for beginners, this project repurposes waste into personalized decor that adds a pop of color to your vanity.
Why Upcycle Duct Tape Rolls for Jewelry Storage?
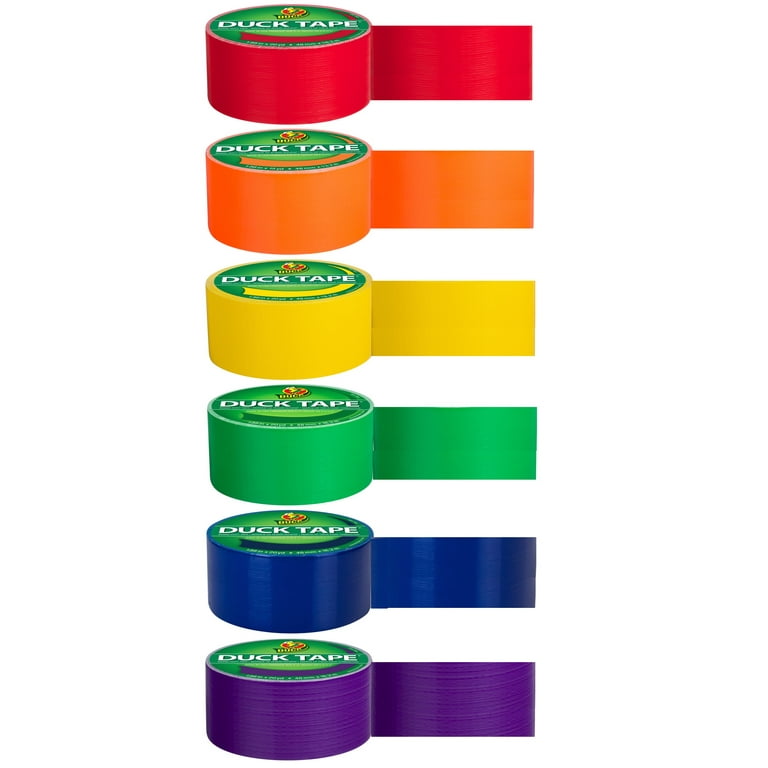
Duct tape rolls are sturdy cardboard cylinders that often end up in the trash after the tape is used.
By transforming them, you’re embracing sustainable crafting—reducing landfill waste while crafting something beautiful.
This DIY is budget-friendly (under $10), customizable, and beginner-friendly. No fancy tools needed: just scissors, hot glue, and your imagination.
Benefits of This DIY Project
- ♡ Eco-Friendly: Repurposes household waste.
- ♡ Customizable: Match your bedroom decor with endless fabric and paint options.
- ♡ Functional: Stackable design with compartments for small accessories.
- ♡ Quick Make: Complete in 45-60 minutes.
Materials Needed
Gather these everyday items for one jewelry box (makes a single roll holder with lid and dividers):
Total cost: $5-10 if sourcing from home or dollar store.
Step-by-Step Instructions
Step 1: Prepare the Duct Tape Roll
- ✂️ Remove any tape residue and wipe the roll clean.
- ✂️ Cut the roll to your desired height (e.g., 4-5 inches for earrings/rings).
- ✂️ Paint the exterior with 2-3 thin coats of acrylic paint. Let dry 10 minutes between coats for a smooth base.
Step 2: Cover with Fabric
- 📏 Measure and cut fabric to wrap around the roll: height + 1 inch, circumference + 2 inches.
- 📏 Apply Mod Podge or hot glue inside the fabric edges.
- 📏 Wrap tightly around the roll, folding edges inside like gift-wrapping. Glue down flaps.
- 📏 Repeat for the bottom: Trace the roll base on cardboard, cut slightly larger, cover with fabric, and glue inside the roll.
Step 3: Create Internal Dividers
- 🔪 Cut cardboard strips 1/2-inch narrower than roll height and width to fit snugly (e.g., 3-4 strips for 4 compartments).
- 🔪 Cover each with fabric matching the exterior.
- 🔪 Slot them radially inside the roll like pie slices, securing with hot glue. This creates perfect slots for rings or studs.
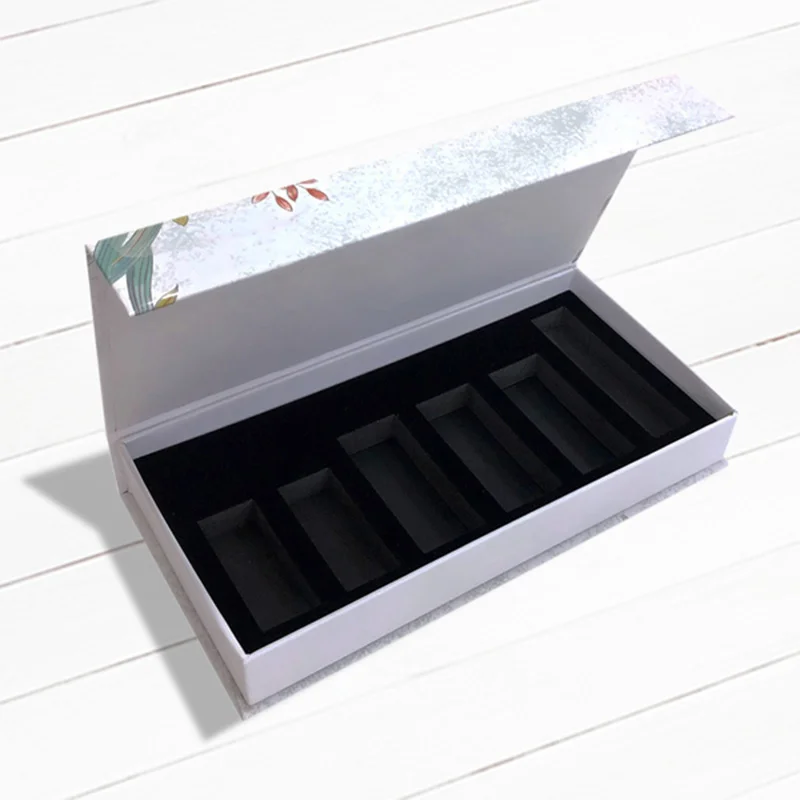
Step 4: Make the Lid
- 📐 Trace the roll top on cardboard twice (one for top, one for reinforcement).
- 📐 Cut and glue the two layers together.
- 📐 Cover with fabric, adding a 1-inch overhang for easy grip.
- 📐 Attach Velcro or magnets to the lid underside and roll top for a secure snap-close.
Step 5: Add Personal Touches and Finish
- ✨ Embellish the lid with glued-on buttons, faux gems, or ribbon trim.
- ✨ Seal all edges with Mod Podge for durability.
- ✨ Let everything dry for 30 minutes. Fill with jewelry and display!
Pro Tip: Stack 2-3 covered rolls for a tiered organizer. Glue bases together for stability.
Customization Ideas for Every Style
Elevate your jewelry box beyond basics with these themed variations:
Boho Chic Version
- 🌿 Use macramé cord or suede fabric.
- 🌿 Add wooden beads and feathers to the lid.
- 🌿 Perfect for festival jewelry.
Minimalist Modern
- ⚪ Opt for neutral linen fabric and gold spray paint.
- ⚪ Incorporate geometric washi tape accents.
- ⚪ Pairs with sleek bedroom aesthetics.
Vintage Glam
- 💎 Wrap in velvet or lace.
- 💎 Hot-glue faux pearls and a mirror fragment to the lid.
- 💎 Ideal for heirloom pieces.
Kid-Friendly Fun
- 🎀 Bright patterned duct tape (ironically!) or cartoon fabric.
- 🎀 Add pom-poms and googly eyes for whimsy.
- 🎀 Great parent-child craft.
Troubleshooting Common Issues
- ⚠️ Fabric Bunching: Use a brayer tool or credit card to smooth while gluing.
- ⚠️ Wobbly Dividers: Reinforce with extra cardboard layers.
- ⚠️ Lid Too Loose: Layer more Velcro or switch to snaps.
Safety Note: Supervise kids with hot glue; use low-temp setting.
Maintenance and Longevity
Your upcycled box will last years with care.
Dust weekly with a soft brush, spot-clean fabric with mild soap, and avoid direct sunlight to prevent fading.
For heavy use, reinforce dividers annually.
This project showcases upcycling’s magic: turning “trash” into treasure. Share your creations on social media with #DuctTapeJewelryBox for inspiration!
FAQ
Can I use a different size roll?
Yes! Smaller mailing tube rolls work for rings; larger ones for bracelets. Adjust dividers accordingly.
What if I don’t have a hot glue gun?
White craft glue or fabric glue works, but drying takes longer (use clamps to hold).
Is this waterproof?
Not fully—seal with waterproof Mod Podge for bathroom vanity use, but avoid submersion.
How many jewelry boxes can I make from one duct tape pack?
Typically 3-4 rolls per pack, yielding 3-4 boxes depending on tape length used.
Can I paint directly on the roll without fabric?
Absolutely—use chalk paint for a matte finish or metallic for shine.
Conclusion
This duct tape roll DIY jewelry box is a game-changer for craft enthusiasts seeking sustainable, stylish storage.
With minimal materials and maximal creativity, you’ll craft a piece that’s both practical and personal.
Start upcycling today—your jewelry (and the planet) will thank you! Dive into your scraps and get making for an organized, envy-worthy vanity.
Leave a Reply