Burlap works well for fall projects because its coarse texture holds shape while accepting paint, dye, and natural embellishments without overpowering other seasonal materials. The twelve ideas below focus on finished objects you can display immediately in your home.
Burlap Pumpkin Accents
Burlap wraps around foam or real pumpkins to create a matte surface that catches light differently than smooth skins. Cut strips wide enough to overlap at the back, then secure with hot glue before adding a small stem from a twig. This approach lets you reuse the same pumpkins year after year by simply swapping the fabric layer.
Place finished pumpkins in groups of three on mantels or entry tables so the repeated texture reads as intentional rather than scattered. Different widths of burlap ribbon produce varied looks, from tight vertical lines to wider horizontal bands that mimic traditional pumpkin ridges.
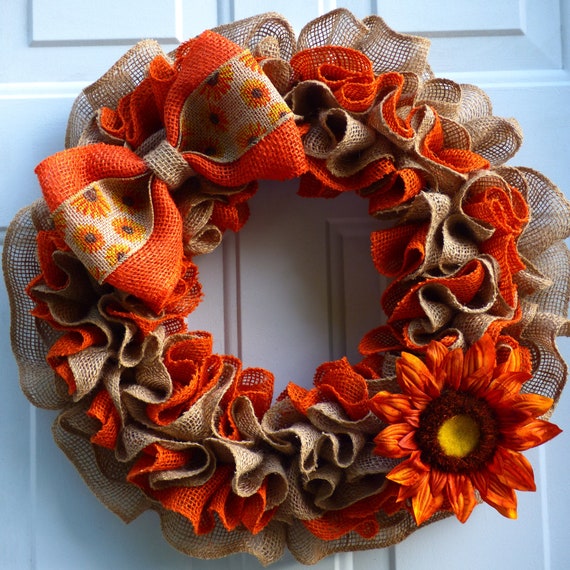
Rustic Burlap Wreaths
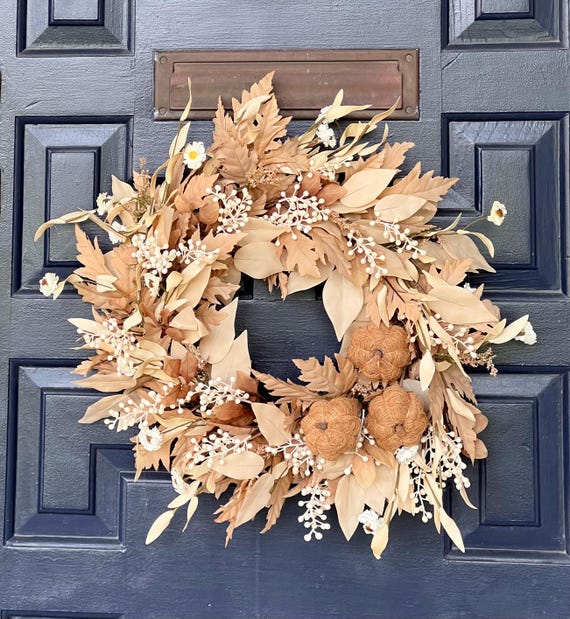
Burlap’s loose weave allows for easy fraying that adds organic edges to projects. Form the base by wrapping a wire wreath frame with strips of burlap, overlapping each layer by half an inch so no wire shows through. Attach dried leaves, small pinecones, or fabric flowers at uneven intervals to avoid a manufactured appearance.
Hang the finished wreath on an interior door or above a fireplace where it can stay for several months without weather exposure. Wider burlap rolls create fuller coverage faster, while narrower strips allow tighter tucking around the frame for more intricate leaf placement.
Leaf-Embellished Table Runners
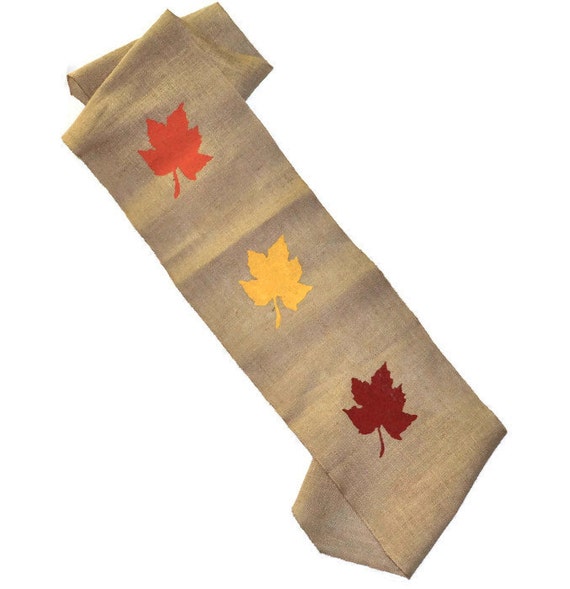
A burlap runner down the center of a dining table sets a neutral ground that makes orange and burgundy accents stand out. Cut the fabric to the exact length of your table plus twelve inches of overhang on each end, then press the raw edges under twice before stitching or gluing them flat. Glue preserved leaves along one side only so the opposite edge remains clean for plates and serving dishes.
- Natural leaf placement: Scatter leaves in clusters of three near the center, leaving the ends plain.
- Painted leaf placement: Stencil single oak or maple shapes in metallic gold at regular intervals.
- Mixed placement: Combine real leaves with small fabric pumpkins spaced every eighteen inches.
Test the runner on your table before attaching any leaves so you can adjust length if needed. Burlap accepts fabric medium well, which prevents paint from bleeding through to the table surface underneath.
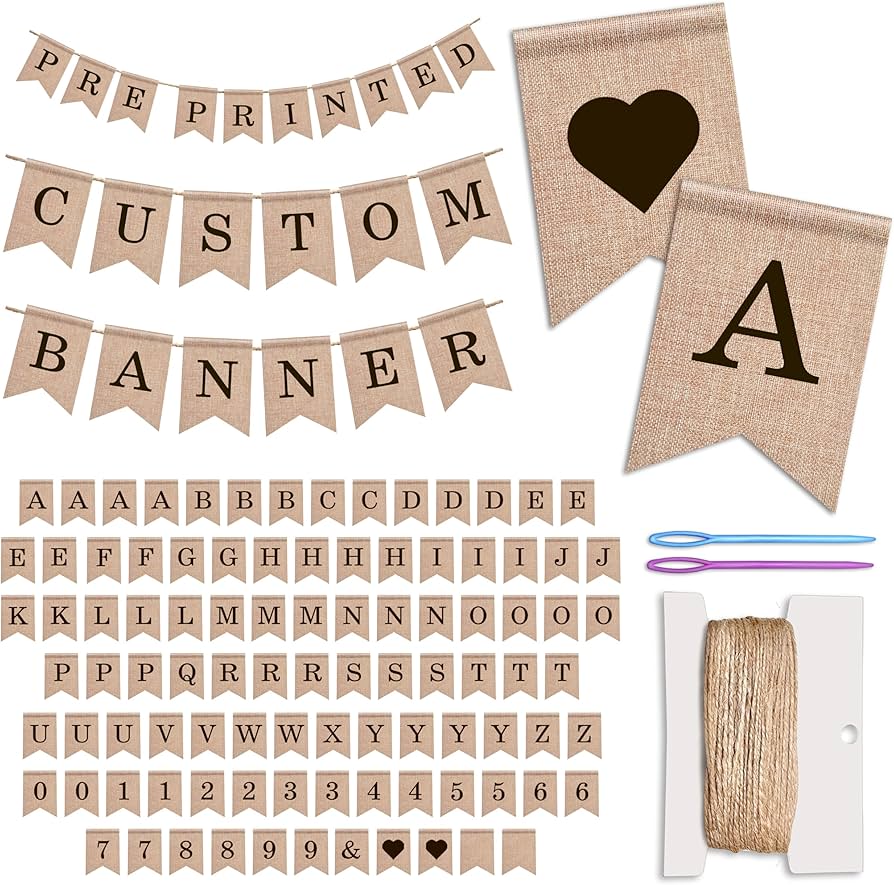
Personalized Burlap Banners

Cut individual pennant shapes from burlap and stencil one letter per flag to spell short words such as harvest or gather. Thread the top edge onto a length of jute rope so the banner can be adjusted to different widths. Leave a two-inch margin at each end of the rope for tying.
Hang the banner across a window or along a stair railing where the letters remain visible from across the room. Choose a font style that matches your existing fall signage rather than introducing a new typeface that competes for attention.
Cozy Burlap Throw Pillows

Burlap pillow covers add weight and texture to a sofa or bench that lighter cottons cannot match. Sew three sides of a simple envelope back, slide in a pillow form, and close the fourth side with fabric glue for a no-sew option. Add a single row of running stitches in contrasting thread along the edges to keep the weave from unraveling further.
| Burlap Weight | Best Use | Durability Note |
|---|---|---|
| Lightweight | Accent pillows | Frays faster, needs edge finishing |
| Medium | Everyday use | Holds shape after washing |
| Heavy | Floor cushions | Stiff at first but softens with use |
Rotate pillow covers seasonally so the burlap does not fade from constant sunlight exposure on one side. Medium-weight burlap launders better than the lightest grades when spills occur.
Layered Burlap Garlands
Pairing burlap with twine creates contrast that highlights fall textures. Cut burlap into two-inch squares, fold each square in half twice, and tie the folded corner onto a long piece of twine with a simple overhand knot. Space the squares four inches apart so each one can fluff outward.
Drape the finished garland above cabinets or along a stair rail where the layers catch moving air and shift slightly. Use two different burlap colors in the same garland for subtle depth without adding extra elements.
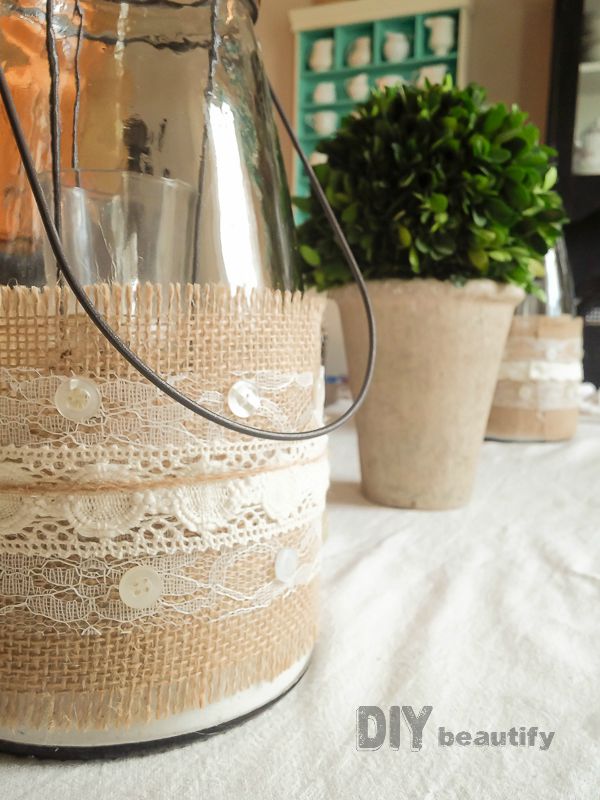
Jar Wraps for Centerpieces
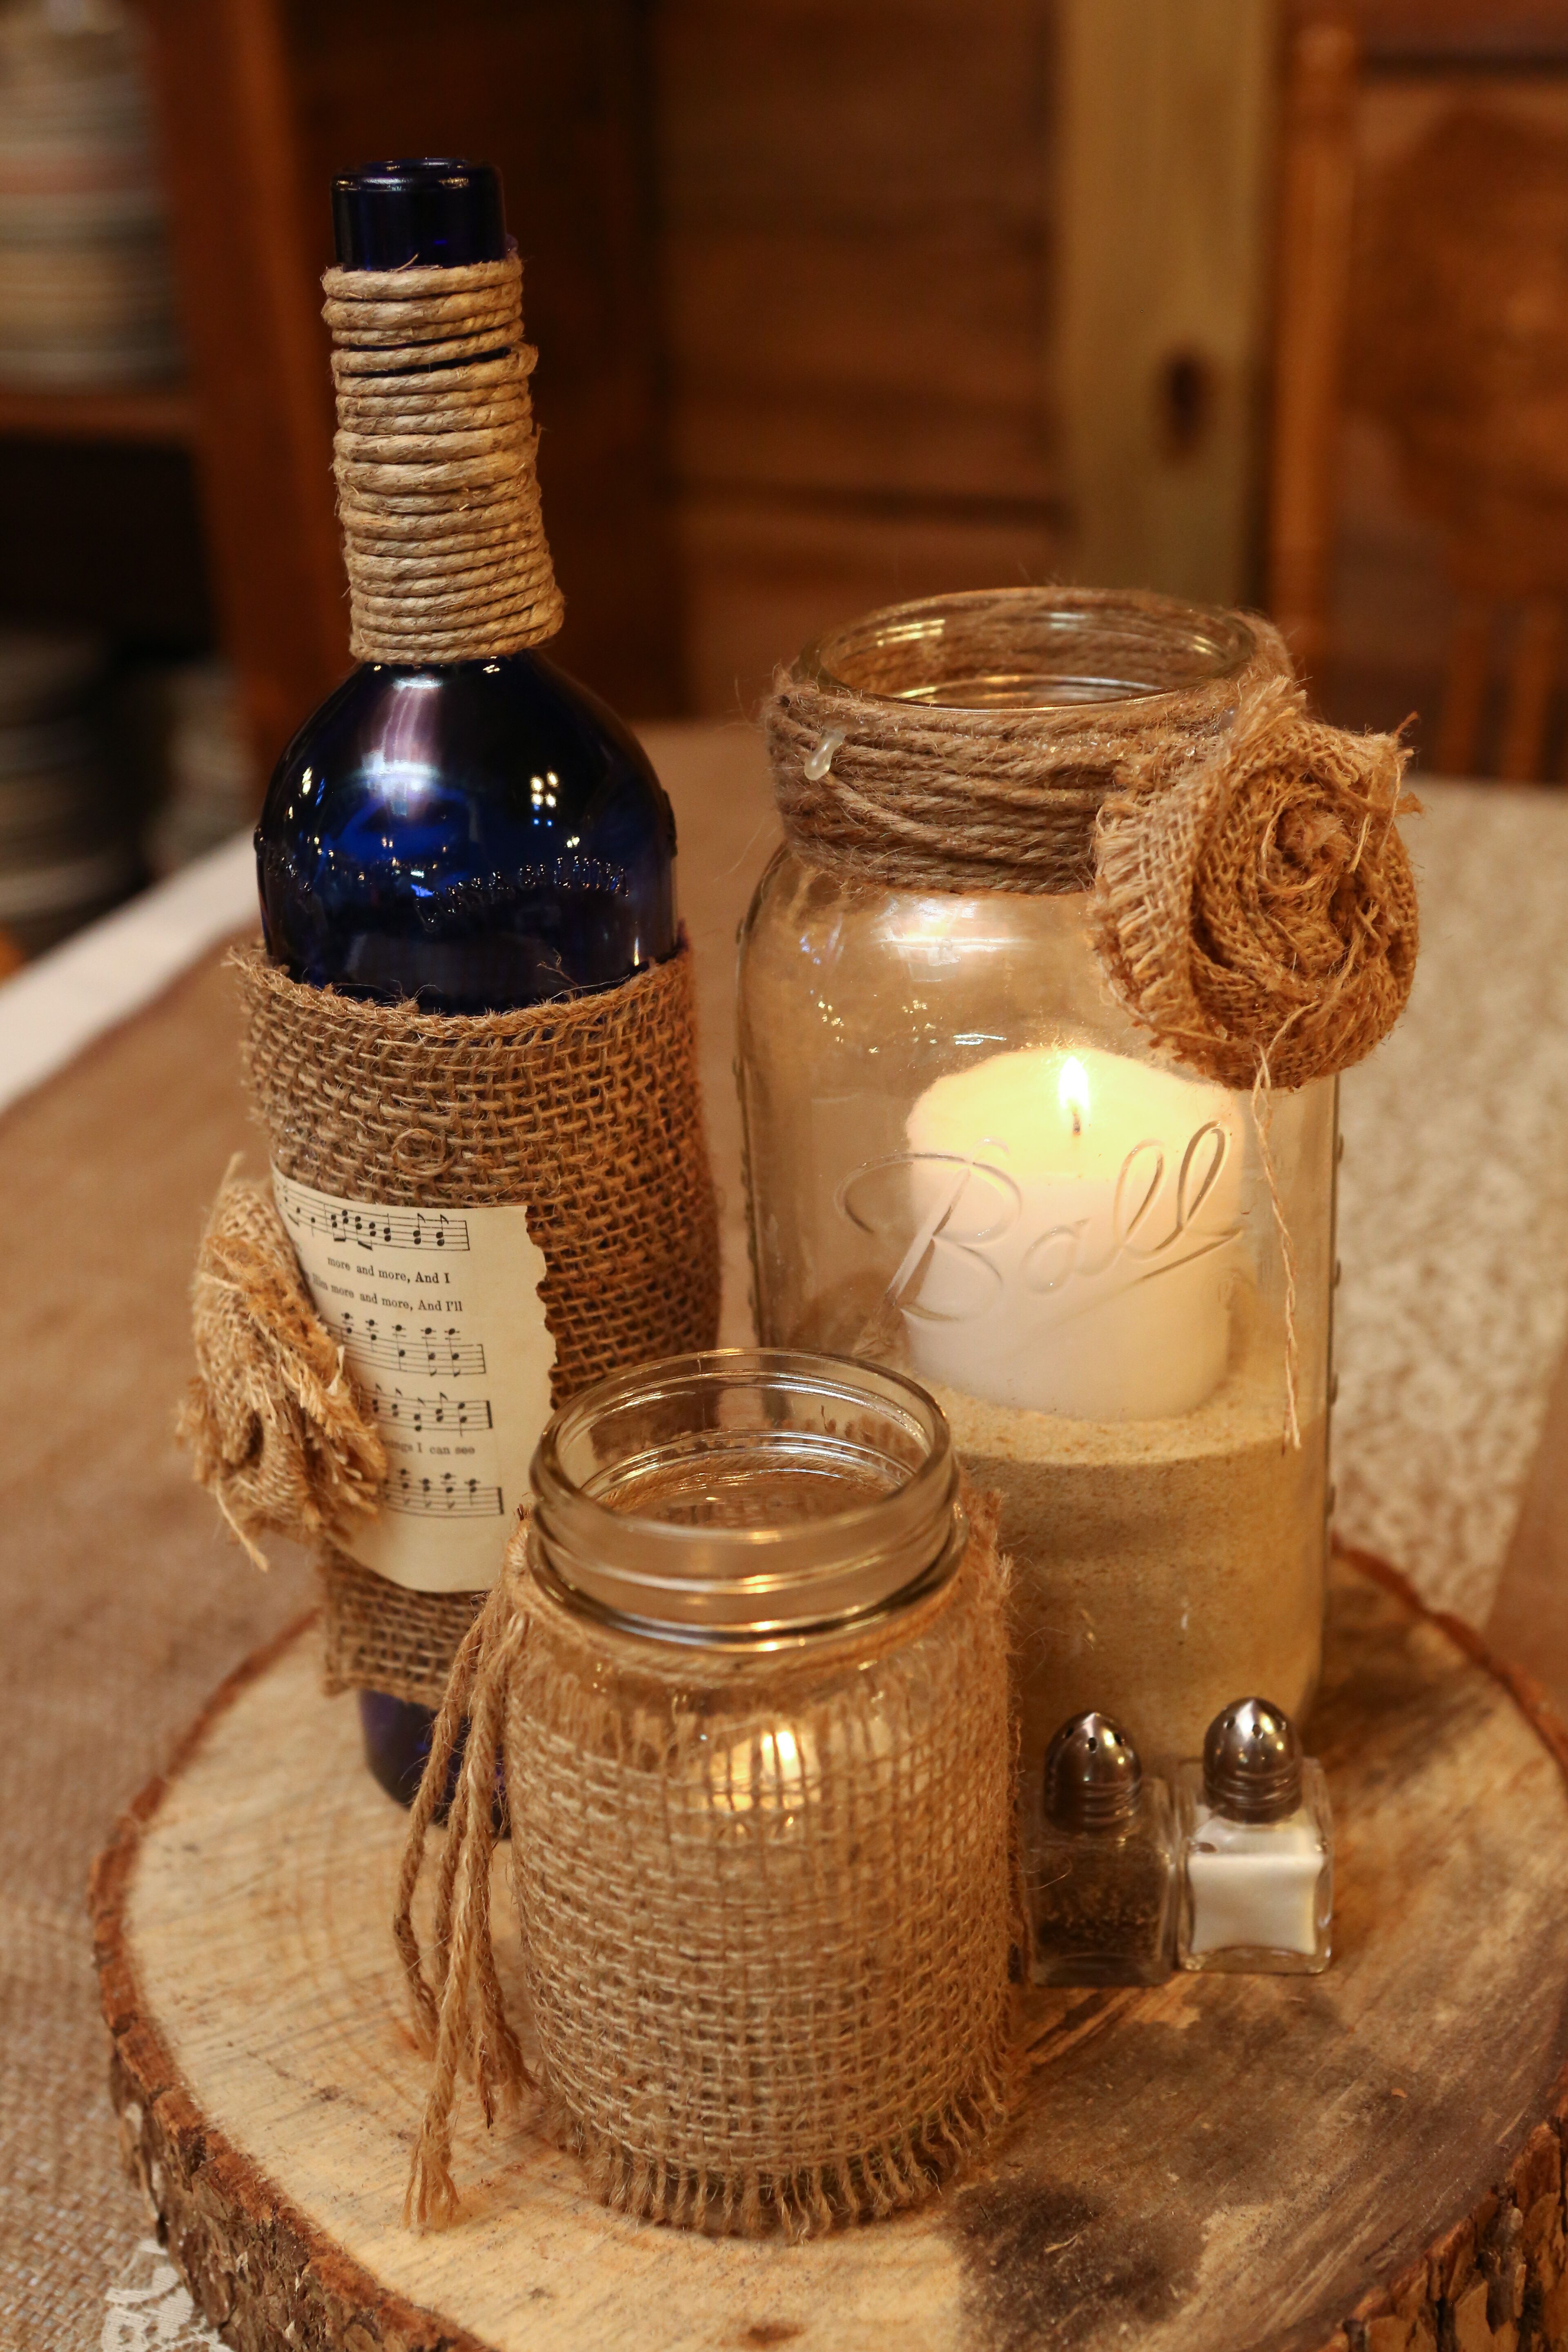
Wrap quart-size mason jars with a single layer of burlap cut to the exact height of the jar. Secure the seam with a vertical line of hot glue, then tie a piece of raffia around the middle. Drop a battery candle inside so the light glows through the fabric weave.
Group three wrapped jars of varying heights on a tray for a balanced centerpiece that can move from table to sideboard as needed. Avoid real candles because the open flame sits too close to the fabric edge.
Simple Burlap Placemats
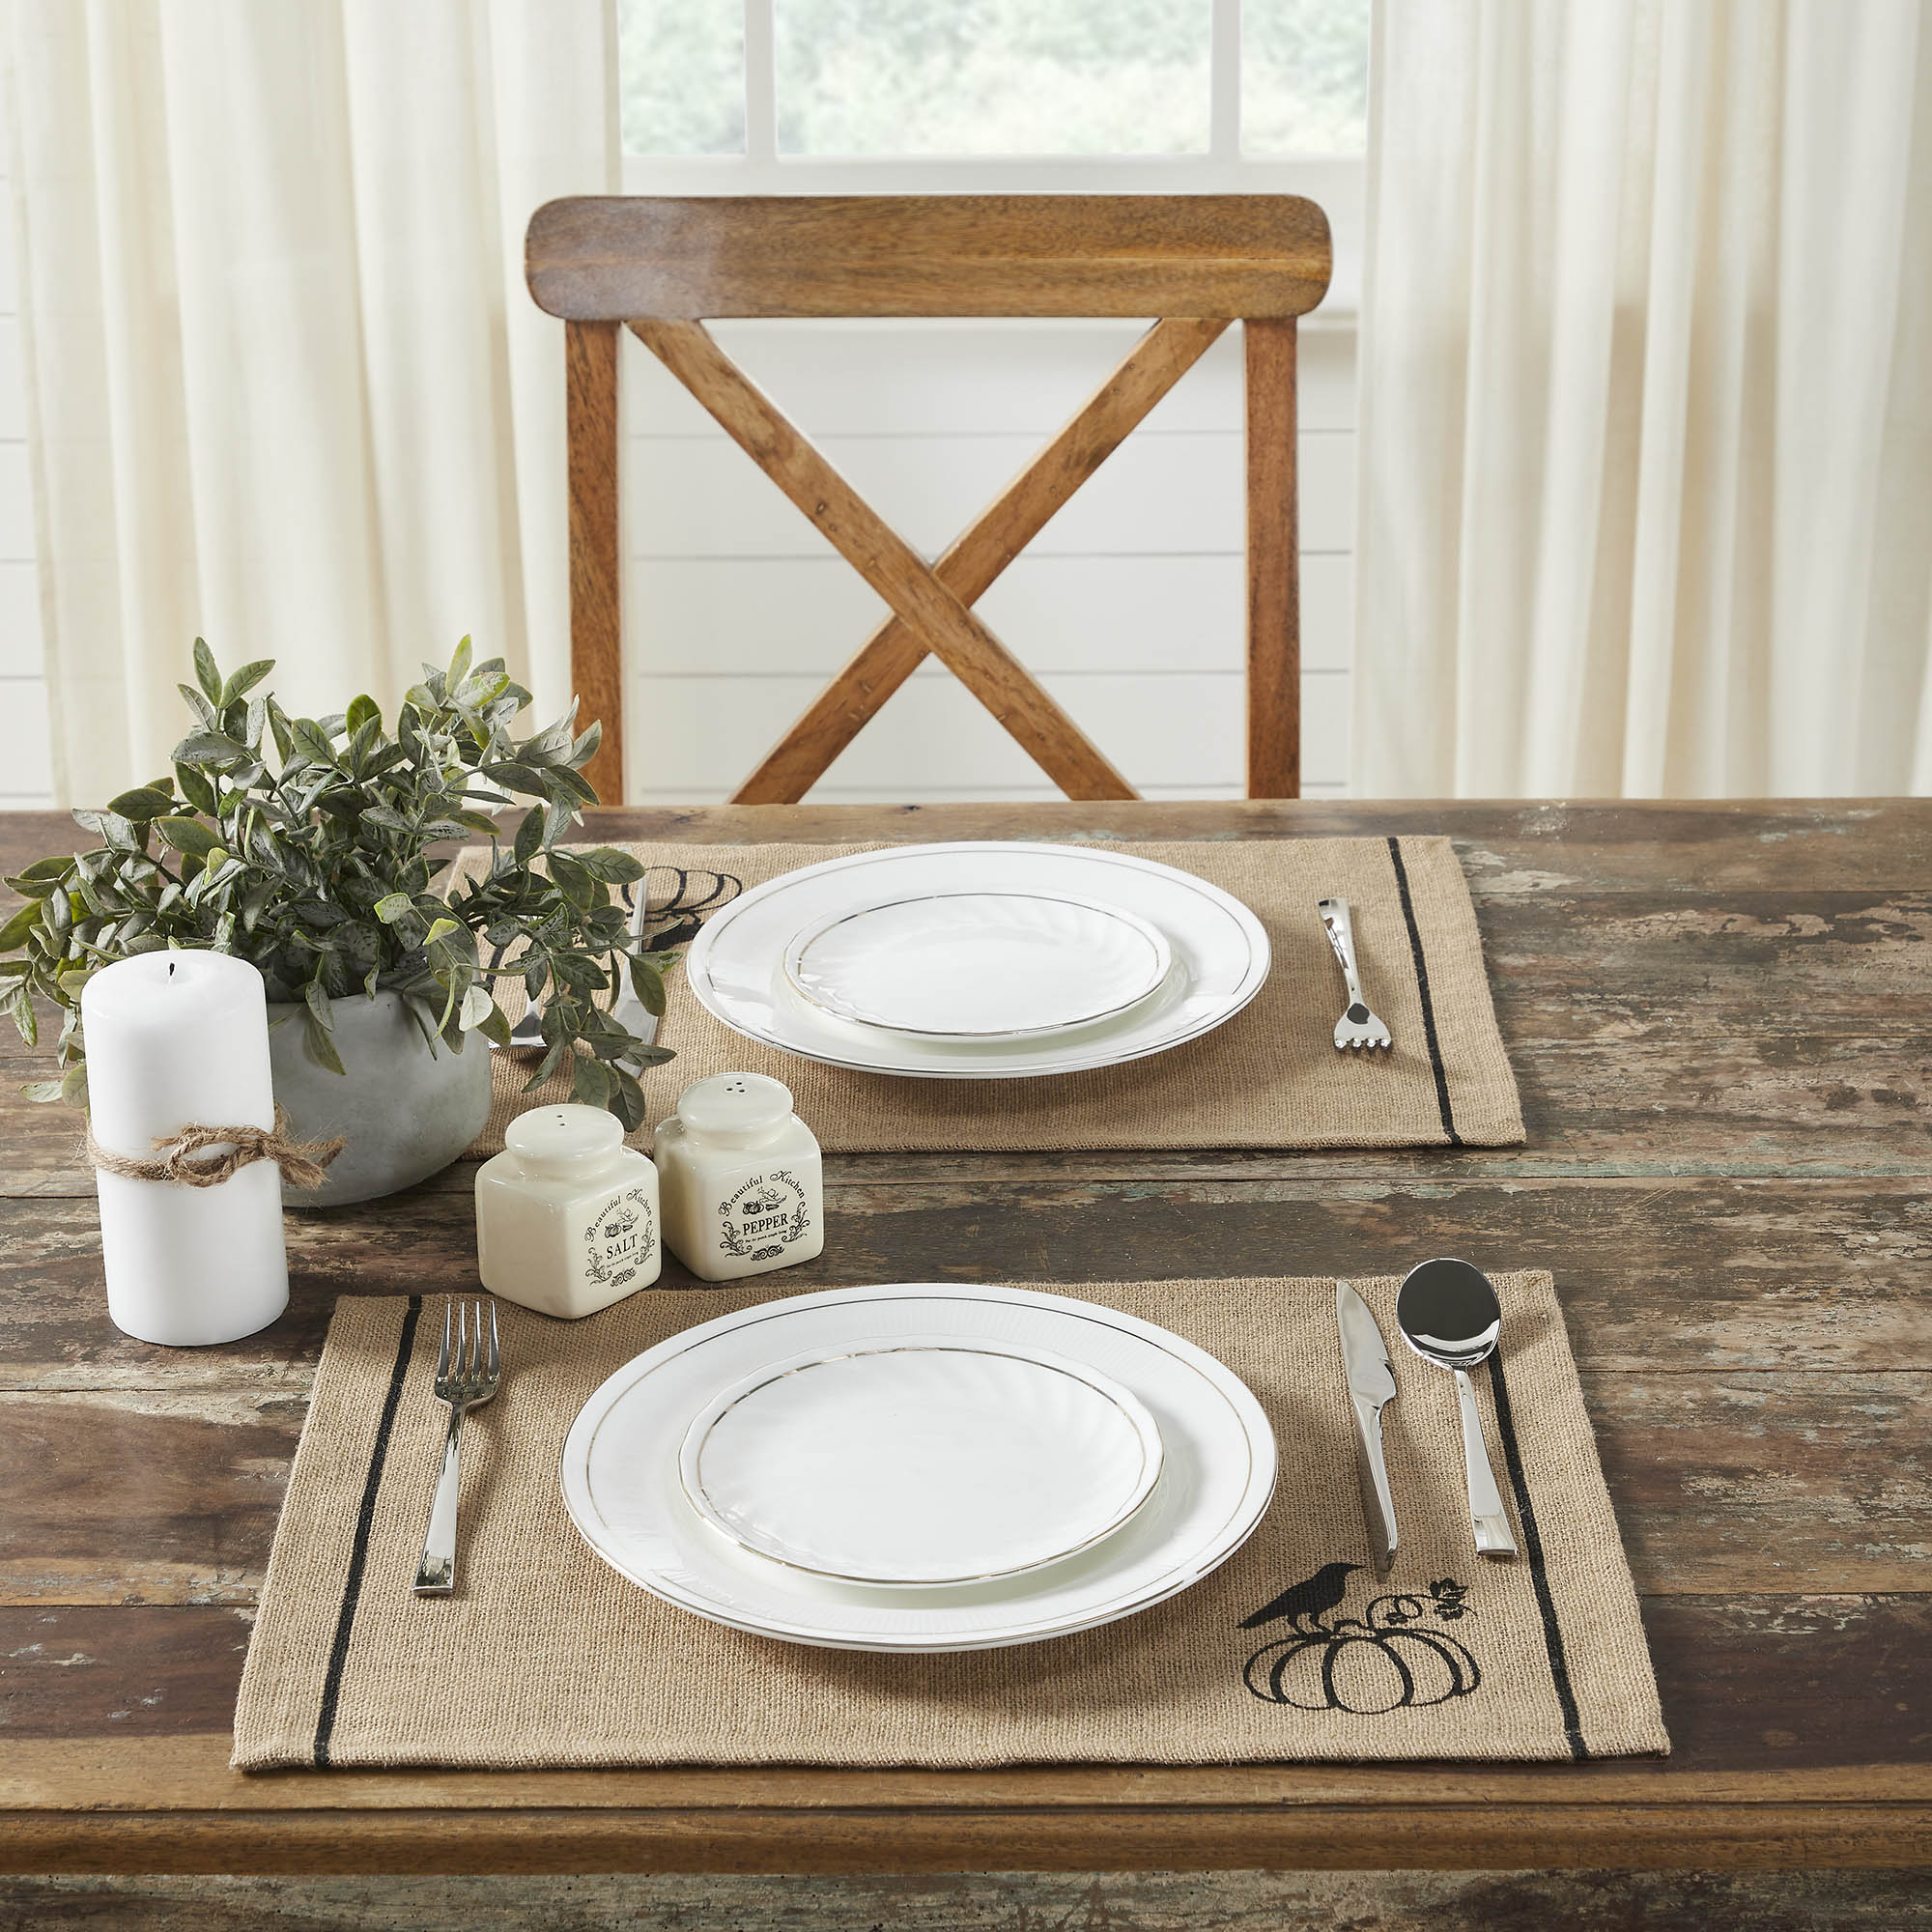
Cut rectangles sixteen by twelve inches from medium-weight burlap and hem all four sides with a narrow rolled edge. The natural color blends with both wood and ceramic dishes, letting the food become the focal point. Add a single stencil of a small acorn in one corner only so the mat remains functional on both sides.
Wash placemats in cold water and lay them flat to dry so the weave does not shrink unevenly. Keep a second set on hand for larger gatherings when extra seating requires additional mats.
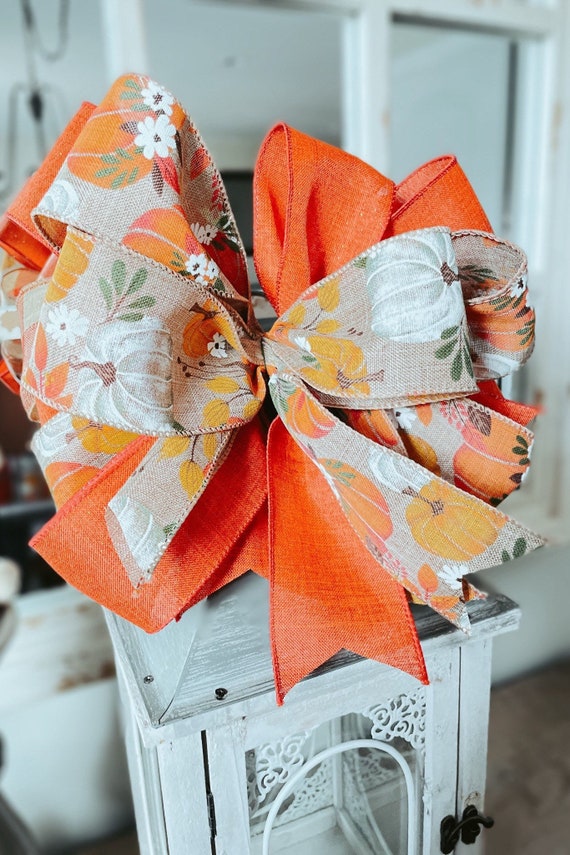
Chair Back Bows in Burlap
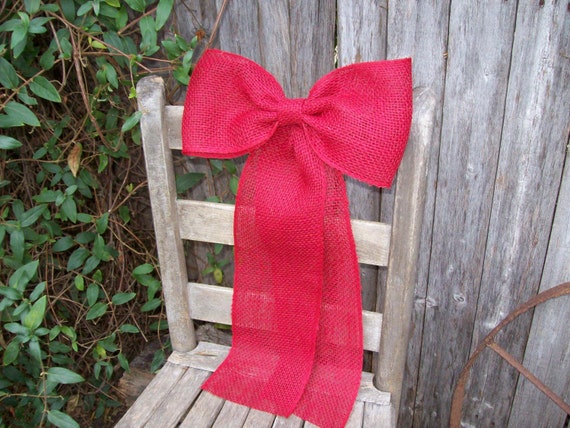
Form large bows from two yards of wide burlap ribbon and wire the center tightly before attaching to the back of each dining chair. The bow width should match the chair back so it sits flat rather than drooping. Use the same ribbon width for every chair to keep the look consistent around the table.
Store the bows flat between seasons by folding them once and placing them in a shallow box so the loops do not crease permanently. Replace the wire every year because repeated bending weakens it.
Mini Scarecrow Displays
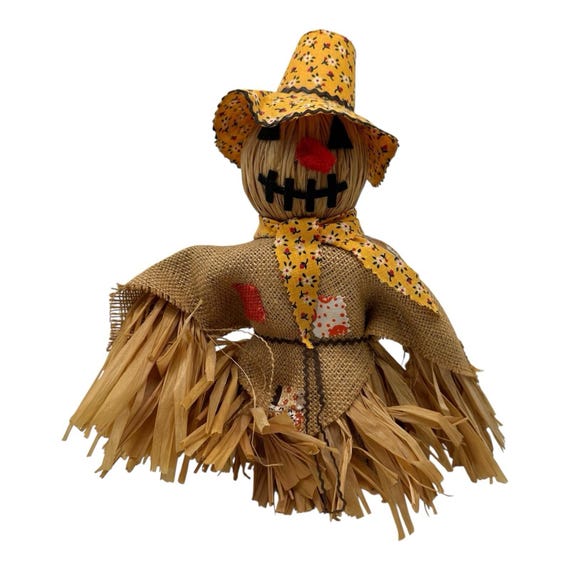
Assemble small scarecrow figures by stuffing a burlap square with fiberfill for the head, then attaching a smaller square body with twine. Draw simple facial features with a permanent marker so the ink does not bleed into the fabric. Set each figure inside a small wooden crate or on a stack of books for height variation.
Keep the figures out of direct sunlight so the marker lines stay crisp through the season. These small versions require less storage space than full-size scarecrows when fall ends.
Candle Sleeve Covers
Measure the circumference of pillar candles and cut burlap rectangles one inch taller than the candle height. Overlap the short edges by half an inch and glue them into a tube shape. Slide the tube over the candle and tie a narrow ribbon at the top edge to keep it in place.
Use these sleeves only with LED candles because real flames can ignite the fabric if the candle burns low. Rotate the sleeves every few weeks so one side does not collect more dust than the other.
Welcome Signs from Burlap

Stretch a piece of burlap over a painted wood frame and staple it to the back for a taut surface. Stencil or hand-letter a short welcome phrase in the center, then add a small cluster of dried wheat at one corner. Hang the sign at eye level in an entryway so guests see it immediately upon entering.
Choose a frame depth of at least one inch so the burlap sits away from the wall and casts a slight shadow. Re-staple the fabric every other season because repeated humidity changes can loosen the tension.
FAQ
How long does a burlap wreath last indoors?
A well-made burlap wreath typically remains intact for two to three full fall seasons when kept away from direct sunlight and high humidity. Rotate its position every few weeks so one side does not fade faster than the other. Store it in a breathable cotton bag rather than plastic to prevent mildew during the off-season.
Can burlap be washed after use as a table runner?
Cold water on a gentle cycle preserves the weave better than hot water, which causes shrinkage. Lay the runner flat to dry instead of using a dryer, then press with a warm iron while slightly damp to remove wrinkles. Spot-clean any spills immediately with a damp cloth before they set into the fibers.
What type of paint works best on burlap for banners?
Fabric paint or acrylic mixed with fabric medium adheres without cracking when the banner is rolled for storage. Test a small corner first because some paints sit on top of the coarse threads rather than soaking in evenly. Allow each layer to dry fully before adding the next to prevent smearing at the edges.
How do you prevent burlap from fraying on pillow covers?
A narrow zigzag stitch along all raw edges contains the threads before assembly. Alternatively, apply a thin line of fabric glue along the inside of the seam allowance so the edge stays neat after repeated handling. Avoid over-washing pillow covers because each cycle loosens the weave further.
Burlap crafts reward simple repetition and natural materials that already exist in most homes during fall.
Leave a Reply