Creating a DIY Easter wreath is one of the most rewarding ways to transition your home from the cold, heavy textures of winter to the vibrant, hopeful energy of spring.
Whether you prefer a rustic farmhouse aesthetic, a modern minimalist hoop, or a whimsical display of pastel eggs, a handmade wreath serves as the perfect focal point for your front door.
By upcycling household items and utilizing natural elements like grapevine and moss, you can create a high-end designer look for a fraction of the retail price.
Essential Materials for DIY Easter Wreath Making
Before diving into specific designs, it is helpful to have a crafter’s toolkit ready.
Depending on your chosen style, you will likely need a combination of the following materials:
| Material | Purpose | Estimated Cost |
|---|---|---|
| Grapevine Base | Provides a sturdy, rustic foundation | $5 – $10 |
| Floral Foam/Hoop | Best for modern or fresh floral designs | $3 – $8 |
| Hot Glue Gun | Securing heavy items like eggs and wood | $10 – $15 |
| Floral Wire/Tape | Attaching stems and greenery invisibly | $4 – $6 |
| Faux Florals | Peonies, tulips, and forsythia are Easter staples | $10 – $20 |
| Decorative Eggs | Plastic, foam, or wooden speckled eggs | $5 – $10 |
| Burlap or Ribbon | Creating the hanging loop and bows | $3 – $7 |
1. The Classic Grapevine & Forsythia Wreath
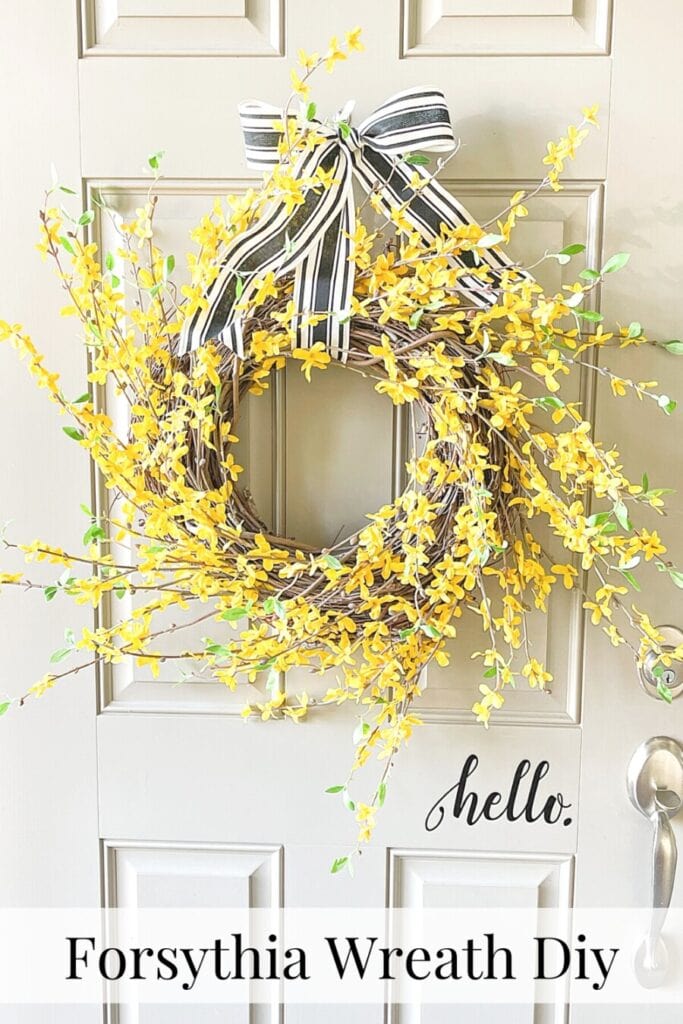
The bright yellow of forsythia is often the first sign of spring. This wreath relies on the contrast between the dark, textured grapevine and the neon pop of the yellow blooms.
To create this, start with a 14-inch grapevine base. Instead of covering the entire circle, focus your florals on one side to create an asymmetrical, modern look.
Use wire cutters to trim forsythia stems into 6-inch pieces and tuck them into the weave of the grapevine, securing them with a dab of hot glue. Add a simple burlap bow at the bottom of the floral arrangement to ground the design.
2. Speckled Egg & Moss Nest Wreath
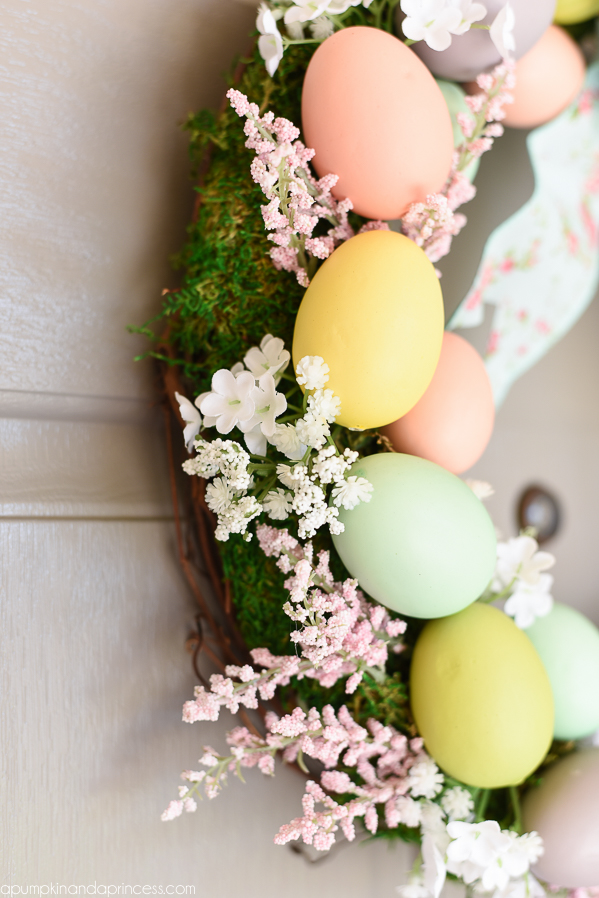
This design mimics a bird’s nest and is perfect for nature lovers. It uses sheet moss to cover a foam wreath form entirely, creating a lush, green backdrop.
Once your moss is glued down, use a variety of foam eggs in different sizes. For a real-world professional touch, paint your eggs with a matte duck egg blue or soft cream and flick a toothbrush dipped in brown acrylic paint over them to create realistic speckles.
Cluster the eggs in groups of three around the wreath to mimic nests, and add a few sprigs of pussy willow for extra height and texture.
3. Rustic Burlap Bunny Wreath

If you want a wreath that is literally shaped like the holiday, the bunny silhouette is a fan favorite.
This requires two grapevine wreaths: one large (for the body) and one small (for the head). Connect the two wreaths using heavy-duty floral wire.
To create the ears, use stiffened white felt or burlap ribbon shaped into loops and wired to the top of the smaller wreath. To keep it sophisticated rather than crafty, skip the googly eyes and instead tie a large, oversized ribbon collar around the bunny’s neck using gingham or pastel linen fabric.
4. Modern Minimalist Hoop Wreath

For those who prefer a less is more approach, the gold hoop wreath is a stunning choice.
This style works best on dark-colored doors where the metallic ring can truly shine. Use a brass embroidery hoop or a metal macramé ring.
Attach a small bundle of eucalyptus and a single large silk peony to the bottom third of the hoop. The key here is negative space—leave the top two-thirds of the hoop completely bare. This is a 15-minute project that looks like it came from a high-end boutique.
5. Pastel Tulle & Pom-Pom Wreath
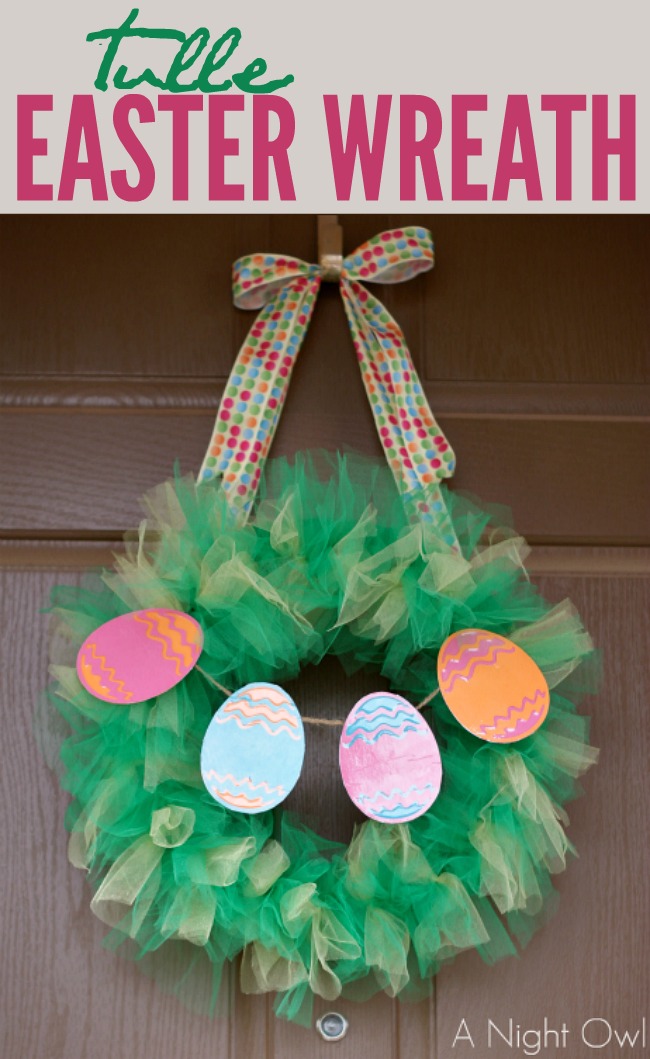
This is an excellent project for families or those who love a soft, tactile aesthetic. Using a wire frame, tie 6-inch strips of pastel tulle (pink, mint, lemon, and lavender) around the wire until the entire frame is fluffy.
Once the base is complete, hot glue handmade yarn pom-poms in coordinating colors. The result is a soft, cloud-like wreath that is lightweight and perfect for protected front doors or interior entryways.
6. Upcycled Rain Boot Door Hanging
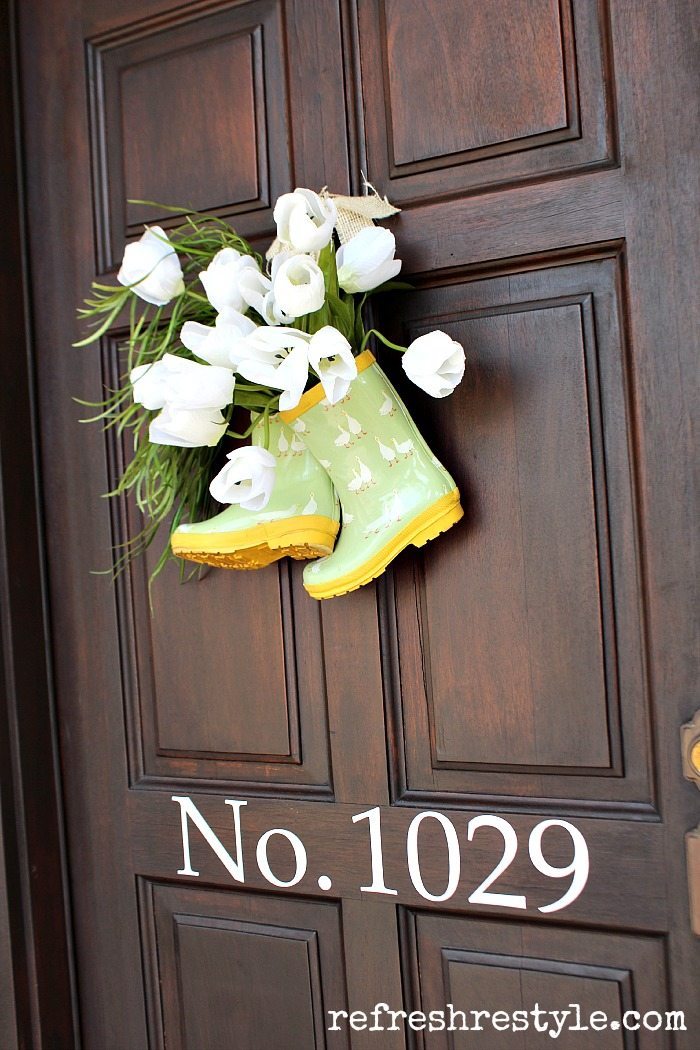
Technically a wreath alternative, this upcycling project is a showstopper. Find an old pair of children’s yellow or floral rain boots (wellies).
Fill the bottom of the boots with rocks or sand to give them weight so they hang straight. Place a piece of floral foam inside the neck of the boot and plant a bouquet of silk tulips, daffodils, and greenery.
Tie the boots together by their pull-tabs with a sturdy ribbon and hang them from your door knocker. It’s a whimsical nod to April showers bring May flowers.
7. Whimsical Carrot-Shaped Tulip Wreath
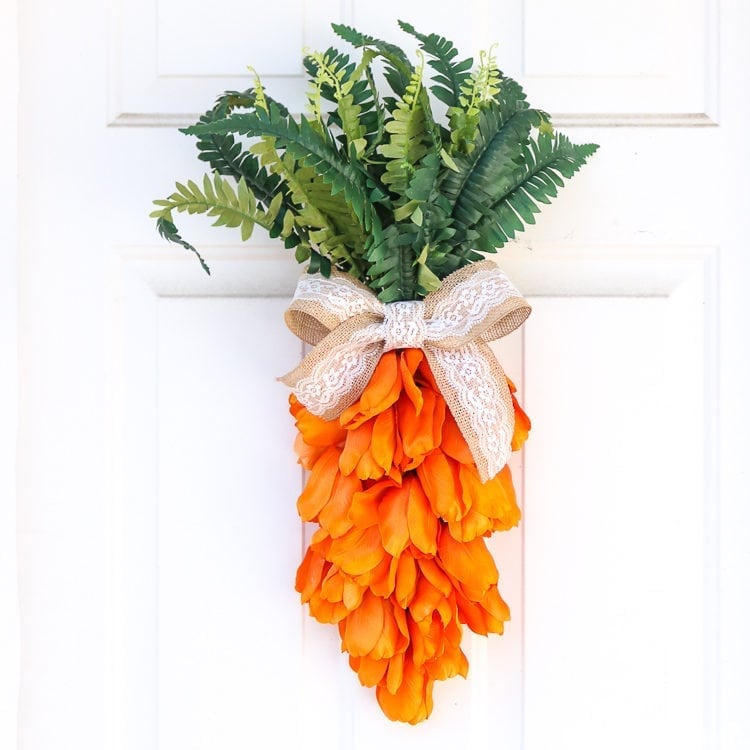
This creative design uses orange tulips to form the shape of a giant carrot. You will need a triangle-shaped wire frame (often sold as tree frames during Christmas, which you can upcycle).
Pack the triangle tightly with orange silk tulips, ensuring the flower heads face outward. At the wide top of the triangle, attach long, wispy green ferns or boxwood stems to act as the carrot top.
This vibrant orange pop is highly visible from the street, providing excellent curb appeal.
8. Farmhouse Boxwood & Buffalo Plaid Wreath
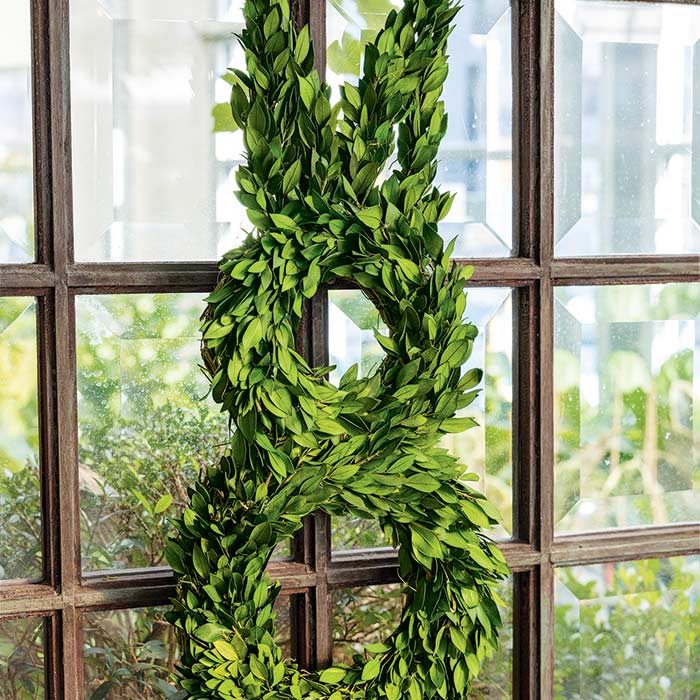
Boxwood is the gold standard for farmhouse decor because it stays green year-round. Start with a pre-made boxwood wreath or a wire frame covered in boxwood clippings.
To make it Easter, add a wooden Happy Easter sign across the center. Finish the look with a large multi-loop bow made of black and white buffalo plaid ribbon.
This style is timeless and can easily transition into the rest of spring by simply removing the Easter sign.
9. Vintage Book Page Flower Wreath
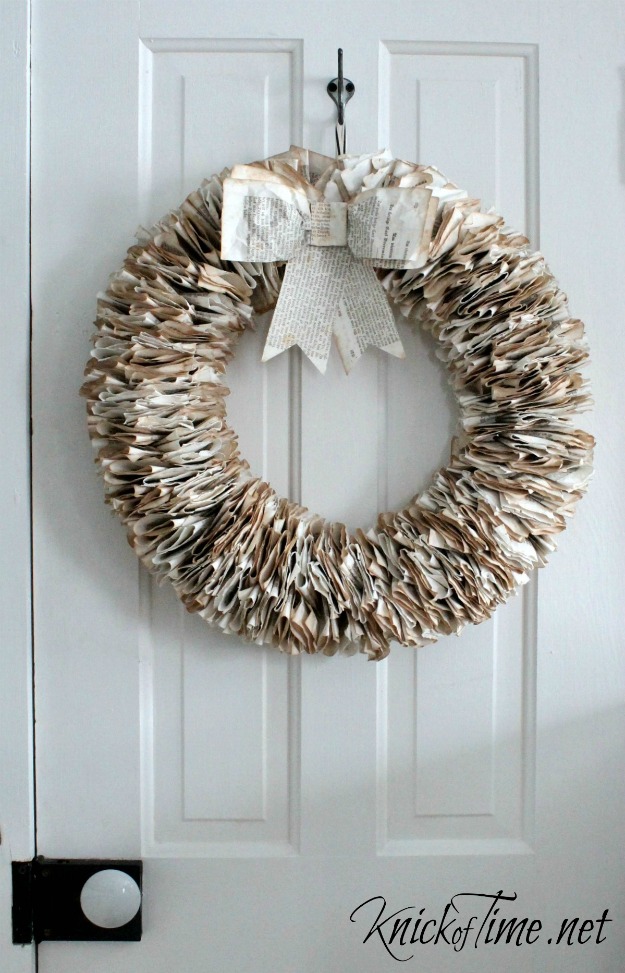
For the eco-conscious crafter, upcycling an old, damaged book into paper flowers creates a stunning, neutral-toned wreath.
Roll book pages into cones or fold them into accordion flowers. Glue these onto a flat cardboard ring.
To give it an Easter touch, nestle a few gold-leafed eggs in the center of the paper blooms. The cream and black text provide a sophisticated vintage vibe that pairs beautifully with a wooden front door.
10. Rainbow Felt Flower Wreath
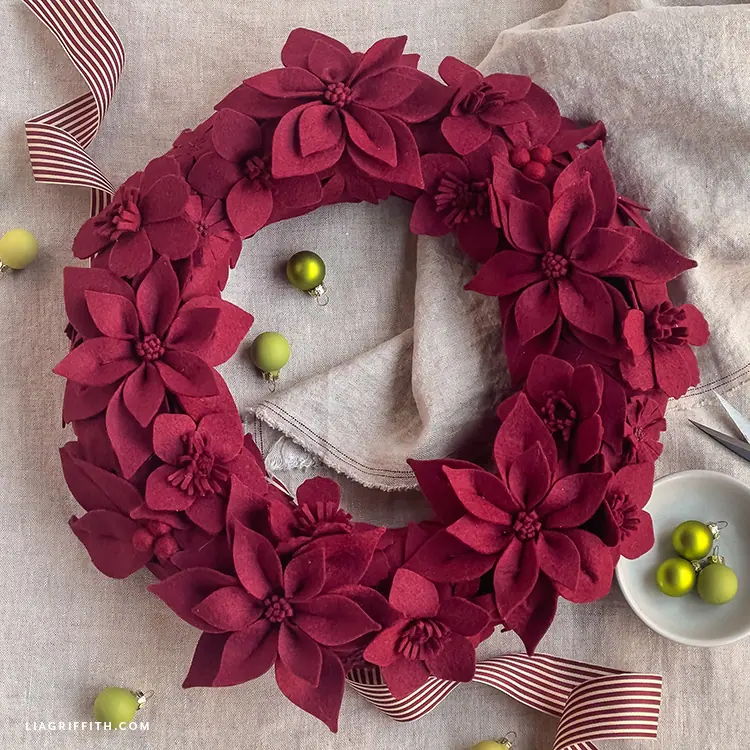
Felt is a forgiving medium that offers deep, saturated colors. Cut circles of felt in various spring shades, then cut them into spirals.
Roll the spirals from the outside in to create beautiful rosettes. Cover a straw wreath form (keep the plastic wrap on the straw to prevent shedding) with these felt flowers.
This wreath is incredibly durable and can be stored and reused for years without the petals fraying or fading like some silk flowers might.
Step-by-Step Tutorial: The Signature Spring Nest Wreath
If you are new to wreath making, this Nest Style wreath is the best place to start.
It combines various techniques that you can apply to any of the ideas listed above.
Step 1: Prepare the Base
Take your grapevine wreath and pull out any stray or loose twigs.
If you want a more manicured look, you can spray paint the grapevine a soft white or light grey, but the natural brown is classic for Easter.
Step 2: Create the Greenery Foundation
Using floral wire, attach bushes of greenery (like eucalyptus or ivy) to the bottom half of the wreath.
Ensure the stems all face the same direction to create a sense of movement.
Step 3: Layer the Focal Points
Apply hot glue to the back of your largest decorative eggs. Press them firmly into the grapevine, nesting them among the greenery.
Pro Tip: Always use an odd number of focal points (3, 5, or 7) as it is more visually pleasing to the eye.
Step 4: Add Fillers
In the gaps between the eggs and greenery, add small filler flowers like Baby’s Breath or tiny daisies.
This hides any visible wire or glue spots.
Step 5: Secure the Hanging Loop
Flip the wreath over. Thread a 10-inch piece of wire through the top of the grapevine and twist it into a loop.
Cover the wire with a piece of ribbon for a finished, professional look.
Tips for Long-Lasting Outdoor Wreaths
- UV Protection: If your front door gets direct sunlight, spray your finished wreath with a UV-resistant clear matte sealer. This prevents the sun from fading your bright fabric and plastic eggs.
- Weatherproofing: For wreaths with paper or delicate felt, ensure they are hung behind a storm door. If your door is exposed to rain, stick to grapevine, plastic eggs, and high-quality silk florals.
- Storage: Store your wreaths in specialized plastic wreath bins or hang them on a coat hanger covered with a large trash bag to prevent dust buildup during the off-season.
Frequently Asked Questions (FAQ)
What is the best base for a DIY Easter wreath?
Grapevine is the most versatile and beginner-friendly base. It allows you to tuck stems into the weave without needing a lot of glue.
For a more modern look, metal hoops are currently very trendy.
How can I make my DIY wreath look expensive?
The secret to a high-end look is layering. Don’t just stick flowers on a base.
Layer different textures of greenery, use various sizes of eggs, and choose ribbons with finished (wired) edges so you can shape the bows.
Can I use real eggs for an Easter wreath?
While possible if blown out (hollowed), real eggshells are extremely fragile and will likely break if the door slams.
It is better to use high-quality foam or wooden eggs that are painted to look real.
How much does it cost to make a DIY Easter wreath?
Most DIY wreaths cost between $15 and $30. This is significantly cheaper than boutique wreaths, which often retail for $75 to $150.
Conclusion
Creating your own Easter wreath is more than just a craft project; it’s a way to welcome the season of renewal into your home.
From the rustic charm of grapevine and burlap to the sleek lines of a minimalist hoop, there is a style to fit every personality and porch.
By following these tutorials and utilizing the material guide, you can create a professional-grade decoration that will be the envy of your neighborhood.
Grab your glue gun, select your favorite pastel palette, and start crafting your way into spring!
Leave a Reply