Creating an adorable plastic bottle turtle is one of the most rewarding upcycling projects for kids and parents alike. This craft transforms everyday household waste—specifically the bottom of a plastic soda or water bottle—into a charming, long-lasting toy or decoration.
Not only does this project teach children the importance of recycling and environmental stewardship, but it also helps develop fine motor skills through cutting, tracing, and gluing. By using the naturally segmented bottom of a plastic bottle, you create a realistic shell that serves as the centerpiece for a variety of colorful and creative turtle characters.
The Essential Materials for Your Turtle Craft
Before diving into the construction process, gather your supplies. This craft is highly customizable, but the foundation remains the same.
Using high-quality craft foam or thick felt ensures the turtle’s body is sturdy enough to support the plastic shell.
| Material | Purpose | Recommended Type |
|---|---|---|
| Plastic Bottle | The Turtle’s Shell | 500ml or 2L soda bottles (clean and dry) |
| Craft Foam/Felt | The Turtle’s Body | 2mm thick EVA foam or stiff felt |
| Scissors | Cutting | Sharp craft scissors (adult supervision required) |
| Adhesive | Assembly | Low-temp glue gun or strong tacky glue |
| Googly Eyes | Features | Self-adhesive or glue-on 8mm eyes |
| Permanent Markers | Decoration | Sharpies or acrylic paint pens |
| Decorative Elements | Personalization | Buttons, sequins, glitter, or pompoms |
Step-by-Step Tutorial: The Classic Plastic Bottle Turtle
Follow these detailed steps to create a standard floating turtle. This method is the foundation for all the variations listed later in this article.
Step 1: Prepare the Shell
Start by thoroughly cleaning a plastic bottle and removing the label. Using a craft knife or sharp scissors, cut off the bottom of the bottle about 2 to 3 inches from the base.
You want to follow the natural “star” or “flower” shape of the bottle’s bottom. Trim the edges so they are smooth and level.
Step 2: Create the Body Template
Place the cut bottle bottom onto a sheet of craft foam or felt. Trace a circle around the bottle that is about half an inch wider than the diameter of the bottle.
Before cutting, draw the head, four flippers (legs), and a small pointed tail extending from this circle.
Step 3: Cut and Refine
Carefully cut out the entire turtle body shape. If you are working with younger children, an adult should handle the cutting of the plastic bottle, while the child can cut the foam body.
Ensure the head is rounded and the flippers are symmetrical.
Step 4: Secure the Shell
Apply a bead of low-temperature hot glue or a thick line of tacky glue along the rim of the plastic bottle bottom. Press it firmly onto the center of the foam body.
Hold it in place for 30 seconds to ensure a tight seal. Note: High-temperature glue guns can melt thin plastic, so stick to low-temp settings.
Step 5: Add Personality
Glue two googly eyes onto the head. Use a permanent marker to draw a small smile and perhaps some nostrils.
You can also use markers to draw “scutes” (the patterns on a turtle shell) directly onto the plastic or the foam flippers.
10 Creative Variations of Plastic Bottle Turtles
To make the most of this craft, here are 10 unique ways to style and use your plastic bottle turtles. Each variation offers a different aesthetic or functional purpose.
1. The Floating Bath Toy Turtle
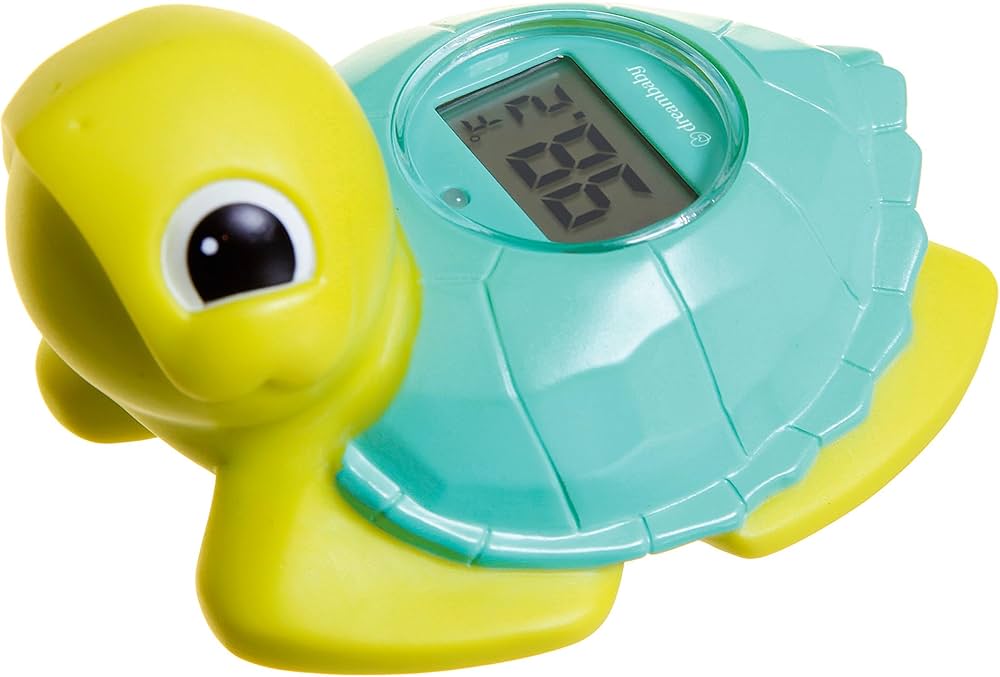
This version is designed specifically for water play. Use waterproof craft foam (EVA foam) for the base and ensure the shell is sealed completely with waterproof silicone glue.
Because the plastic bottle traps air inside, the turtle will float perfectly in the bathtub or a backyard kiddie pool. Kids can race them or watch them bob along the waves.
2. The Sparkly Glitter Shell Turtle
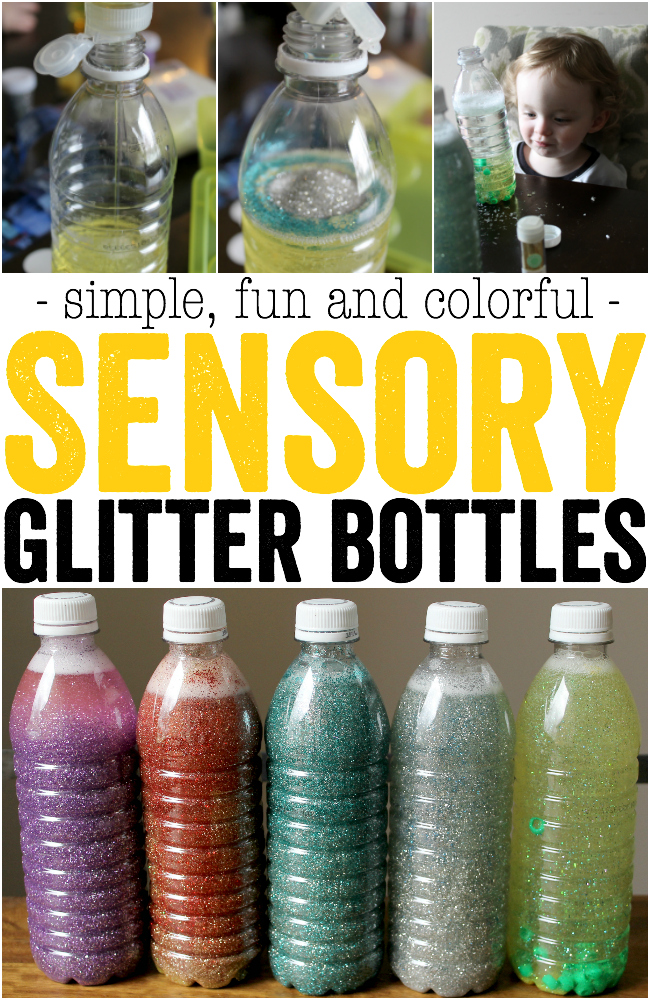
For a more magical look, apply a layer of clear-drying school glue to the inside of the plastic bottle bottom before attaching it to the base.
Shake in a generous amount of iridescent or green glitter, swirl it around to coat the interior, and dump out the excess. Once dry, the shell will have a deep, shimmering crystalline effect that won’t rub off on hands.
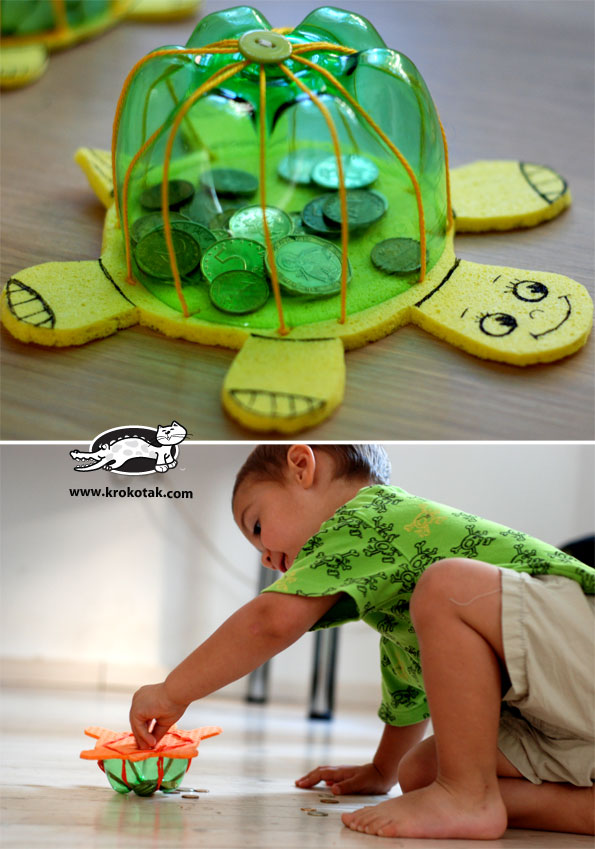
3. The Turtle Piggy Bank
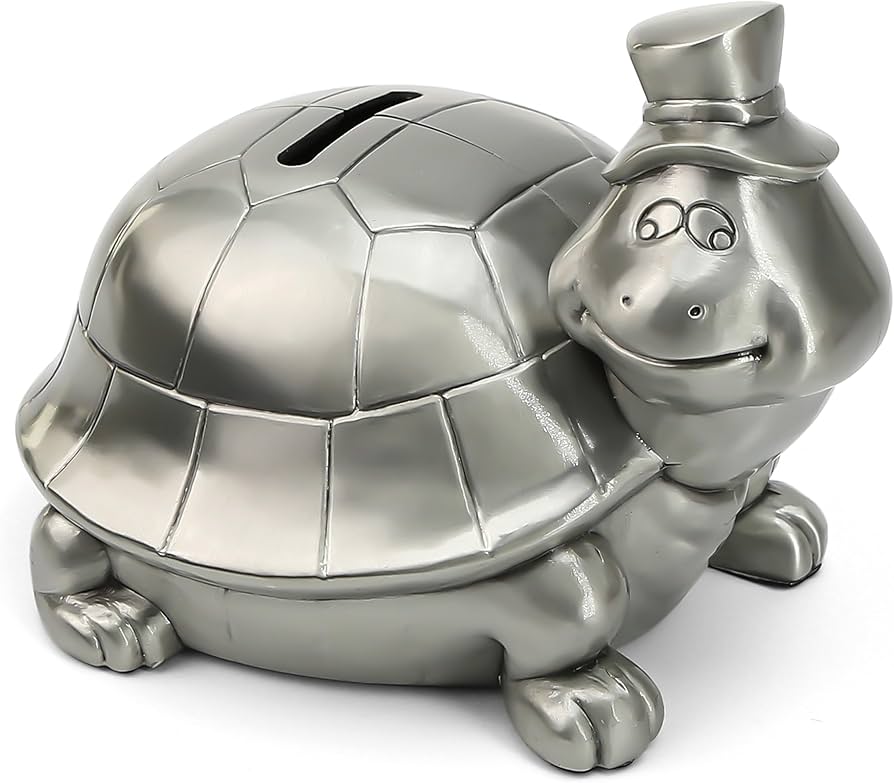
Turn your craft into a functional tool for teaching financial literacy. Before gluing the shell to the base, use a utility knife to cut a small slit (about 1.5 inches long) in the top center of the plastic shell.
Secure the shell to the foam base. Children can drop coins through the slit. To retrieve the money, you can use a Velcro strip on one side of the shell instead of permanent glue.
4. The Pompom Head Turtle
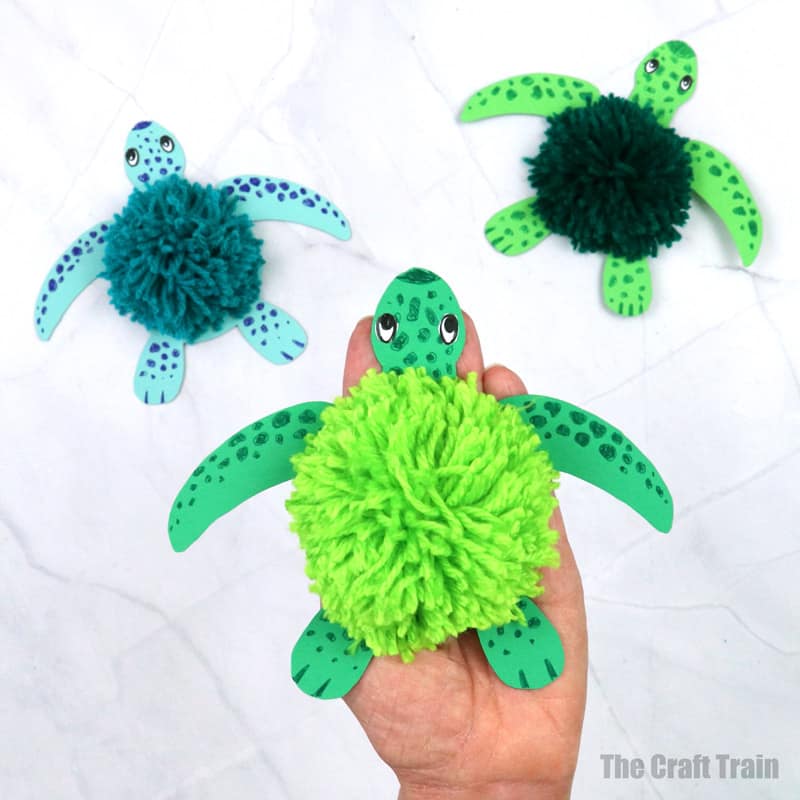
Instead of a flat foam head, give your turtle a 3D look. Glue a large green pompom to the front of the foam base to serve as the head.
Attach the googly eyes to the pompom. This gives the turtle a soft, “kawaii” (cute) appearance that is very popular with younger children. You can also use smaller pompoms for the feet.
5. The Fabric-Wrapped Shell Turtle
To give the turtle a more “shabby chic” or rustic home decor feel, wrap the plastic shell in a scrap of colorful cotton fabric or lace.
Apply Mod Podge to the outside of the plastic bottle bottom, press the fabric over it, and trim the edges. This hides the plastic look and makes the turtle feel like a designer plush toy.
6. The Glowing Nightlight Turtle
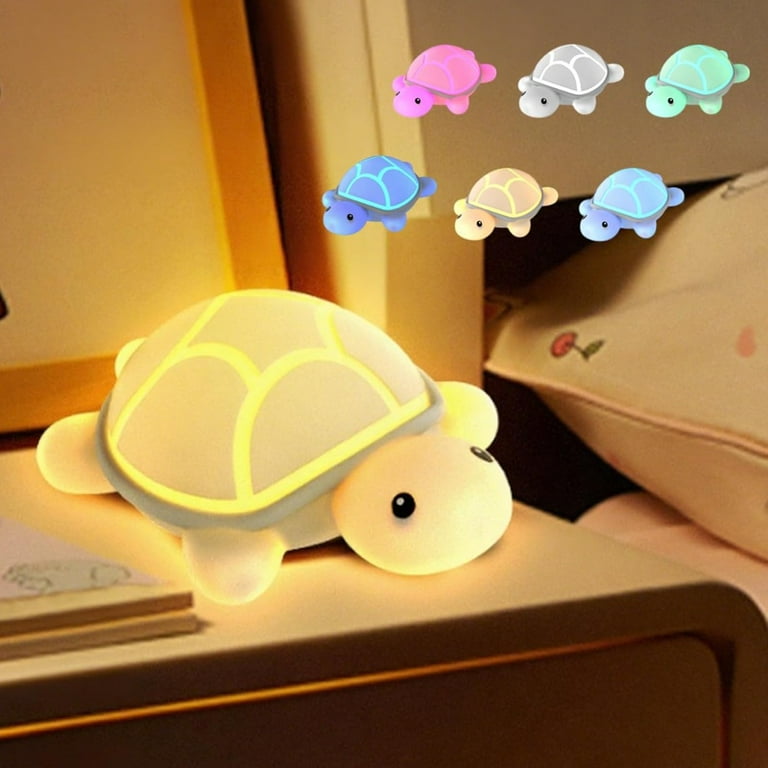
This is a favorite for bedrooms. Instead of gluing the shell permanently, create a “pressure fit” or use a small piece of double-sided tape.
Place a battery-operated LED tea light on the foam base and set the plastic shell over it. Use a green or blue tinted bottle for a soothing glow. The ridges of the bottle will project beautiful patterns onto the walls.
7. The Rainbow Painted Turtle
Using acrylic paint or multi-surface paint pens, decorate each “segment” of the bottle bottom with a different color. This is a great way to teach color theory to kids.
You can paint the inside of the bottle for a glossy finish or the outside for a textured, matte look. Adding white dots or swirls can mimic the patterns of a real Box Turtle or Painted Turtle.
8. The Button-Back Turtle
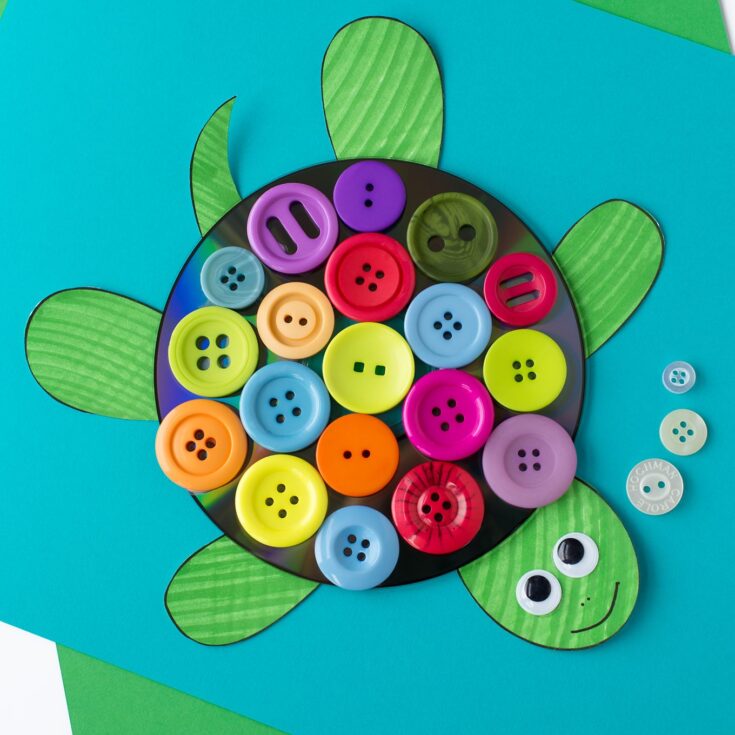
For a tactile, sensory experience, glue various sizes of green, brown, and yellow buttons onto the surface of the plastic shell.
This adds weight to the craft and creates a wonderful mosaic effect. It’s an excellent way to use up leftover buttons from old clothing while adding a high-end “boutique” look to the project.
9. The Succulent Planter Turtle
Transform the turtle into a living piece of decor. Cut the plastic bottle slightly taller (about 4 inches) and poke a few drainage holes in the bottom.
Glue the foam legs and head directly to the sides of the bottle rather than a flat base. Fill the shell with potting soil and plant a small succulent or air plant. It looks like the plant is growing right out of the turtle’s back!
10. The Beaded Sea Turtle
Before attaching the shell, thread small pony beads onto some fishing line or thin wire and wrap them around the base of the shell.
You can also fill the empty shell with colorful beads or sea shells before gluing it down. When the turtle is moved, it acts like a rattle, making it an engaging sensory toy for toddlers.
Why Upcycling is Important for Kids
Engaging in “trash-to-treasure” projects like the plastic bottle turtle offers several developmental benefits:
- ⬤ Environmental Awareness: It starts a conversation about where plastic goes and how we can reduce waste.
- ⬤ Resourcefulness: It teaches children to look at mundane objects and see potential rather than garbage.
- ⬤ Fine Motor Skills: The precision required to trace the bottle and cut around the flippers strengthens hand-eye coordination.
- ⬤ Scientific Curiosity: You can pair this craft with a lesson on marine biology, discussing why sea turtles are endangered and how plastic in the ocean affects them.
Tips for Success and Safety
Sanding the Edges: After cutting the plastic bottle, the edges can be sharp. Use a piece of fine-grit sandpaper or a nail file to smooth the edges before letting a child handle it.
The Iron Method: For perfectly smooth edges, briefly press the cut edge of the plastic bottle against a medium-heat clothing iron (protected by parchment paper). The plastic will curl inward slightly, creating a smooth, rounded rim.
Adhesive Choice: While hot glue is fast, white school glue or “Tacky Glue” is safer for very young children. Just keep in mind that these require longer drying times (usually overnight).
Bottle Variety: Experiment with different brands. Some bottles have five-pointed bases, while others have more intricate, flower-like designs. Each provides a different “species” of turtle.
Frequently Asked Questions
What is the best glue to use for plastic and foam?
A low-temperature hot glue gun is the most efficient choice because it bonds instantly. However, for a kid-safe alternative, “Aleene’s Tacky Glue” or a similar thick craft glue works well, though it requires patience while drying.
Can I use water-based markers to decorate the shell?
Water-based markers (like standard Crayola markers) will usually rub off or bead up on the plastic. It is best to use permanent markers (Sharpies) or acrylic paint pens for a design that stays put.
How do I make the turtle waterproof?
If you want the turtle to play in the water, use EVA foam (the kind used for gym mats or standard craft foam sheets) and a waterproof adhesive like E6000 (adults only) or a high-quality silicone sealant.
What size bottle works best?
A standard 500ml water bottle makes a small, “hatchling” sized turtle. A 2-liter soda bottle makes a large “mother” turtle. Creating a family of different sizes is a popular way to extend this project.
Conclusion
The plastic bottle turtle craft is a hallmark of creative upcycling. It bridges the gap between environmental education and artistic expression, resulting in a toy that is as durable as it is adorable.
Whether you are making a simple foam-based turtle or a sophisticated glowing nightlight, the process of turning “trash” into a friendly sea creature is a lesson in creativity that stays with a child long after the glue has dried.
By following this guide and exploring the ten variations provided, you can create an entire colony of these charming recyclables while keeping plastic out of our landfills and oceans.
Leave a Reply