Knitting in the round is a transformative skill that elevates a beginner from simple rectangular scarves to professional-looking, seamless garments and home decor.
By using circular needles or double-pointed needles (DPNs), you create a continuous tube of fabric, eliminating the need for bulky seams and the tedious task of sewing pieces together at the end.
Whether you are looking to create a cozy beanie, a modern plant cozy, or a sustainable kitchen accessory, circular knitting offers a fluid, meditative rhythm that many crafters prefer over flat knitting.
To help you master this technique, we have curated seven high-authority, beginner-friendly projects that focus on texture, utility, and modern aesthetics.
1. The Classic Beginner’s Stockinette Beanie
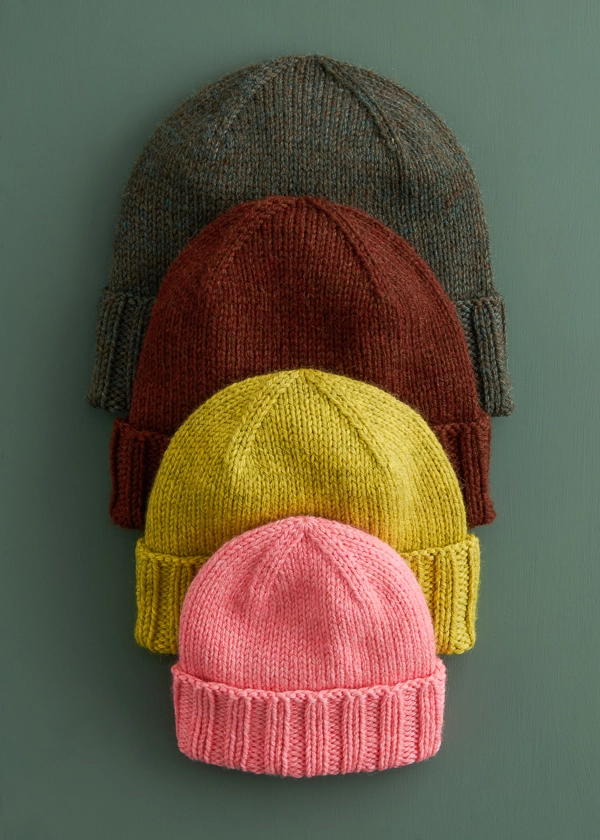
The beanie is the quintessential circular knitting project.
Because you are knitting in a continuous spiral, you only need to perform the knit stitch to achieve the smooth “Stockinette” look, as you are always working on the “right side” of the fabric.
Materials Needed
- • Yarn: 100g of Worsted weight wool or acrylic blend.
- • Needles: 16-inch circular needles (5.0mm) and a set of DPNs for the crown decrease.
- • Tools: Stitch marker, tapestry needle.
Step-by-Step Instructions
- 1. Cast On: Cast on 80 stitches (standard adult size) onto your circular needles.
- 2. The Join: Ensure your stitches aren’t twisted and place a marker. Join the round by knitting the first stitch of the cast-on row.
- 3. The Brim: Work in K2, P2 ribbing (Knit 2, Purl 2) for 2 inches. This provides the stretch needed to stay on your head.
- 4. The Body: Knit every stitch until the hat measures 7 inches from the cast-on edge.
- 5. The Decrease: Switch to DPNs as the circumference narrows. Knit 8, Knit 2 Together (K2Tog) across the round. Continue decreasing in subsequent rounds (K7, K2Tog; K6, K2Tog) until 8 stitches remain.
- 6. Finishing: Cut the yarn, thread it through the remaining loops, and weave in the ends.
2. The Chunky Infinity Cowl
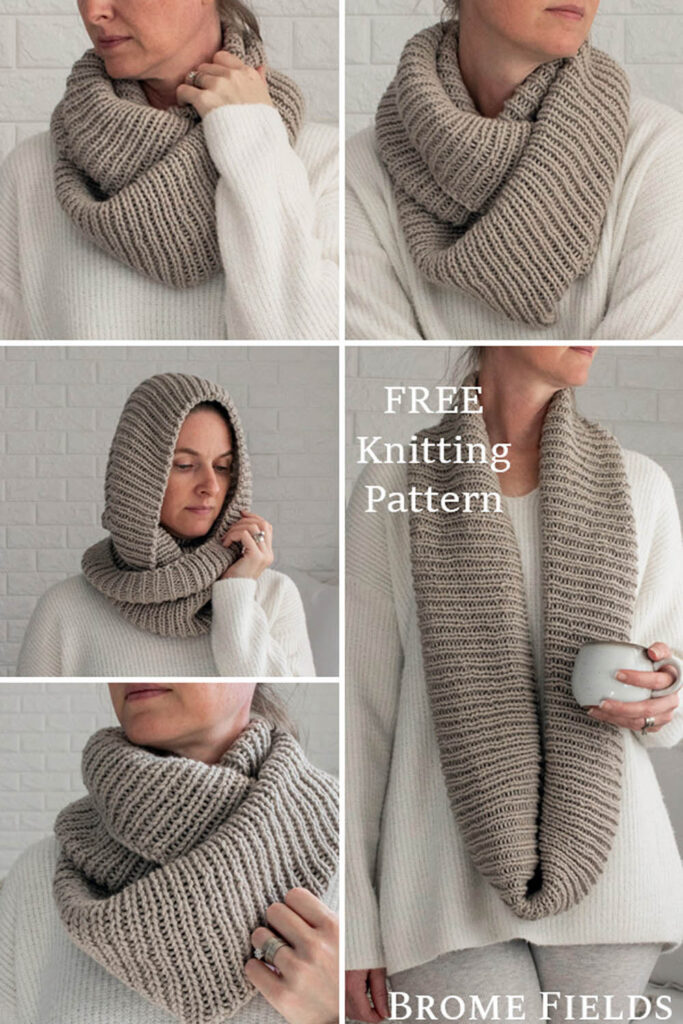
An infinity cowl is a stylish, functional accessory that teaches you how to manage a large number of stitches on a long circular needle.
This project uses Seed Stitch to add sophisticated texture.
Materials Needed
- • Yarn: 200g of Super Bulky yarn.
- • Needles: 24-inch or 32-inch circular needles (9.0mm or 10.0mm).
- • Tools: Large stitch marker.
Step-by-Step Instructions
- 1. Cast On: Cast on an odd number of stitches (e.g., 99 stitches) to ensure the seed stitch pattern offsets correctly each round.
- 2. The Pattern: Join in the round. Work a pattern of [K1, P1] continuously. Because you have an odd number of stitches, the stitch that was a Knit in the previous round will naturally become a Purl in the next, creating the bumpy seed stitch texture.
- 3. Growth: Continue until the cowl is approximately 10–12 inches tall.
- 4. Bind Off: Bind off loosely in pattern to ensure the edge remains stretchy.
3. Eco-Friendly Reusable Cotton Face Pads
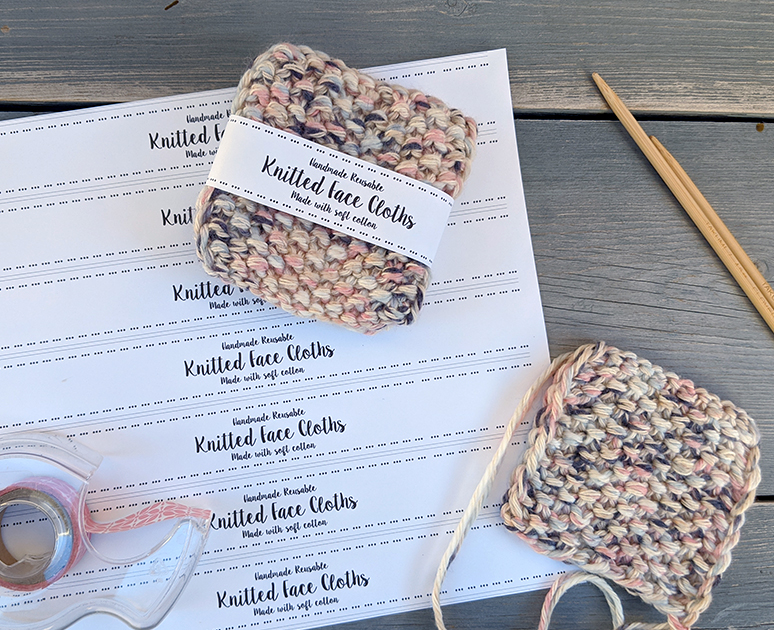
Upcycling your lifestyle starts with small changes.
These circular face pads are perfect for practicing Magic Loop or working with DPNs on a very small scale.
Materials Needed
- • Yarn: Small scraps of 100% cotton yarn (worsted weight).
- • Needles: 4.0mm DPNs or a long circular needle for Magic Loop.
Step-by-Step Instructions
- 1. Cast On: Cast on 6 stitches and distribute them across three DPNs.
- 2. Increase Rounds:
- • Round 1: Knit into the front and back (KFB) of every stitch (12 stitches).
- • Round 2: Knit all.
- • Round 3: [K1, KFB] repeat to end (18 stitches).
- • Round 4: [K2, KFB] repeat to end (24 stitches).
- 3. Finishing: Bind off all stitches and weave the tail into the center to close the small hole.
4. Modern Chunky Knit Floor Pouf
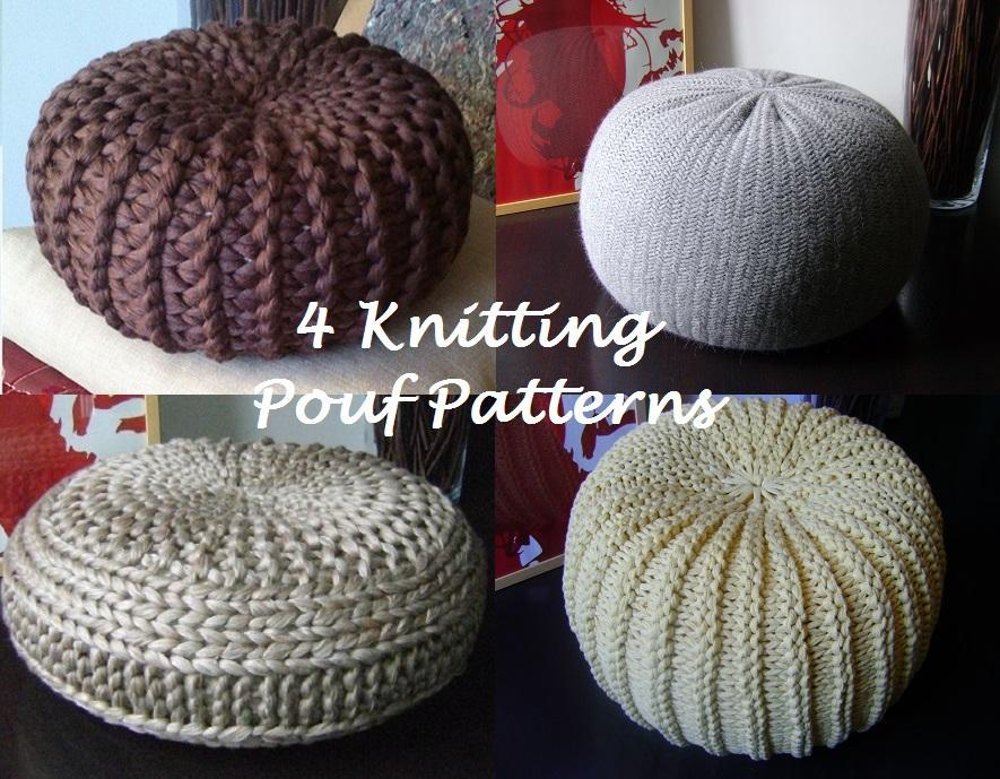
This is a high-impact home decor project that uses circular knitting to create a large structural tube that is gathered at both ends.
It’s an excellent way to use upcycled t-shirt yarn or jumbo wool roving.
Project Specifications Table
| Feature | Specification |
|---|---|
| Skill Level | Advanced Beginner |
| Yarn Type | Jumbo / T-Shirt Yarn |
| Needle Size | 12mm – 15mm Circular (32″) |
| Filling | High-density foam or old blankets |
| Dimensions | 18″ Diameter x 12″ Height |
Step-by-Step Instructions
- 1. Foundation: Cast on 60 stitches. Join in the round.
- 2. Texture: Knit every round (Stockinette) for a smooth look, or Purl every round (Reverse Stockinette) for a rugged, pebbled look.
- 3. Height: Knit until the tube reaches 20 inches in length.
- 4. Assembly: Bind off. Thread a heavy-duty yarn through the cast-on edge and pull tight like a drawstring. Stuff the pouf firmly with your chosen filling. Repeat the drawstring closure on the bind-off edge.
5. Boho-Chic Knit Plant Cozy
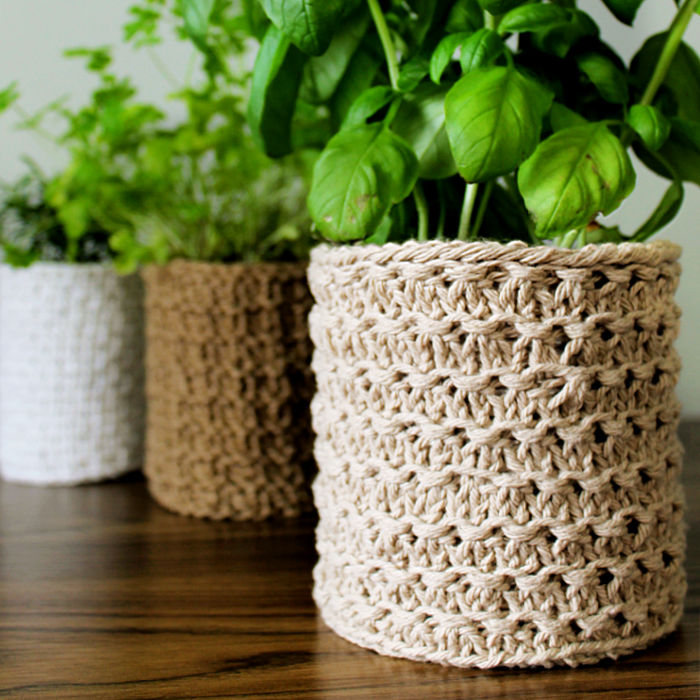
Give your plastic nursery pots a makeover with a knitted sleeve.
This project introduces the concept of Negative Ease—knitting the item slightly smaller than the object it covers so it fits snugly.
Step-by-Step Instructions
- 1. Measure: Measure the circumference of your pot and subtract 1 inch.
- 2. Gauge Swatch: Knit a small square to see how many stitches per inch you produce.
- 3. Cast On: Calculate your stitches based on the measurement. Use a 16-inch circular needle.
- 4. The Pattern: Use a Basketweave stitch (4 rounds of K2, P2 followed by 4 rounds of P2, K2).
- 5. Finish: Knit until the cozy matches the height of the pot. Bind off and slip it over the base of your plant.
6. Minimalist Fingerless Mittens
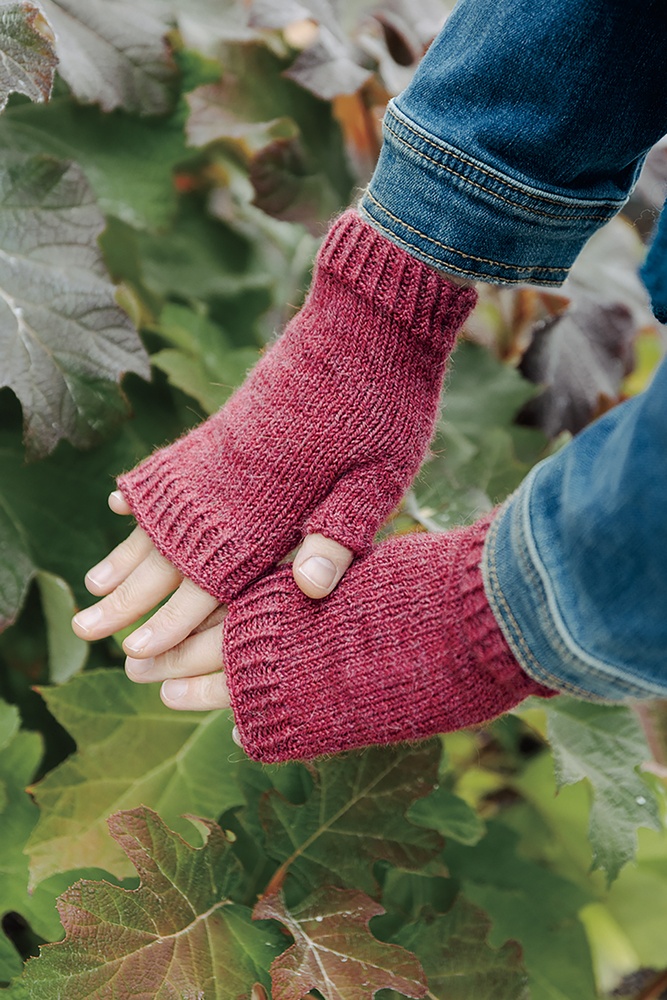
Fingerless mitts are the perfect introduction to shaping in the round.
You will learn how to create a thumb gusset using simple increases.
Materials Needed
- • Yarn: 50g DK weight yarn.
- • Needles: 3.75mm DPNs.
Step-by-Step Instructions
- 1. Cuff: Cast on 40 stitches. Work in K1, P1 ribbing for 3 inches.
- 2. Hand: Knit 2 rounds plain.
- 3. Gusset: Increase 1 stitch on either side of a marker every other round until you have 12 extra stitches.
- 4. Thumb Hole: Place those 12 stitches on a scrap piece of yarn. Cast on 2 stitches over the gap and continue knitting the main hand in the round.
- 5. Finishing: After 2 more inches of knitting, work 4 rounds of ribbing and bind off. Pick up the thumb stitches and knit for 1/2 inch to finish the thumb.
7. Spiral Kitchen Scrubbies
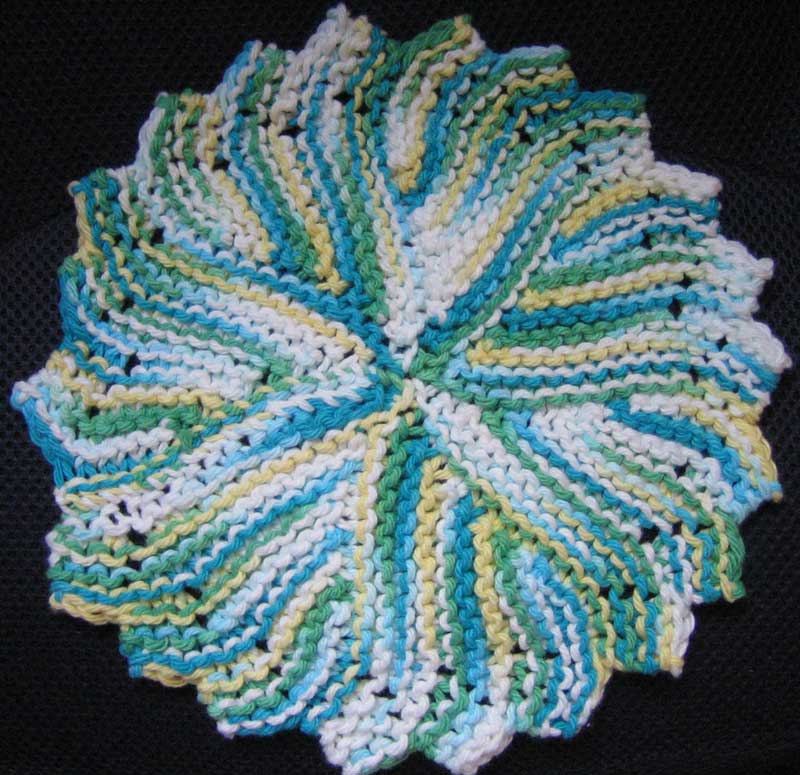
These scrubbies use a unique spiral construction that is worked in the round to create a double-thick, durable cleaning tool.
Using nylon scrubby yarn makes them even more effective for dishes.
Step-by-Step Instructions
- 1. Cast On: Cast on 10 stitches using DPNs.
- 2. The Increase: In every stitch, KFB (20 stitches).
- 3. The Spiral: Knit 1, KFB across the round. Continue this pattern of increasing until the circle is 5 inches wide.
- 4. The Decrease: To create the double-thick “donut” shape, begin decreasing at the same rate you increased (e.g., K2, K2Tog).
- 5. Closing: Once you are back down to 10 stitches, cut the yarn and pull it through. Flatten the piece so the decreases sit behind the increases, creating a thick, two-layered disc.
Essential Tips for Success with Circular Needles
Before you dive into these projects, keep these technical tips in mind to ensure a professional finish:
- • Avoid the Twist: When joining your stitches in a circle for the first time, lay the needle flat on a table. Ensure all the braids of the cast-on row are facing inward toward the center. If they twist around the needle, your entire project will be a warped Mobius strip.
- • Mind the Gap: To avoid a small hole at the join, cast on one extra stitch. When joining, slip the last stitch of the right needle onto the left needle and knit those two stitches together.
- • Length Matters: Ensure your circular needle cord is shorter than the circumference of your project. If you try to knit a 16-inch hat on a 32-inch cord, the stitches will be stretched too thin (unless you are using the Magic Loop technique).
Frequently Asked Questions
What is the Magic Loop technique?
Magic Loop is a method that allows you to knit small-circumference items (like socks or sleeves) using one very long circular needle (usually 32 or 40 inches).
You pull a loop of the cable out between the stitches, effectively dividing them into two halves.
Can I use circular needles for flat projects?
Absolutely. Many knitters prefer using circular needles for heavy blankets or sweaters worked back and forth because the cord holds the weight of the project in your lap rather than putting strain on your wrists like straight needles do.
How do I choose the right cord length?
- • 16-inch: Ideal for hats and baby sweaters.
- • 24-inch: Perfect for standard sweaters and small cowls.
- • 32-inch to 40-inch: Best for large shawls, blankets, or Magic Loop projects.
Why are my stitches tighter in the round?
Many knitters find their tension changes when they don’t have to purl every other row (as in Stockinette).
If your gauge is too tight, try moving up half a needle size.
Conclusion
Mastering circular knitting opens up a world of seamless possibilities in the DIY craft space.
By starting with these seven simple patterns—ranging from wearable accessories like the Stockinette Beanie to functional home decor like the Chunky Pouf—you build the muscle memory needed for more complex garments.
Remember that the key to circular knitting is in the setup; take your time ensuring your stitches aren’t twisted, and don’t be afraid to experiment with different cord lengths.
With these projects, you’ll soon find that knitting in the round is not just a technique, but your new favorite way to create.
Leave a Reply