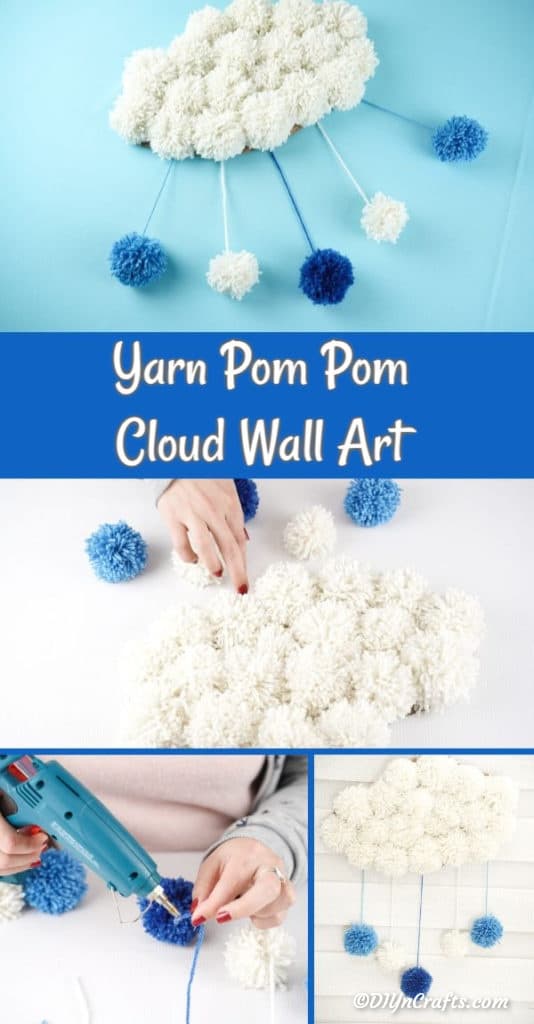
Pom pom cloud wall art has emerged as a leading trend in modern interior design, offering a perfect blend of whimsical charm and tactile sophistication.
Whether you are decorating a serene nursery, a creative home office, or a cozy reading nook, these soft, sculptural pieces add a three-dimensional element that flat prints simply cannot match.
By utilizing various yarn weights, textures, and color palettes, you can transform a simple bunch of wool into a high-authority decor piece that looks professionally curated.
This guide explores seven distinct modern styles and provides a comprehensive tutorial to help you master the craft of upcycling yarn into stunning wall installations.
1. The Vibrant Rainbow Rain Cloud
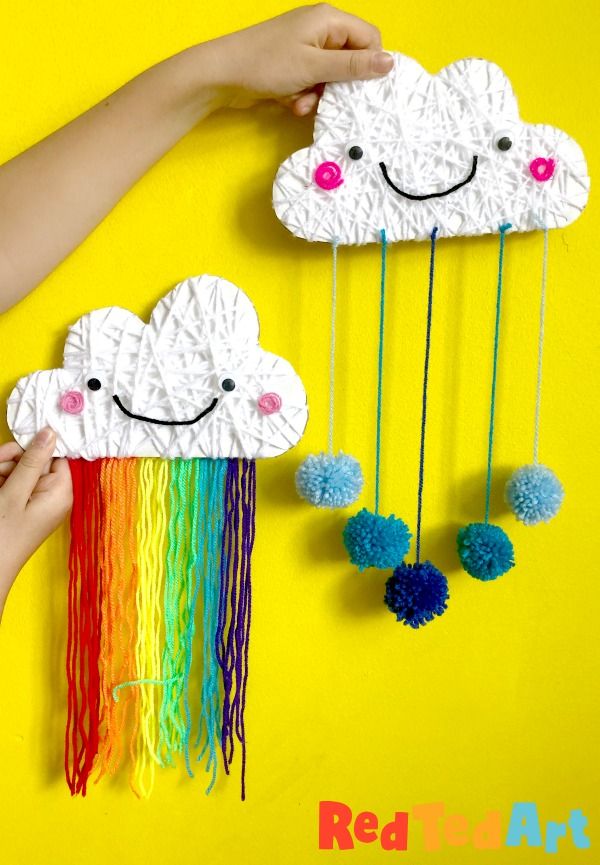
The Rainbow Rain Cloud is a celebratory piece that uses color to create a sense of joy and movement.
Unlike traditional flat rainbows, this 3D version uses a thick, white “cumulus” base made of oversized white pom poms, with “rain” consisting of smaller, multi-colored pom poms cascading down on invisible nylon threads.
Design Elements
- ●The Base: Use extra-large (4-inch) white acrylic yarn pom poms to create a dense, fluffy cloud shape.
- ●The Raindrops: Create 1-inch pom poms in every color of the spectrum: red, orange, yellow, green, blue, indigo, and violet.
- ●The Arrangement: String the colored pom poms on clear fishing line at varying lengths to simulate falling rain.
Styling Tip
This piece works best against a neutral wall (light grey or eggshell) to allow the vibrant colors to pop.
It is a favorite for Montessori-style playrooms where color recognition and tactile stimulation are encouraged.
2. The Minimalist Scandi Monochrome Cloud
For those who prefer the “less is more” approach, the Scandinavian-inspired monochrome cloud focuses on texture rather than color.
By using different shades of white, cream, and very light grey, you create a sophisticated piece that relies on shadows and fiber depth for visual interest.
Design Elements
- ●Mixed Fibers: Combine matte cotton yarn, shiny silk-blend yarn, and fuzzy mohair to create different light-reflecting surfaces within the same color family.
- ●The Frame: Use a minimalist wire frame or a simple cardboard cutout shaped like a stylized, flat-bottomed cloud.
- ●Spacing: Keep the pom poms tightly packed to hide the base entirely, creating a seamless “puff” effect.
Why It Works
The Scandi style is all about “Hygge”—the feeling of coziness.
The softness of the yarn provides a visual warmth to modern, sharp-edged furniture.
3. The Celestial Night Sky Cloud
This design moves away from the traditional white cloud and into the depths of a midnight sky.
By using deep navy, charcoal, and black yarns, this cloud serves as a moody backdrop for metallic accents.
Design Elements
- ●Color Palette: Navy blue, midnight blue, and dark slate grey.
- ●Metallic Accents: Interspersed among the dark pom poms, add a few “stars” made of gold or silver tinsel yarn.
- ●Dangling Elements: Instead of raindrops, hang small wooden stars or crescent moons painted in metallic gold from the bottom of the cloud.
Table: Best Yarn Types for Celestial Clouds
| Yarn Type | Visual Effect | Best Used For |
|---|---|---|
| Velvet Yarn | Deep, light-absorbing matte | Main cloud body |
| Tinsel/Lurex | Sparkly and reflective | Star accents |
| Chunky Wool | Heavy, structural texture | Creating depth |
4. The Upcycled Mixed-Texture Cloud
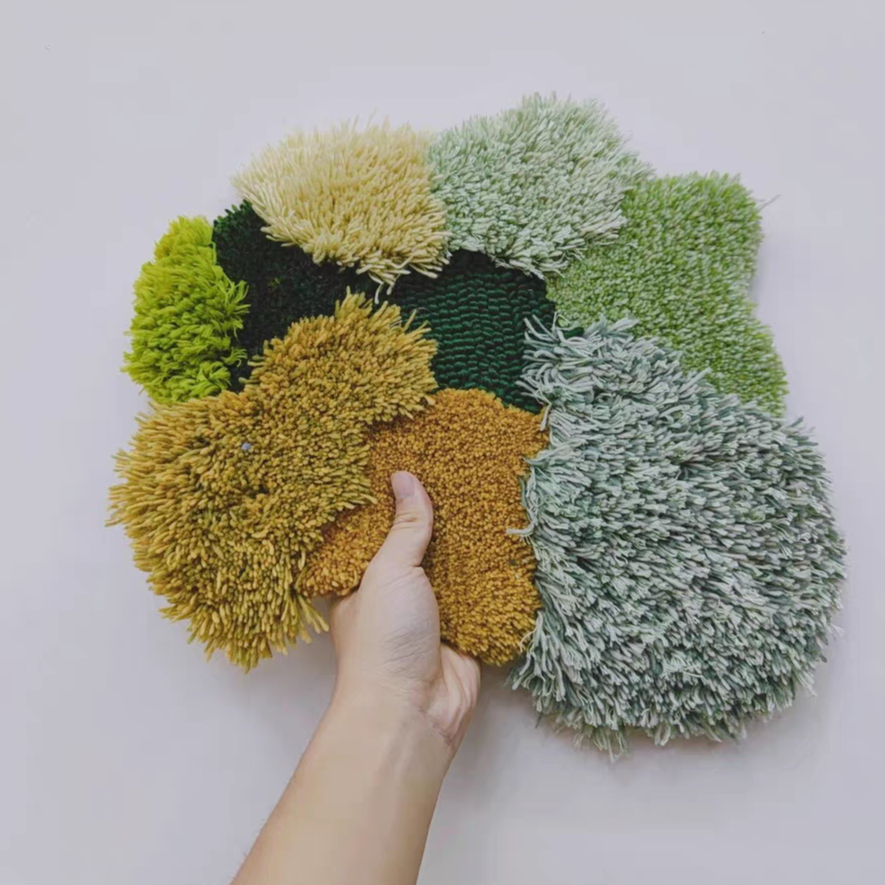
Sustainability meets style in this upcycled project.
This idea encourages the use of “scrap” materials—leftover yarn from knitting projects, strips of old t-shirts, or even unraveled sweaters.
The result is an eclectic, bohemian piece that tells a story.
Design Elements
- ●T-Shirt Yarn: Cut old cotton shirts into thin strips to make unique, heavy-hanging pom poms.
- ●Fringe Details: Instead of only using pom poms, add long tassels or macramé knots to the bottom of the cloud for a “Boho-chic” fusion.
- ●Organic Shapes: Avoid a symmetrical cloud; go for an elongated, wispy “cirrus” cloud shape to emphasize the varied textures.
Pro Tip for Upcycling
If your scrap yarn is different weights, combine two or three strands together when wrapping your pom pom maker to ensure every pom pom has a consistent fullness.
5. The 3D Layered Cumulus Cloud
This is the most “architectural” of the ideas.
Instead of a flat wall hanging, this project uses a multi-layered base to create a cloud that juts out from the wall at different depths, mimicking the towering look of a summer storm cloud.
Design Elements
- ●The Base: Use stacked foam board circles to create a tiered foundation.
- ●Graduated Sizes: Place the largest pom poms (5-6 inches) in the center and smaller ones (2 inches) toward the edges to create a dome effect.
- ●Shadowing: Use slightly darker grey pom poms at the bottom of the “mounds” to simulate natural cloud shadows.
Installation
Because this piece is heavier than others, use a sturdy French cleat or heavy-duty Command strips to ensure it stays flush against the wall.
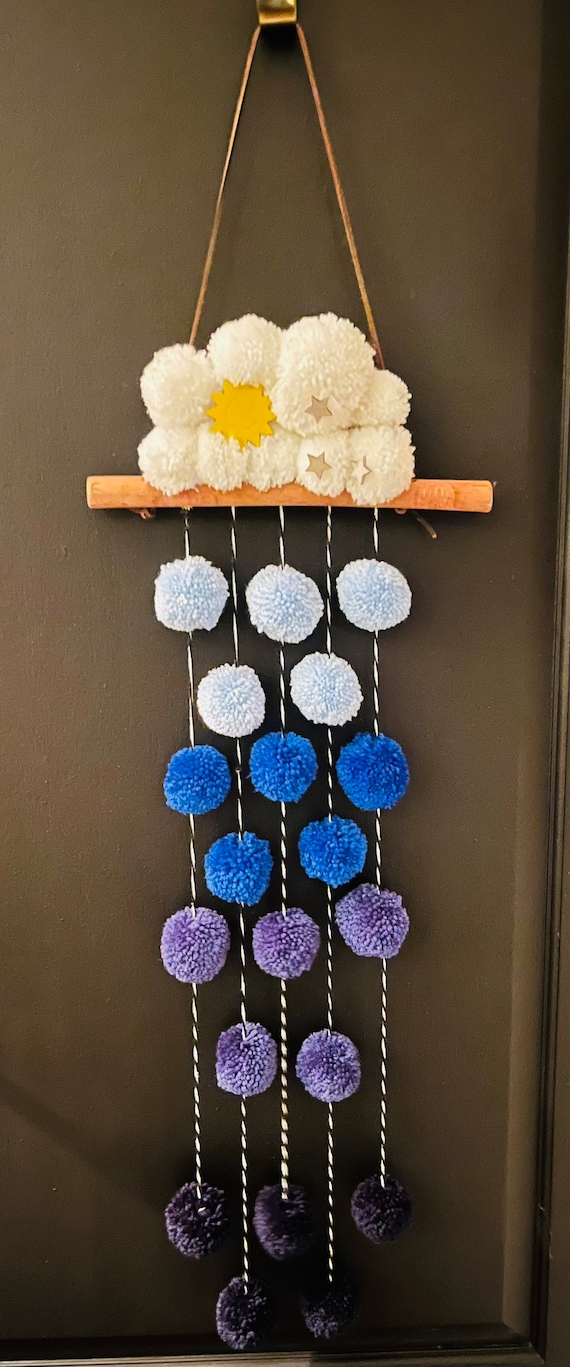
6. The Ombre Sunset Cloud
The Ombre Sunset Cloud mimics the beautiful transition of colors seen during golden hour.
This project requires a bit more planning in color selection to ensure a smooth gradient from one side of the cloud to the other.
Design Elements
- ●Color Gradient: Start with deep violet on the left, transitioning into magenta, then coral, and finally a bright sun-yellow on the right.
- ●Blending Technique: To make the transition smoother, create “hybrid” pom poms using half of one color and half of the next color in the sequence.
- ●Backlighting: For an extra “wow” factor, hide a battery-operated LED fairy light string behind the pom poms to make the sunset glow.
7. The Interactive Sensory Cloud
Designed specifically for nurseries or sensory rooms, this cloud isn’t just to be looked at—it’s meant to be touched.
It incorporates various elements that provide different tactile feedback for children.
Design Elements
- ●Texture Variety: Use “scrubby” yarn (rough), velvet yarn (soft), loop yarn (bumpy), and felted wool balls (firm).
- ●Auditory Elements: Hide small bells inside a few of the pom poms so they jingle when touched.
- ●Safety First: Ensure all pom poms are double-knotted and the base is securely fastened to the wall out of reach of very small infants, but accessible for supervised sensory play.
Step-by-Step Tutorial: Creating Your Cloud Base
To bring any of these ideas to life, you need a solid foundation.
Follow these steps to create a professional-grade pom pom cloud.
Materials Needed
- ●Cardboard or Foam Board: For the cloud template.
- ●Yarn: At least 3-4 skeins depending on size.
- ●Sharp Fabric Scissors: Crucial for “grooming” the pom poms.
- ●Hot Glue Gun: For attaching pom poms to the base.
- ●Pom Pom Makers: Various sizes (clover style is recommended).
Step 1: Create the Template
Draw a cloud shape on your foam board.
Avoid overly complex “bumpy” edges, as the pom poms will naturally create that texture.
A simple, elongated kidney or oval shape works best.
Cut it out using a craft knife.
Step 2: Mass-Produce the Pom Poms
Using your pom pom maker, wrap the yarn until the tool is completely full.
The fuller the wrap, the denser the pom pom.
Once tied, do not trim the long “tails” used to tie the center—you can use these to tie the pom poms to the board if you prefer not to use glue.
Step 3: The “Grooming” Phase
This is what separates amateur crafts from professional decor.
Trim your pom poms into perfect spheres.
Shake them out, trim the stray hairs, and repeat until they look like solid balls of fluff.
Step 4: Assembly
Start by placing your largest pom poms in the center of the board.
Apply a generous amount of hot glue to the base of the pom pom and press firmly onto the board for 10 seconds.
Work your way outward, filling in gaps with smaller pom poms.
Step 5: Adding the “Rain” (Optional)
If your design includes hanging elements, flip the board over and tape or glue your strings to the back of the foam board before adding the final row of pom poms to the bottom edge.
FAQ: Frequently Asked Questions
How do I clean a pom pom cloud?
Since yarn attracts dust, do not wash the piece.
Instead, use a hairdryer on the “cool” and “low” setting to blow dust off once a month.
For deeper cleaning, a handheld vacuum with a brush attachment used very gently will work.
What is the best yarn for beginners?
Acrylic yarn is the best for beginners.
It is inexpensive, comes in every imaginable color, and “blooms” well when trimmed, meaning the fibers spread out to create a very full look.
How do I make my pom poms look professional?
The secret is “over-wrapping.”
Most people don’t use enough yarn.
Wrap your pom pom maker until you can barely close it.
Also, spend time trimming the edges—a well-groomed pom pom looks like a solid object rather than a bunch of strings.
Can I make this without a pom pom maker?
Yes! You can use the “cardboard donut” method or even the “fork method” for mini pom poms.
However, for a large wall art piece, an inexpensive plastic pom pom maker will save you hours of time and ensure size consistency.
Conclusion
Modern pom pom cloud wall art is more than just a craft project; it is an exploration of texture, color, and form.
Whether you choose the bold statement of a Rainbow Rain Cloud or the sophisticated subtlety of a Scandi Monochrome design, you are creating a piece that adds literal and figurative softness to your living space.
By focusing on high-quality yarns, meticulous grooming, and creative layering, your DIY project will rival high-end boutique decor.
Grab your yarn, start wrapping, and let your creativity drift into the clouds!
Leave a Reply