Jute rope is one of the most versatile, eco-friendly, and cost-effective materials for home decor enthusiasts. Its natural, earthy texture fits perfectly into various interior design styles, from rustic farmhouse and coastal chic to modern bohemian.
Creating your own DIY jute rope placemats not only adds a personalized touch to your dining table but also provides a durable, heat-resistant surface for your dinnerware.
By mastering a few simple techniques like coiling, braiding, and embellishing, you can transform a basic hardware store item into a high-end boutique-style table accessory.
Essential Materials for Jute Rope Projects
Before diving into the specific styles, it is important to have the right tools on hand. The quality of your rope and the strength of your adhesive will determine the longevity of your placemats.
| Material | Recommended Type/Size | Purpose |
|---|---|---|
| Jute Rope | 6mm to 10mm thickness | Primary structure of the placemat |
| Adhesive | High-temp hot glue or E6000 | Securing the rope in place |
| Backing Fabric | Felt, cork, or heavy canvas | Provides stability and protects the table |
| Cutting Tools | Heavy-duty fabric scissors | Clean cuts for rope ends |
| Finishing | Clear acrylic sealer (optional) | Prevents fraying and repels moisture |
| Decorative Elements | Acrylic paint, tassels, or lace | Customizing the aesthetic |
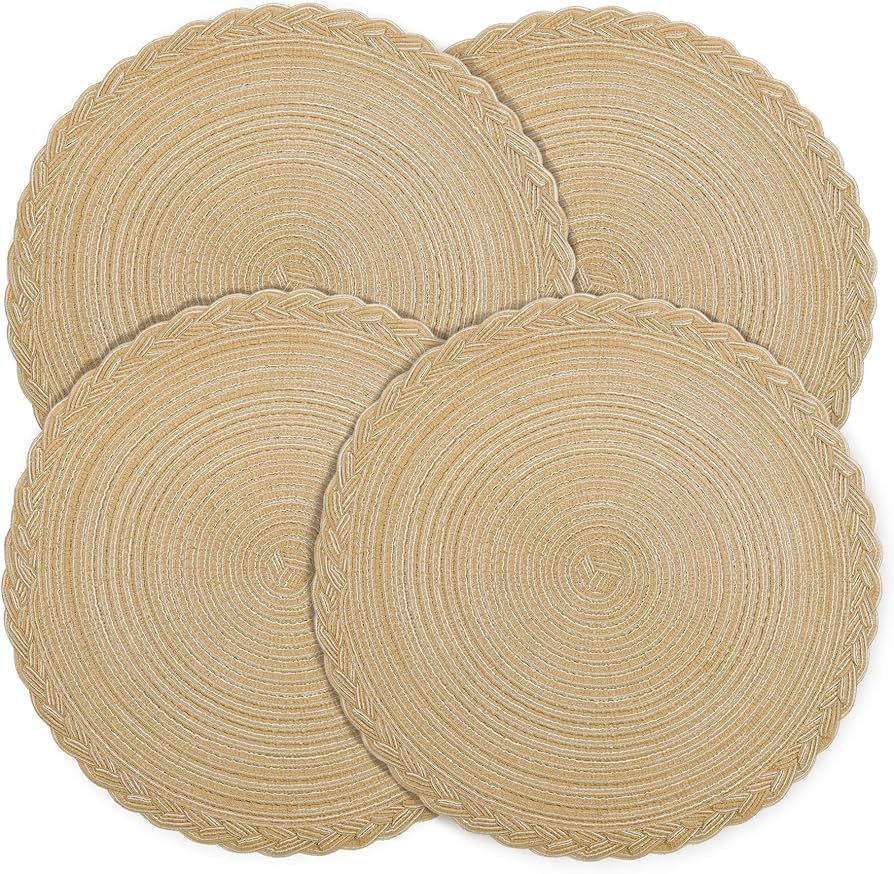
1. The Classic Spiral Coiled Placemat
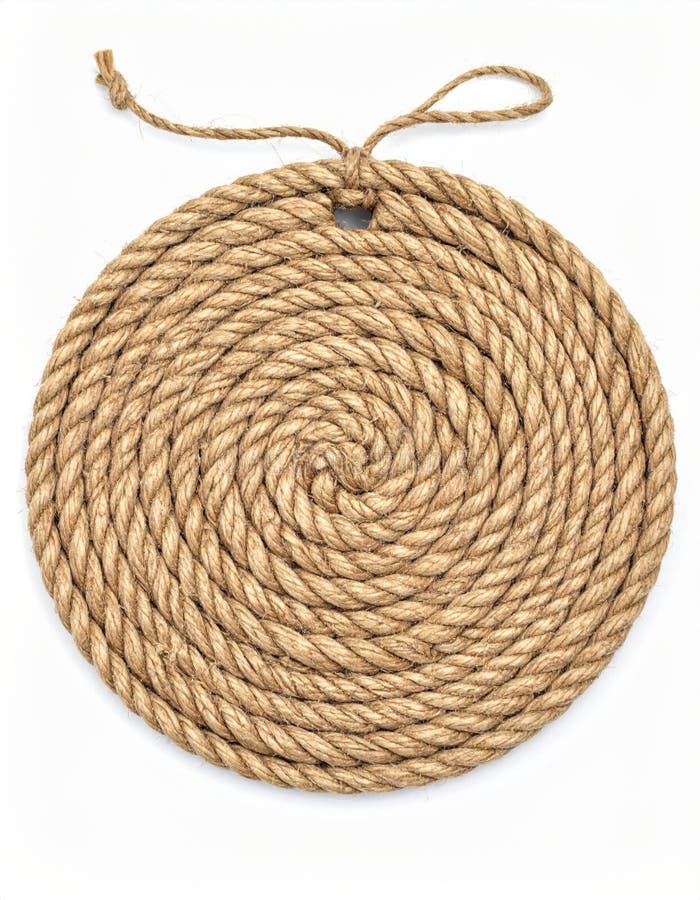
The classic spiral is the foundation of almost all rope-based crafts. It is minimalist, sturdy, and highlights the natural beauty of the jute fibers.
This project is perfect for beginners because it requires no complex weaving or knotting.
Step-by-Step Instructions:
- 1 Prepare the End: Start by cutting the end of your rope at a slight angle. Apply a small dab of hot glue to the tip to prevent fraying.
- 2 The Center Core: Fold the tip over itself to create a tiny “snail” shape. This is the most crucial step, as a tight center ensures the rest of the placemat remains symmetrical.
- 3 Coiling: Apply a thin line of glue along the outer edge of the center core and wrap the rope around it. Continue this process, pressing the rope firmly against the previous layer.
- 4 Maintaining Flatness: Always work on a flat surface (like a glass table or a silicone mat) to ensure the placemat doesn’t “bowl” or curve upward.
- 5 Finishing: Once you reach a diameter of 12–14 inches, cut the rope at an angle and glue the end tucking it slightly under the previous row for a seamless look.
Pro Tip: Use a heavy book to press down on the placemat as the glue cools to ensure it stays perfectly flat.
2. The Braided Nautical Disc
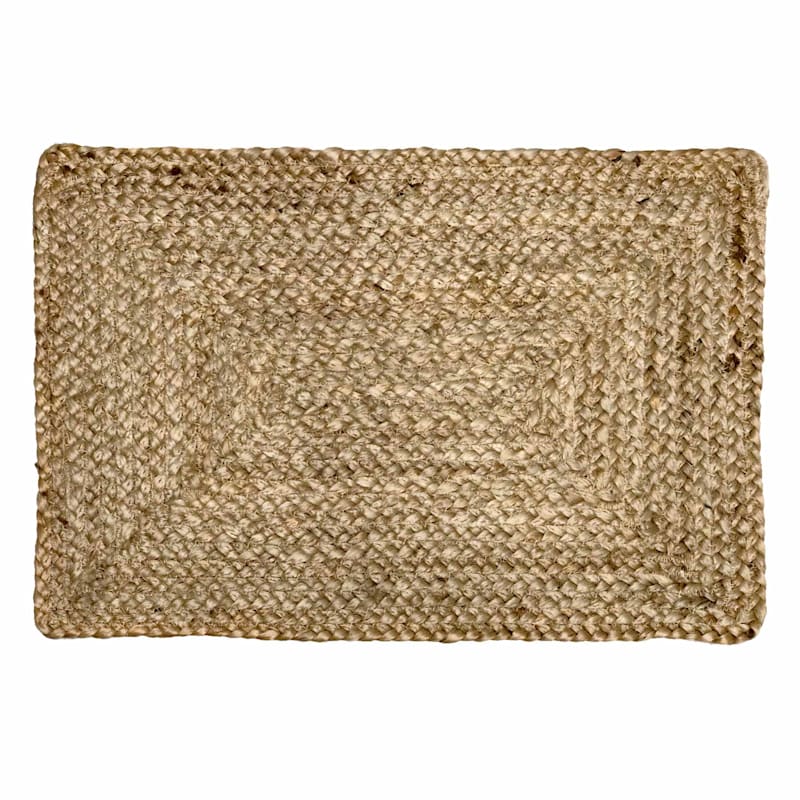
If you prefer a more textured, chunky look, the braided nautical disc is an excellent choice. This style mimics the heavy-duty ropes found on sailing vessels, making it ideal for coastal-themed homes.
Step-by-Step Instructions:
- 1 Create the Braid: Measure out three long strands of 6mm jute rope. Secure the ends with a rubber band and create a standard three-strand braid. You will need several yards of braided rope to complete one placemat.
- 2 Spiral the Braid: Just like the classic spiral method, start coiling the braid from the center. Because the braid is wider than a single strand, this project goes by much faster.
- 3 Glue Placement: Apply glue to the valleys of the braid where it will meet the next row. This creates a stronger bond.
- 4 Edge Treatment: Because braided ends are bulky, consider wrapping the final inch of the braid with thin twine before gluing it down to create a tapered finish.
3. Boho Tassel-Edged Jute Placemat
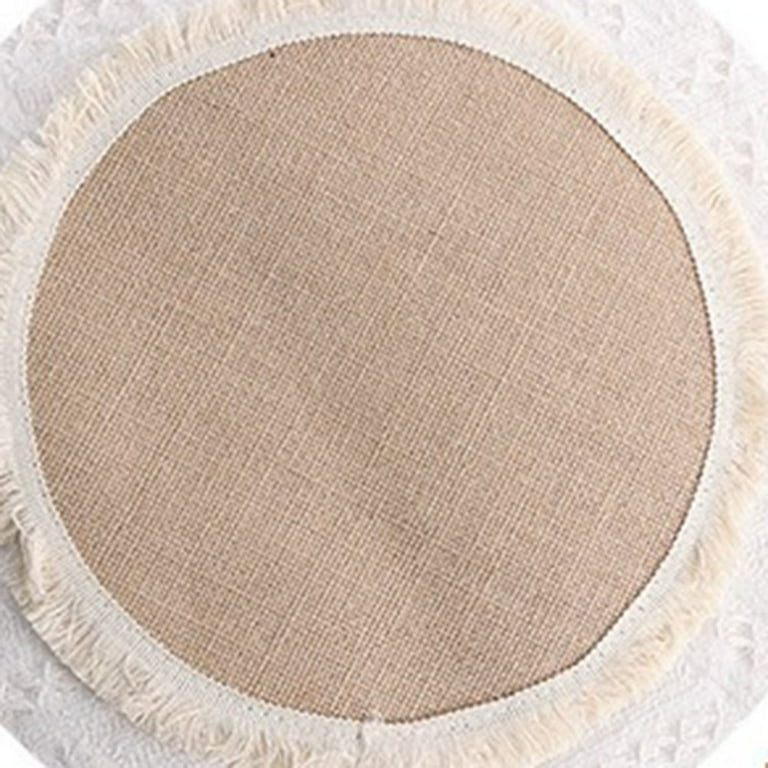
Adding tassels to a standard jute placemat instantly elevates it from hardware store DIY to boutique find. This style is highly popular in bohemian and eclectic interiors.
How to Customize:
- Tassel Material: Use cream-colored cotton yarn for a soft contrast or colorful embroidery floss for a pop of color.
- Attachment: You can either glue the tassels directly to the underside of the outer rim or use a large upholstery needle to sew them through the outer rope layer.
- Spacing: Space tassels approximately 2 inches apart for a sophisticated look, or place them side-by-side for a full, fringed sunburst effect.
Project Note: If you want a more shabby chic look, you can unwrap the last two inches of the jute rope itself to create a built-in jute fringe instead of adding yarn tassels.
4. Painted Geometric Modernist Placemat
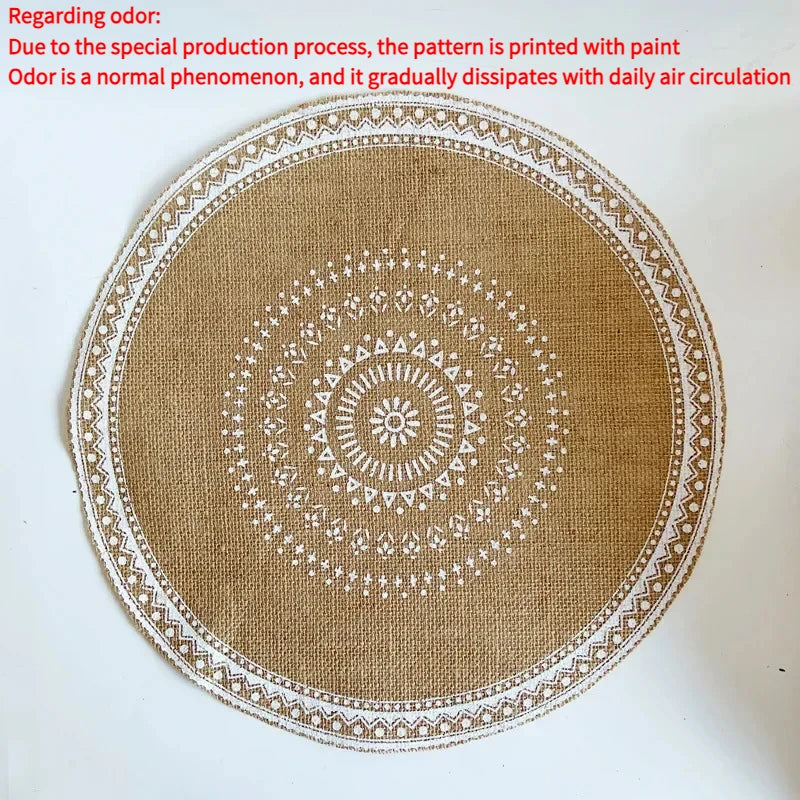
Jute takes pigment surprisingly well. By using painter’s tape and acrylic paint, you can add modern patterns to your natural rope mats.
This is the best way to coordinate your placemats with your existing kitchen color palette.
Design Ideas:
- The Half-Moon: Tape off exactly half of the circular placemat and paint it a solid matte black or navy blue.
- Chevron Stripes: Use thin masking tape to create V-shapes across the surface before dabbing paint on with a sponge brush.
- Color Blocking: Divide the circle into thirds and use complementary colors like terracotta, sage green, and cream.
Important: Use a stippling motion (up and down) rather than a brushing motion to ensure the paint gets into the crevices of the rope without causing the fibers to pill.
5. Lace-Trimmed Vintage Placemat
For those who love the Cottagecore or vintage farmhouse aesthetic, combining the ruggedness of jute with the delicacy of lace creates a beautiful visual balance.
Execution Steps:
- Select Your Lace: Choose a wide crocheted lace or a delicate eyelet trim.
- Application: Glue the lace to the underside of the final rope row so that only the decorative scalloped edge peeks out from underneath.
- Layering: For a more intricate look, you can glue a thinner strip of lace directly onto the top surface of the rope, about two inches in from the edge.
This style is particularly popular for wedding table settings or formal holiday brunches.
6. Mixed-Material Jute and Fabric Scraps
Upcycling is at the heart of DIY. If you have leftover fabric from other projects—such as denim, linen, or floral cotton—you can weave them into your jute placemat for a multi-textured appearance.
The Technique:
- Intertwining: As you coil the jute rope, occasionally wrap a 1-inch wide strip of fabric around the rope before gluing it down.
- Alternating Rows: Create three rows of pure jute, followed by one row where the rope is completely encased in fabric, then return to jute.
- Denim Upcycling: Using old blue jean strips with jute creates a rugged, industrial look that is incredibly durable for daily use.
7. Circular Ombre-Dyed Jute Placemat
Ombre (the gradual blending of one color hue to another) adds a professional, artistic flair to your table. This method requires dyeing the rope before you coil and glue it.
The Dyeing Process:
- 1 Prepare the Dye: Use a standard fabric dye (like Rit) in a large bucket.
- 2 Sectional Dipping: Divide your long length of rope into three sections. Submerge the first third in the dye for 20 minutes. Submerge the second third for only 5 minutes. Leave the final third natural.
- 3 Drying: Allow the rope to dry completely (at least 24 hours) before coiling.
- 4 Assembly: Start coiling with the natural end in the center, moving to the light shade, and finishing with the darkest shade on the outer rim.
Maintenance and Care for Jute Placemats
Jute is a natural fiber, which means it requires specific care to stay looking fresh. Since these are held together with glue, they cannot be tossed in the washing machine.
- Spot Cleaning: Use a damp cloth with mild soap to dab at spills immediately. Do not rub, as this can fray the fibers.
- Shaking Out: Regularly shake the placemats outside to remove crumbs and dust trapped in the rope crevices.
- Moisture Control: Never leave jute placemats soaking wet. If they get saturated, air dry them flat in the sun to prevent mold and warping.
- Heat Resistance: While jute is naturally heat-resistant, high-temperature hot glue can soften if a boiling pot is placed directly on it. For trivet use, consider using E6000 or sewing the coils together instead of using hot glue.
Frequently Asked Questions
What is the best thickness of rope for placemats?
For a standard dining placemat, 6mm to 8mm is the sweet spot. Anything thinner takes too long to coil and feels flimsy; anything thicker than 10mm can make the placemat too bulky, causing wine glasses or narrow-based dishes to tip over.
How do I stop the jute from shedding?
Jute naturally sheds small fibers. To minimize this, you can spray the finished placemat with a light coat of clear matte acrylic sealer or a mixture of 50% water and 50% clear school glue. This locks the fibers in place.
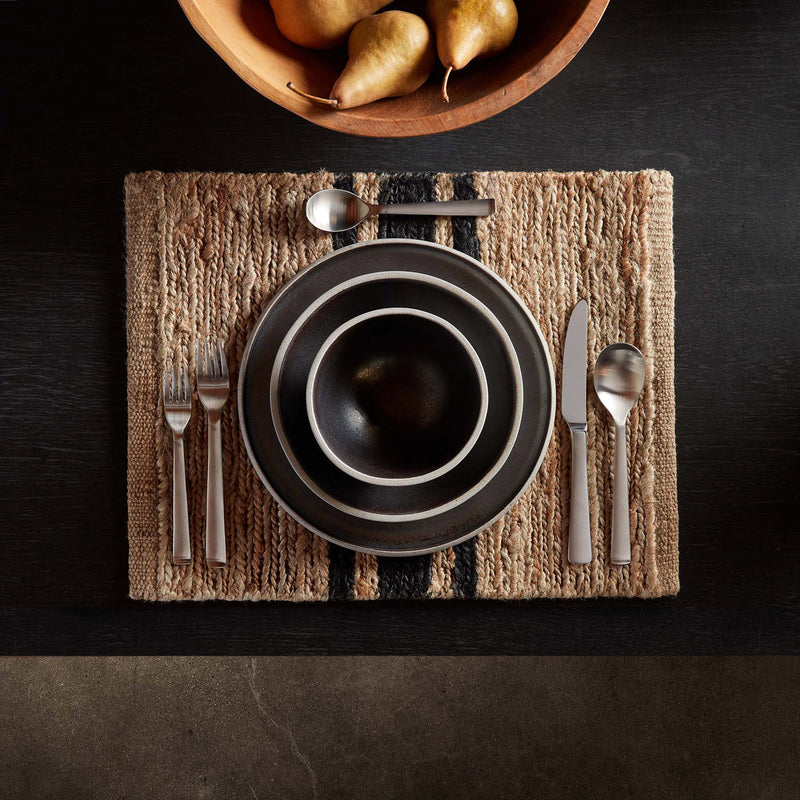
Can I make these rectangular instead of circular?
Yes! To make a rectangular placemat, start with a straight center piece (e.g., a 6-inch straight line of rope) and wrap the rope around that core in an oval fashion.
For a true rectangle, you will need to cut individual strips of rope and glue them side-by-side onto a piece of felt backing.
Is hot glue strong enough for daily use?
High-temperature hot glue is generally sufficient for decorative and light dining use. However, for heavy-duty daily use, applying a flexible permanent adhesive like E6000 or using a heavy-duty sewing machine to zigzag the coils together is recommended.
Conclusion
Creating DIY jute rope placemats is a rewarding project that combines utility with high-end aesthetic appeal.
Whether you choose the simplicity of the Classic Spiral or the artistic complexity of the Ombre-Dyed method, these handmade items will bring a sense of warmth and craftsmanship to your home.
By following the steps outlined above—and remembering to work on a flat surface with a steady hand—you can produce a set of professional-quality placemats for a fraction of the retail cost. Happy crafting!
Leave a Reply