Transforming ordinary household items into high-end decor doesn’t require a massive budget or professional carpentry skills.
One of the most vibrant and accessible ways to brighten your living space is by upcycling paper straws into twisted vases. By layering these eco-friendly tubes at various angles around a recycled glass jar or plastic container, you create a dynamic, architectural piece that mimics the look of expensive 3D-printed or ceramic designer vases.
Whether you are looking for a pop of neon or a sophisticated metallic accent, these seven DIY paper straw twisted vase ideas offer a sustainable way to refresh your home.
Essential Materials for Paper Straw Vases
Before diving into the specific designs, ensure you have your crafting station ready. Working with paper straws requires precision and a quick-setting adhesive.
| Material | Purpose | Pro Tip |
|---|---|---|
| Paper Straws | The main structural and decorative element. | Buy in bulk packs to ensure color consistency. |
| Recycled Vessel | The base (glass jar, Pringles can, or plastic bottle). | Clean thoroughly with rubbing alcohol for better adhesion. |
| Hot Glue Gun | To secure straws quickly. | Use low-temp glue to avoid melting thinner plastic bases. |
| Precision Scissors | For trimming straws at angles. | Sharp shears prevent the paper from fraying or crushing. |
| Clear Sealant | To protect the paper from moisture. | A matte or glossy spray acrylic works best. |
| Ruler/Protractor | To measure the twist angle. | Consistency is key for a professional architectural look. |
1. The Vibrant Rainbow Spiral Cylinder
The Rainbow Spiral is the ultimate statement piece for a nursery, home office, or a sun-drenched kitchen. This design utilizes the full spectrum of the rainbow, arranged in a tight diagonal slant to create the illusion of movement.
How to Create the Look
To achieve this, select a cylindrical base like a tall pasta jar. Start by gluing your first straw at a 15-degree angle from the vertical axis.
Follow the ROYGBIV color sequence, ensuring each straw is flush against the previous one. The twist occurs naturally as you wrap around the cylinder.
Design Tip: Use straws with varying patterns—some solid, some striped, some polka-dotted—within the same color family to add depth and texture to the rainbow.
2. The Ombre Gradient Twisted Bud Vase
Ombre remains a staple in interior design because of its calming, sophisticated transition of color. This twisted vase idea works best with smaller bud vases or medicine bottles, creating a delicate accent for a bedside table.
How to Create the Look
Choose three to four shades of a single color (e.g., navy, royal blue, sky blue, and white). Instead of a horizontal gradient, apply the straws diagonally.
Cut the straws into varying lengths to follow the contour of the vase. Start with the darkest shade at the bottom twist and transition to the lightest at the top.
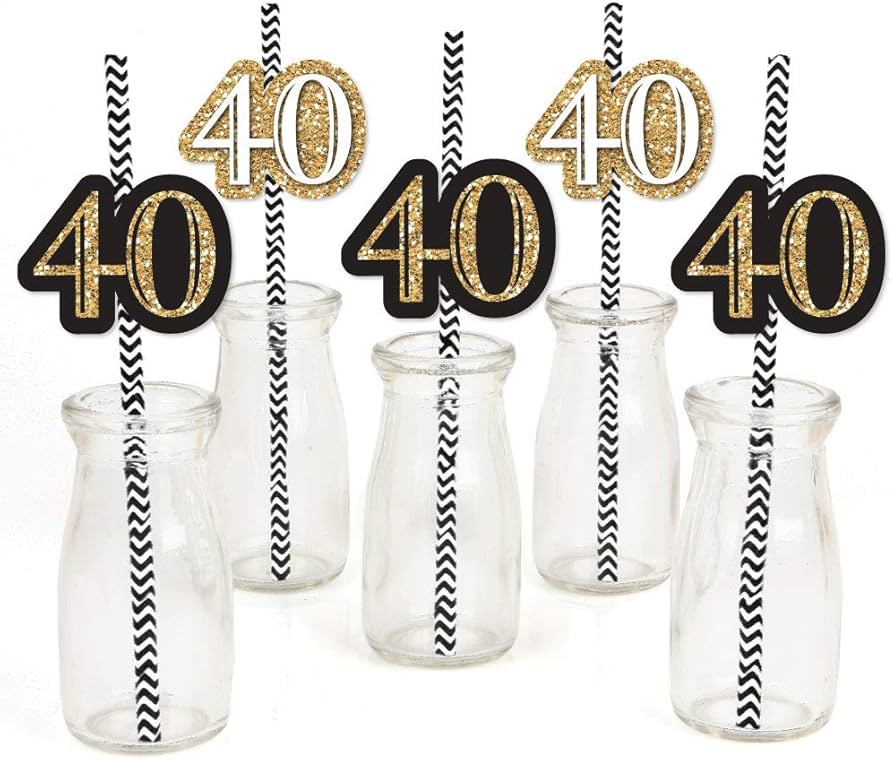
Pro Tip: For a seamless ombre, find multi-tonal straw packs that are specifically designed for party themes; they usually have the perfect gradient pre-sorted for you.
3. The Metallic Geometric Twister
If your home leans toward Modern Mid-Century or Industrial styles, the Metallic Geometric Twister is the project for you. By using gold, silver, or copper paper straws, you can mimic the look of expensive metalwork.
How to Create the Look
For this design, the twist should be more dramatic. Instead of a slight 15-degree tilt, aim for a 45-degree angle.
This will require you to trim the straws more frequently at the top and bottom edges of your vessel. Use a matte black glass jar as your base; if any gaps appear between the straws, the black background will look like an intentional shadow rather than a mistake.
Styling Suggestion: Pair this vase with dried eucalyptus or pampas grass. The organic texture of the plants contrasts beautifully with the rigid, metallic lines of the straws.
4. The Pastel Scalloped Twist
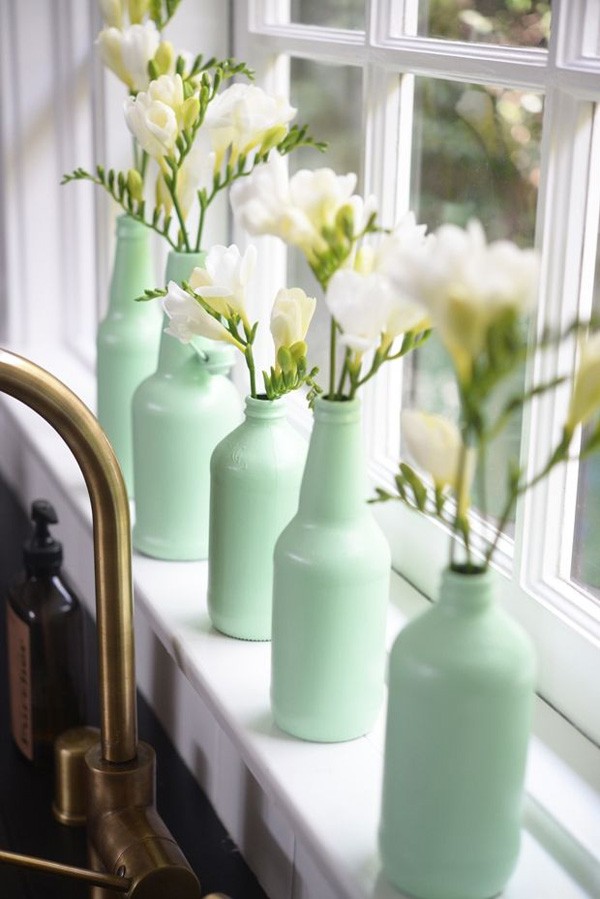
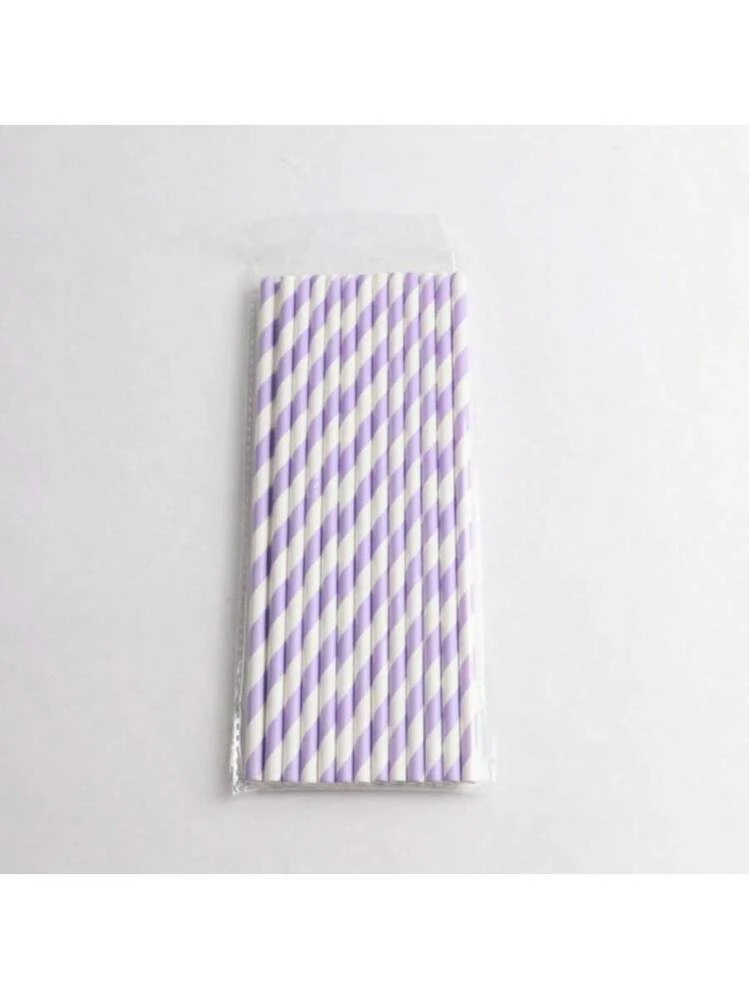
Perfect for Spring decor or a Grandmillennial aesthetic, the Pastel Scalloped Twist uses soft hues like mint, lavender, and peach. This design focuses on a layered twist rather than a single wrap.
How to Create the Look
Instead of long, full-length straws, cut your straws into 2-inch segments. Glue them in a shingle or scalloped pattern, tilting each row slightly more than the one below it. This creates a spiraling, pinecone-like effect that adds significant volume to the vase.
Maintenance Note: Because this design has more exposed paper edges, it is crucial to apply two coats of clear acrylic sealer to prevent the edges from absorbing humidity.
5. The Monochrome Architectural Column
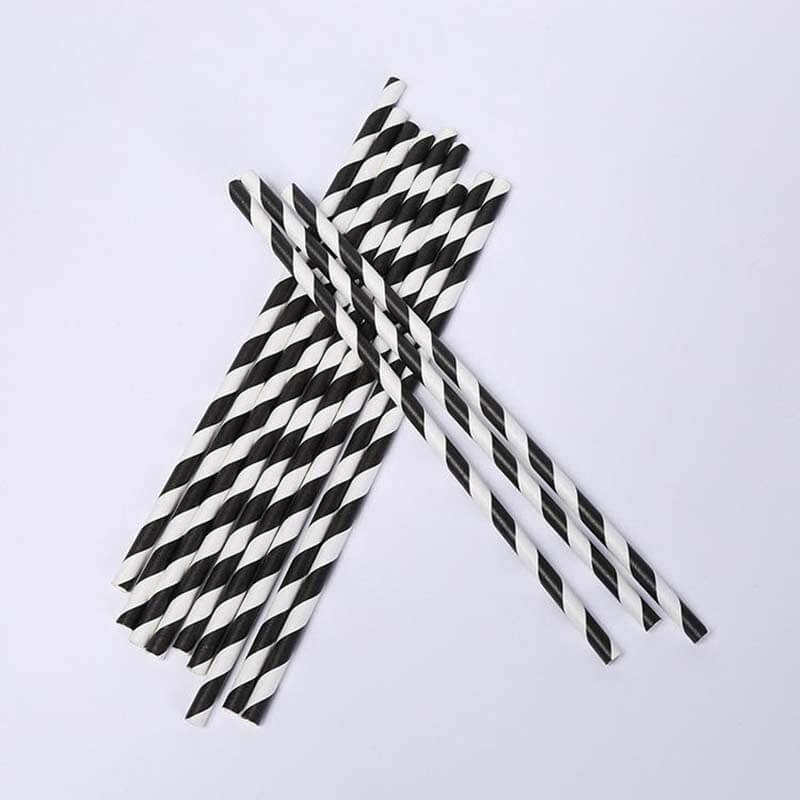
High-contrast decor is a hallmark of modern minimalism. A monochromatic twisted vase—using only black and white straws—creates a bold, optical illusion effect that draws the eye immediately.
How to Create the Look
Use a strictly alternating pattern: one solid black straw, then one white striped straw. Glue them at a steep angle. The twist combined with the stripes creates a barber pole effect that looks incredibly high-end.
Why it Works
The human eye is drawn to repetitive patterns. When those patterns are tilted, it creates a sense of kinetic energy in a static object. This makes the vase look like a piece of contemporary sculpture rather than a DIY craft.
6. The Tropical Mixed-Media Spiral
Bring the outdoors in by combining paper straws with organic textures. This twisted idea uses vibrant green and yellow straws interspersed with segments of natural jute twine or thin bamboo skewers.
How to Create the Look
Apply five straws at a twist, then wrap a section of the vase in brown twine, then apply another five straws. The juxtaposition of the smooth, colorful paper with the rough, earthy twine creates a Boho-Chic vibe.
Best For: This style looks exceptional when holding large, leafy greens like Monstera leaves or palm fronds.
7. The Neon Glitch Twisted Vase

For those who love maximalism and the dopamine decor trend, the Neon Glitch vase uses the brightest colors available. The goal here is intentional irregularity.
How to Create the Look
Instead of a uniform twist in one direction, change the direction of the twist halfway up the vase. Start with a clockwise tilt for the bottom 3 inches, then switch to a counter-clockwise tilt for the top.
This clash at the center creates a geometric V shape that looks futuristic and edgy. Use neon pink, electric lime, and bright orange for maximum impact.
Step-by-Step Construction Guide
Regardless of which style you choose, the assembly process follows a standard set of rules to ensure durability.
Step 1: Prep the Base
Clean your vessel with soap and water, then wipe with alcohol. If you are using a clear glass jar but don’t want the glass to show through the straws, give the jar a quick coat of spray paint in a neutral color first.
Step 2: Establish Your Angle
Place your first straw. Use a piece of low-tack painter’s tape to hold it at the desired angle before you apply the glue. This acts as your North Star for the rest of the project.
Step 3: Glue and Repeat
Apply a thin line of hot glue directly to the straw, then press it onto the vessel. Avoid putting the glue on the vessel itself, as it can dry too quickly or create messy strings.
Step 4: Trimming the Overhang
Once the vase is fully covered, you will likely have straw ends poking out over the top and bottom. Use your precision scissors to trim them flush with the rim. For a cleaner look, you can glue a single horizontal straw or a piece of ribbon around the top rim to hide the raw paper edges.
Step 5: Seal and Protect
In a well-ventilated area, spray the entire piece with a clear sealant. This makes the paper water-resistant and gives the colors a more vibrant, finished look.
Styling Your Twisted Vases
These vases are lightweight, which means they are best suited for:
- • Silk Flowers: Since they don’t require water, they are the safest bet for paper-based decor.
- • Dried Florals: Lavender, wheat, or dried eucalyptus add a sophisticated touch.
- • Internal Liners: If you want to use real flowers, ensure your base vessel (the glass jar inside) is 100% watertight. Be very careful when pouring water to avoid splashing the exterior paper straws.
Frequently Asked Questions
Can I use plastic straws instead of paper?
While you can use plastic, paper straws are preferred for this DIY. Paper straws are more rigid, easier to glue, and take paint/sealant much better than plastic. Additionally, paper straws are more environmentally friendly and come in a wider variety of matte and patterned designs.
How do I clean my paper straw vase?
Do not submerge these vases in water or put them in the dishwasher. To clean, simply use a dry microfiber cloth or a soft-bristled brush (like a clean makeup brush) to dust between the straw ridges.
Will the hot glue melt the straws?
Standard hot glue will not melt paper straws. However, if you are using a very thin plastic bottle as your base, the heat from the glue gun could warp the bottle. In that case, use a Low-Temp glue gun or a specialized craft adhesive like E6000.
How many straws do I need for one vase?
For a standard 12oz glass jar, you will typically need between 40 and 60 straws, depending on how tightly you pack them and the angle of the twist. Always buy an extra pack to account for trimming and mistakes.
Conclusion
DIY paper straw twisted vases are a masterclass in upcycling. They prove that with a little geometry and a lot of color, you can turn party trash into mantel treasure.
By experimenting with angles, color gradients, and textures, you can create a collection of vases that look like they were plucked from a high-end boutique. Start with a simple rainbow spiral, and once you master the twist, challenge yourself with the architectural or glitch designs.
Not only will you have a unique piece of home decor, but you’ll also have the satisfaction of knowing you’ve repurposed materials into something beautiful.
Leave a Reply