The horsetail loose braid ponytail is the ultimate effortless hairstyle that actually requires a bit of crafty intention to perfect. It combines the volume of a classic ponytail with the intricate texture of a relaxed braid, creating a silhouette that mimics the thick, tapered look of a show-horse’s tail.
By adding specific accents—like velvet ribbons, thrifted pearls, or even hardware-store metallic rings—you transform a simple gym-ready look into a high-fashion statement.
Whether you’re heading to a rustic wedding or just want to level up your weekend brunch aesthetic, mastering the pancaking technique and choosing the right embellishments is key to making this style look intentional rather than messy.
The Crafter’s Toolkit: Essential Supplies
Before we dive into the styles, let’s talk shop. As someone who spends more time in the craft aisle than the beauty aisle, I’ve learned that the best hair accessories are often repurposed or DIY-ed.
To get that perfect horsetail volume, you’ll need more than just a hair tie.
- ◈ Texture Spray or Dry Shampoo: This is your primer. Without it, the braid will slip and lose that loose charm.
- ◈ Clear Elastic Bands: These are the invisible scaffolding of your masterpiece.
- ◈ Hair Padding or Donuts: For those of us with thinner hair, a little bit of hidden stuffing near the base of the pony helps achieve that thick horsetail diameter.
- ◈ The Accents: Velvet ribbons, silk scarves, pearl pins, leather cord, or jump rings.
- ◈ A Tail Comb: For precision sectioning and teasing the crown.
1. The Bohemian Velvet Ribbon Wrap
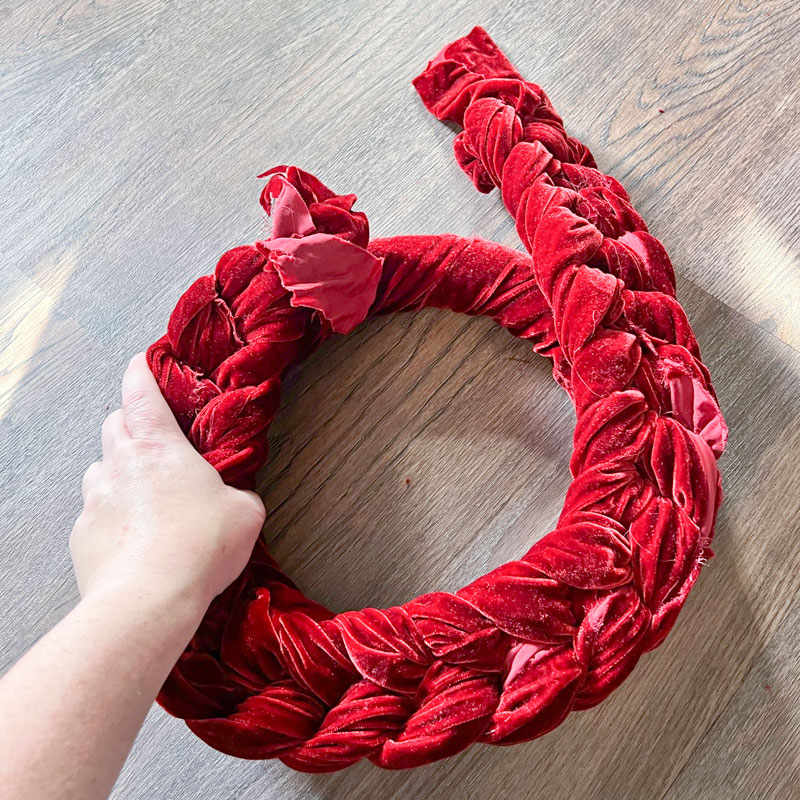
There is something incredibly nostalgic and cottagecore about velvet. For this style, we arent just tying a bow at the top; we are integrating the ribbon into the structural integrity of the braid itself.
This is my go-to when I want to hide a hair elastic that just doesnt match my outfit.
How to Style It
Start by pulling your hair into a mid-height ponytail. Secure it tightly. Take a long piece of velvet ribbon (about three times the length of your hair) and tie it around the elastic, leaving two equal tails.
Divide your ponytail into three sections, adding one ribbon tail to the left section and the other to the right section. As you perform a loose three-strand braid, the velvet will weave in and out of the hair.
The Crafty Hack
Dont buy expensive hair ribbons. Go to the fabric store and buy velvet trim by the yard. It’s a fraction of the price, and you can get custom lengths.
I recommend a 1-inch width for maximum impact. When you reach the bottom, dont just tie a knot—tie a floppy, oversized bow to balance the volume at the top of the horsetail.
2. The Pearl-Encrusted Romantic Braid
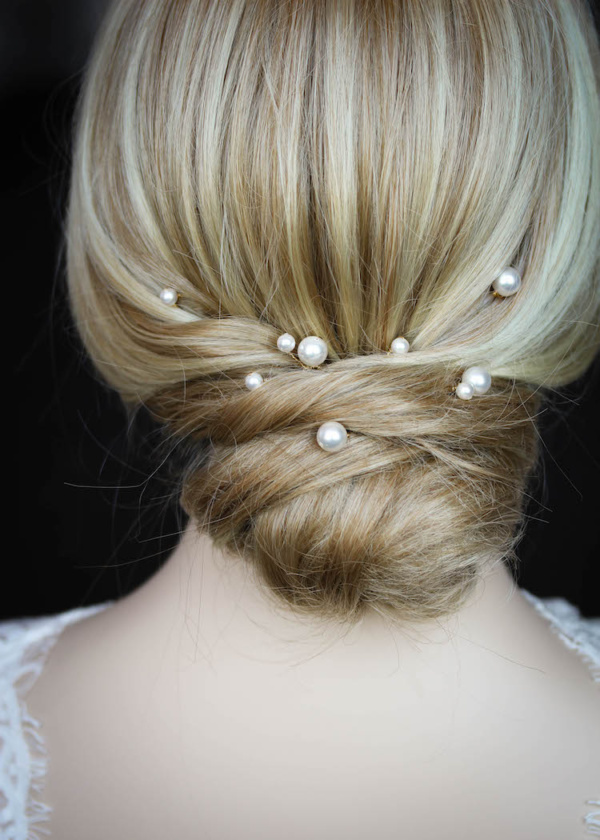
If you’re a fan of upcycling, this is the style for you. We’ve all got an old pearl necklace that’s broken or a set of grandma earrings we dont wear.
This style uses those pearls to create a scattered effect throughout the loose loops of the braid.
How to Style It
Construct a very loose Dutch braid (where the strands go under instead of over) starting from the nape of your neck and working down. Once the braid is secured with a clear elastic, pancake it.
This means gently pulling the outer edges of the braid loops to make them look three times wider. Once you have that wide, flat horsetail shape, take your pearl pins and tuck them into the center of each link of the braid.
DIY Pearl Pins
If you dont have pearl hair pins, make them! Take a standard bobby pin and a loose craft pearl with a hole through the center. Slide the pearl onto the long side of the bobby pin until it hits the curve.
Use a tiny drop of E6000 glue to secure it if the hole is too large. It’s a 5-minute craft that saves you $15 at a boutique.
3. The Leather-Bound Industrial Pony

For my edgy crafters who prefer a bit of industrial chic, leather is the way to go. This style focuses on the horsetail aspect by creating a long, structured neck at the top of the ponytail before it breaks into a messy, textured braid.
How to Style It
Pull your hair into a high ponytail and secure it. Take a strip of leather or suede cord (brown or black works best) and wrap it tightly around the first 3-4 inches of the ponytail. This creates a collar effect.
Below the leather wrap, begin a fishtail braid. A fishtail braid looks much more intricate and horse-like because of the thin strands. Keep the fishtail tight near the leather and gradually get looser as you move down.
Pro Tip for Grip
Leather can be slippery on hair. To keep your wrap from sliding down, spray the section of hair with a heavy-duty hairspray before wrapping, or anchor the first loop of leather through the hair elastic itself.
4. The Scarf-Intertwined Garden Braid
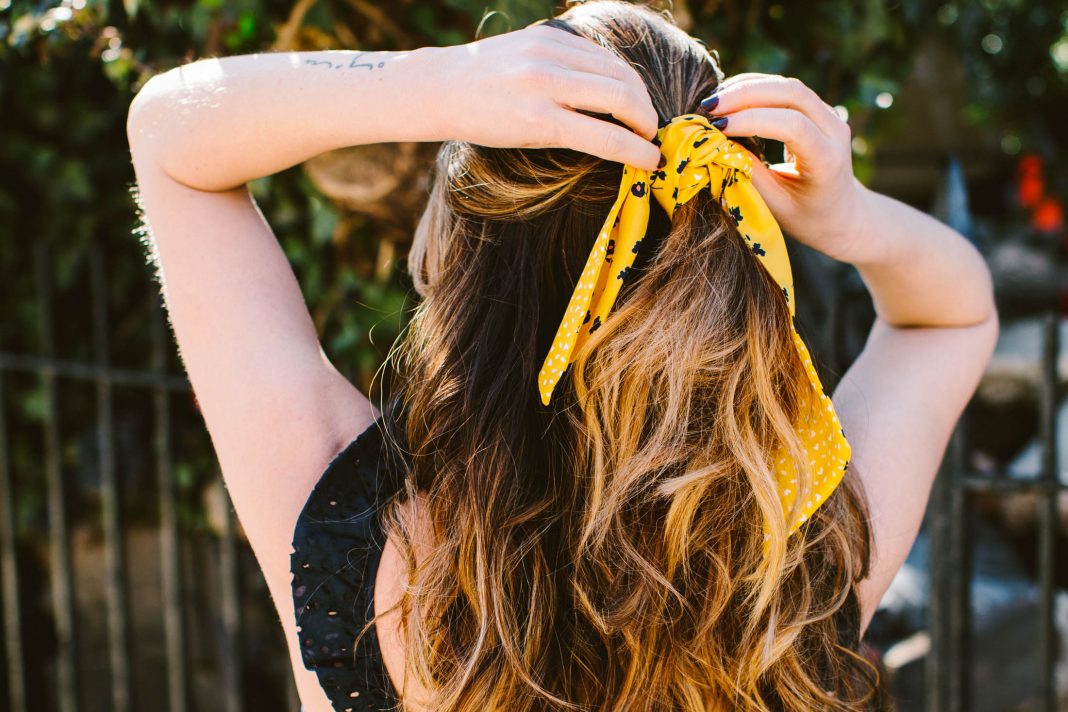
This is the ultimate hide a bad hair day trick. Using a silk or chiffon scarf adds massive volume to the braid, making even the thinnest hair look like a thick, luxurious horsetail.
It’s also a great way to repurpose those vintage scarves you find at the thrift store.
How to Style It
Fold your square scarf into a long, thin band. Tie it around the base of your ponytail. Now, treat the two ends of the scarf as two of your three braid strands.
This means you will have one strand of hair and two strands of scarf (or vice versa). Braid them together loosely. The fabric will take up a lot of space, creating a giant, colorful horsetail that looks incredibly high-end.
Choosing the Fabric
Avoid heavy cotton fabrics; they weigh the head down and can cause headaches. Stick to silk, satin, or lightweight polyester.
If the scarf is too long, dont cut it! Just wrap the excess around the base of the ponytail a few extra times to create a scrunchie effect.
5. The Metallic Ring & Chain Braid
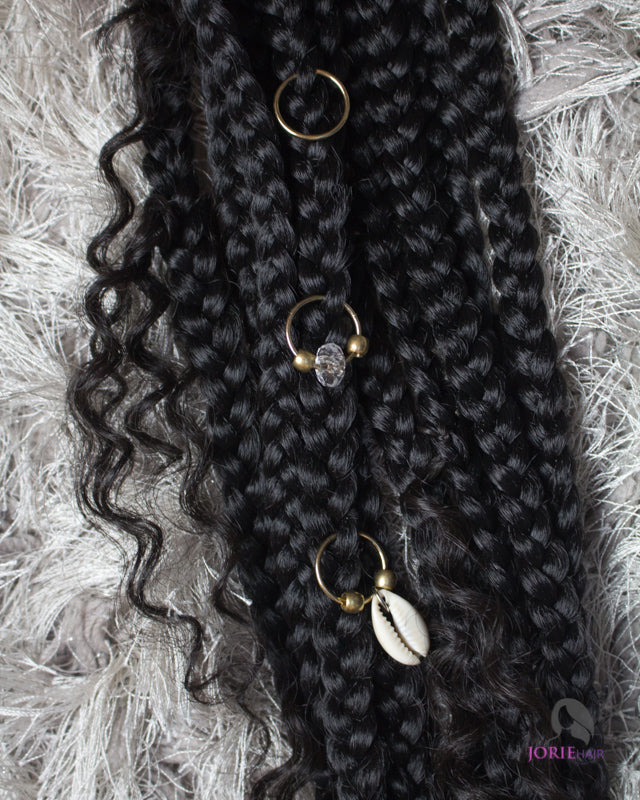
This is where the hardware store meets the hair salon. We’re using jump rings or hair piercings to add a metallic, modern edge to the loose braid.
It’s perfect for festivals or concerts where you want a look that stays put but looks undone.
How to Style It
Create a standard loose ponytail braid. Before you start braiding, slide small metallic rings (available in the jewelry-making aisle) onto small sections of hair.
As you braid, position these rings so they sit on the outer crest of each braid loop. Alternatively, you can use clip-in rings that snap shut over the hair once the braid is finished.
The Hardware Secret
If you cant find specific hair rings, go to the jewelry section of a craft store and look for Open Jump Rings in 10mm or 12mm sizes. Use a pair of needle-nose pliers to open them, hook them through a small section of the braid, and squeeze them shut.
It’s much cheaper than buying official hair jewelry, and you get a variety of finishes like antique bronze, silver, and gold.
Style Comparison Table
Not sure which one to try first? Here is a quick breakdown of the difficulty and vibe of each style.
| Style Name | Difficulty (1-5) | Time Required | Best For… | Key Material |
|---|---|---|---|---|
| Velvet Ribbon | 2 | 10 Mins | Romantic dates / Fall vibes | Velvet trim |
| Pearl Encrusted | 3 | 15 Mins | Weddings / Formal events | DIY Pearl pins |
| Leather Industrial | 4 | 20 Mins | Concerts / Edgy outfits | Suede/Leather cord |
| Scarf Intertwined | 1 | 5 Mins | Beach days / Casual lunch | Thrifted silk scarf |
| Metallic Rings | 5 | 25 Mins | Festivals / High fashion | Jewelry jump rings |
The Pancaking Technique: A Masterclass
The secret to any loose horsetail braid is the pancake. If you just braid your hair and leave it, it looks like a schoolgirls plait.
To make it a horsetail, you need width.
- Secure the Bottom First: Never pancake a braid until the end is tied off. If you do, the whole thing will just fall apart.
- Start from the Bottom: Work your way up. Use your thumb and forefinger to gently tug at the outermost edges of the braid.
- The Wiggle Motion: Dont just pull out; wiggle the hair slightly to loosen the fibers without pulling the strand completely out of the loop.
- Hairspray as You Go: Once a section looks perfectly pancaked, hit it with a puff of light-hold hairspray to freeze the volume.
Frequently Asked Questions (FAQ)
How do I stop my loose braid from falling out after an hour?
The secret is grit. Clean hair is too slippery. Use a sea salt spray or a volumizing powder before you start.
Also, using hidden elastics every few inches inside the braid (the bubble braid method) can provide a skeleton that keeps the loose hair in place.
Can I do this with short hair?
The horsetail look relies on length to get that tapered tail effect. If your hair is shoulder-length, I recommend using a wrap-around ponytail extension.
You can braid the extension hair just like your own, and the accent (like a scarf or ribbon) will hide the attachment point perfectly.
My hair is very thin; how can I get that thick horsetail look?
Crimp your hair first! Use a micro-crimper on the inner layers of your hair. This creates massive mechanical volume that doesnt fall flat like teasing does.
When you braid it, the crimped texture will make the braid look twice as thick.
Where can I find the best accents on a budget?
Thrift stores are gold mines for silk scarves and vintage jewelry that can be taken apart. For ribbons and hardware, skip the beauty supply store and head to the Trim or Jewelry Making aisles of a craft store like Michaels or Joann Fabrics.
Conclusion
Styling a horsetail loose braid is more like a craft project than a grooming routine. It’s about playing with textures, balancing volumes, and using accents to tell a story.
Whether you choose the soft romance of velvet or the hard edge of metallic rings, remember that the imperfections are what make this style work. A few flyaways and a slightly lopsided loop only add to the cool girl aesthetic.
So, grab your ribbons, find your favorite old scarf, and start braiding. Your hair is just another canvas for your creativity—treat it with the same DIY spirit you bring to your home decor!
Leave a Reply