Creating professional, eye-catching DIY candle labels is the secret to transforming a simple jar of wax into a high-end home decor piece or a thoughtful handmade gift.
Whether you are launching a small business or simply want to organize your home fragrance collection, the label serves as the face of your candle, communicating the scent profile, mood, and brand story.
By utilizing digital design tools like Canva, specialized label papers, and creative upcycling techniques, you can achieve a boutique aesthetic at a fraction of the cost.
1. Minimalist Monochrome Typography
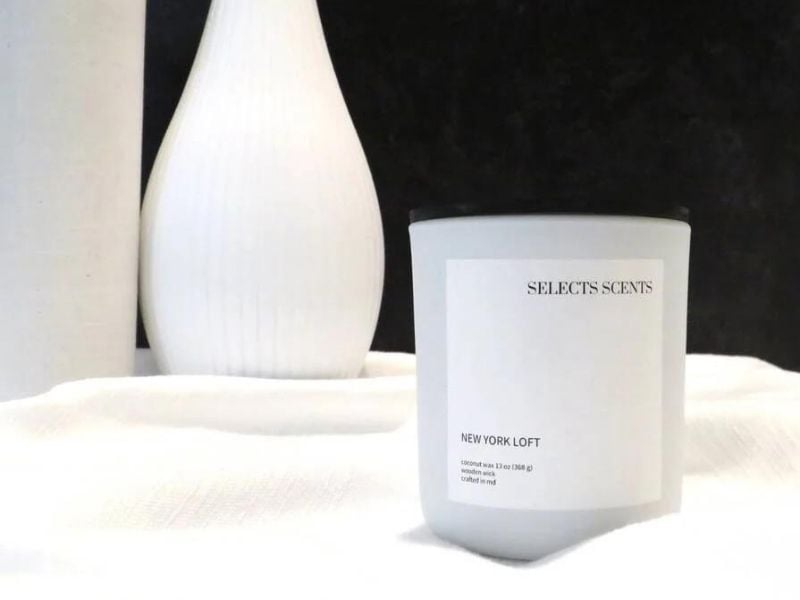
Minimalist labels are currently dominating the luxury candle market. This style focuses on clean lines, ample white space, and high-contrast typography.
The goal is to let the scent name be the hero of the design without distracting graphics.
- ✓ The Design: Use a bold sans-serif font for the scent name (e.g., SANDALWOOD) and a smaller, light serif font for the details like Hand-poured or 100% Soy Wax.
- ✓ The Paper: Use a matte white or eggshell-textured sticker paper.
- ✓ Pro Tip: Stick to a strictly black-and-white color palette to maintain a sophisticated, Scandinavian-inspired look.
2. Vintage Apothecary Style
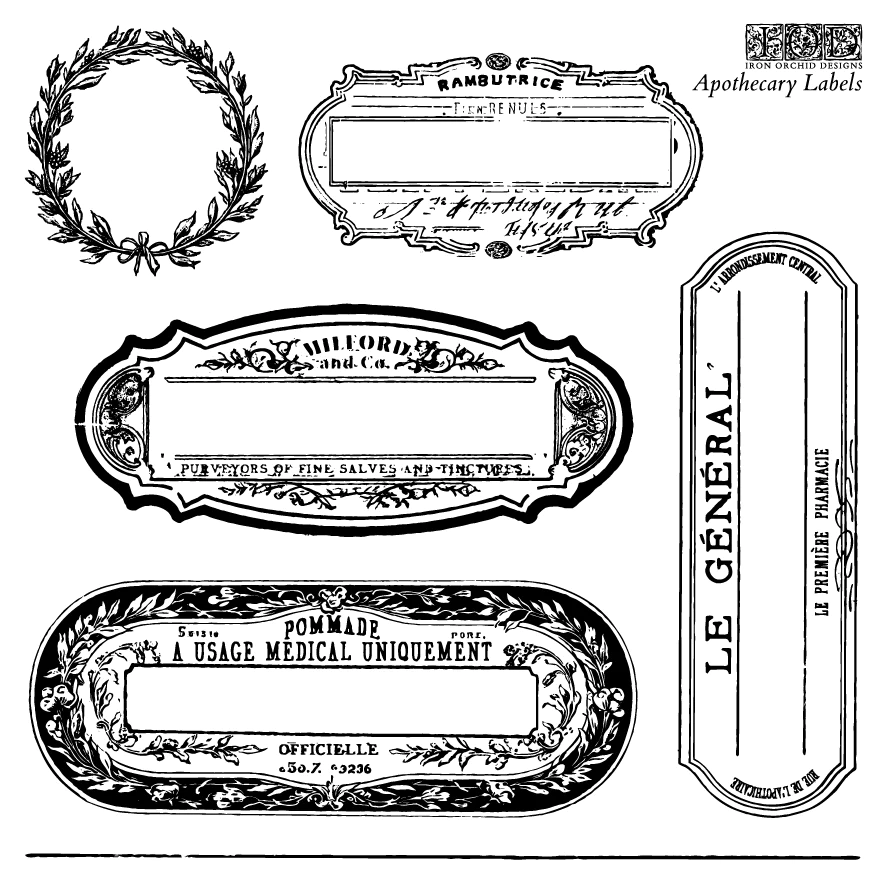
Inspired by old-world pharmacies, these labels evoke a sense of nostalgia and craftsmanship.
They often feature aged paper textures and intricate border frames.
- ✓ The Design: Incorporate elements like Batch No., Date Distilled, and Master Blender Signature. Use typewriter fonts (like Courier or American Typewriter) to enhance the authentic feel.
- ✓ The Paper: Kraft paper or parchment style adhesive sheets work best. You can even tea-stain white paper before printing for an extra weathered effect.
- ✓ Tutorial Step: Distress the edges of the label with a bit of brown ink or a slightly dampened sponge to give it that 19th-century aesthetic.
3. Pressed Flower and Botanical Prints
Perfect for floral or herbal scents like lavender, rose, or eucalyptus, botanical labels bring a touch of nature to your candle jars.
You can use realistic illustrations or actual dried elements.
- ✓ The Design: Search for public domain vintage botanical illustrations. Place the image on one side of the label and the text on the other.
- ✓ The Technique: For a 3D effect, glue a small dried flower to the jar and cover it with a clear, transparent label that has the text printed on it.
- ✓ Best For: Spring collections and eco-friendly gift sets.
4. Custom Watercolor Washes
Watercolor labels add an artistic, soft, and handmade touch. These are ideal for mood-based candles, such as Ocean Breeze or Sunset Glow, where the colors represent the feeling of the scent.
- ✓ The Design: Create a soft wash of color (pinks for florals, blues for fresh scents) as the background. Keep the text centered and simple.
- ✓ The Paper: Use a textured felt paper if your printer can handle it, as it mimics the look of real watercolor paper.
- ✓ DIY Hack: You can paint actual watercolor onto labels, let them dry, and then run them through your printer for the text.
5. Textured Fabric and Linen Labels
Moving away from traditional paper, fabric labels provide a tactile experience that screams premium craft.
This is an excellent upcycling project if you have scrap linen or cotton.
- ✓ The Design: Since printing directly on fabric can be tricky for beginners, you can print your design on iron-on transfer paper and apply it to a piece of linen.
- ✓ The Application: Use a strong adhesive spray or double-sided fabric tape to attach the linen strip to the jar.
- ✓ Pro Tip: Fray the edges of the fabric slightly for a rustic, farmhouse-chic appearance.
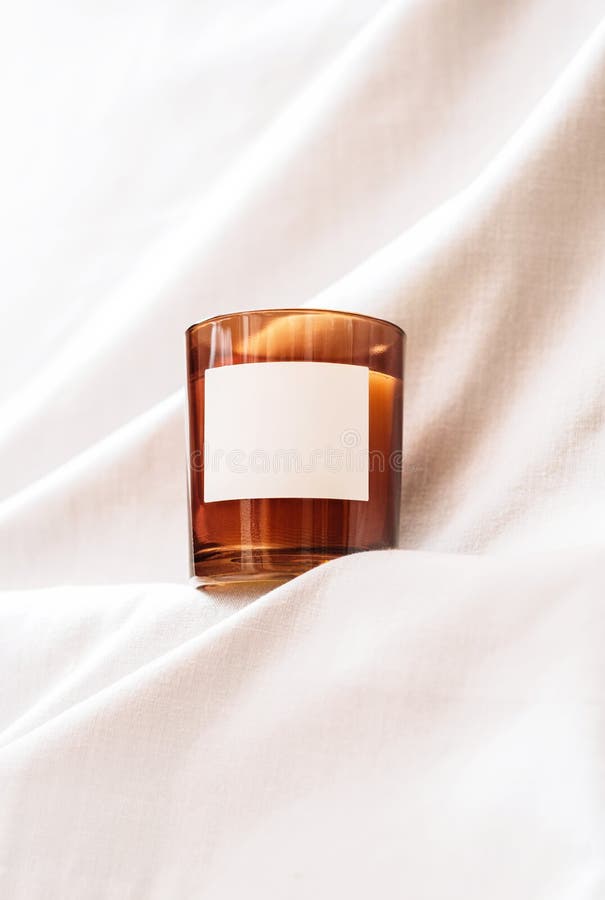
6. Transparent No-Label Look
The transparent label creates a seamless look where the text appears to be printed directly onto the glass.
This is highly effective for colored wax or jars with unique textures.
- ✓ The Design: Use high-contrast colors (usually pure black or bright white) so the text remains readable against the wax.
- ✓ The Paper: Clear gloss or clear matte sticker film.
- ✓ Application Trick: Clean the glass jar thoroughly with rubbing alcohol before applying to ensure there are no fingerprints or oils trapped under the clear film.
7. Chalkboard and Erasable Labels
If you frequently reuse your jars or like to change the names of your scents, chalkboard labels are a functional and stylish choice.
They offer a cozy, kitchen-craft vibe.
- ✓ The Design: Use pre-cut chalkboard stickers.
- ✓ The Customization: Use a white liquid chalk marker for a crisp look that won’t smudge easily but can be wiped off with a damp cloth.
- ✓ Best For: Kitchen candles (e.g., Cinnamon Apple) or personalized gifts where you can write a custom message for the recipient.
8. Washi Tape and Eclectic Collage
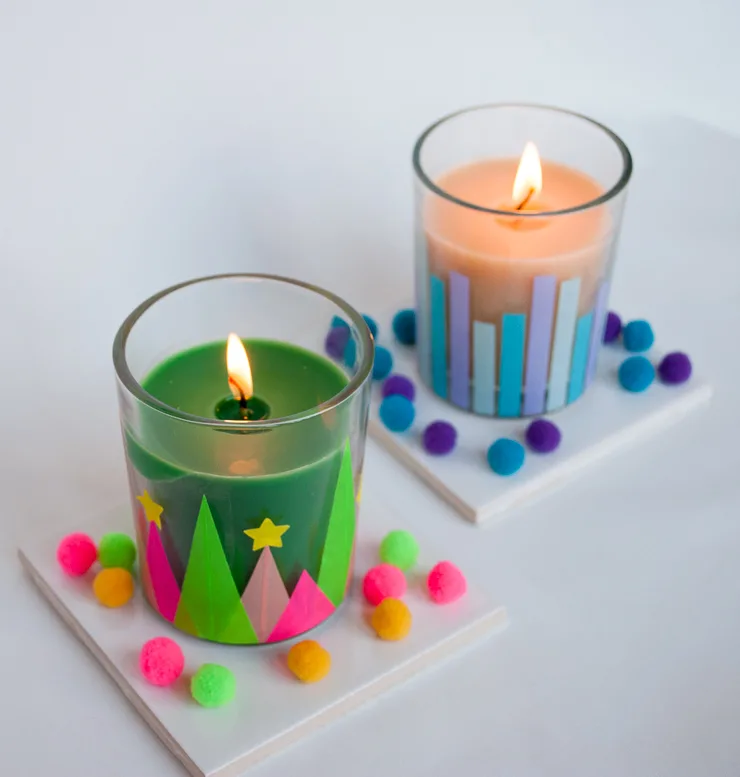
For the maximalist crafter, washi tape labels offer endless color and pattern possibilities.
This is a great way to color-code different scent families (e.g., florals in pink tape, woods in green tape).
- ✓ The Design: Layer strips of washi tape horizontally or vertically around the jar. Place a smaller, simple paper label on top with the scent name.
- ✓ The Vibe: Bright, cheerful, and youthful.
- ✓ Tutorial Step: Mix and match patterns like polka dots, stripes, and solid colors to create a scrapbook aesthetic on your candle vessel.
9. Luxury Metallic Gold Foil
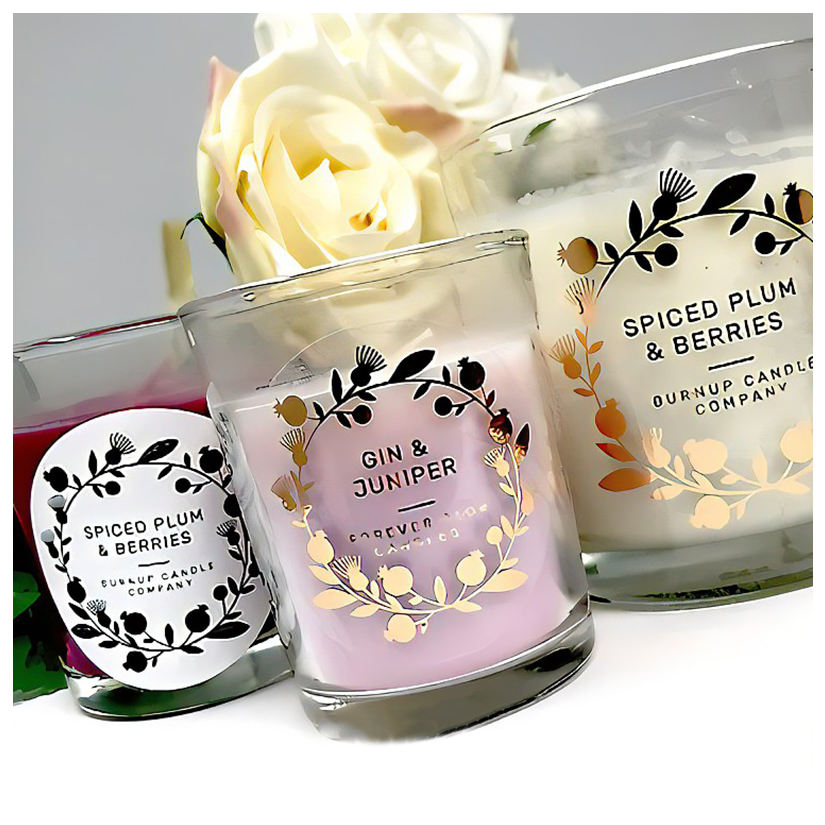
Nothing says expensive like metallic accents. Gold, silver, or rose gold foil labels are perfect for holiday collections or wedding favors.
- ✓ The Design: Keep the graphics minimal so the foil can shine. Ornate borders or a single foiled logo work best.
- ✓ The Technique: You can use a Minc machine or a laminator with reactive foil, or simply purchase gold foil printable sticker paper.
- ✓ The Impact: These labels catch the light beautifully when the candle is lit, enhancing the glow of the flame.
10. Personalized Photo Labels
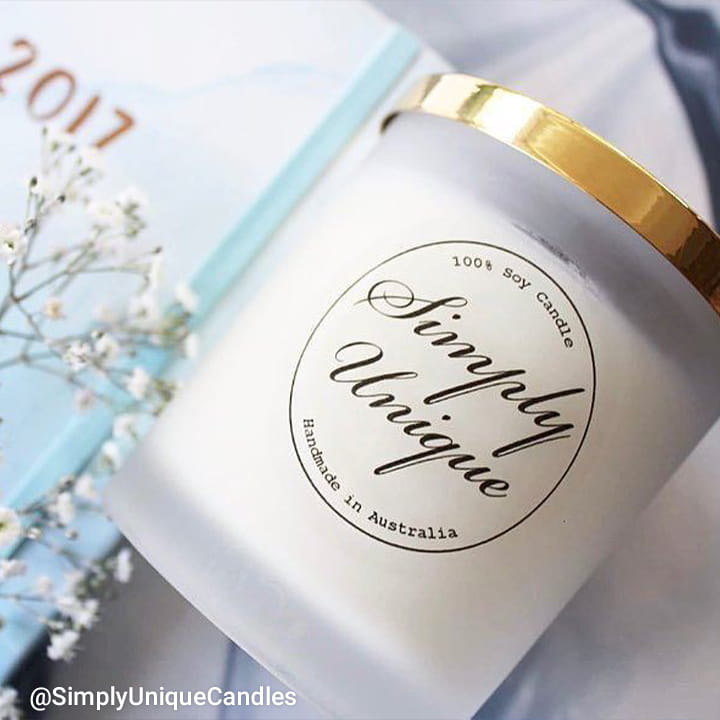
Photo labels turn a candle into a cherished memento. These are popular for memorial candles, wedding anniversaries, or new home gifts.
- ✓ The Design: Use a high-resolution photo as the background (slightly faded or with an overlay) and place the text in a clean box in the center.
- ✓ The Paper: High-gloss photo sticker paper to ensure the image remains sharp and vibrant.
- ✓ Sentiment: Add a small quote or a date at the bottom of the photo to commemorate the specific occasion.
Technical Specifications: Choosing the Right Label Material
Selecting the right material is just as important as the design. Candles get hot, and some fragrance oils can dissolve standard ink.
Refer to the table below to choose the best material for your project.
| Label Material | Best For… | Durability | Aesthetic |
|---|---|---|---|
| Matte Paper | Minimalist/Modern | Low (smudges with oil) | Clean & Professional |
| Glossy Paper | Photo Labels | Medium | Vibrant & Shiny |
| Weatherproof Polyester | Professional Selling | High (Oil/Water resistant) | Sleek & Durable |
| Kraft Paper | Rustic/Apothecary | Medium | Earthy & Natural |
| Clear Film | No-Label Look | High | Seamless & Elegant |
Step-by-Step: How to Design and Apply Your Labels
Phase 1: Designing
- Measure Your Jar: Use a flexible measuring tape to determine the height and circumference. Ensure your label doesn’t overlap the curve of the jar, or it will wrinkle.
- Use a Template: Open Canva or Avery Design & Print. Set your custom dimensions based on your measurements.
- Hierarchy of Information: Place the Scent Name largest, followed by the Wax Type, and then the Weight (e.g., 8 oz / 226g).
Phase 2: Printing
- Print a Test Sheet: Always print on regular printer paper first to check the sizing against your jar.
- Adjust Quality Settings: Set your printer to High Quality or Photo Paper mode to ensure the ink is saturated and crisp.
- Let it Dry: If using inkjet printers, let the labels sit for at least 30 minutes before touching them to avoid smearing.
Phase 3: Application
- Prep the Surface: Wipe the jar with 70% isopropyl alcohol.
- The Center Technique: Peel the backing and hold the label by the edges. Line up the center of the label with the center of the jar. Press down in the middle first, then smooth outward to the edges to prevent air bubbles.
Frequently Asked Questions (FAQ)
1. Do I need a special printer for candle labels?
No, most DIYers use standard Inkjet or Laser printers. However, if you are using an Inkjet, ensure you use Inkjet-compatible sticker paper to prevent the ink from running.
2. How do I make my labels oil-proof?
Fragrance oils can ruin paper labels. To make them oil-proof, use Weatherproof Polyester label sheets, or apply a clear fixative spray or a piece of clear packing tape over a standard paper label.
3. What information is legally required on a candle label?
If you are selling your candles, you generally need:
- ● The brand name and location.
- ● The name of the scent.
- ● The net weight of the candle.
- ● A Safety Warning Label (usually placed on the bottom) containing fire safety icons and instructions.
4. Can I put labels on the lid instead of the jar?
Absolutely! Lid labels are a great way to keep the glass looking clean and unbranded while still providing necessary information.
Conclusion
Creating unique DIY candle labels is one of the most rewarding parts of the candle-making process.
It allows you to express your personal style, whether that is the rugged charm of a vintage apothecary jar or the sleek sophistication of a minimalist glass tumbler.
By following the design ideas and technical tips outlined above, you can ensure your handmade candles look just as good as they smell.
Remember, the best label is one that reflects the soul of the scent inside—so don’t be afraid to experiment with textures, colors, and typography until you find the perfect match for your creation.
Leave a Reply