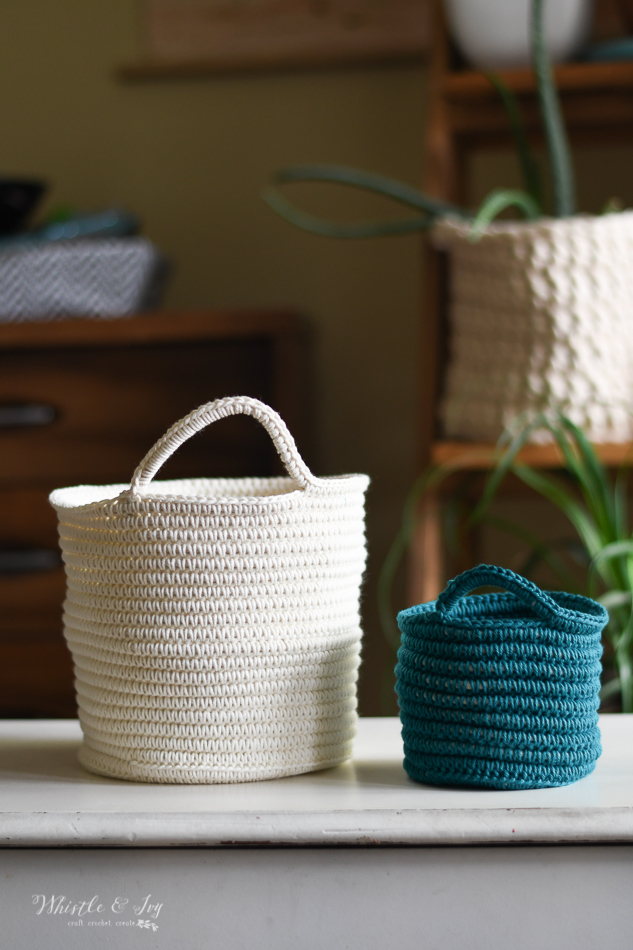
DIY rope baskets are the ultimate intersection of functional storage and high-end aesthetic appeal.
Whether you are aiming for a minimalist Scandinavian look, a cozy coastal vibe, or a rustic farmhouse feel, these versatile containers offer a tactile warmth that plastic bins simply cannot replicate.
By using simple materials like cotton piping, jute twine, or sisal rope, you can create custom-sized organizers for everything from laundry and toys to keys and jewelry.
Not only is crafting your own rope basket more cost-effective than purchasing designer versions, but it also allows for complete creative control over color, texture, and size.
Essential Supplies for DIY Rope Baskets
Before diving into the specific projects, ensure you have these fundamental supplies on hand.
The choice of rope significantly impacts the final look and structural integrity of your basket.
| Material Type | Best Use Case | Pros |
|---|---|---|
| Cotton Piping/Clothesline | Large storage bins, nursery decor | Soft texture, easy to sew, takes dye well |
| Jute or Sisal Rope | Entryway bowls, plant covers | Durable, rustic aesthetic, holds shape well |
| Nylon/Poly Rope | Outdoor storage, mudrooms | Moisture resistant, colorful |
| Leather Scraps | Handles and accents | Adds a premium, professional finish |
1. The Classic No-Sew Coiled Cotton Basket
The no-sew method is the most accessible entry point for DIY beginners.
Using a high-temperature glue gun, you can build a sturdy basket by spiraling cotton clothesline around itself.
This project is perfect for creating small “catch-all” trays for coffee tables or bedside stands.
How to Make It:
- Start the Base: Apply a small bead of glue to the end of your rope and fold it over to create a tight center.
- Coil: Continue wrapping the rope around the center, applying glue to the side of the rope as you go. Keep the base flat on a table to ensure it remains even.
- Build the Walls: Once your base reaches the desired diameter, begin stacking the rope slightly on top of the previous layer rather than next to it.
- Finish: Cut the rope at an angle (tapering it) and glue the end firmly to the inside of the basket to hide the raw edge.
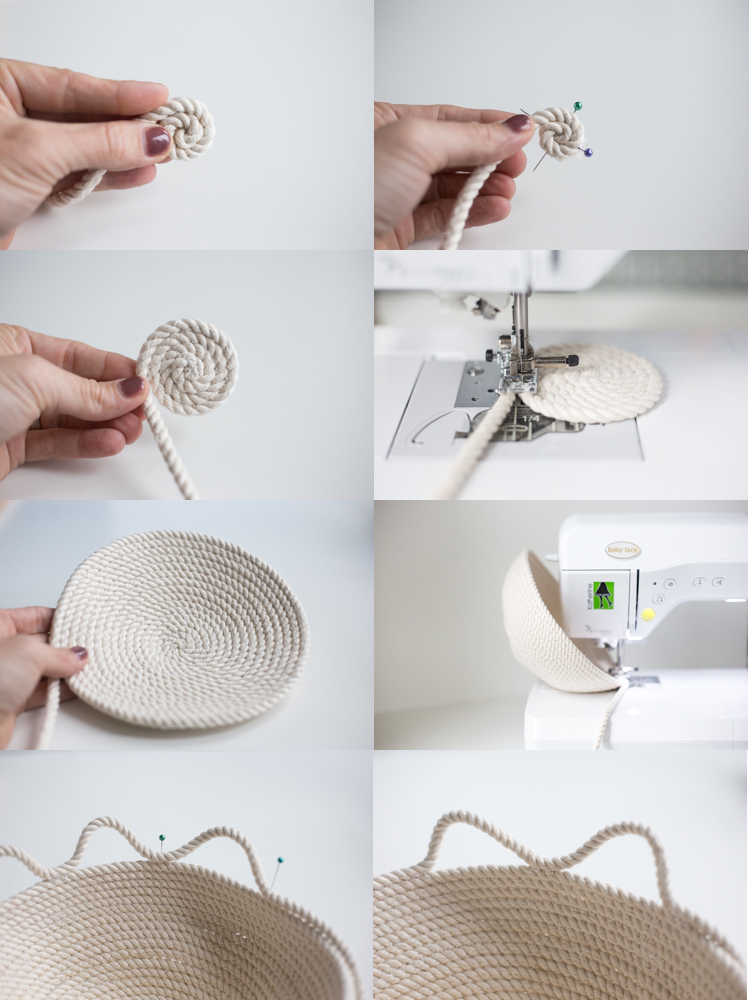
2. The Zig-Zag Stitched Sewing Machine Basket
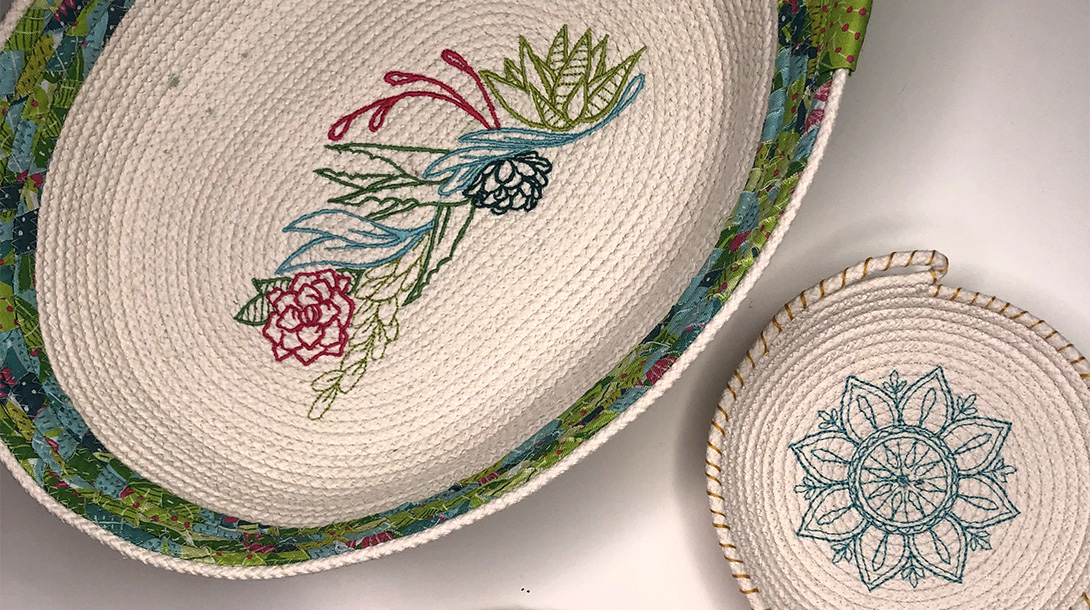
For a professional, boutique-quality finish, using a sewing machine is the gold standard.
This method creates a flexible yet incredibly durable textile that can withstand heavy use.
It requires a heavy-duty needle (90/14 or 100/16) and a zig-zag stitch setting.
How to Make It:
- The Center: Coil the first three inches of rope by hand and secure it with a few pins.
- The Stitch: Set your machine to a wide zig-zag stitch. Place the coil under the presser foot so the needle catches both sides of the rope as they meet.
- The Turn: Slowly rotate the coil as you sew. Once the base is large enough, tilt the base upward against the side of the machine to begin creating the walls.
- Styling Tip: Use a contrasting thread color (like neon pink or deep navy) to make the stitching a design feature.
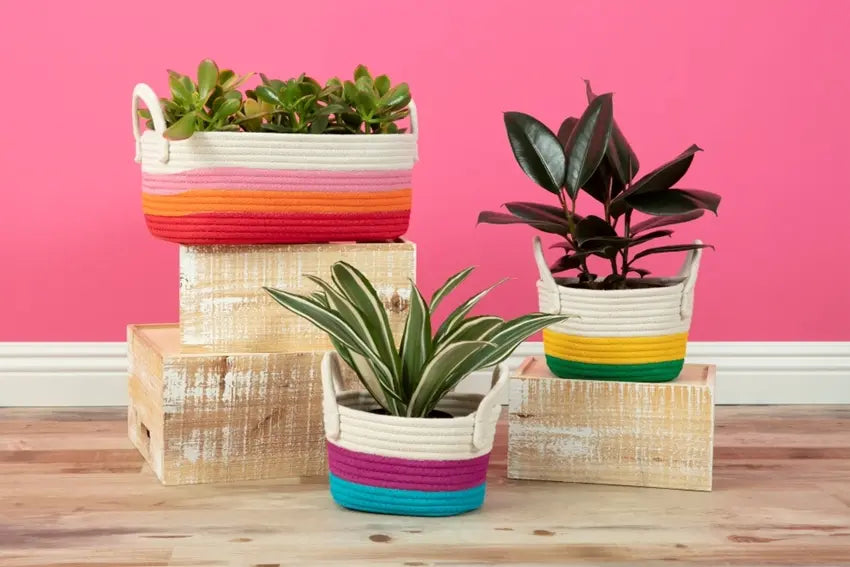
3. Ombre Dyed Rope Storage Bin
Adding color to cotton rope is a fantastic way to match your basket to specific room palettes.
The ombre effect provides a sophisticated transition from deep saturated tones to the natural cream of the cotton.
How to Make It:
- Dye the Rope First: Submerge the first third of your rope bundle into a fabric dye bath (like Rit Dye) for 20 minutes. Dip the next third for only 5 minutes, and leave the final third natural.
- Dry Completely: Ensure the rope is 100% dry before sewing or gluing to prevent the color from bleeding onto your machine or hands.
- Construct: Follow the sewing or gluing methods mentioned above, starting with the darkest color at the bottom of the basket for a “grounded” look.
4. Jute Rope Tiered Hanging Basket
Vertical storage is a lifesaver in small kitchens or bathrooms.
Using a rougher jute rope provides the structural strength needed to hold produce or toiletries while suspended from the ceiling or a wall hook.
How to Make It:
- Create Three Baskets: Make three flat-bottomed baskets in increasing sizes (small, medium, large).
- Connect with Vertical Ropes: Use three long strands of thicker sisal rope to thread through the sides of the baskets.
- Secure with Knots: Tie heavy-duty knots under each basket layer to keep them level.
- Best For: Storing onions and potatoes in the kitchen or hand towels in a guest bath.
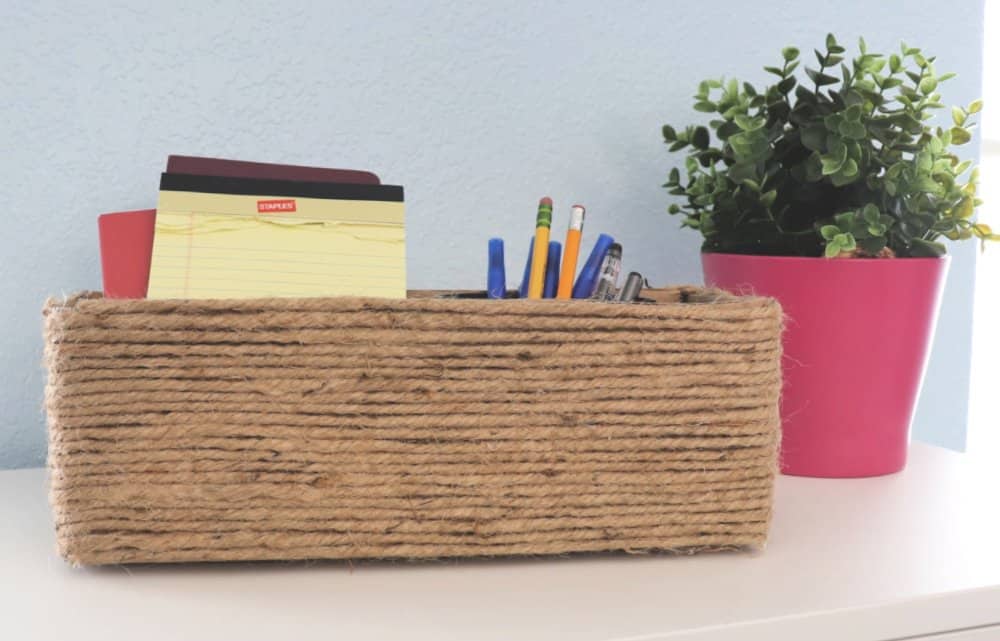
5. Upcycled Cardboard Box & Rope Wrapper
If you struggle with maintaining a perfect circular shape, use a “form.”
An old shipping box can be transformed into a high-end rectangular storage crate by wrapping it in rope.
How to Make It:
- Prep the Box: Cut the top flaps off a sturdy cardboard box.
- Line the Inside: Glue fabric or a pillowcase inside the box first to hide the cardboard.
- Wrap the Exterior: Starting at the bottom, glue the rope in continuous horizontal lines around the box.
- Finish the Rim: Ensure the final loop of rope covers the raw edge of the cardboard and the fabric liner.
6. Nautical Rope Tote with Leather Handles
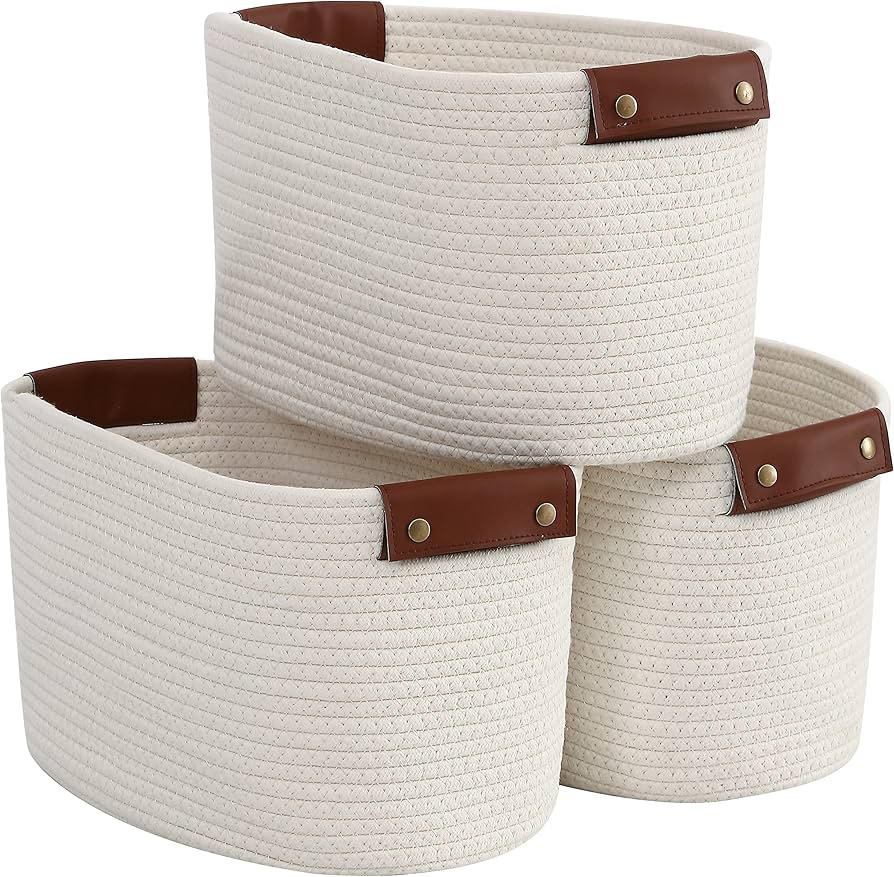
Adding leather handles elevates a DIY project from “crafty” to “commercial quality.”
This style is particularly effective for large laundry hampers or firewood carriers where a strong grip is necessary.
How to Make It:
- Construct a Large Cylinder: Use the sewing machine method for maximum strength.
- Source Leather: Use old belts or purchase leather strips from a craft store.
- Attach: Punch holes in the leather and use copper rivets or heavy embroidery thread to “X” stitch the handles onto the sides of the basket.
- Pro Tip: Position handles exactly opposite each other to ensure the basket remains balanced when carried.
7. Pom-Pom Embellished Nursery Basket
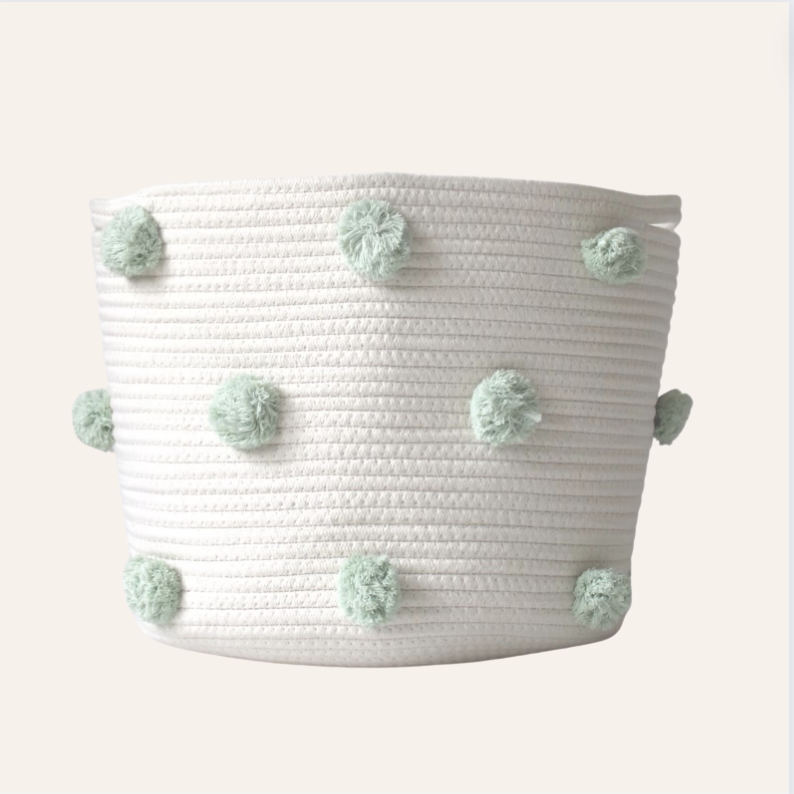
Rope baskets are ideal for nurseries because they are soft, have no sharp edges, and are easy to clean.
Adding colorful yarn pom-poms adds a playful, tactile element that kids love.
How to Make It:
- Build a Basic White Basket: Use white or cream cotton clothesline.
- Make Pom-Poms: Use a pom-pom maker or the fork method to create 10-15 yarn balls in various sizes.
- Attach: Use a yarn needle to pull the pom-pom tails through the rope layers and tie them securely on the inside.
- Placement: Arrange them in a single row around the rim or scattered across the front of the basket.
8. Square Rope Basket with Wooden Base
For items that require a perfectly flat, rigid bottom (like books or heavy magazines), a wooden base is superior to a coiled rope base.
How to Make It:
- The Base: Use a pre-cut wooden circle or square from a craft store. Drill small holes around the perimeter, spaced about 1/2 inch apart.
- The Anchor: “Sew” the first layer of rope to the wood by looping twine through the holes and around the rope.
- Build Up: Once the first layer is anchored to the wood, continue gluing or sewing subsequent rope layers on top of each other.
- Stability: This hybrid method ensures the basket won’t “belly out” under weight.
9. Two-Tone Sisal Entryway Bowl
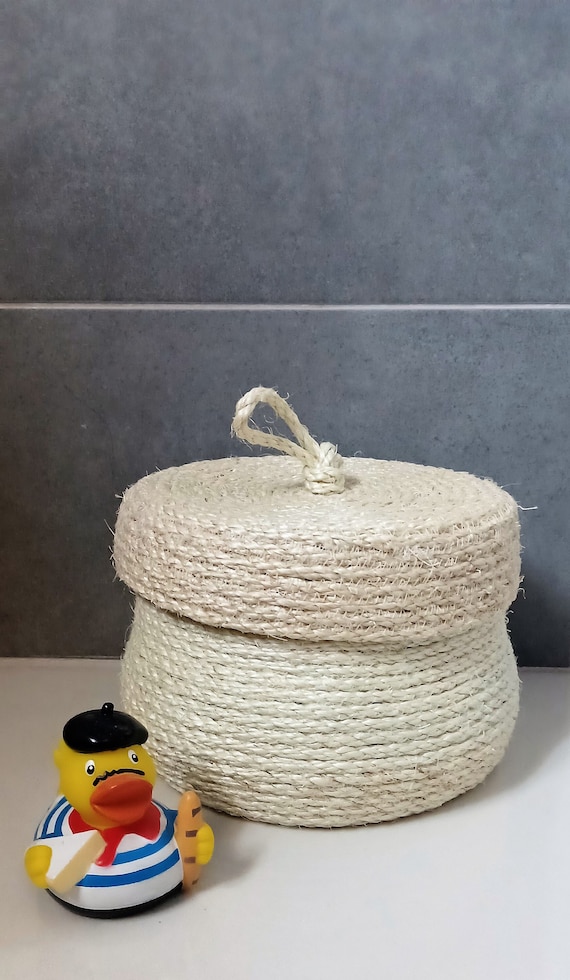
Sisal rope is stiffer and more “hairy” than cotton, giving it a distinct organic feel.
A two-tone design—using natural sisal and a dyed version—creates a striking geometric look for entryway organization.
How to Make It:
- The Split: Coil the first half of the basket using natural rope.
- The Transition: Cut the natural rope at a sharp angle and “butt” the dyed rope up against it, securing the joint with extra glue or tight stitches.
- Shape: Create a shallow, wide bowl shape by angling the rope outward at a 45-degree angle rather than a 90-degree vertical.
- Use Case: Perfect for holding keys, sunglasses, and mail.
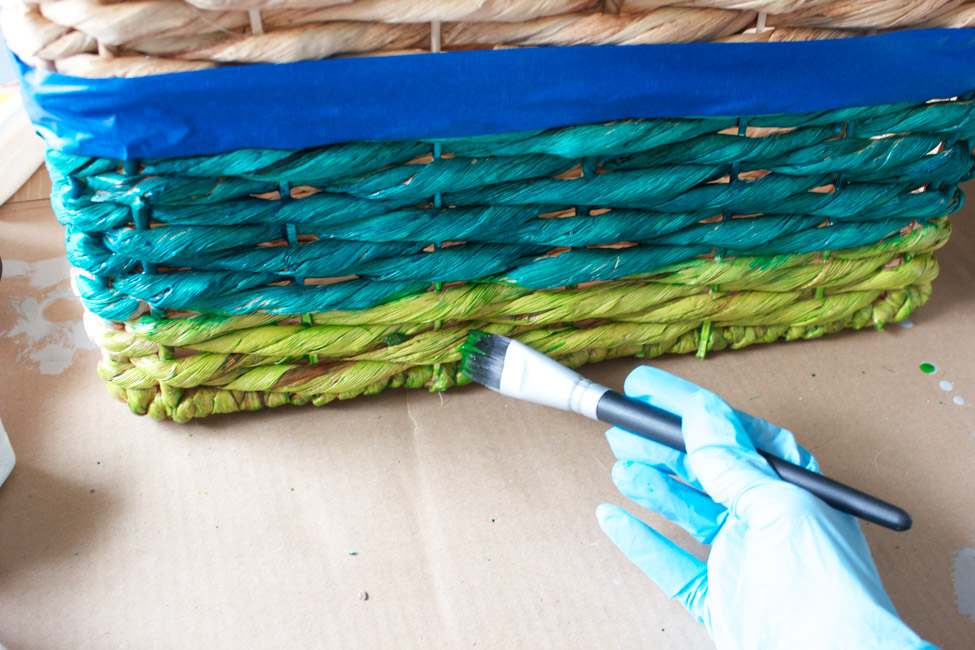
10. Painted Pattern Rope Basket
If you aren’t comfortable with dyeing rope, painting it after the basket is constructed is a great alternative.
This allows for sharp lines, triangles, or even polka dots.
How to Make It:
- Masking: Use painter’s tape to mark off geometric sections on your finished rope basket.
- Paint: Use acrylic paint mixed with a “fabric medium” to ensure the paint remains flexible and doesn’t crack.
- Stipple: Use a dabbing motion with your brush to get the paint into the crevices of the rope fibers.
- Seal: Once dry, a light coat of clear matte spray sealer can help prevent the paint from chipping.
Tips for Maintaining Your DIY Rope Baskets
To ensure your handmade creations last for years, follow these maintenance guidelines:
- ✨Dusting: Use a vacuum attachment or a lint roller to remove dust from the crevices of the rope.
- ✨Spot Cleaning: For cotton baskets, use a damp cloth with mild detergent. Avoid soaking the basket, as it can lose its shape.
- ✨Reshaping: If a basket becomes misshapen, lightly steam it with a clothes steamer and stuff it with towels until it dries and regains its form.
- ✨Avoid Moisture: Jute and sisal are organic fibers that can mildew if kept in high-humidity environments like unventilated bathrooms.
Frequently Asked Questions
Q: What is the best glue for no-sew rope baskets?
A: Use high-temperature hot glue sticks. They provide a stronger bond than low-temp glue, which is essential for the structural integrity of the basket. For extra durability, look for “industrial strength” glue sticks.
Q: Can I wash my DIY rope basket in the washing machine?
A: It is not recommended. The agitation can weaken the glue or cause the zig-zag stitches to pull. Furthermore, the rope can take a very long time to dry, leading to potential mold issues inside the coils.
Q: How much rope do I need for a medium-sized basket?
A: A standard 10-inch diameter basket that is 6 inches tall typically requires about 50 to 75 feet of 1/4-inch thick rope. Always buy a little more than you think you’ll need to avoid mid-project joins.
Q: My basket is “wobbly.” How can I make it stiffer?
A: You can spray the finished basket with a heavy fabric stiffener or a mixture of water and school glue (PVA). Allow it to dry around a solid form (like a bucket) to set the shape.
Conclusion
DIY rope baskets are more than just a weekend craft; they are a sustainable, stylish solution to home clutter.
From the rustic charm of sisal to the modern clean lines of stitched cotton, there is a style to fit every room in your house.
By mastering these ten ideas, you can create a cohesive storage system that reflects your personal style while keeping your space organized and serene.
Grab your glue gun or head to your sewing machine—your perfectly organized home is just a few coils away.
Leave a Reply