Creating a beautiful flower painting is not only a rewarding experience but also a great way to relax and express your creativity. Whether you’re new to painting or just looking for some inspiration, this tutorial will guide you through each step to create a gorgeous floral masterpiece. I remember when I first started painting, I was a bit intimidated by the process. But once I got the hang of it, I found it to be a wonderfully meditative and fulfilling hobby. Let’s dive in!
Materials You’ll Need 🛠️
Before we start, make sure you have the following materials:
- Acrylic paints: Red, yellow, and green.
- Brushes: A medium round brush and a fine detail brush.
- Canvas or watercolor paper: Choose your preferred surface.
- Palette: For mixing your colors.
- Water and paper towels: To clean your brushes and manage any messes.
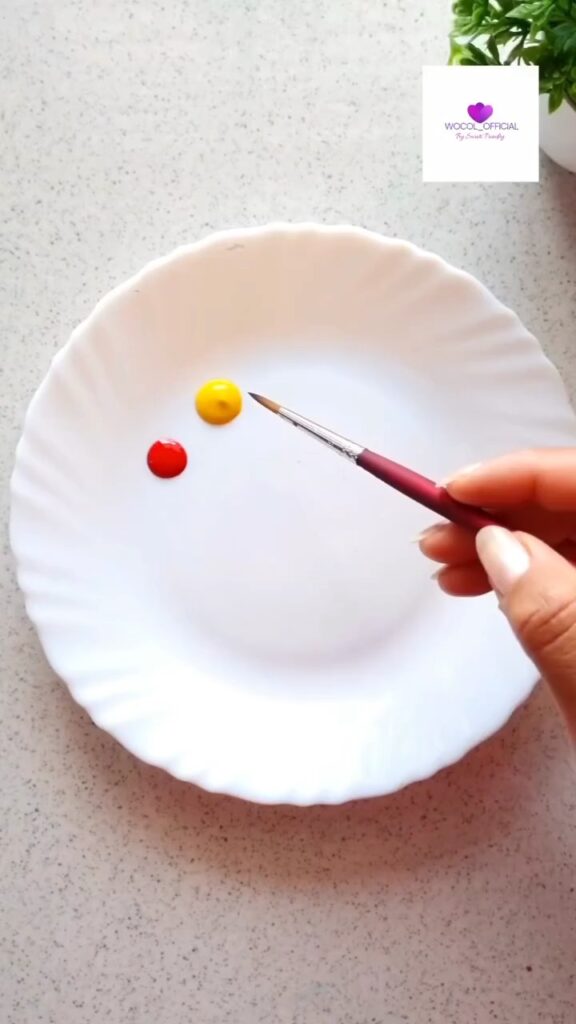
Step 1: Preparing Your Palette 🎨
Start by squeezing small amounts of red and yellow paint onto your palette. These will be your base colors for the flower petals. The mix of these colors will give you a beautiful gradient effect.
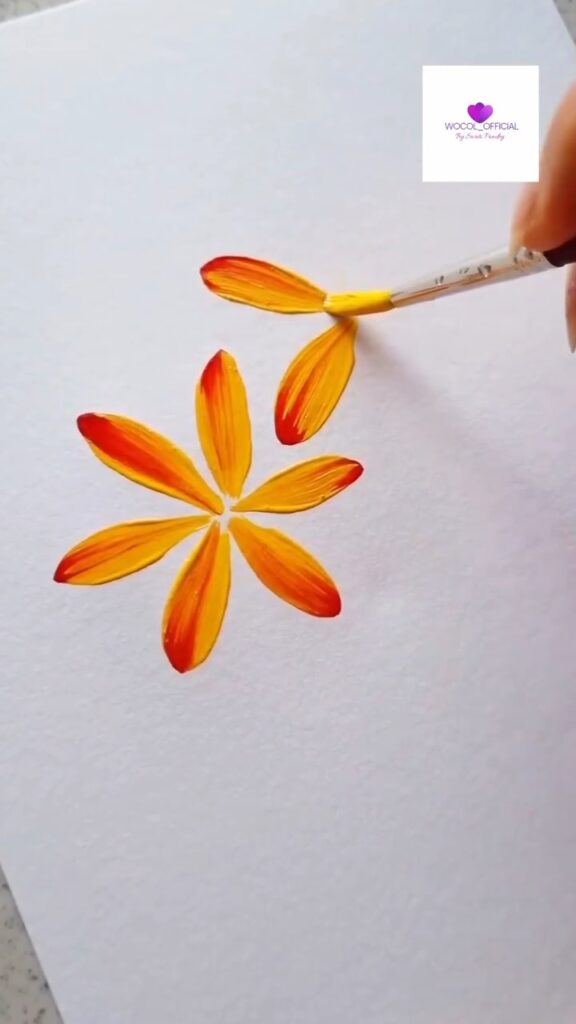
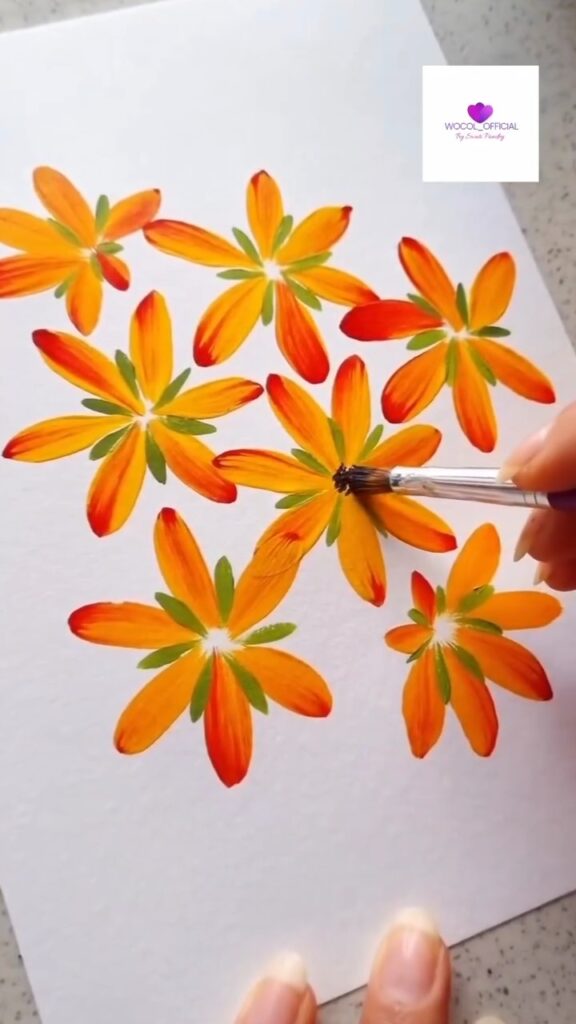
Step 2: Painting the First Petals 🌼
Using your medium round brush, dip into the yellow paint first and then slightly into the red. Begin by painting the first petal on your canvas. As you press down and pull the brush, you’ll notice a lovely blend of the two colors forming the petal. Repeat this process to create a flower with five petals.
Tip: Make sure to leave a small gap in the center of the flower, as this will be where we add details later on.
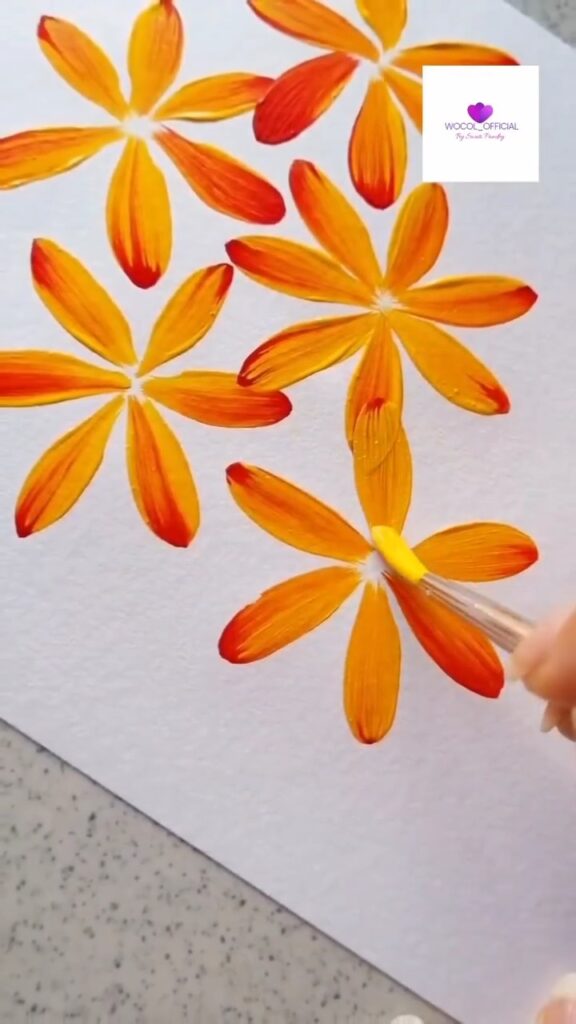
Step 3: Adding More Flowers 🌺
Continue the same process to add more flowers around your initial bloom. You can vary the size and direction of the petals to make your composition more dynamic. Remember to let the colors blend naturally on the paper; this will give your flowers a more realistic and vibrant appearance.
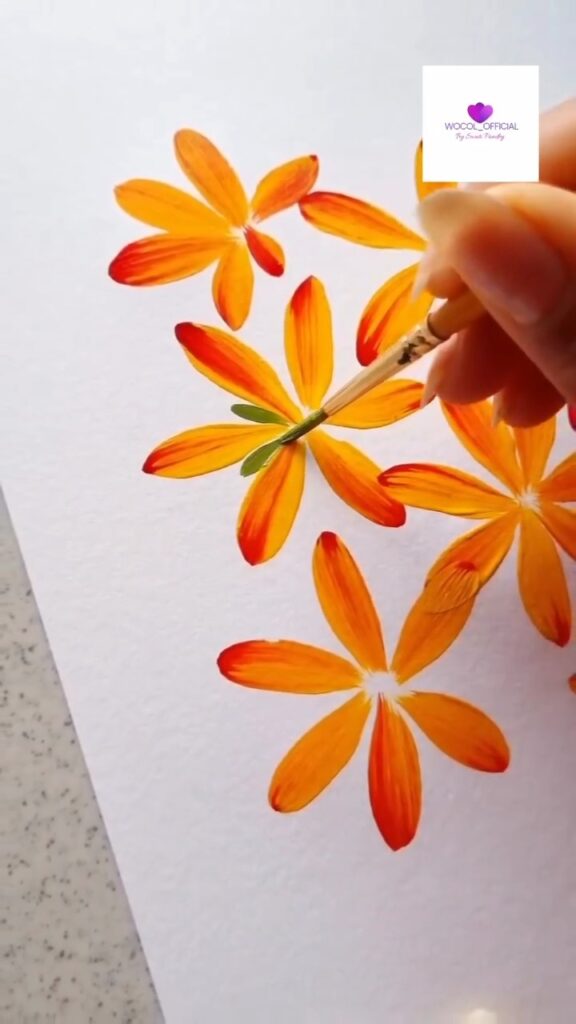
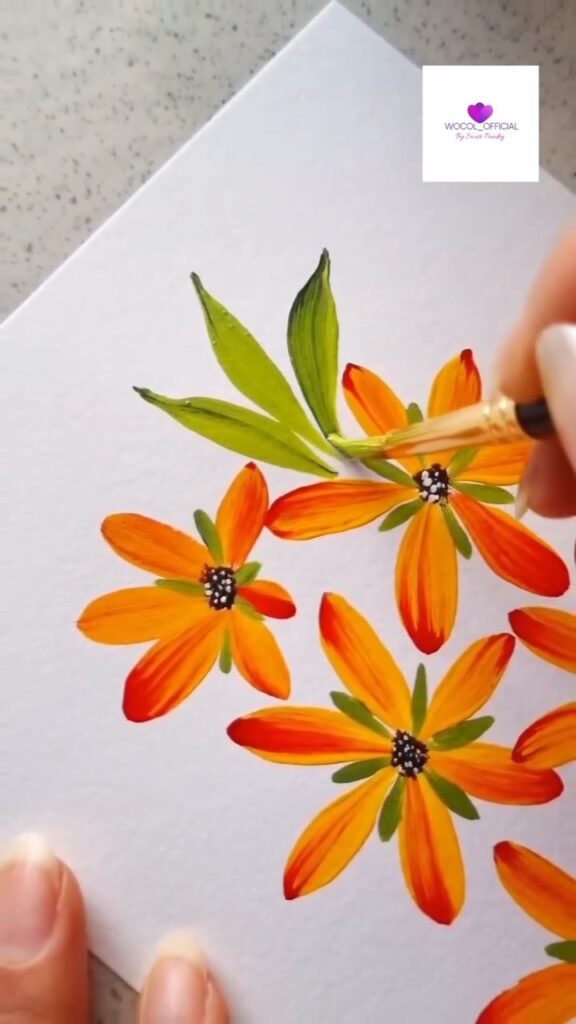
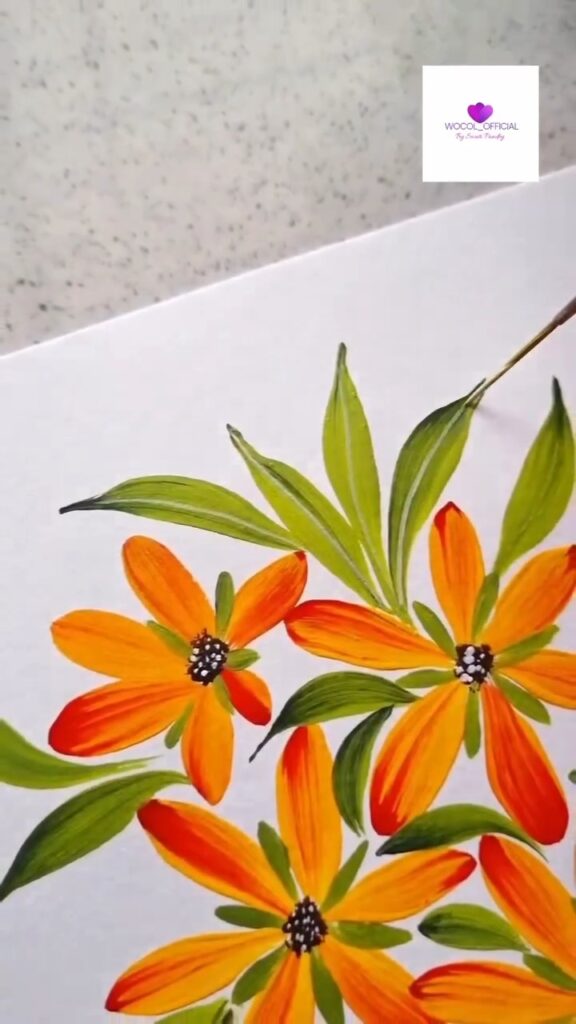
Step 4: Adding Leaves 🌿
Now, it’s time to add some greenery to your painting. Mix your green paint with a bit of water to make it flow smoothly. Using the same brush, paint elongated leaves around the flowers. Make sure to vary the size and placement of the leaves to create a natural look.
Step 5: Adding Detail to the Flowers 🌸
Switch to your fine detail brush and mix a bit of black or dark brown paint. Gently dab the center of each flower to create the illusion of depth. You can also add tiny dots or lines to the petals for more texture. This small detail makes the flowers pop and adds a touch of realism.
Step 6: Final Touches ✨
Take a step back and observe your painting. Are there any areas that need a bit more color or detail? Feel free to go back and adjust until you’re happy with the result. Don’t worry about making it perfect; the beauty of art lies in its imperfections.
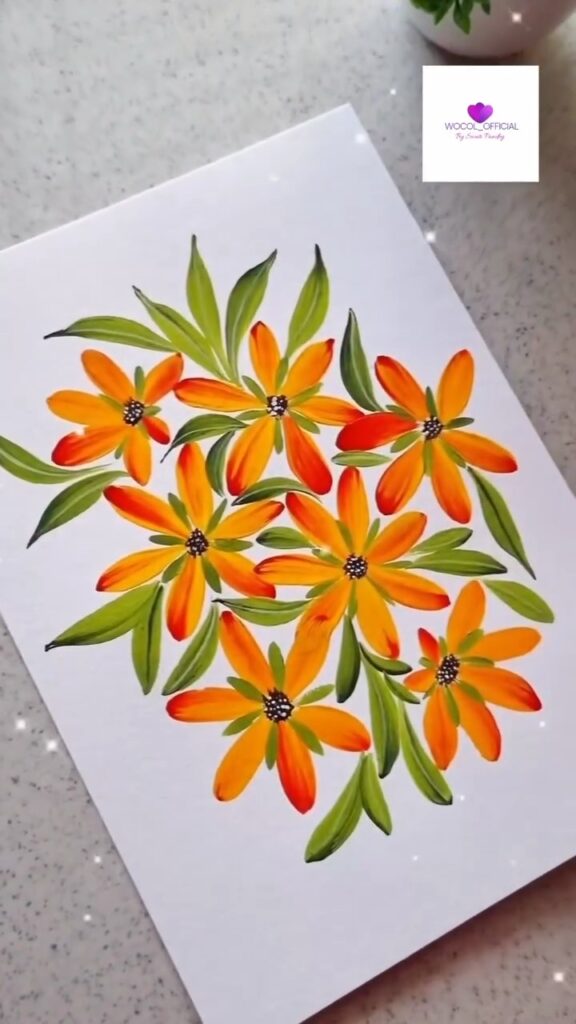
Your Finished Flower Painting! 🎉
And there you have it! A stunning flower painting made by your own hands. This piece can be a wonderful addition to your home decor, a thoughtful gift, or simply a way to unwind and enjoy your time.
Final Thoughts 💭
Flower painting has always been a way for me to connect with nature and bring a bit of the outdoors inside. There’s something incredibly soothing about watching the colors blend together and form something beautiful. I hope this tutorial inspires you to pick up your brushes and create something that brings you joy.
Happy painting! 🎨💐
Leave a Reply