Crafting has always been a special way for me to connect with my kids and unwind after a long day. One of our favorite little projects is making these adorable mini airplanes out of popsicle sticks.
It’s a fun and simple DIY craft that’s perfect for rainy days, playdates, or just some creative “me-time.” So, let’s dive into this step-by-step tutorial, and I’ll show you how you can create your own mini airplane at home. 🛠️

What You’ll Need 🛒
Before we start, make sure you have the following materials ready:
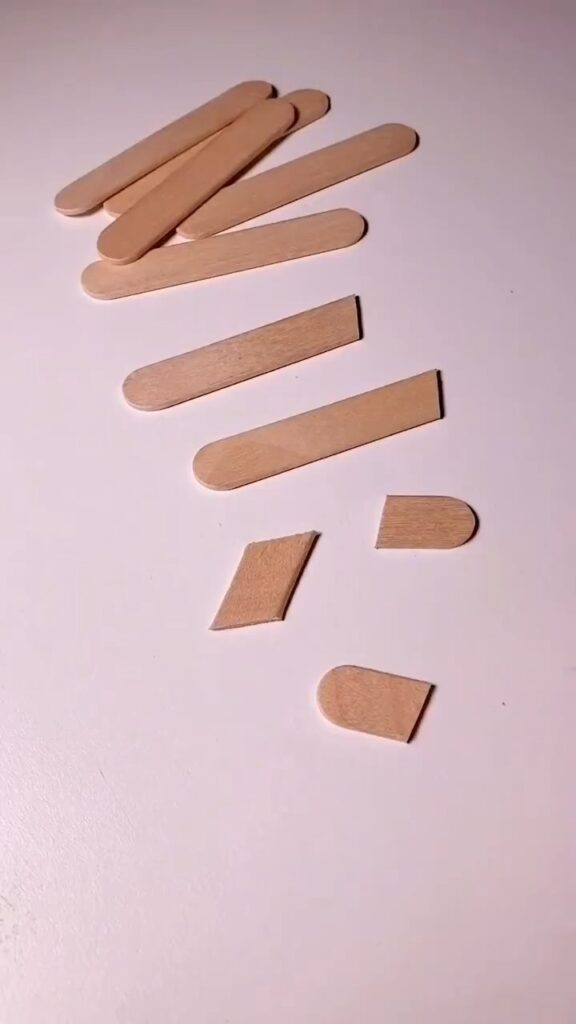
- Popsicle sticks – You’ll need around 7-8 sticks for one airplane.
- Craft knife or scissors – To trim the sticks.
- Glue gun or strong adhesive – To assemble the pieces.
- Black marker – To add some final touches.
- Optional: Small round stickers or buttons for the wheels.
Step-by-Step Instructions 📝
1. Prepare Your Materials
First things first, gather your popsicle sticks and get ready to create. I remember the first time I did this, my little one was so excited to help out. It’s moments like these that make crafting together so special. 🥰
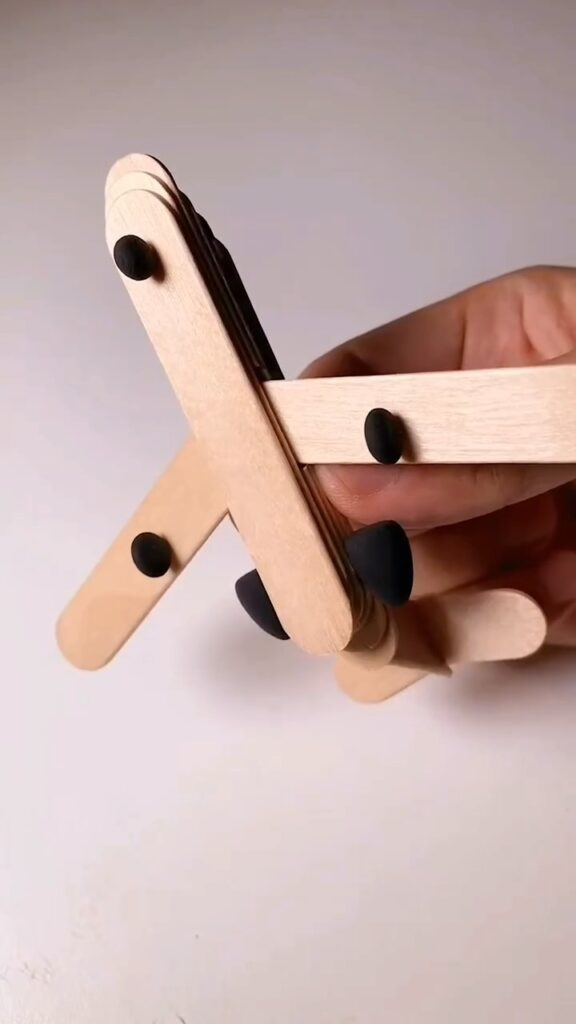
Lay out 7-8 popsicle sticks in front of you. You’ll notice in the first frame that there are two full sticks, some trimmed ones, and one cut into a rounded tip. You’ll need to cut and shape a few of the sticks like this to form the different parts of the airplane.
2. Assemble the Airplane’s Body
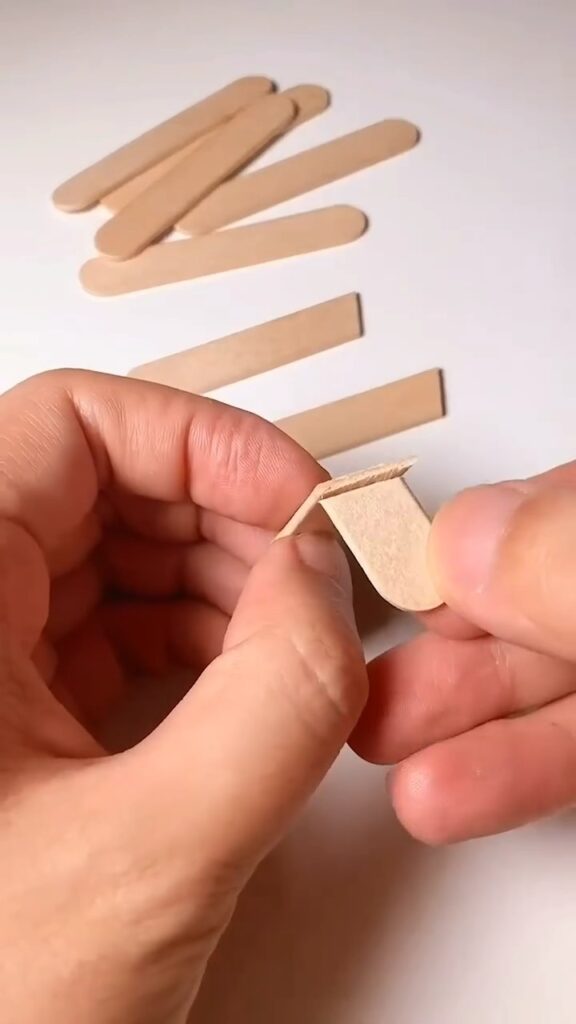
Now, take one of the full-length sticks and glue a smaller trimmed piece vertically across it. This will form the main body and wings of your airplane. It’s always fun to see the shape start coming together at this stage. My daughter loves helping out here, adding a dollop of glue and sticking the pieces together.
After that, take the smallest piece, which is the rounded tip, and glue it to the end of the long stick. This will be the airplane’s tail. I always remind my little helpers to be careful with the glue – we don’t want any sticky fingers! 😉
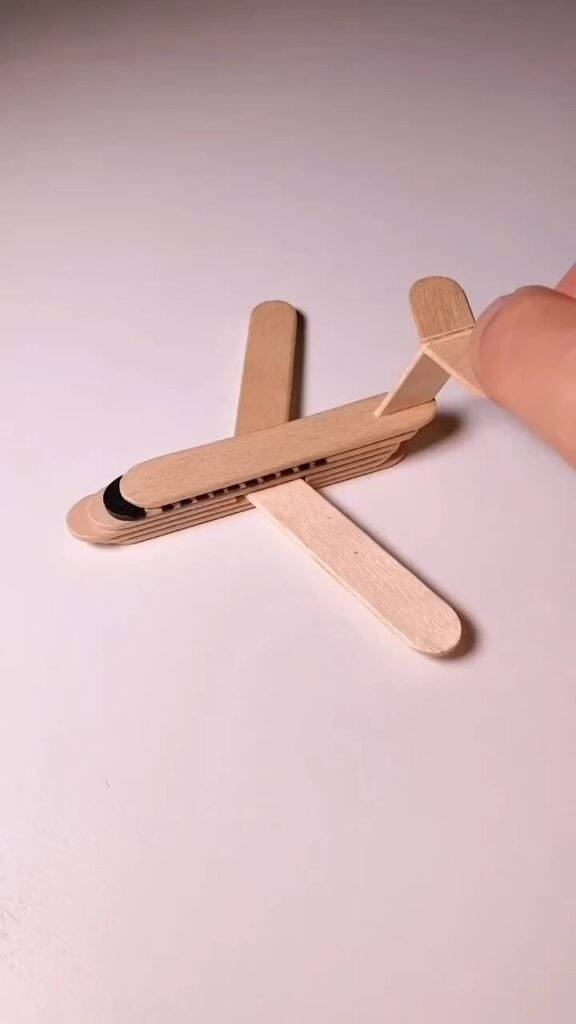
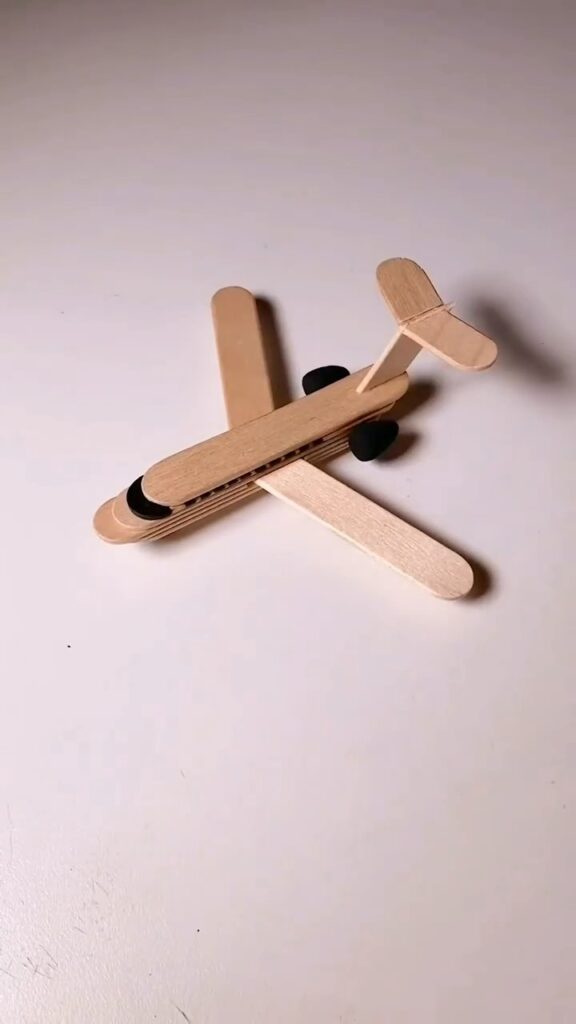
3. Attach the Wings ✈️
Next, grab two more full-length sticks and cross them over each other to form the wings. Attach these to the main body with a bit of glue. You can see this clearly in the third frame. The crisscrossed wings give the airplane that classic look, and it’s so satisfying to see it all come together.
This step is always a hit with the kids – they love pretending the wings make the airplane “fly” while we’re still building it! 🛫
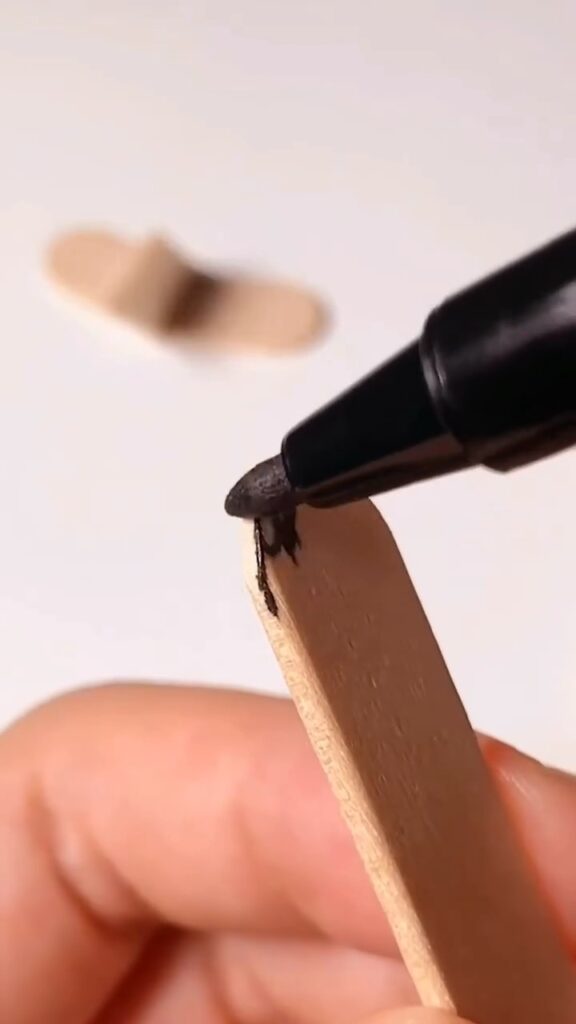
4. Add the Final Details
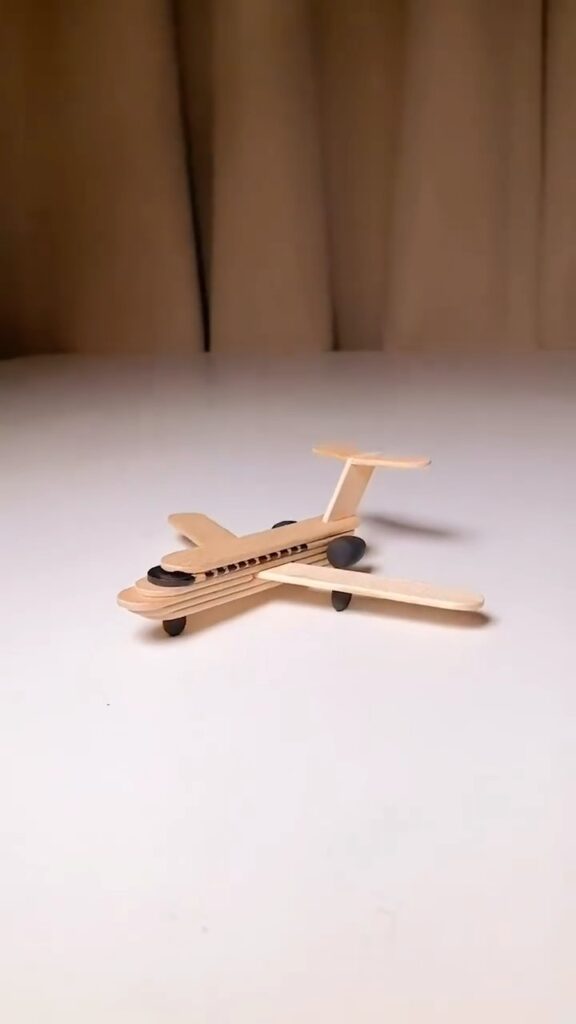
For the final touch, use your black marker to draw on the airplane’s windows and other details. If you want to go the extra mile, you can stick small round stickers or buttons as wheels on the underside of the plane, as shown in the fifth and sixth frames.
I like to let my children personalize their airplanes with different colors and designs – it makes each one unique, just like them. ❤️
5. Admire Your Work!
Once everything is assembled and the glue has dried, your mini airplane is ready for takeoff! My little ones love zooming their planes around the house, making all kinds of sound effects. And I must admit, I love joining in too – it’s a little escape from the everyday routine.
Final Thoughts 💭
Crafting isn’t just about creating something beautiful; it’s about the time spent together, the laughter, and the memories made. Whether you’re a mom, a grandma, or just someone who loves a good DIY project, this mini airplane craft is a delightful way to spend an afternoon.
So why not gather your materials, call the kids (or maybe just take some “me-time”), and start crafting? I promise, you’ll have as much fun making this as your little ones will have playing with it. Happy crafting! ✨
Leave a Reply