There’s something so satisfying about creating your own home decor, isn’t there? I remember when I first started making crafts, I was always on the lookout for simple projects that didn’t require a ton of materials but still looked absolutely gorgeous. Well, this one hits the nail on the head! 🌟
Let’s dive into the step-by-step guide and get our hands busy, shall we?
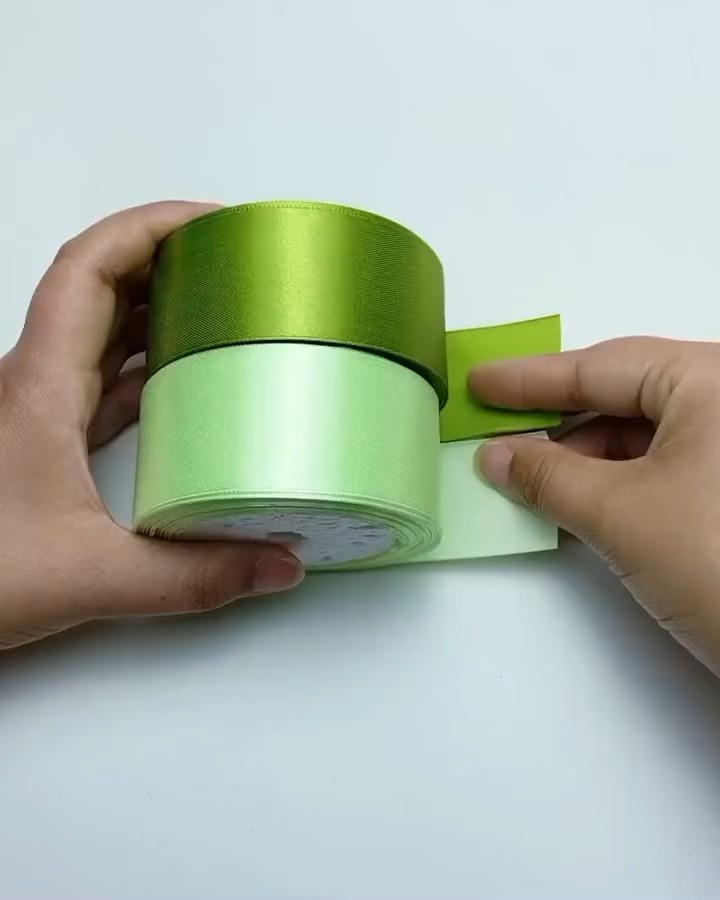


Materials You’ll Need
- Green satin ribbon (or any color you prefer)
- Scissors ✂️
- Floral wire (thin and flexible)
- Double-sided tape or glue
- Green crepe paper
- A small vase or pot for the final arrangement
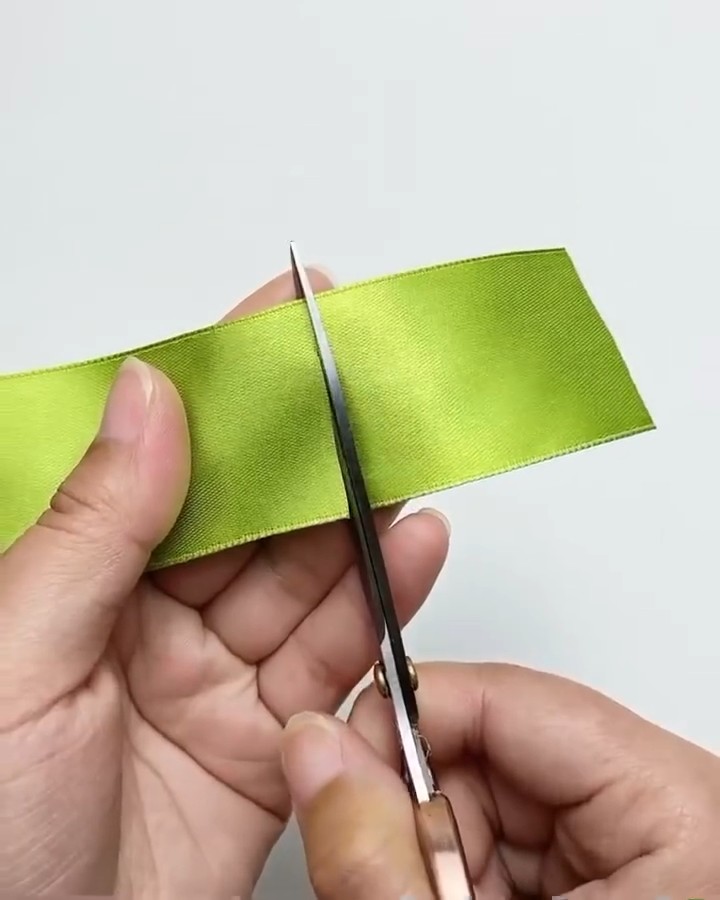
Step 1: Preparing the Ribbon Strips
Start by cutting your satin ribbon into equal lengths. For this project, you’ll need several strips, so go ahead and cut about 5-6 pieces, each approximately 6-8 inches long. Tip: I like to use a slightly wider ribbon to give the plant a fuller look. 🌿
Why Ribbon?
Using ribbon instead of traditional paper or fabric gives the faux plant a glossy, high-quality look. Plus, it’s super easy to work with!
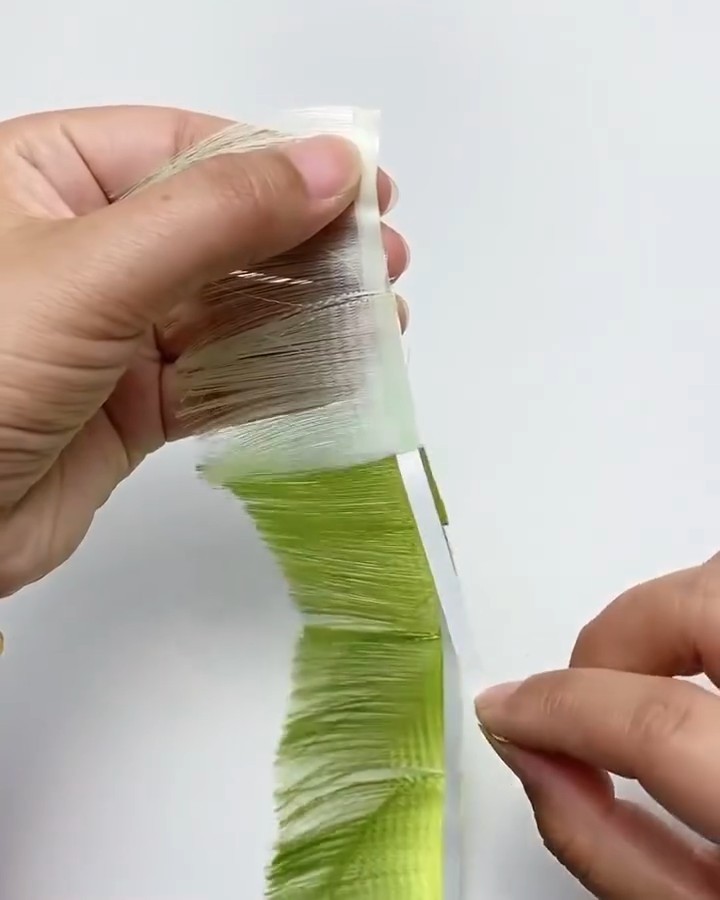
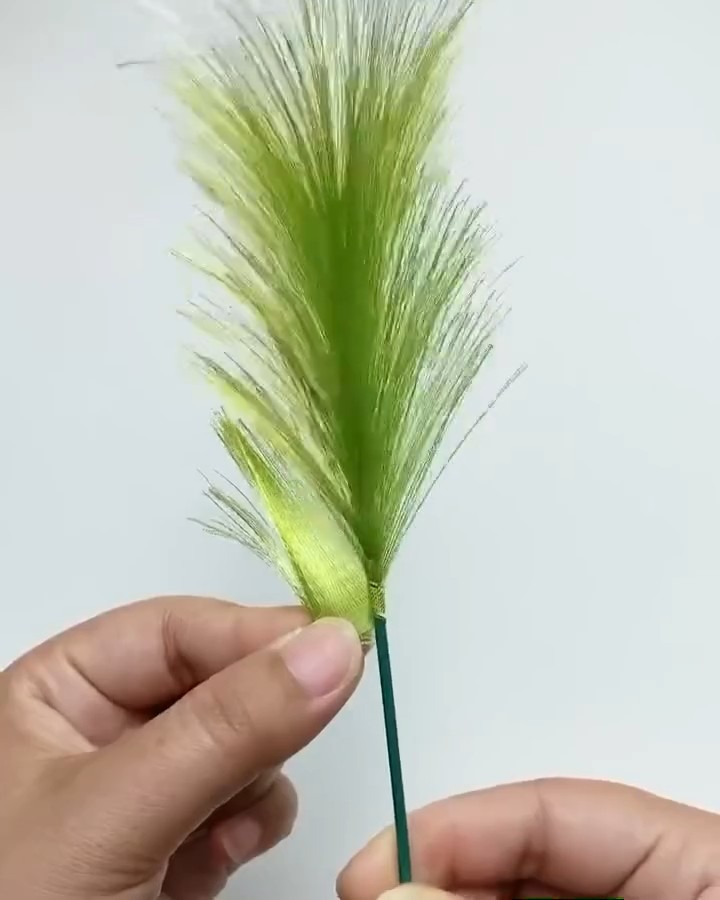
Step 2: Creating the Fringe
Take your scissors and carefully cut small slits along one side of each ribbon strip. These slits should be close together, but don’t cut all the way through—leave about a quarter inch at the top. This will create a beautiful fringe effect that mimics the fine details of a real plant.
Pro Tip: Don’t worry about being too precise here. The more varied the fringes, the more natural your plant will look!
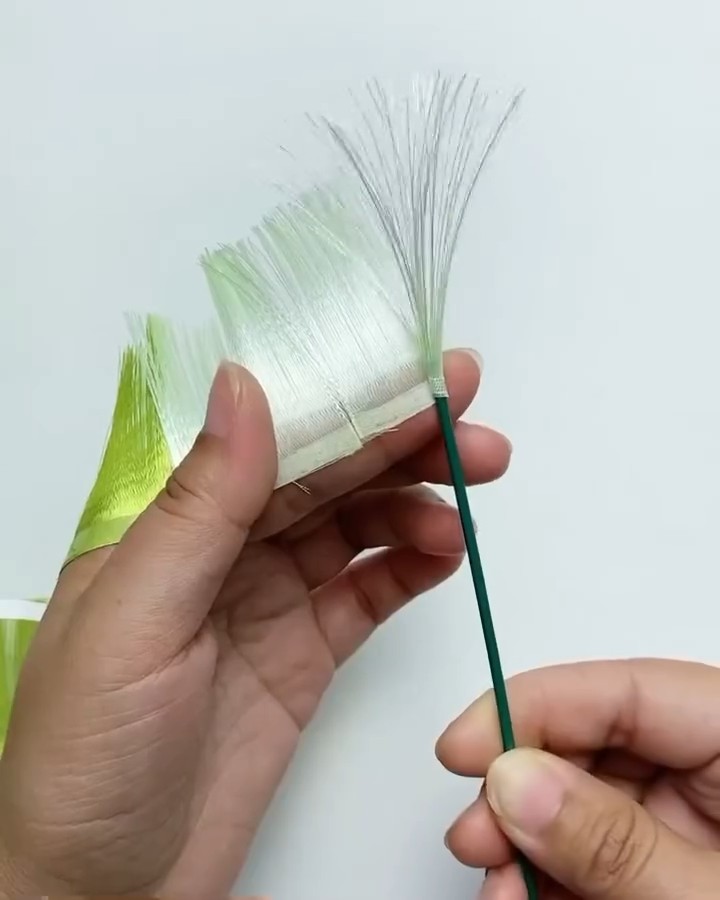
Step 3: Attaching the Ribbon to the Floral Wire
Now, grab your floral wire. This will be the “stem” of your plant. Wrap the uncut side of the ribbon around the wire, securing it with double-sided tape or a bit of glue as you go. Tip: Start at the top and work your way down, gently overlapping each fringe to create a fuller look.
This part is so relaxing, isn’t it? I always find myself getting lost in the rhythm of wrapping and securing. Sometimes, I’ll even have a cup of tea nearby and just enjoy the moment. ☕️
Step 4: Fluffing and Shaping
Once all your ribbons are attached, it’s time to give your plant some life! Gently fluff out the fringes by running your fingers through them, separating the strands to create a soft, feathery effect. This is where your plant really starts to take shape! 🌱
Pro Tip: You can trim the fringes to different lengths for a more realistic, natural appearance.
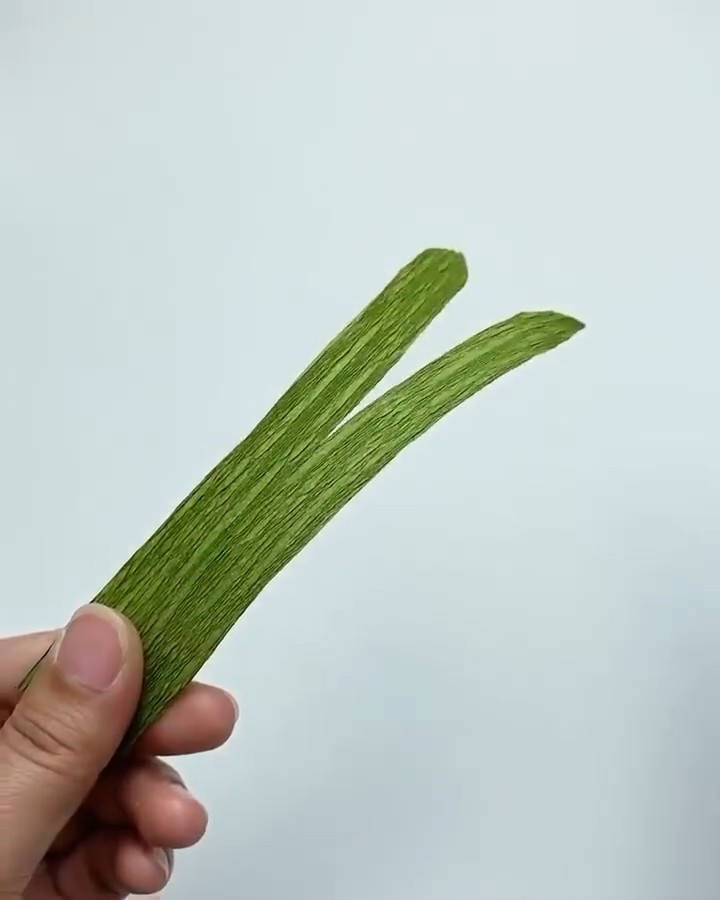
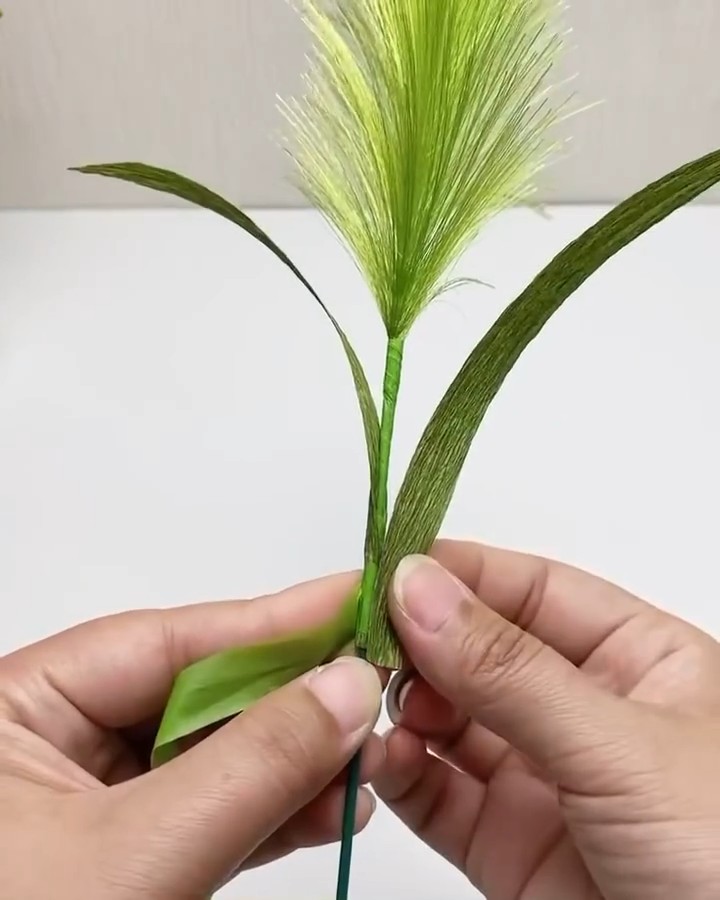
Step 5: Adding Leaves
To make the plant even more realistic, cut some long, thin leaves from the green crepe paper. These will act as the accent leaves. Attach them to the base of the floral wire using more tape or glue. The contrast between the satin ribbon and the crepe paper adds a nice touch of texture to your faux plant.
Step 6: Assembling Your Plant
Now that your plant is ready, it’s time to assemble it in a vase or pot. I love using a sleek, modern vase to really make the green pop. Simply place your faux plant into the vase, adjusting the height and fluffing the fringes as needed.
Step 7: Admire Your Creation!
And voila! You’ve just created a beautiful faux plant arrangement that’s perfect for any room in your home. This DIY project is not only easy but also incredibly satisfying. Every time I look at my own, I can’t help but smile knowing that I made it myself. 😊
Why I Love This Project
As a busy mom, I’m always looking for ways to add a bit of beauty to my space without spending a fortune or too much time. This project ticks all the boxes for me—it’s quick, affordable, and the end result is simply stunning.
So, what are you waiting for? Gather your materials and get crafting! I promise, once you start, you won’t want to stop. 🌸


Leave a Reply