Hey there, crafty queens! 🌸✨ If you’re looking to add a splash of color to your space or create a heartfelt handmade gift, you’re in for a treat. Today, I’m going to walk you through making the most adorable DIY Paper Flower Bouquet. It’s fun, easy, and perfect for any occasion. So, grab your supplies and let’s get crafting!
What You’ll Need:
- Green construction paper
- Colorful paper (for the flowers)
- Scissors
- Glue
- A pencil
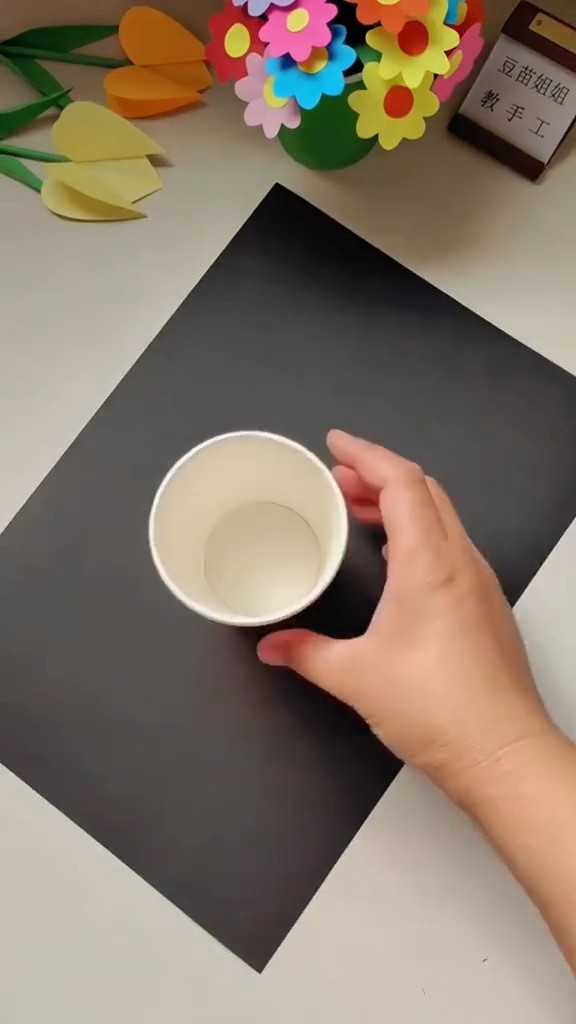
- A small cup (optional for base)
Step-by-Step Instructions:
Step 1: Prepare Your Green Paper
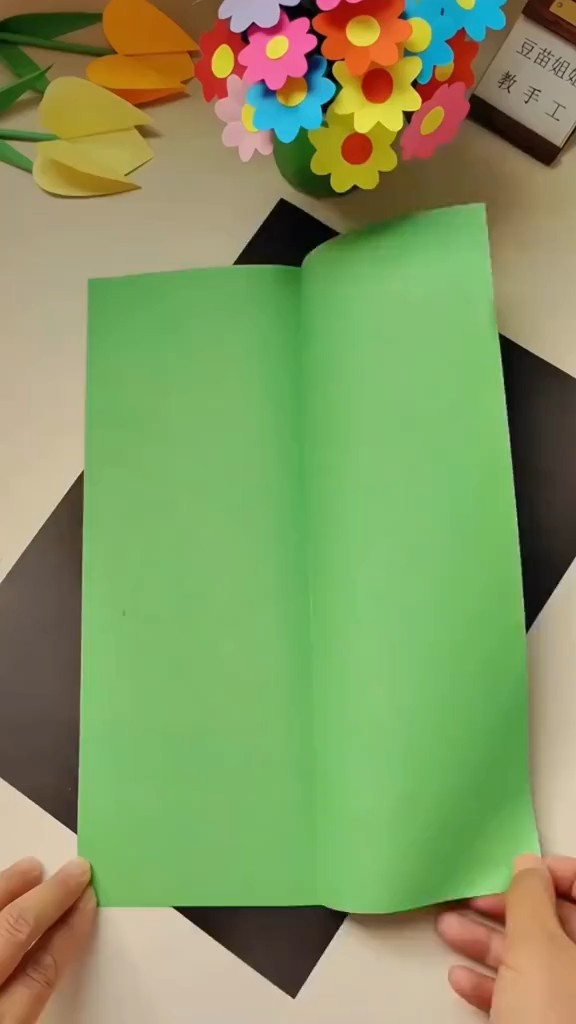
Start by taking your green construction paper and folding it in half lengthwise. This will be the base of your bouquet, acting as the leaves and stems. Make sure the fold is crisp and clean.
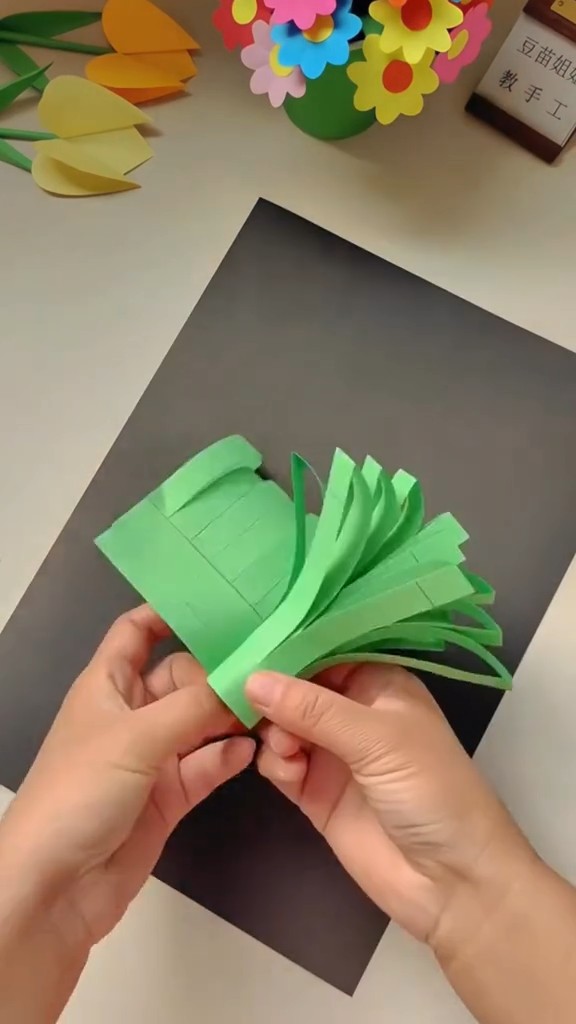
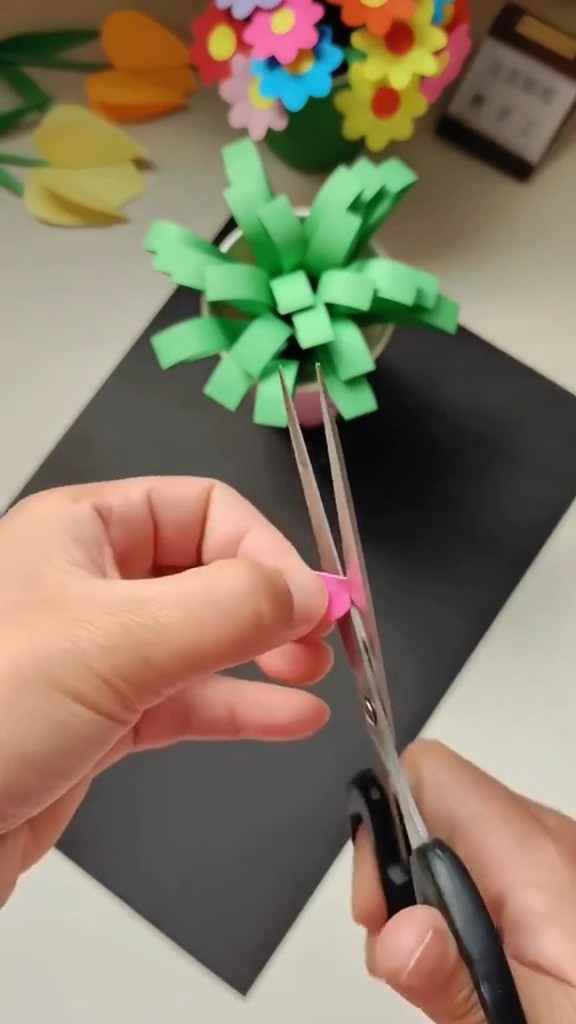
Step 2: Cut the Fringes
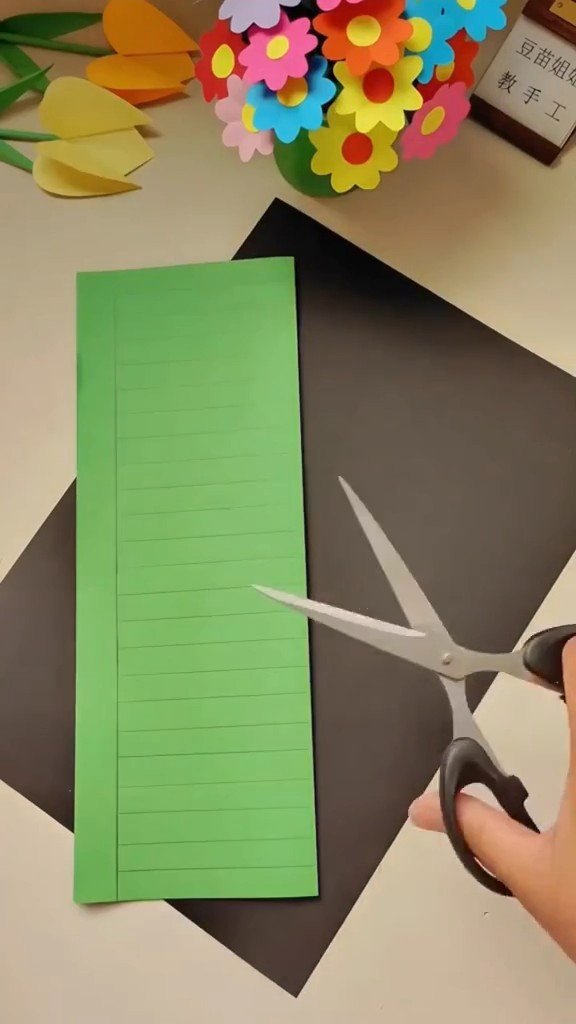
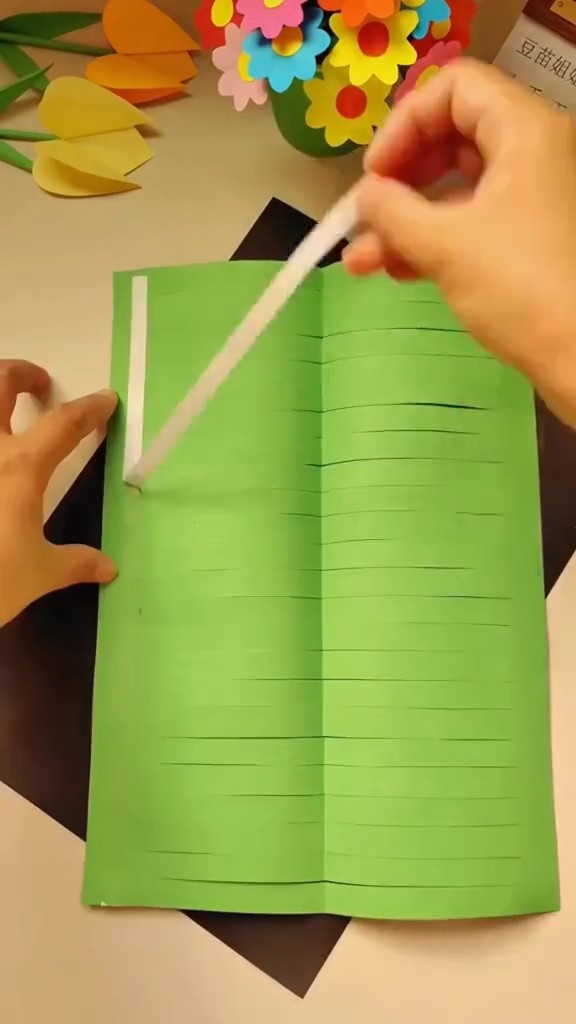
Unfold the green paper and start drawing parallel lines along the length of the paper, about half an inch apart. These lines will guide your cuts. Once you’re done, use your scissors to cut along these lines, stopping about an inch from the top. These fringes will become the leaves of your bouquet.
Step 3: Roll It Up
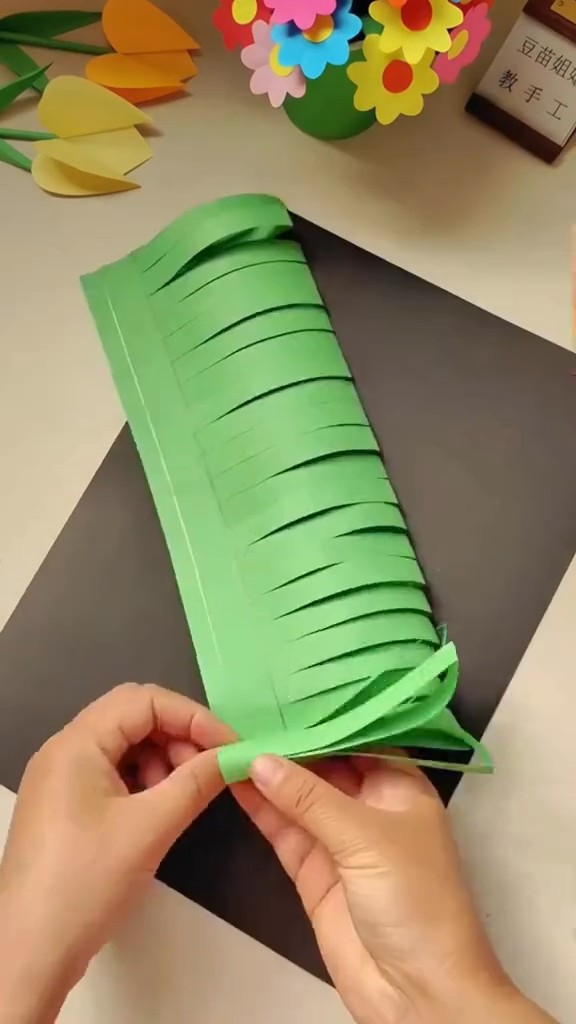
Now, gently roll the green paper lengthwise to form a tube, with the fringes on one end. Secure the edge with glue. Don’t worry if it looks a bit messy at this stage; it will all come together beautifully!
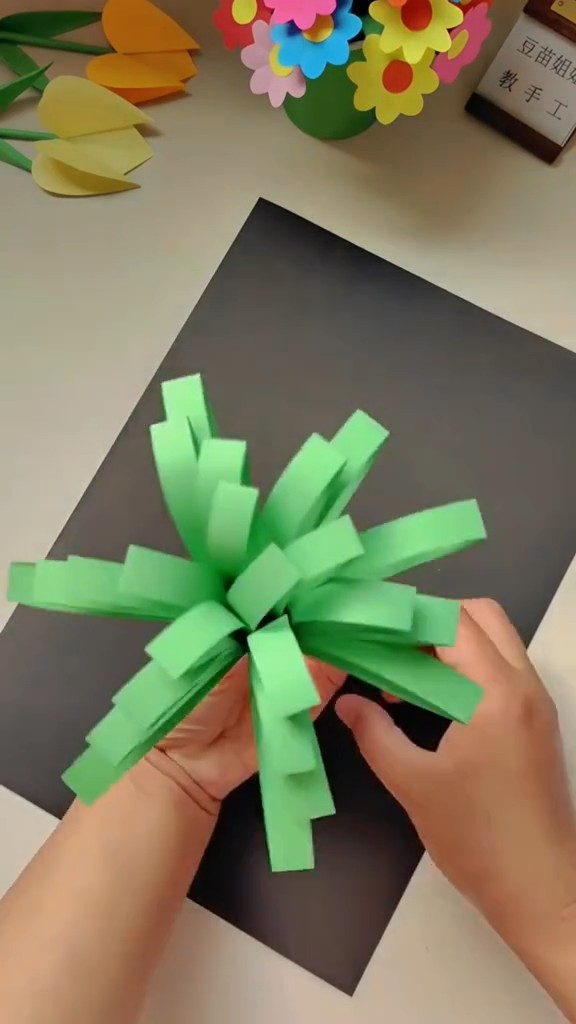
Step 4: Fluff Out the Leaves
Carefully spread out the fringes to create a fuller, leaf-like appearance. This gives your bouquet a lush, natural look. Take your time to make sure the leaves are evenly distributed.
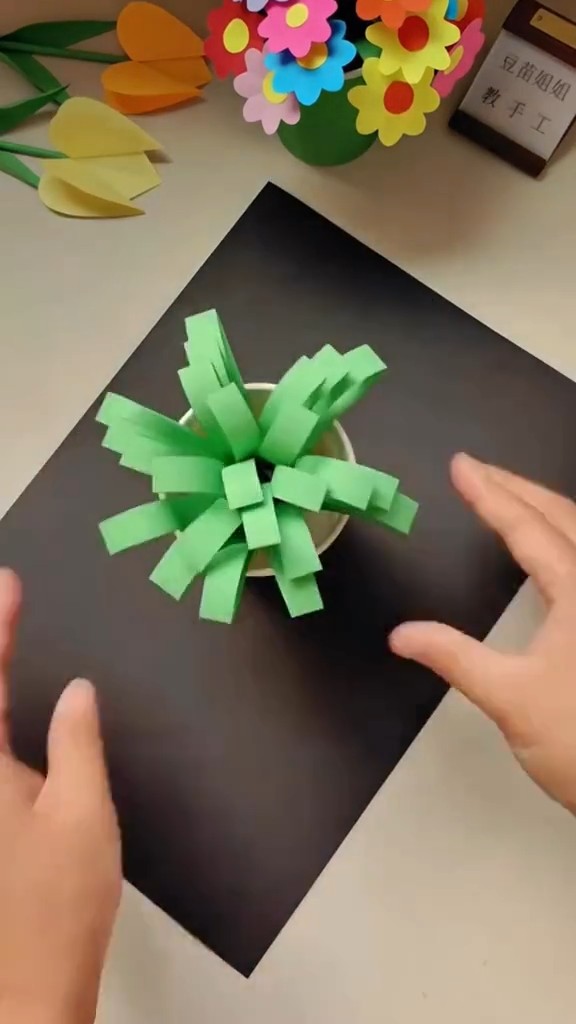
Step 5: Prepare the Base
If you’re using a small cup as a base, now’s the time to get it ready. This will help your bouquet stand upright and give it a neat finish. Place your rolled-up green paper into the cup, ensuring it fits snugly.
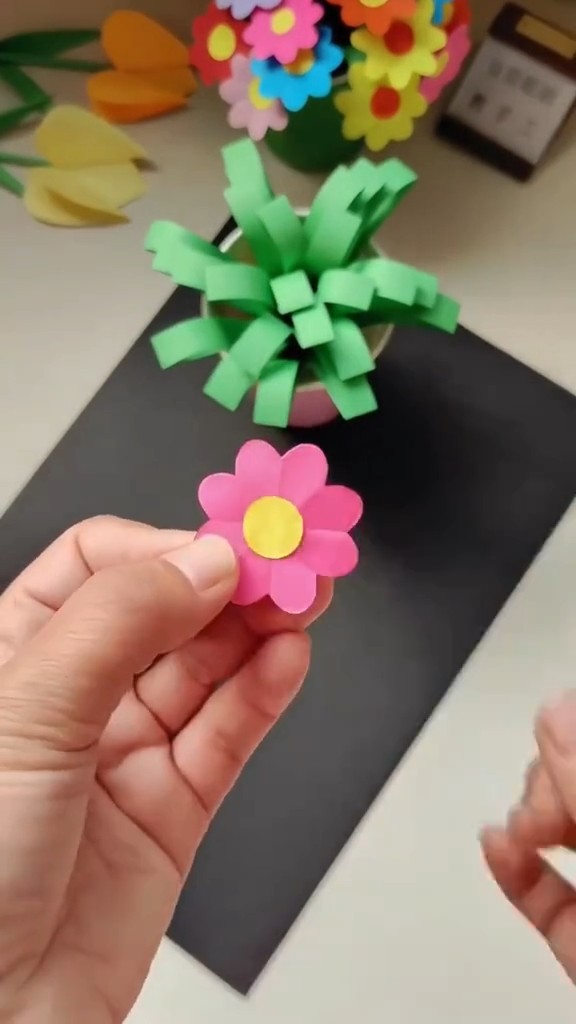
Step 6: Create the Flowers
Next, it’s time to make the flowers! Cut out flower shapes from your colorful paper. You can freehand them or use a stencil for uniformity. Once you have your flowers cut out, snip a small slit at the bottom of each flower. This will help in attaching them to the bouquet.
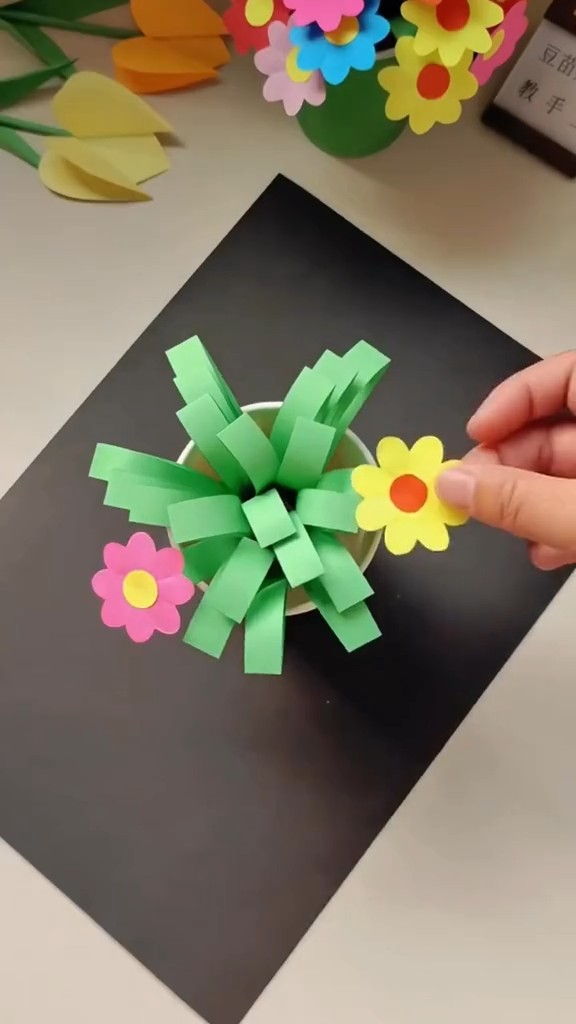
Step 7: Attach the Flowers
Take each flower and attach it to the fringed ends of your green paper. Insert the bottom slit of the flower into the fringed ends and secure with a dab of glue. Hold for a few seconds to ensure they stick properly. Repeat this process for all the flowers, mixing up colors to make your bouquet pop!
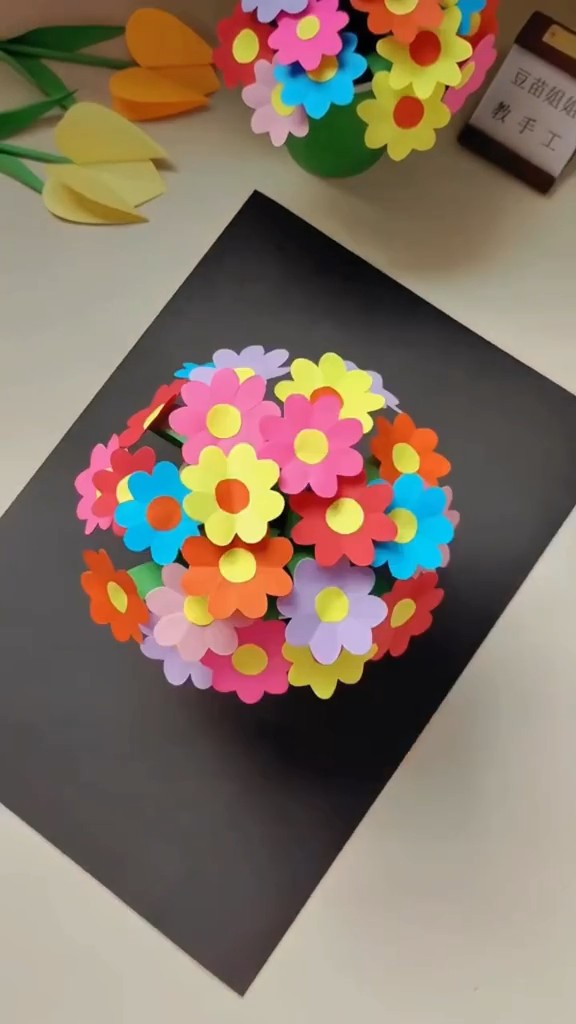
Step 8: Final Touches
Once all your flowers are attached, take a moment to adjust them, making sure they’re evenly spaced and the bouquet looks full. If you have any extra decorations like glitter or stickers, feel free to add them for a bit of extra sparkle!
Voila! Your DIY Paper Flower Bouquet is ready!
Place your gorgeous bouquet on your desk, give it as a gift, or use it as a centerpiece. It’s a beautiful way to bring some cheer into any room.
Tips & Tricks:
- Mix and Match: Don’t be afraid to mix different shades of green for the leaves or use patterned paper for the flowers.
- Personalize It: Write sweet messages on the flower petals for a personal touch.
- Get Creative: Use different shapes and sizes for your flowers to create a more dynamic bouquet.
Hope you had as much fun making this DIY Paper Flower Bouquet as I did! 🌼✨ Share your creations with us and tag us in your posts. Happy crafting, lovelies! 💖
Leave a Reply