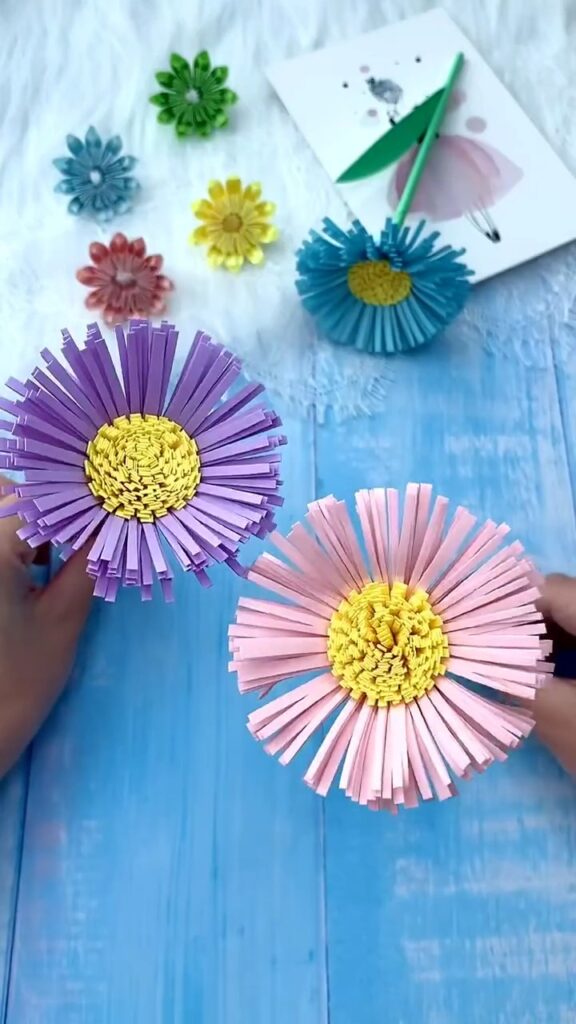
Hey there, fabulous crafters! 🌼✨ Ready to dive into a fun and beautiful DIY project? Today, we’re creating these stunning Creative Paper Flowers that will add a pop of color and charm to any space. Whether you’re looking to decorate your home, make a gift, or simply indulge in some crafty fun, these paper flowers are perfect. Let’s get started!


What You’ll Need:
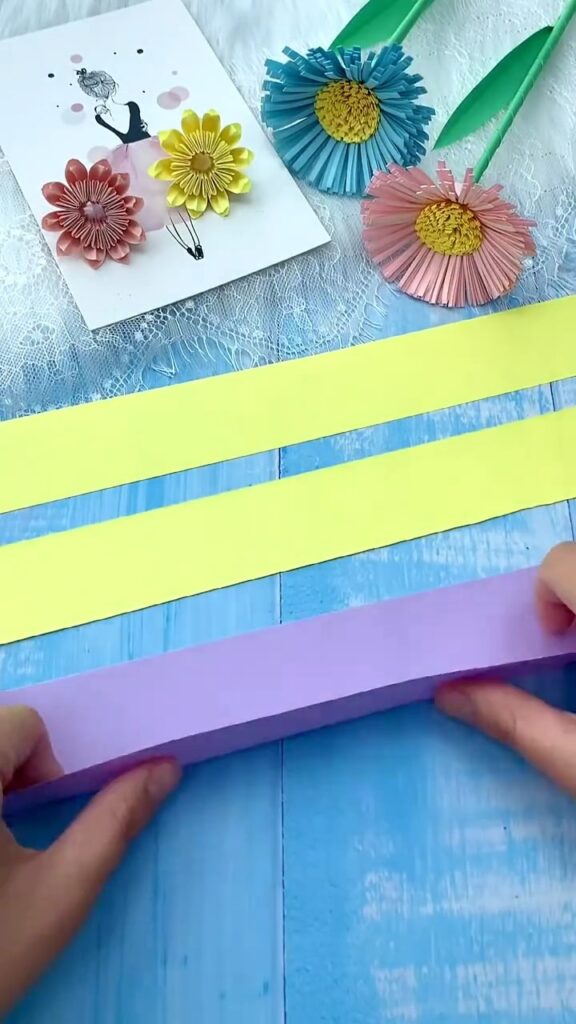
- Colored paper strips (sizes: 3.5 x 30 cm, 7 x 30 cm)
- Scissors
- Glue
- A pencil or a thin stick (for rolling the paper)
- Green paper (for leaves and stem)
Step-by-Step Instructions:
Step 1: Cut Your Paper Strips
Begin by cutting your colored paper into strips. For this project, you’ll need:
- Two strips of 3.5 x 30 cm for the petals
- One strip of 7 x 30 cm for the flower center
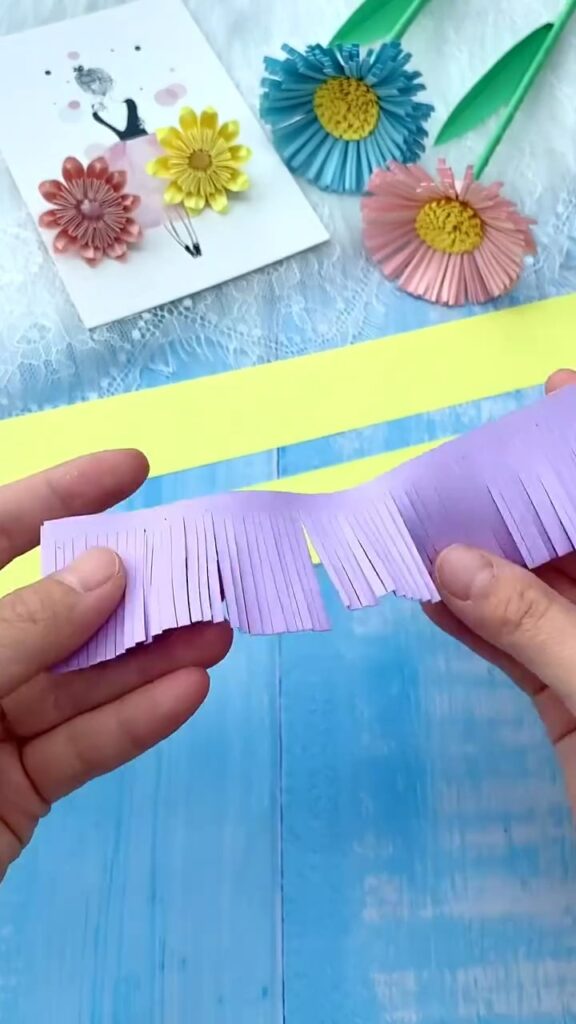
Step 2: Create the Petals
Take one of the 3.5 x 30 cm strips and fold it in half lengthwise. Use your scissors to cut small slits along the folded edge, creating a fringed effect. Be sure not to cut all the way through to the open edge.
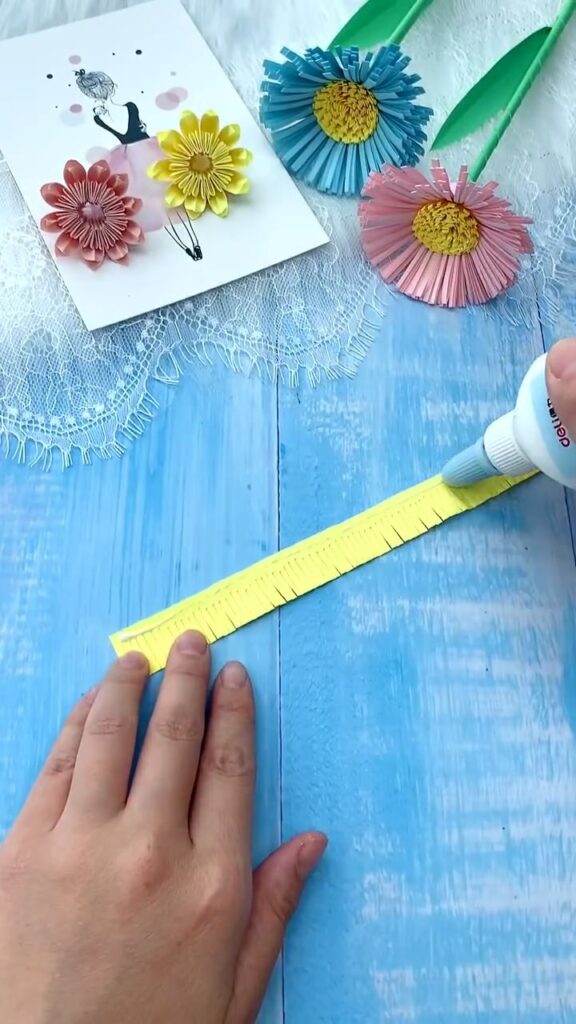
Step 3: Roll the Center
Now, grab the 7 x 30 cm strip. Apply a thin line of glue along one edge and start rolling it tightly to form the center of the flower. Keep the roll tight and even.
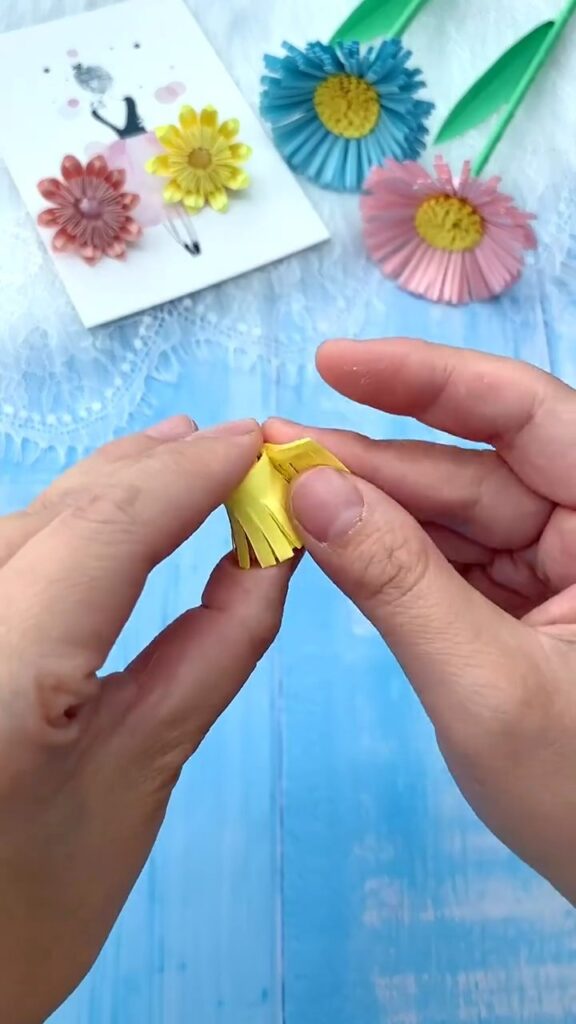
Step 4: Attach the Petals
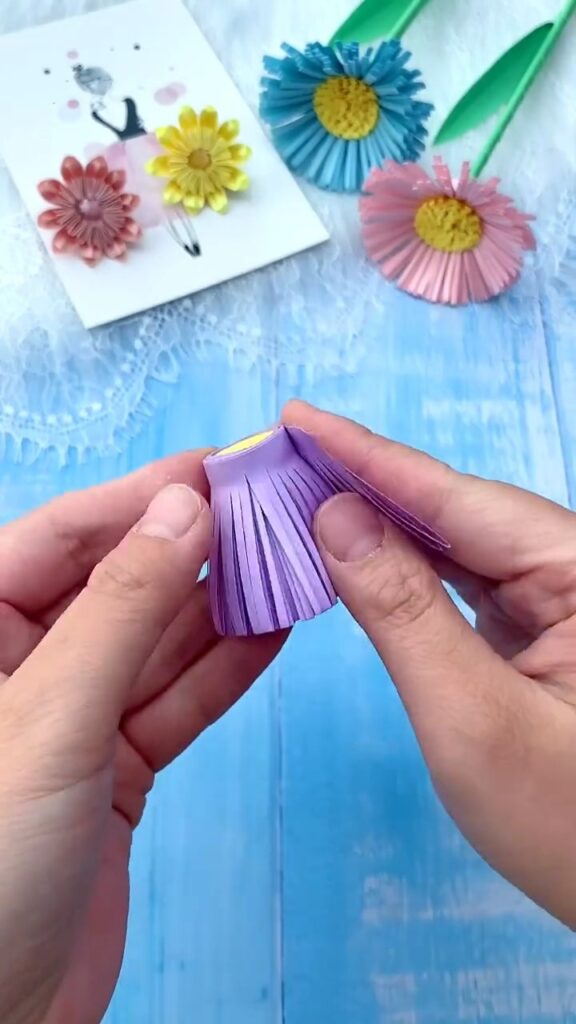
Next, take one of your fringed strips and apply glue along the uncut edge. Carefully roll this strip around the center piece you created in the previous step. Repeat this with the second fringed strip, gluing and rolling it to build up the layers of petals.
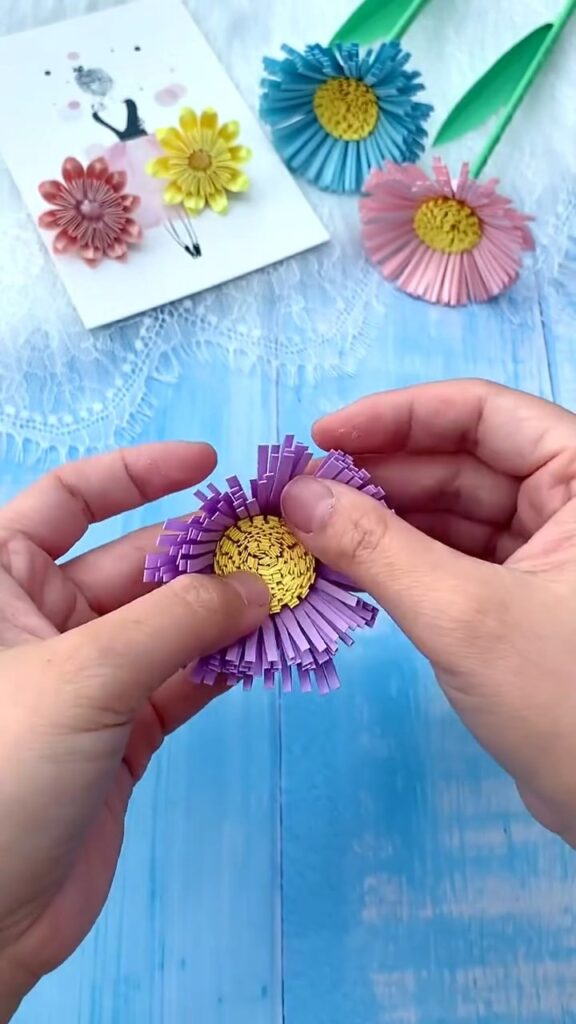
Step 5: Shape the Flower
Once all the strips are attached, gently fluff out the fringed edges to create a fuller, more natural-looking flower. Take your time to adjust the petals and ensure they’re evenly spaced.
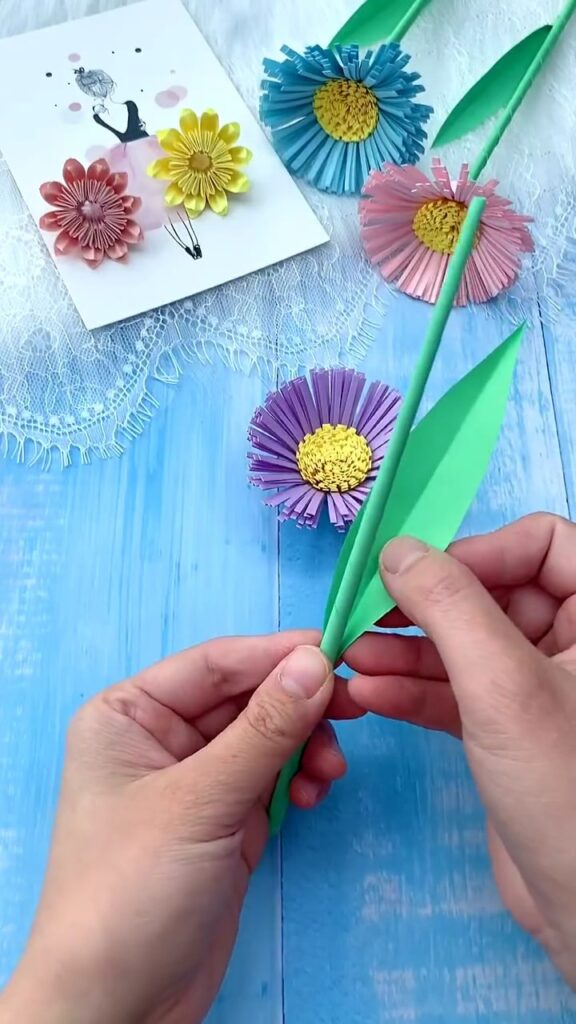
Step 6: Prepare the Stem and Leaves
Cut a long strip of green paper for the stem. Roll it tightly to form a sturdy stem for your flower. Next, cut out leaf shapes from the green paper. You can make these as simple or as intricate as you like.
Step 7: Attach the Stem and Leaves
Apply glue to one end of the green strip and attach it to the base of your flower. Wrap it tightly to secure. Then, attach the leaves to the stem using small dots of glue. Position them wherever you think looks best.
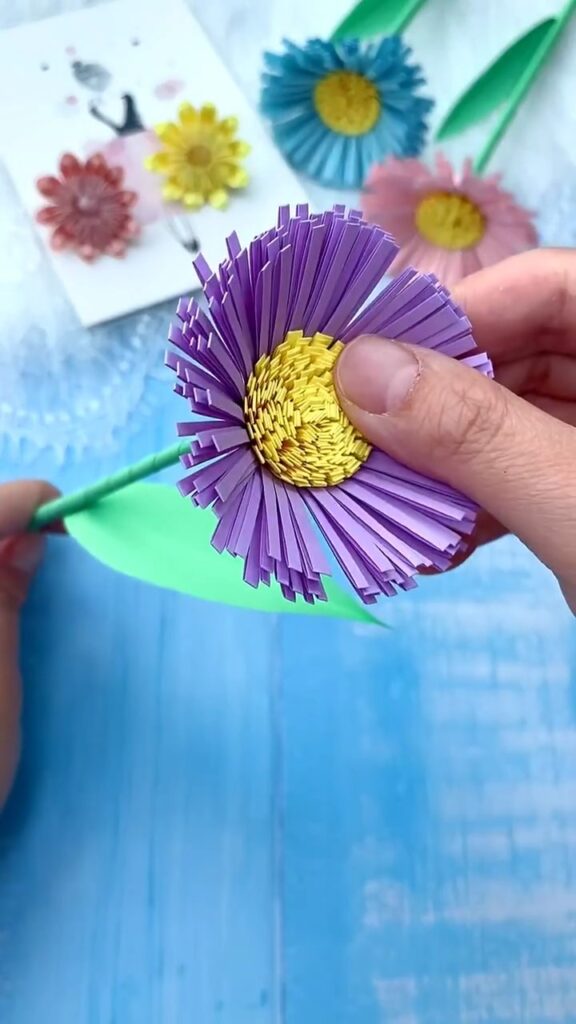
Step 8: Final Touches
Make sure everything is securely glued and give your flower one final fluff to ensure it looks perfect. Repeat these steps to create more flowers in different colors and sizes for a beautiful bouquet!
And there you have it! Your Creative Paper Flower Craft is complete! 🌸✨
Tips & Tricks:
- Mix Colors: Use different color combinations for a vibrant bouquet.
- Personalize It: Add small details like glitter or paint for an extra touch of glam.
- Gift It: These paper flowers make wonderful handmade gifts for friends and family.
I hope you had a blast making these lovely paper flowers! 🌼✨ Don’t forget to share your beautiful creations with us and inspire others with your creativity. Happy crafting, lovelies! 💖

Leave a Reply