The half-up half-down hairstyle is the “Swiss Army Knife” of the beauty world—it’s versatile, keeps hair out of your face, and works for everything from a messy DIY day to a formal wedding.
My “Ultimate Twist” version elevates this classic by using a hidden anchoring technique and a literal hair-twist that adds volume and security without requiring dozens of bobby pins that inevitably fall out by noon.
Whether you have fine, slippery hair or thick, unruly curls, this method provides a structural foundation that lasts all day while looking effortlessly chic.
The Crafter’s Toolkit: Essential Supplies for the Perfect Style
Before we dive into the “construction” of this look, let’s talk tools.
Just like in my upcycling projects, the quality of your “adhesives” and “fasteners” matters. You don’t need a $100 salon kit, but you do need the right basics.
The Material List
-
✓
A Texture Base: If your hair is “too clean” (yes, that’s a thing), it won’t hold. I recommend a budget-friendly sea salt spray or even a bit of dry shampoo at the roots.
-
✓
Clear Elastic Bands: These are the “wood glue” of hair styling. They are invisible and hold much better than the bulky fabric scrunchies for the base structure.
-
✓
A Rat-Tail Comb: Essential for clean “seams” (partings).
-
✓
Bobby Pins (The Good Kind): Look for pins with a matte finish; they have more “grip” than the shiny, slippery ones.
-
✓
The “Twist” Tool: Your own fingers, or a Topsy Tail tool if you want to get fancy.
Hair Type vs. Product Compatibility
| Hair Type | Recommended “Primer” | The “Weakness” to Watch For |
|---|---|---|
| Fine/Straight | Volumizing Mousse | Slippage; the style may go flat without grit. |
| Thick/Coarse | Leave-in Conditioner | Bulk; the “twist” can become too chunky to pin. |
| Curly/Coily | Lightweight Oil/Serum | Frizz; manipulation can break the curl pattern. |
| Oily | Dry Shampoo (Pre-application) | Weight; oil makes the hair heavy and the lift will fail. |
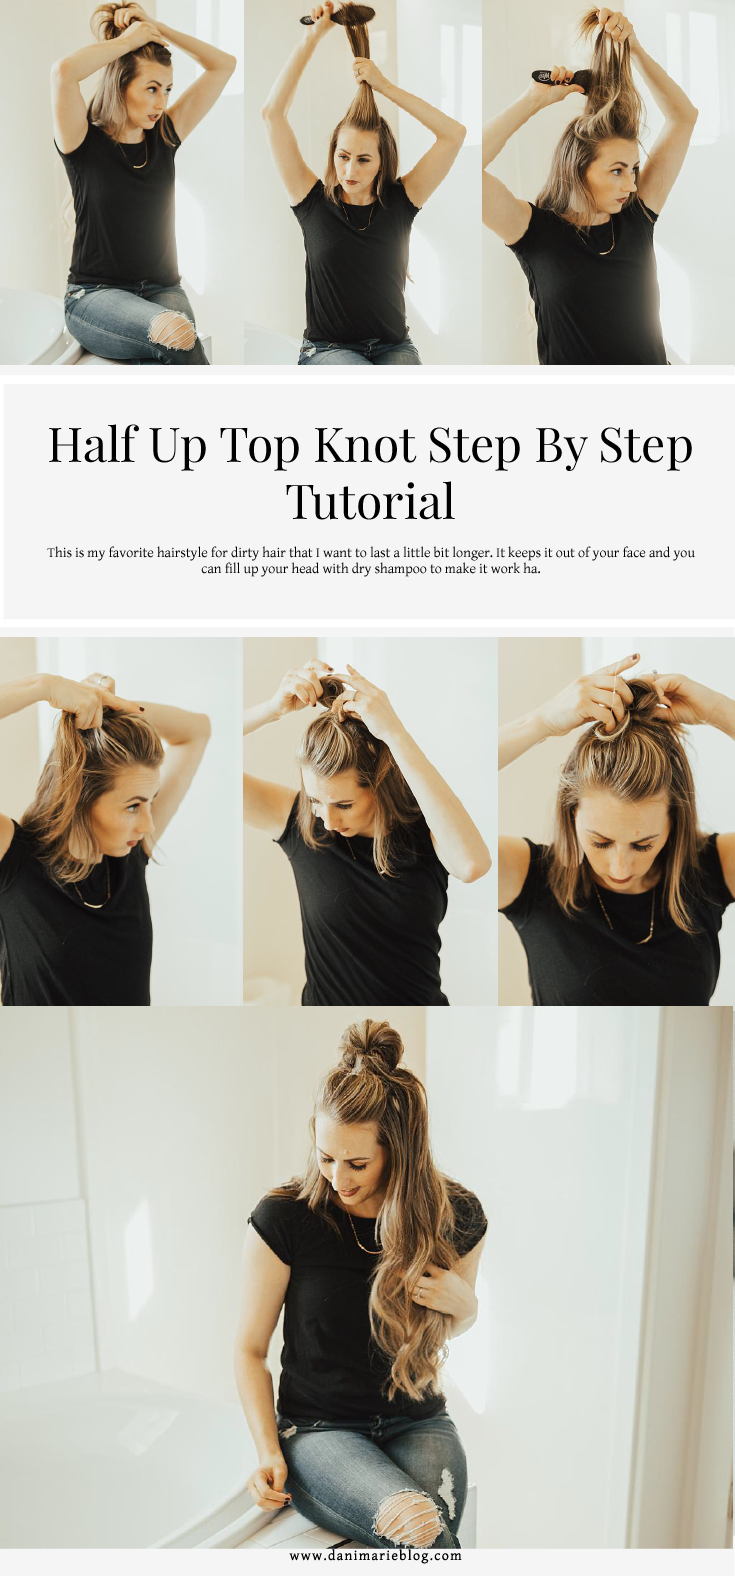
1. The Classic Boho Twist with a Structural Anchor
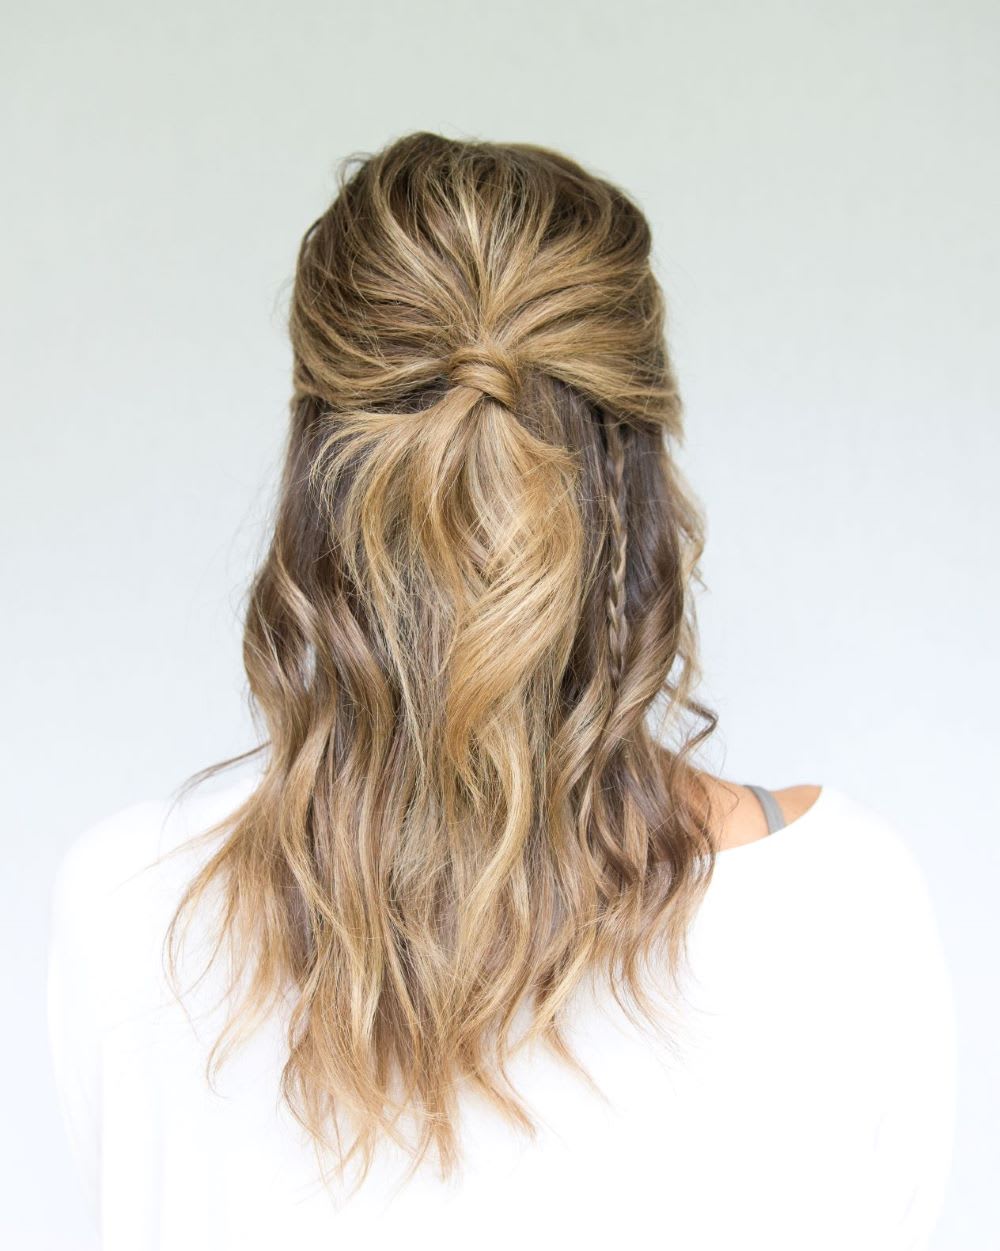
This is my go-to when I want to look like I spent an hour on my hair but actually only spent five minutes.
The “twist” here isn’t just for show—it actually locks the top section of hair in place so it doesn’t sag.
The Process: I start by sectioning off a U-shaped area from the temples to the crown.
Here’s my big pro-tip: instead of just pinning it, I tie this section into a small ponytail with a clear elastic.
Then, I create a “hole” just above the elastic and loop the ponytail through it (the “topsy tail” move). This creates a beautiful, rolled-edge twist that stays secure.
I then gently pull at the edges of the twist to “pancake” it—this makes the hair look three times thicker than it actually is.
Budget Hack: If you don’t have a Topsy Tail tool, just use your index and middle finger to pull the hair through. It’s free and works every time.
2. The Braided Crown Hybrid

If you’re a fan of intricate textures, this is for you.
We’re going to combine a standard three-strand braid with our twist anchor.
The Process: I take two small sections from the very front (near the bangs) and braid them loosely back toward the center of the head.
Instead of pinning them where they meet, I incorporate them into the “twist” we did in Idea #1.
By feeding the braids into the loop-through, they become part of the structure. It’s like weaving fabric—the more points of contact, the stronger the hold.
I love this for windy outdoor events because the braids keep those annoying “flyaways” tucked in tight.
3. The Messy Top Knot Twist
Sometimes you want that “I just finished a craft project” vibe but still want to look put-together.
This version uses the twist to create a base for a bun.
The Process: After I do the initial loop-through twist, I take the “tail” of the ponytail and wrap it around the base.
Because the twist creates a bit of a “shelf,” the bun has something to sit on. This prevents that annoying sagging where the bun eventually ends up at the nape of your neck.
I use two bobby pins in an “X” shape to lock the bun to the twist.
Crafter’s Note: If your bun feels too small, “tease” the ponytail tail with a comb before wrapping it. It adds instant volume without needing a hair donut.
4. The Sleek Red Carpet Pull-Back
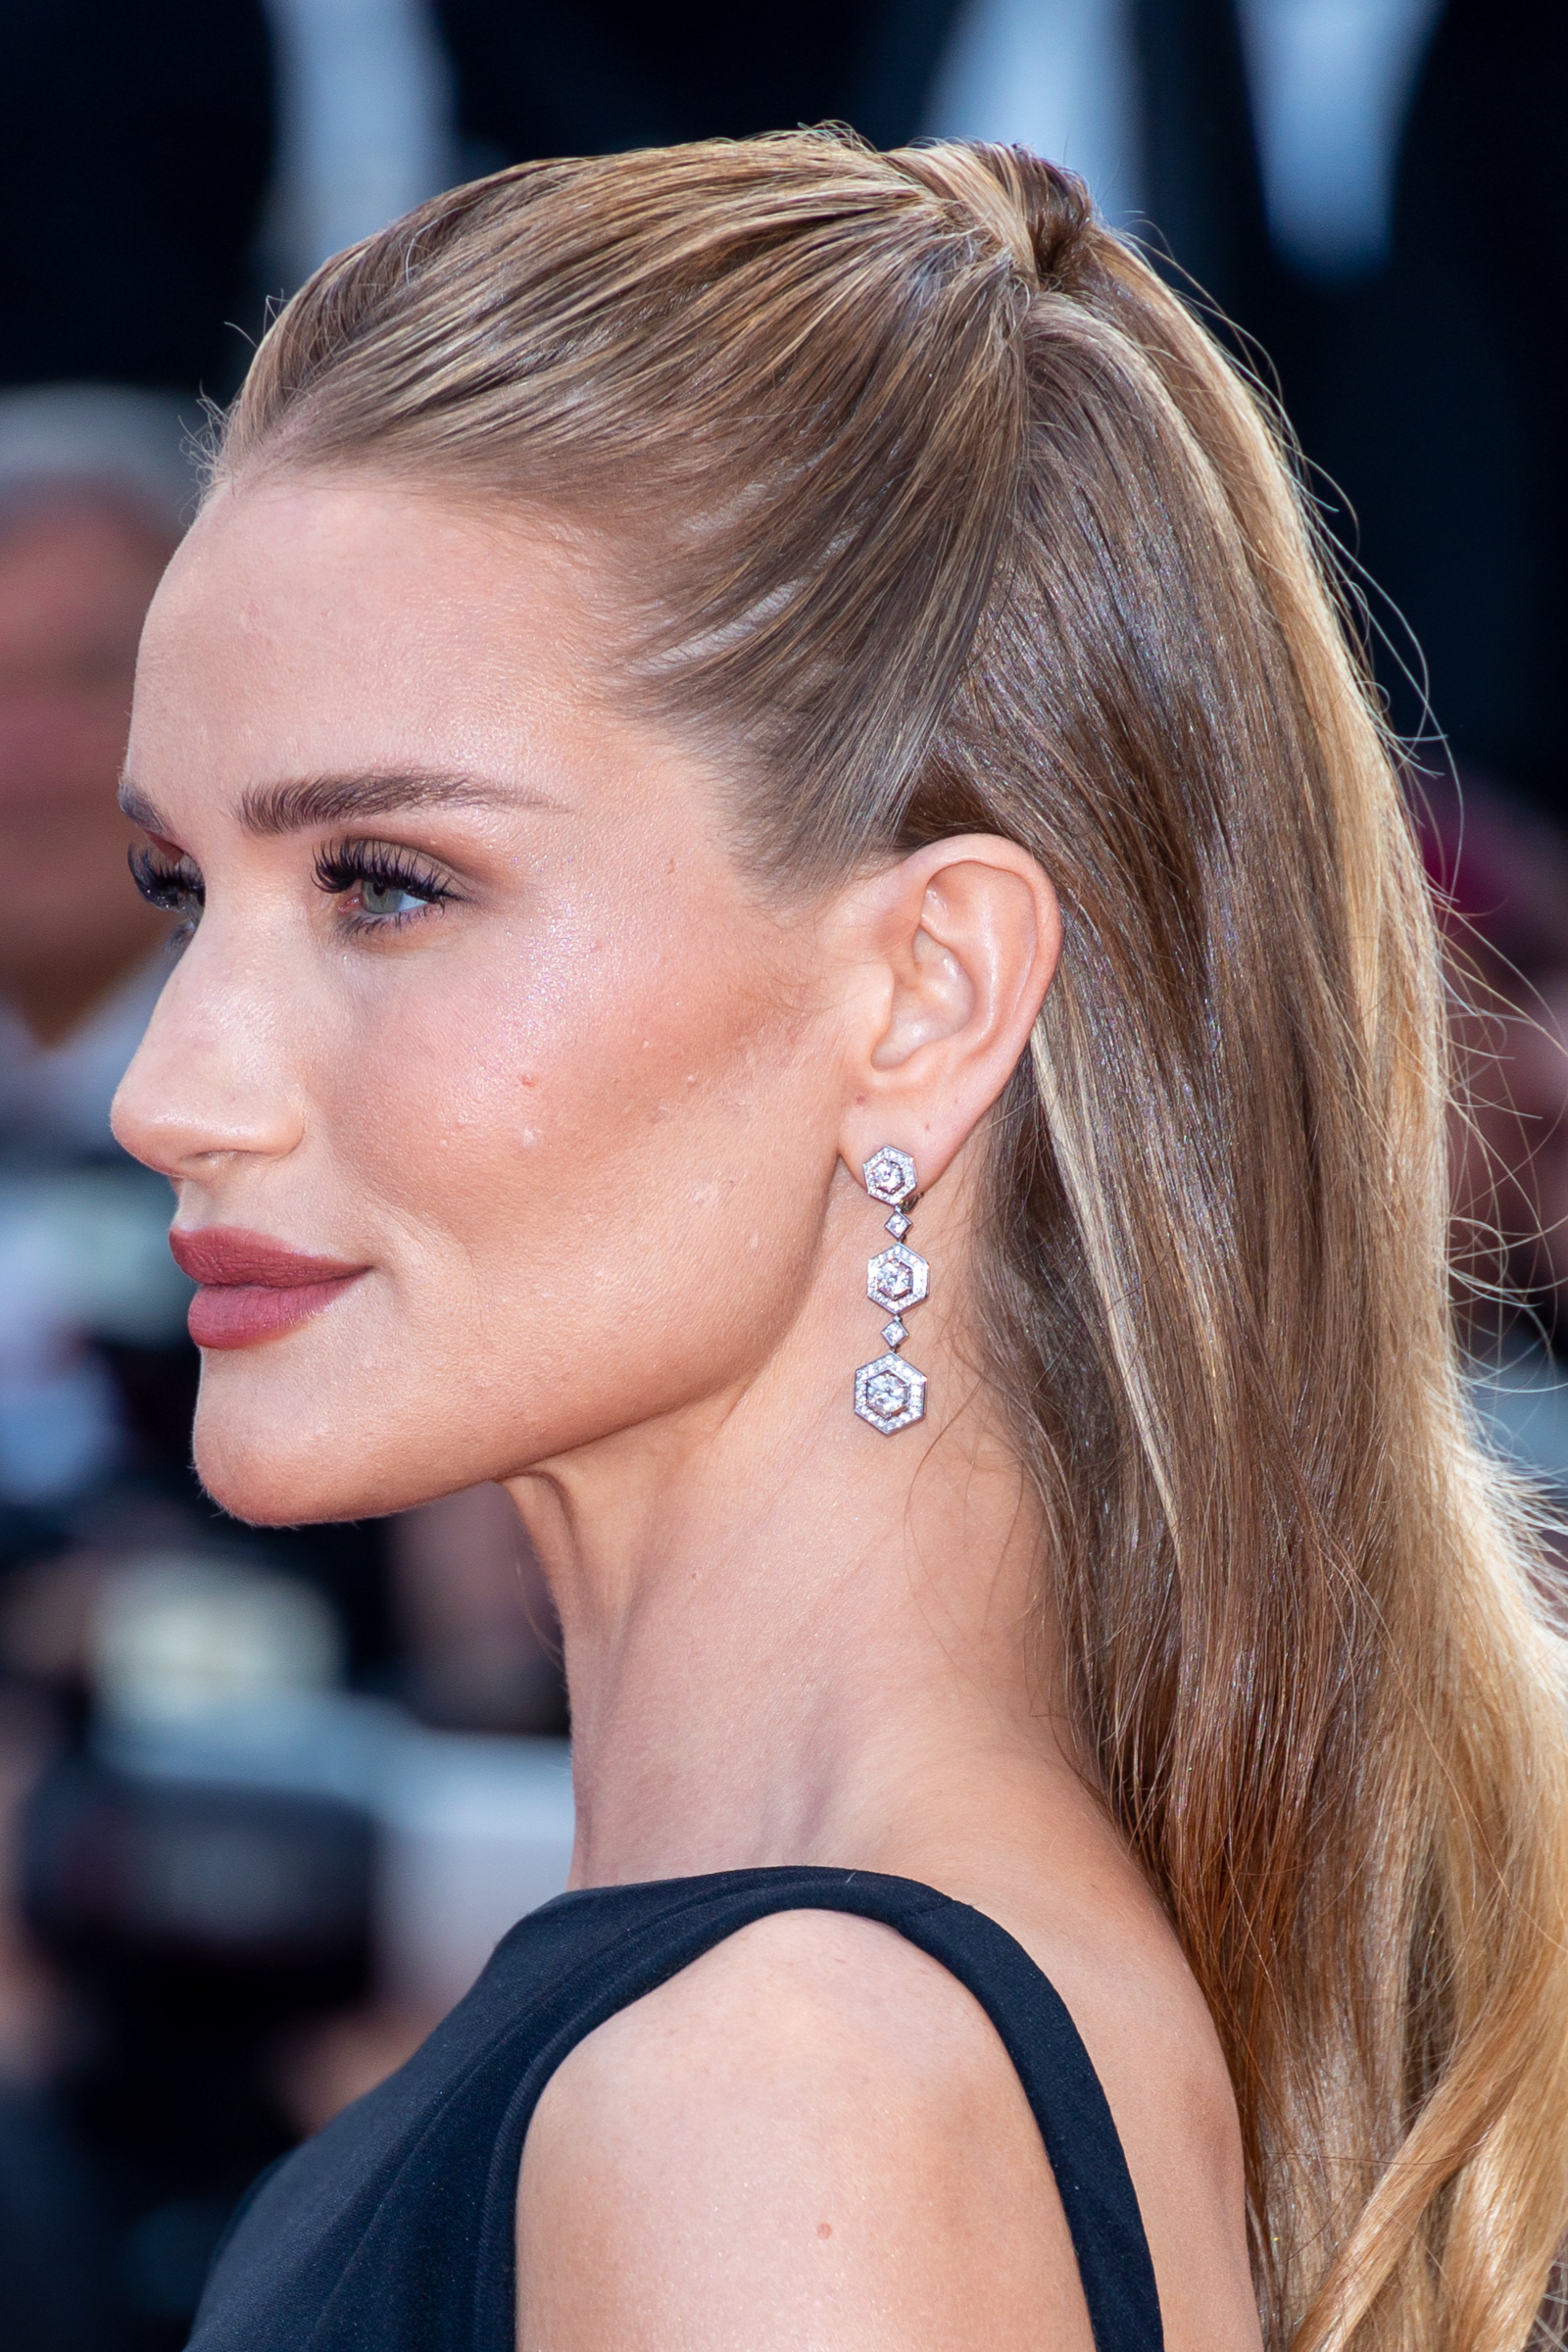
For those days when you want to channel your inner boss, a sleek version is key.
This requires a bit more “adhesive” (hair gel or wax).
The Process: I use a fine-tooth comb to slick back the sides of my hair, right above the ears.
The “twist” here is done very tightly. Instead of a messy loop, I use a small amount of hair wax on my fingers while performing the flip-through.
This keeps every hair in place. The result is a sharp, polished look that highlights your cheekbones.
Material Weakness: Be careful with too much gel; it can make the hair look “wet” or crunchy. Use a tiny amount and build up.
5. The Bubble Braid Half-Up

Bubble braids are everywhere right now, and they are incredibly easy to “build.”
The Process: I start with the standard half-up twist.
Then, every two inches down the remaining “tail,” I add another clear elastic. After placing each elastic, I pull the hair outward to create a “bubble” or a bead effect.
It looks like a complex macramé project but literally takes sixty seconds. It’s a great way to handle long hair that tends to get tangled throughout the day.
6. The Ribbon-Woven Romantic
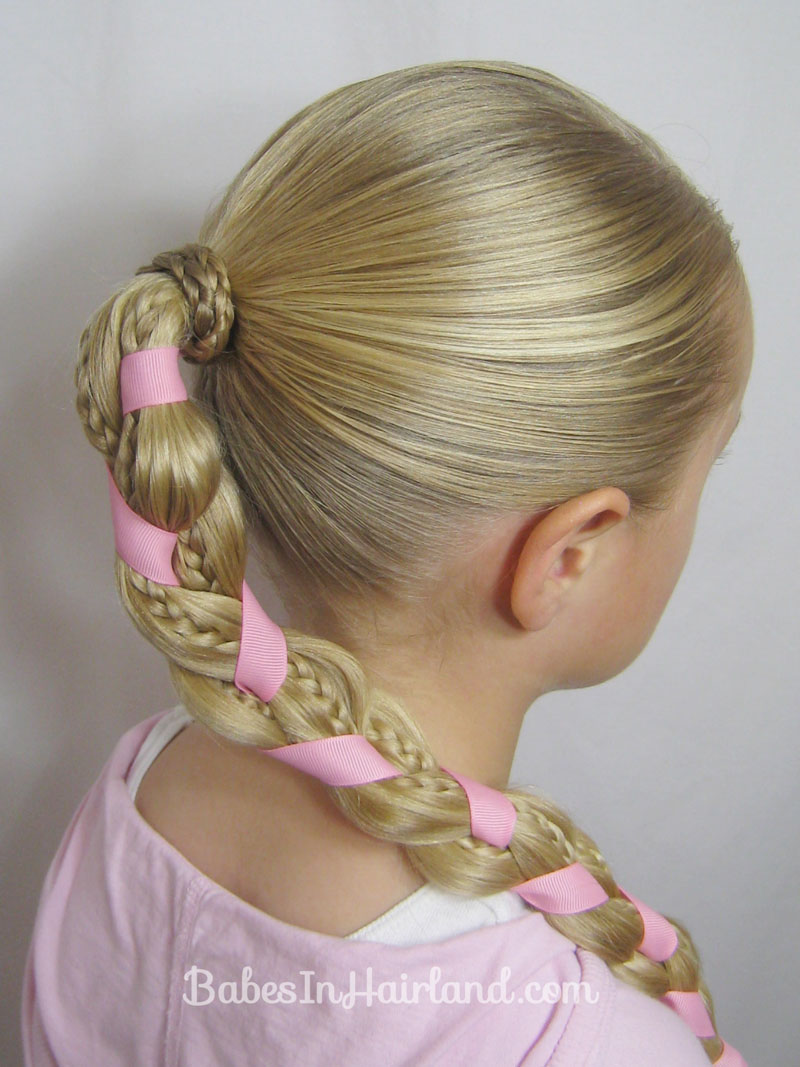
As a crafter, I have bins full of leftover ribbons and lace.
This is the perfect way to upcycle them into your beauty routine.
The Process: I take a piece of velvet or silk ribbon and tie it around the elastic of the initial twist.
Then, I incorporate the ribbon into a loose braid or simply let it mingle with the “tail” of the half-up section. It adds a pop of color and a touch of vintage charm.
Budget Hack: Don’t buy expensive hair ribbons. Go to the craft store and buy a spool of “grosgrain” or “velvet” ribbon for $2. It’s the exact same thing for a fraction of the cost.
7. The Fishtail Accent Twist

The fishtail braid looks incredibly high-end, but it’s really just a two-strand weave.
The Process: I perform the base twist, then turn the resulting ponytail into a fishtail braid.
By starting the braid *after* the twist, you ensure the top of the head has volume and height, while the braid provides the visual interest.
I usually stop the braid halfway down and leave the ends loose for a “mermaid” effect.
8. The Voluminous 60s Bardot

This is all about “structural engineering.” We’re building height at the crown.
The Process: Before doing the twist, I take a section of hair at the crown and back-comb (tease) the underside.
I “lock” the tease with a quick spritz of hairspray. Then, I carefully smooth the top layer over the “bump” and proceed with the half-up twist.
The twist acts as a “tensioner” that holds the volume in place so it doesn’t deflate by lunchtime.
9. The Knotted Macramé Style

This style uses the hair itself as the “thread.”
It’s very tactile and perfect for those who like a “handmade” look.
The Process: Instead of using an elastic for the first step, I take two small sections from the sides and literally tie them into a knot at the back of my head—just like the first step of tying a shoelace.
I do this twice to create a “square knot.” Then, I pin the knot from the underside so the pins are hidden.
It creates a beautiful, organic texture that elastics just can’t replicate.
10. The Scarf-Wrapped Upcycle
Similar to the ribbon, but using a larger silk scarf.
This is my “third-day hair” secret weapon.
The Process: I do a very high half-up twist (almost on top of the head).
I then fold a square scarf into a long band and wrap it around the base of the twist, tying it in a bow or a knot with long tails.
This hides any grease or messy roots and makes you look like you’re on vacation in the French Riviera.
Troubleshooting & Pro-Tips for Success
Even the best DIY projects hit a snag.
Here is how to fix common hair “construction” errors:
| Issue | Likely Cause | The Fix |
|---|---|---|
| The “Sag” | Elastic is too loose. | Use a smaller elastic or wrap it one extra time. |
| Visible Pins | Pins are being pushed in the wrong way. | Always “weave” the pin into the hair, pushing it *into* the bulk of the style, not across it. |
| Flat Crown | No internal “support.” | Gently tug the hair *upward* from the twist before it’s fully tightened. |
| Frizz | Over-manipulation. | Rub a drop of hair oil between your palms and “pet” the flyaways down. |
The “Twist” Secret: The 2-Finger Rule
When you are doing the loop-through (the topsy-tail move), only use two fingers to create the gap.
If you make the hole too big, the twist will look messy and lose its structural integrity. Think of it like a pilot hole in woodworking—it needs to be just the right size for the “screw” (the hair) to fit snugly.
FAQ: Everything You Need to Know
Q: Can I do this with short hair?
Absolutely! As long as your hair reaches the back of your head, you can do a half-up twist.
For bobs, use smaller sections of hair and mini-elastics to avoid a bulky look.
Q: My hair is very slippery. How do I make it stay?
The secret is “grit.” Use a texture spray or even a little bit of sea salt water.
Also, try “scuffing” your bobby pins by spraying them with hairspray before putting them in your hair. It makes them tacky and less likely to slide out.
Q: Does this work on wet hair?
I wouldn’t recommend the full “twist” on soaking wet hair because hair is at its weakest when wet and can break easily.
However, on damp hair with a bit of leave-in conditioner, it can create beautiful heatless waves once it dries!
Q: How do I hide the elastic?
The “twist” method naturally hides the elastic by rolling the hair over it.
If it’s still peeking through, take a tiny sliver of hair from the ponytail, wrap it around the elastic, and tuck the end into the band.
Conclusion
Mastering the half-up half-down hairstyle with a twist is less about “beauty” and more about “engineering.”
Once you understand how to create a solid anchor using the loop-through method, you can customize the look with braids, ribbons, or knots to suit any occasion.
It’s the ultimate budget-friendly beauty hack—requiring nothing more than a few elastics and a bit of creativity.
So, next time you’re reaching for a boring old hair tie, try the twist instead. Your hair (and your mirror) will thank you!
Keep crafting, keep styling, and remember: there are no mistakes, only “rustic” variations!
Leave a Reply