Looking for a creative way to mark your spot in your favorite book? This DIY Handmade Paper Butterfly Bookmark is not only super cute but also easy to make! With just a few simple steps, you’ll have a lovely bookmark that flutters out from the pages like a beautiful butterfly. Let’s get crafting! 🌸


Materials You’ll Need 📋
Before diving into the steps, make sure you have these materials ready:
- Patterned Paper: Choose a design you love. Floral patterns work beautifully for this project!
- Plain Paper: A contrasting color to highlight the butterfly’s wings.
- Scissors: Sharp enough for clean cuts.
- Glue: A strong adhesive that dries clear.
- Bone Folder (optional): To create crisp folds.
Step-by-Step Instructions ✂️
Step 1: Prepare Your Paper 📄
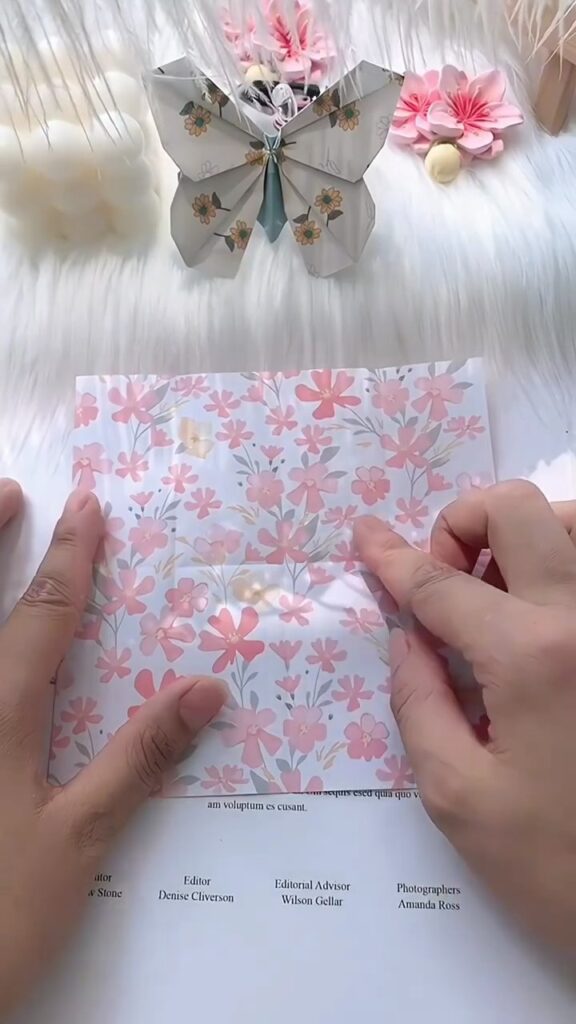
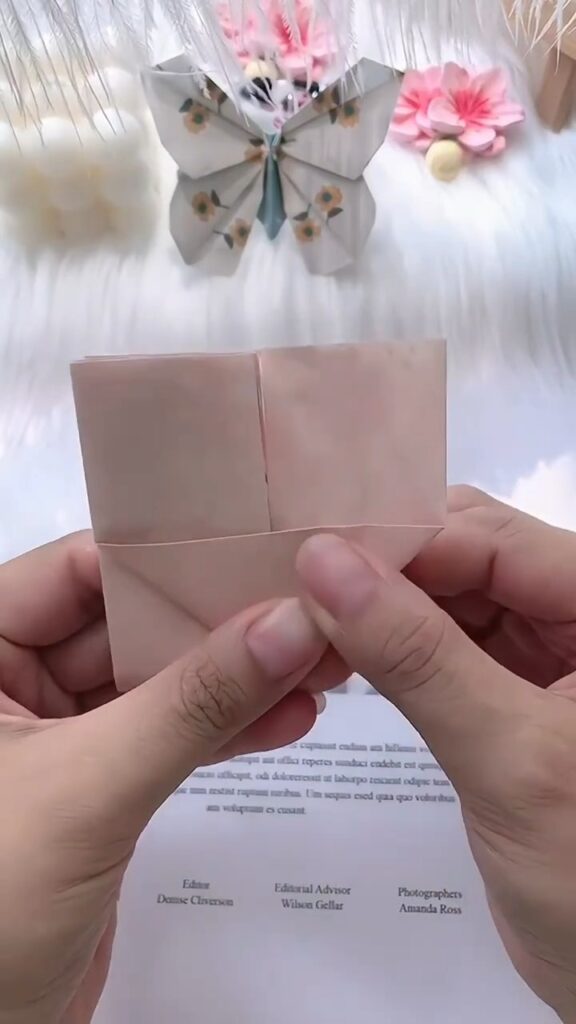
1️⃣ Cut the Paper:
Begin by cutting a square piece of patterned paper and a matching square piece of plain paper. The size of the square will determine the size of your butterfly. In this tutorial, both papers are cut into equal squares to create a balanced look.
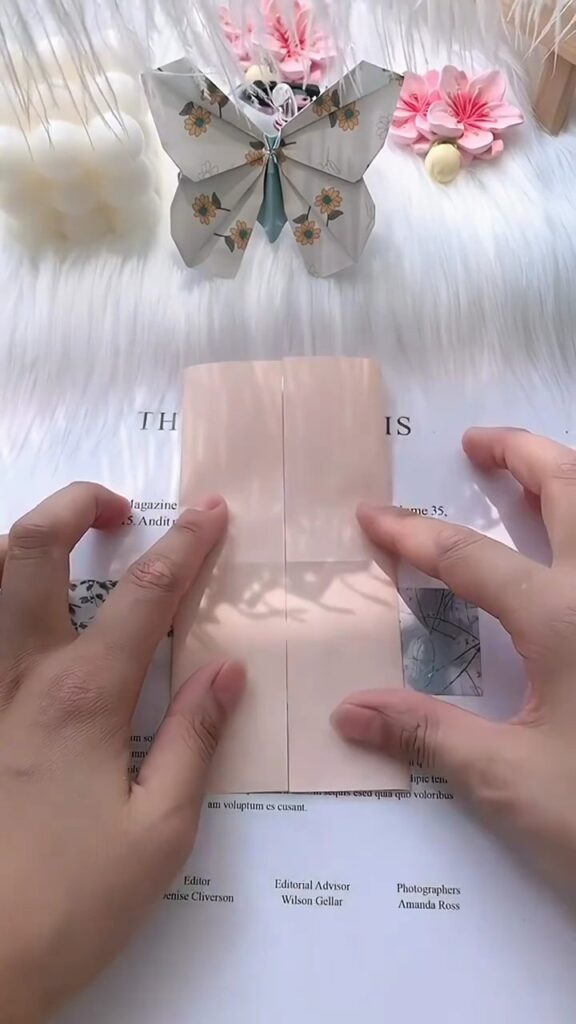
2️⃣ Fold the Paper:
Next, fold both squares in half vertically, and then unfold them. This crease will guide you in the following steps.
Pro Tip:
Using a bone folder can help you create sharp, clean folds, but if you don’t have one, your fingers will do just fine!
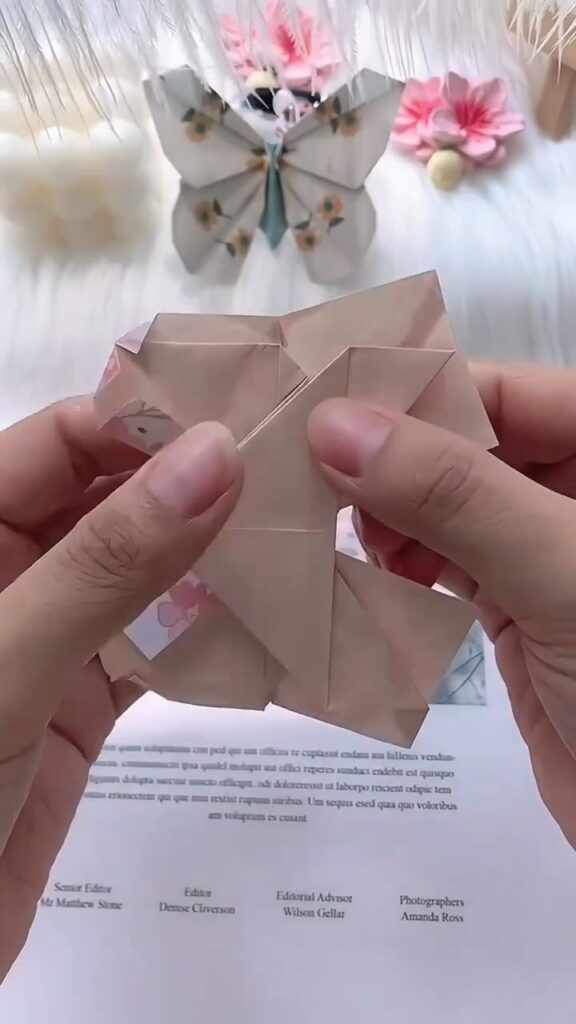
Step 2: Shape the Butterfly Wings 🦋
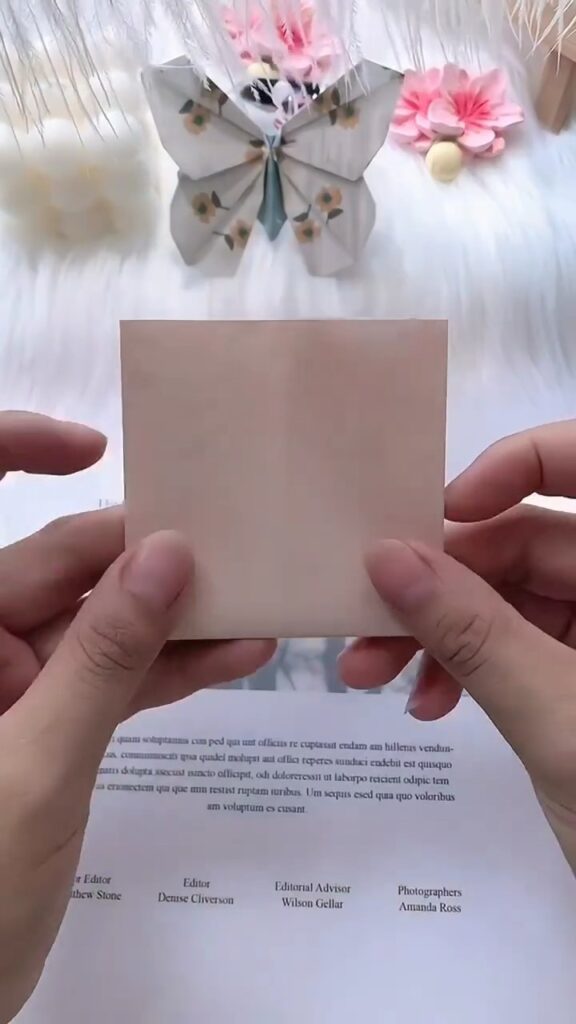
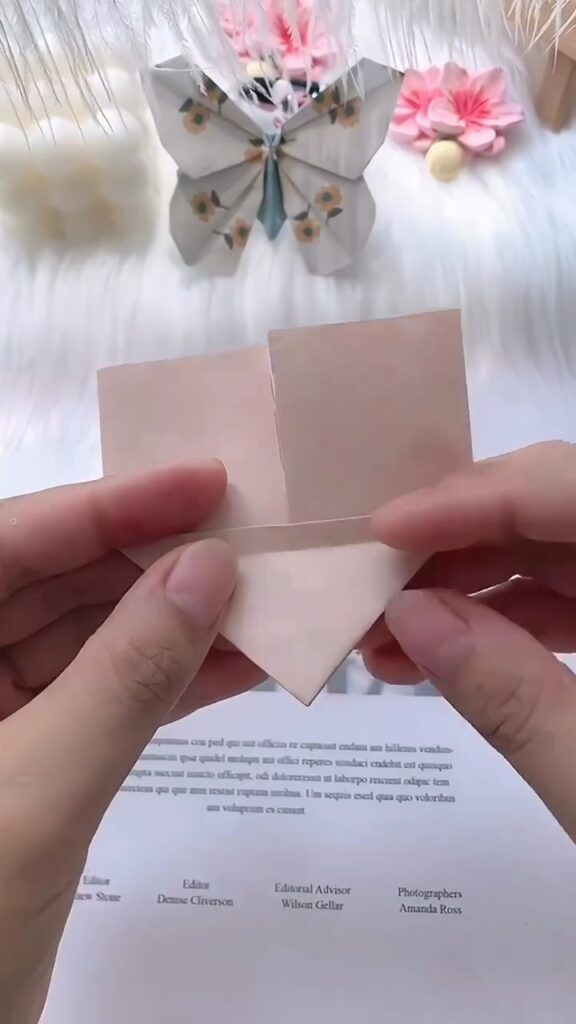
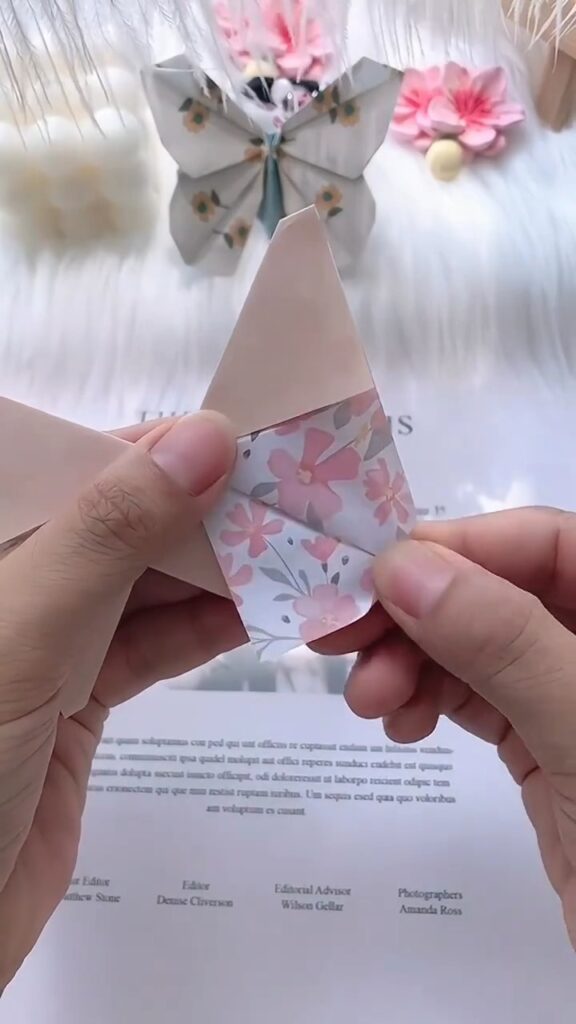
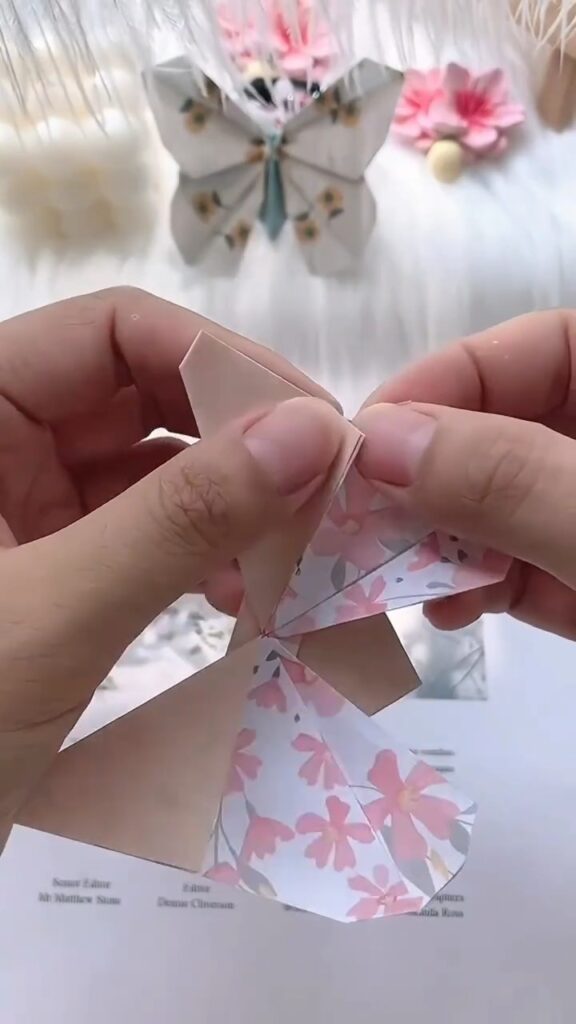
1️⃣ Create the Wing Base:
With your patterned paper, fold the bottom corners upwards, aligning them with the top edge. This forms the base of the butterfly wings. Do the same with the plain paper.
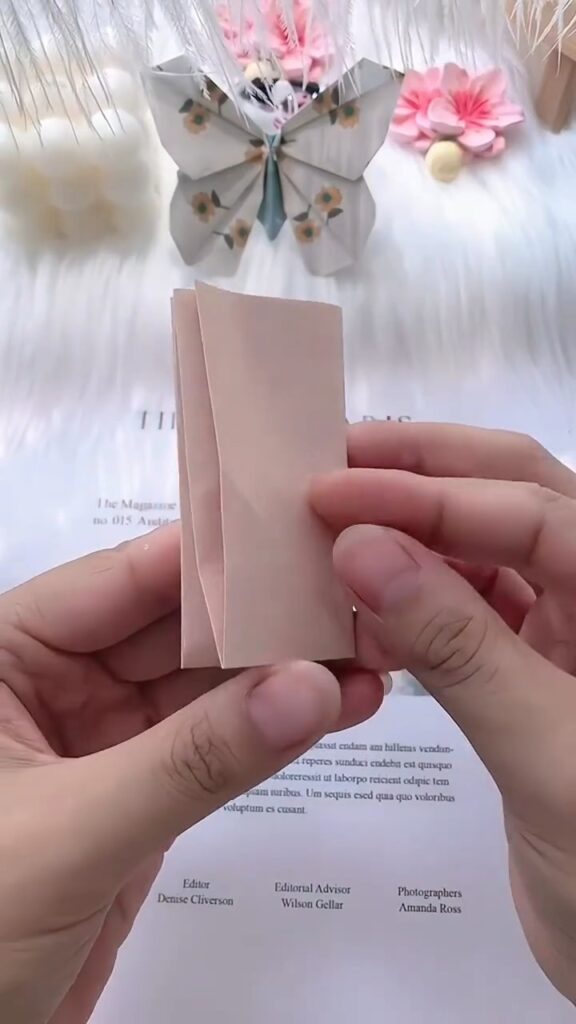
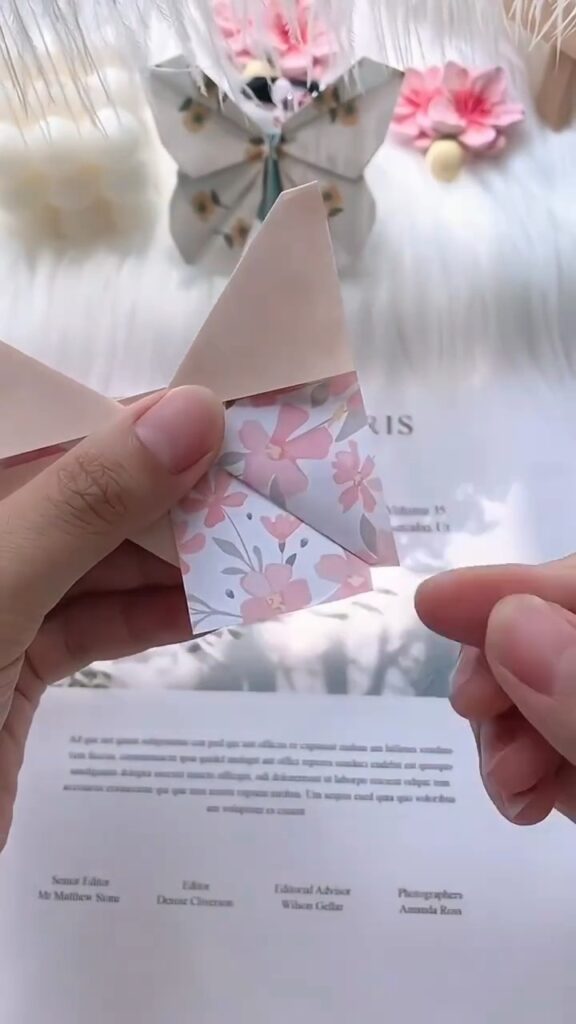
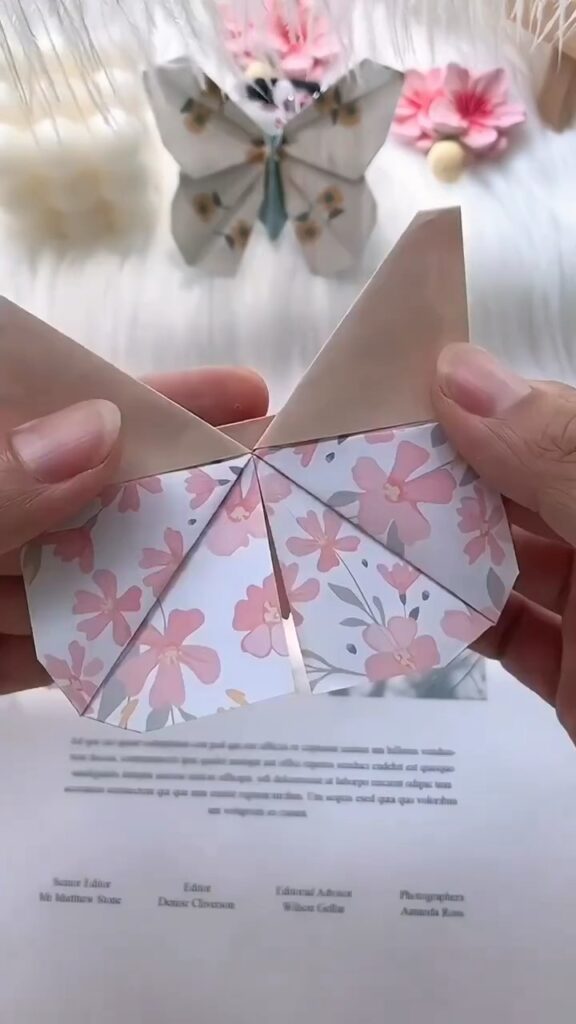
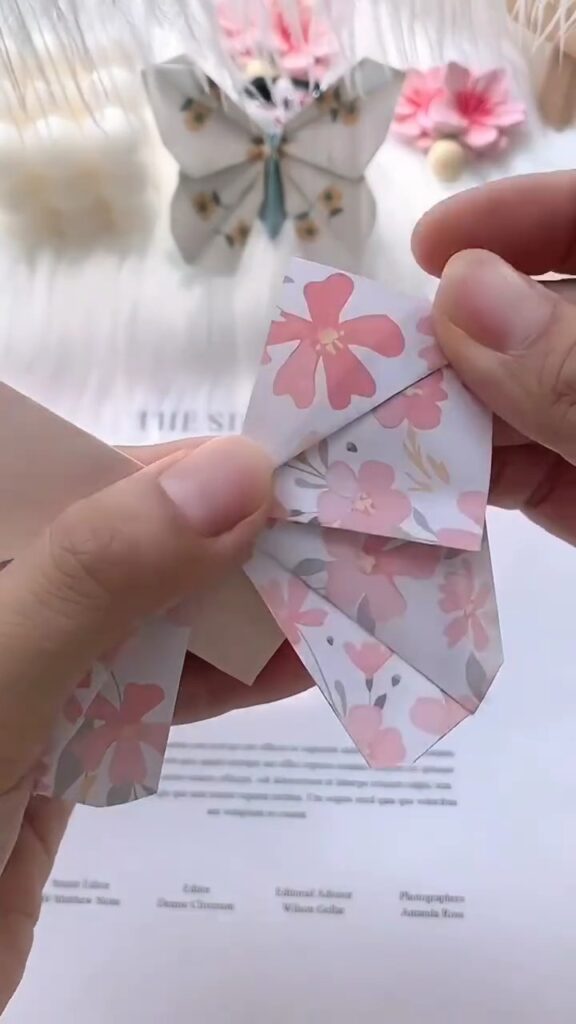
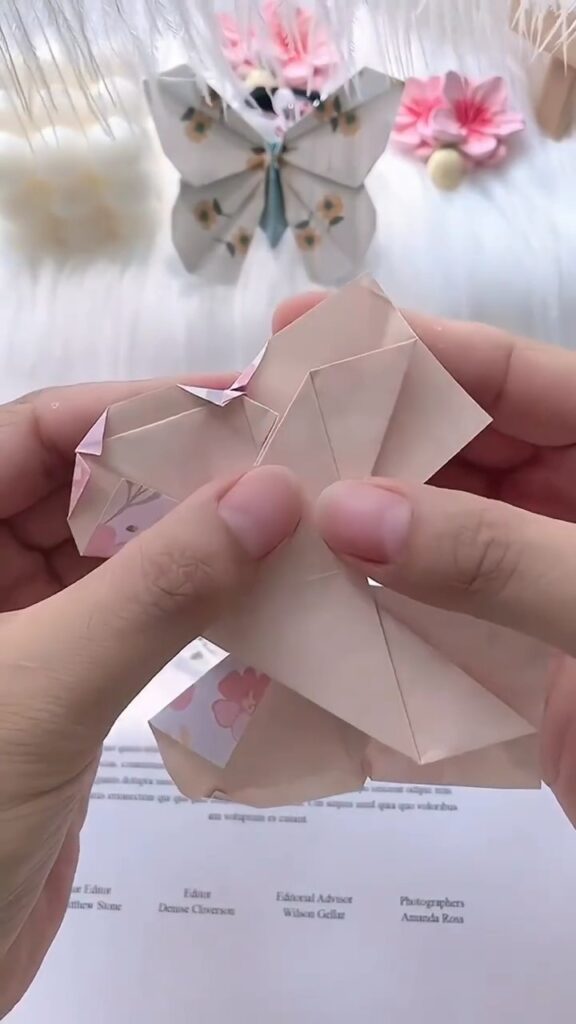
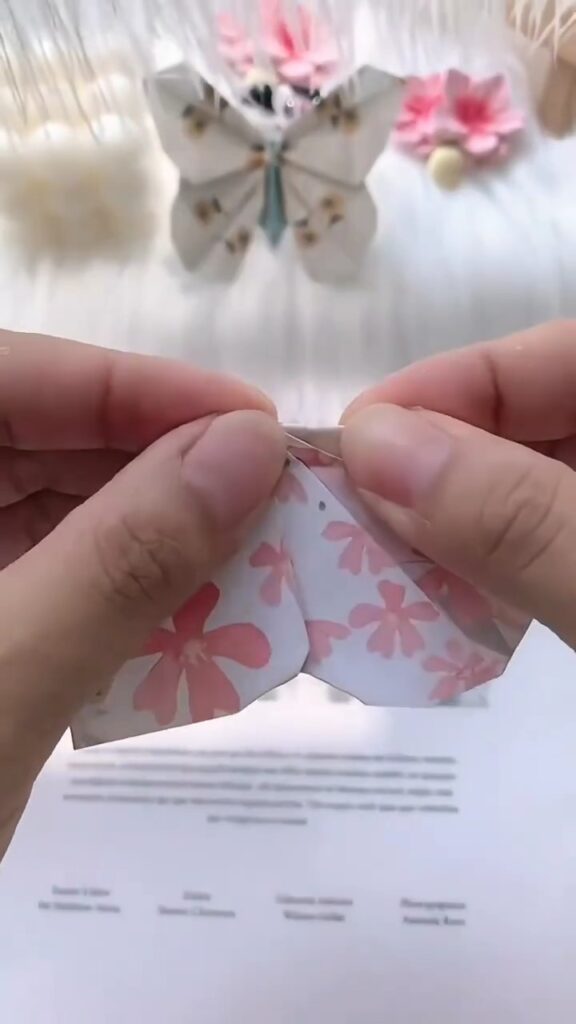
2️⃣ Refine the Wing Shape:
Now, take the newly folded edges and fold them back on themselves to create a crimped effect. This step adds texture and detail to your butterfly wings. Notice how the wings start to take shape as you fold—just like in the image frames!
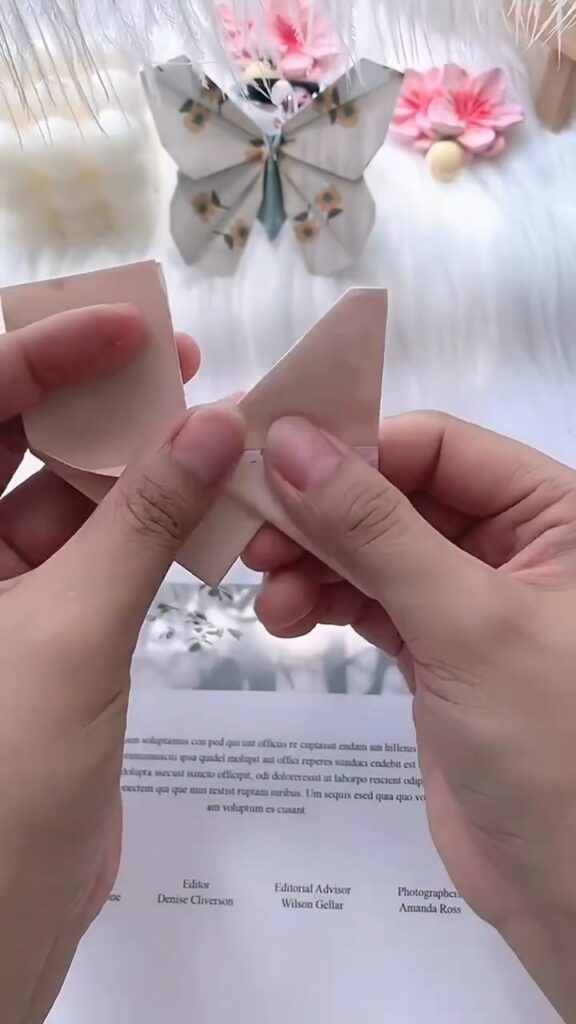
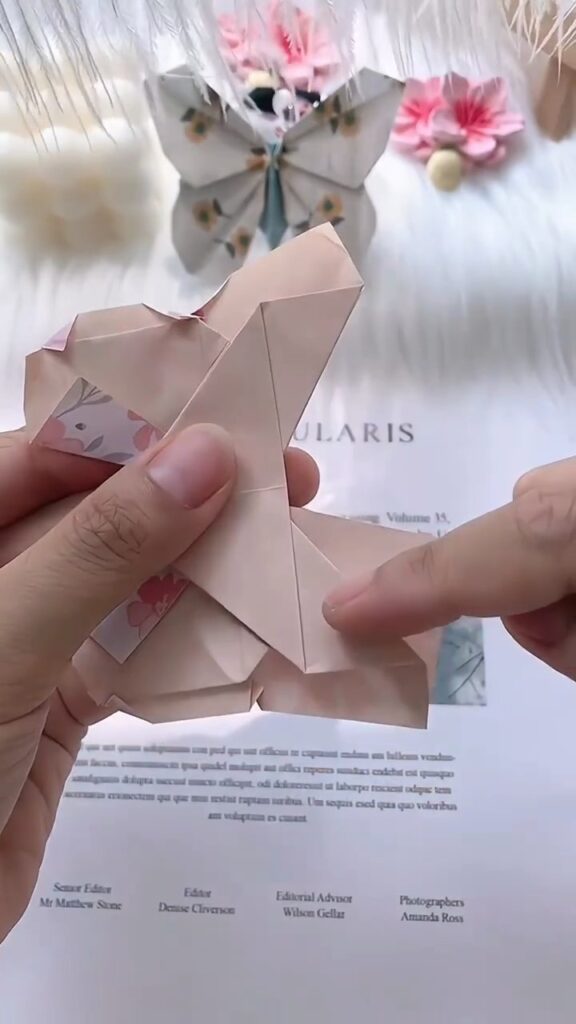
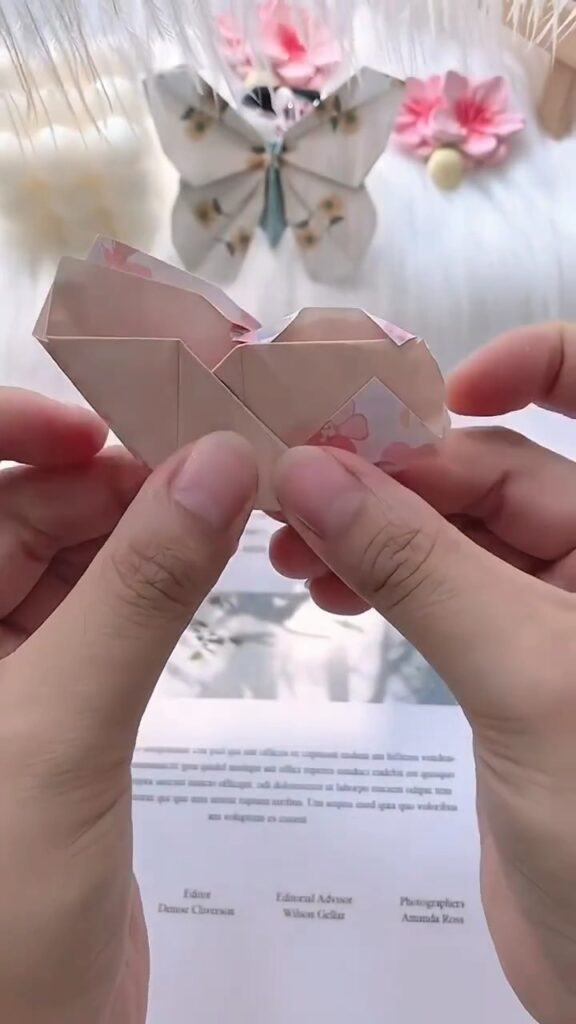
3️⃣ Attach the Wings:
Once both papers are folded into the desired shape, it’s time to attach them. Apply a small amount of glue to the back of the patterned paper and carefully press it onto the plain paper. This combination creates a stunning two-tone effect.
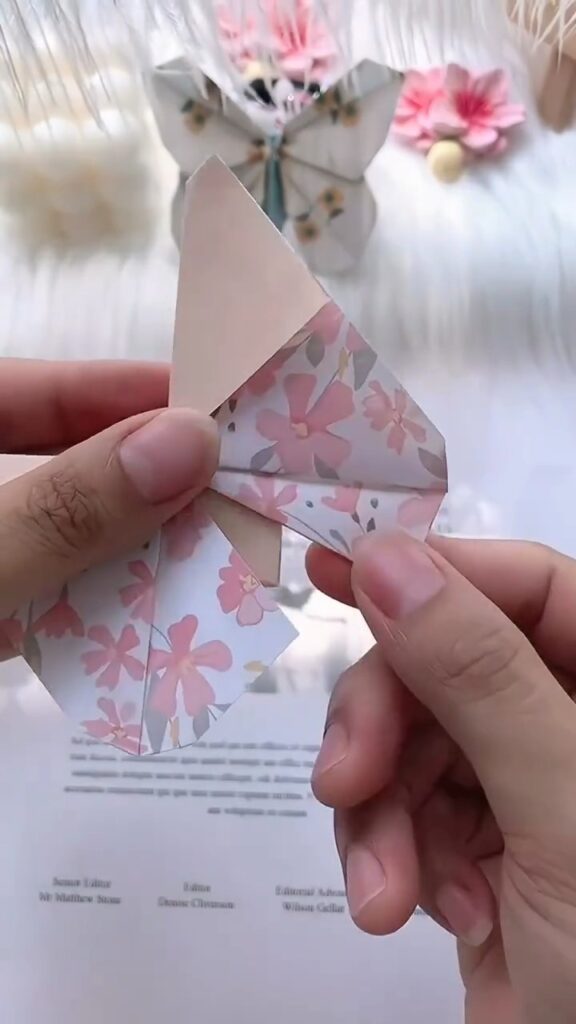
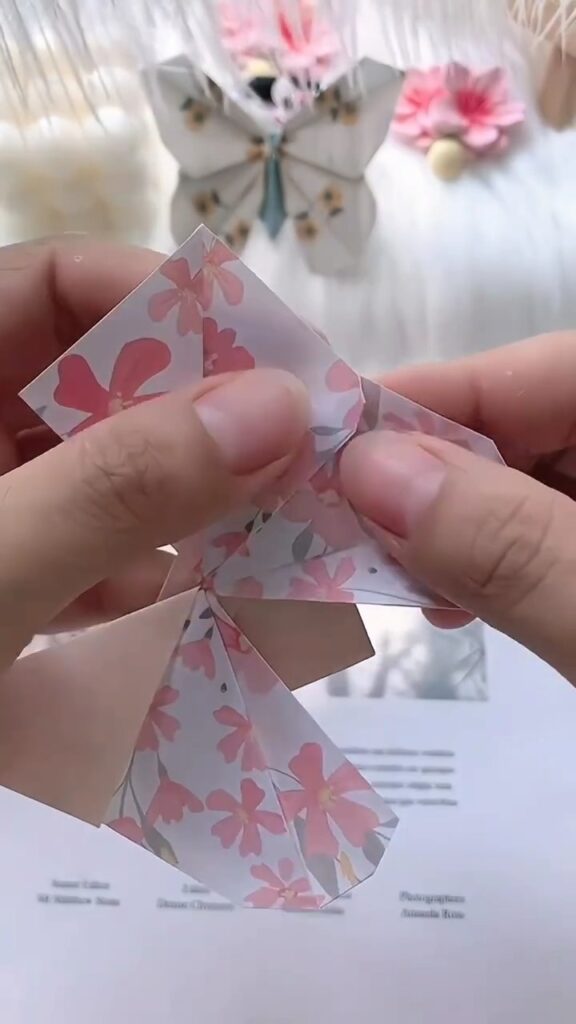
Step 3: Form the Butterfly’s Body 🌺
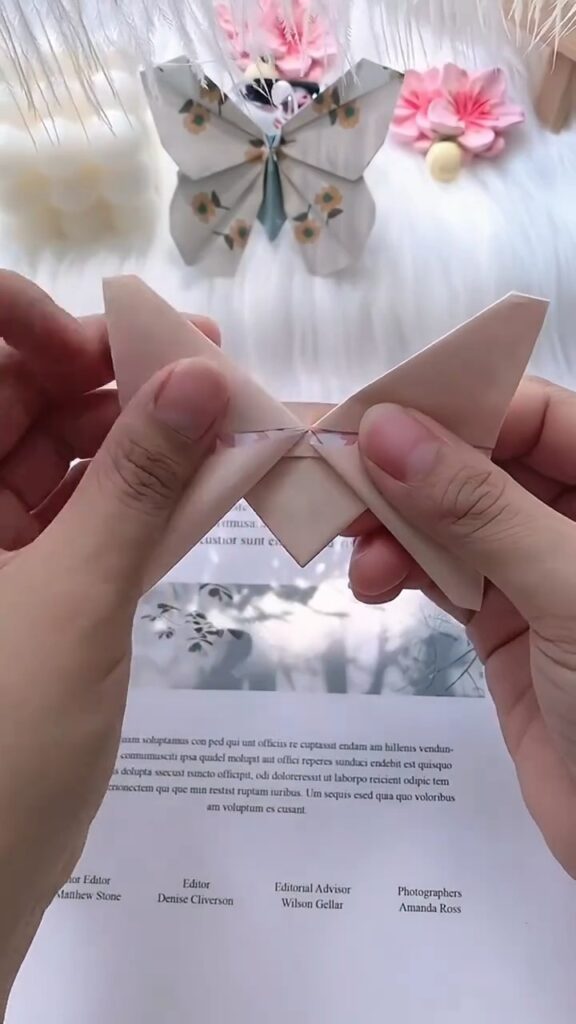
1️⃣ Fold the Body:
Using the remaining strips of paper, fold a small, thin piece to form the body of the butterfly. The body should be slender to contrast with the broader wings.
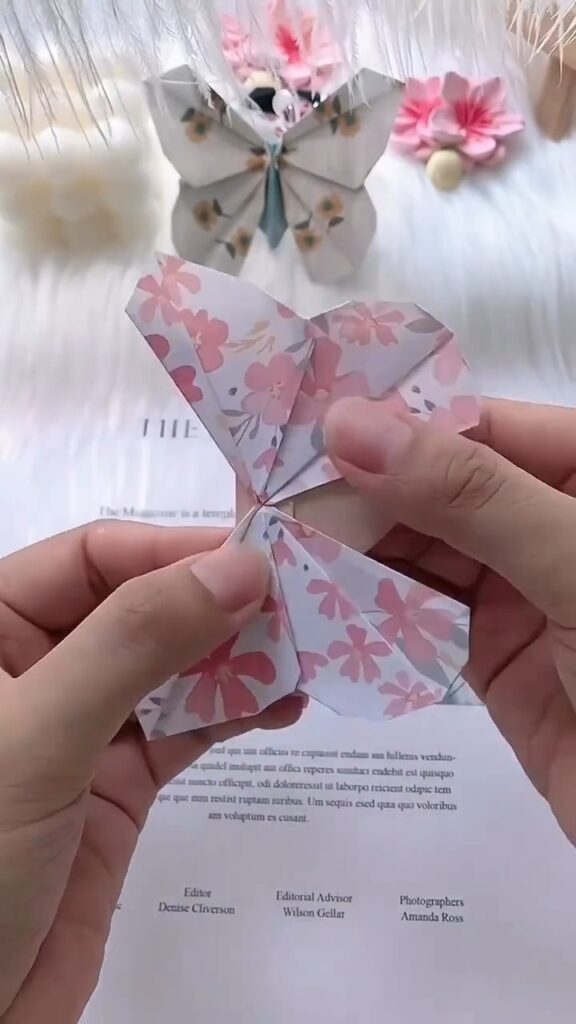
2️⃣ Attach the Body:
Carefully glue the body to the center of the butterfly wings. Ensure it’s placed vertically, with the head of the butterfly facing upward.
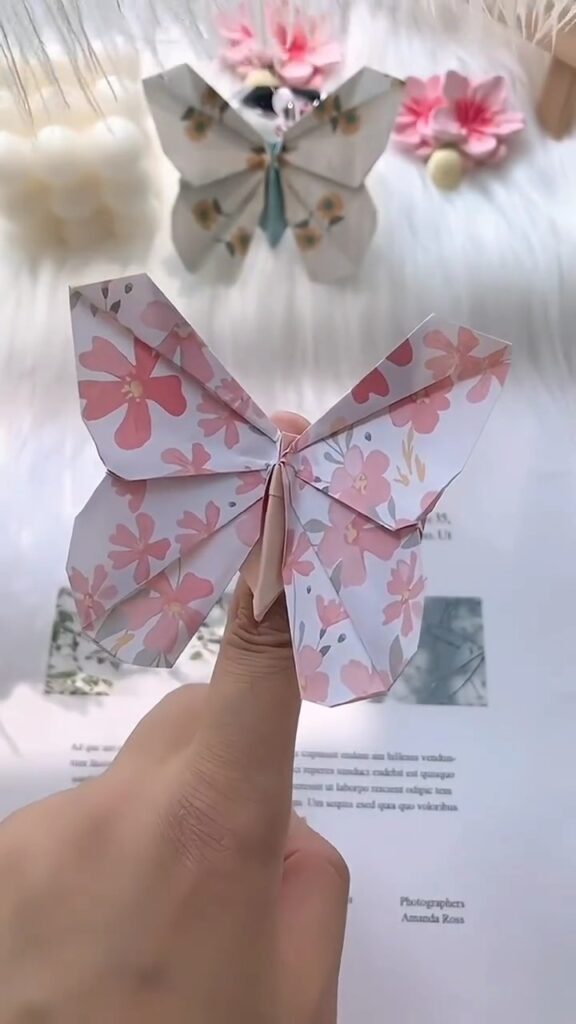
3️⃣ Shape the Antennae (optional):
If you want to add a little more detail, you can create tiny antennae from thin strips of paper and attach them to the top of the butterfly’s body.
Pro Tip:
I love adding a little sparkle to the butterfly’s body with a touch of glitter or a small rhinestone for a bit of extra flair. 🌟
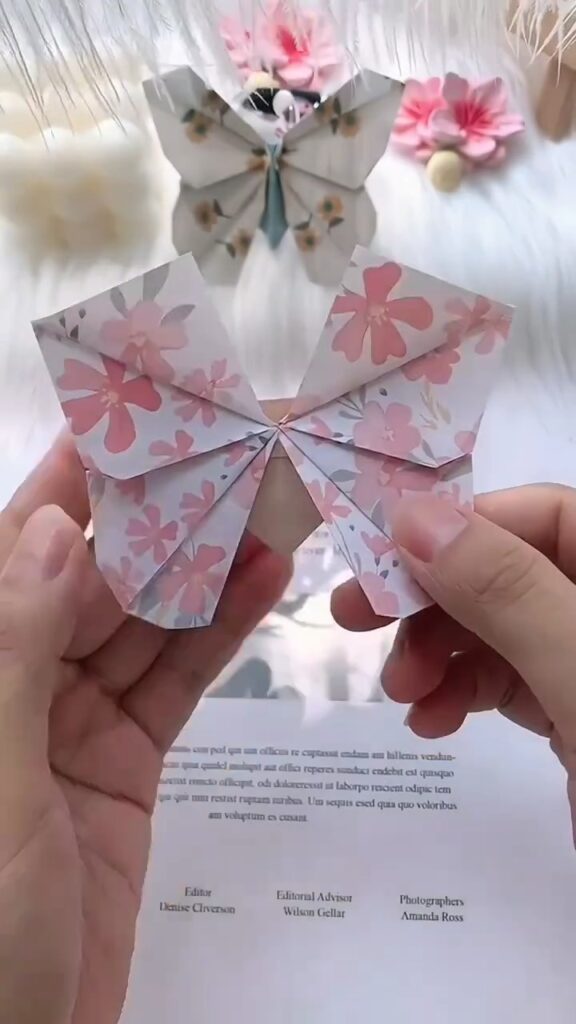
Step 4: Assemble the Bookmark 📚
1️⃣ Fold the Butterfly:
Fold the butterfly gently in half so that it can slip over the edge of a page. Be careful not to crease it too much—you want it to look like it’s just resting on the page.
2️⃣ Secure the Fold:
For a more secure fit, apply a tiny dot of glue at the base where the wings meet the body. This will help the butterfly stay put as a bookmark without slipping off.
Displaying and Using Your Butterfly Bookmark 🦋
Your beautiful butterfly bookmark is now ready to take flight! Slip it over the top of the page you’re reading, and let it flutter gently every time you open your book. Whether you’re reading a romance novel or your favorite self-help book, this bookmark will add a touch of elegance and charm to your reading experience.

Leave a Reply