If you’ve ever wanted to bring a splash of vibrant color to your space, then this easy DIY acrylic painting project is perfect for you! Whether you’re a seasoned artist or just someone who enjoys a bit of creative therapy, this step-by-step guide will help you create a stunning yellow flower painting. 🌻 Let’s dive in and unleash your inner artist!

Materials You’ll Need 🎨
Before we begin, gather the following materials:
- Acrylic Paints: Yellow, Green
- Paintbrushes: Flat brush and round detail brush
- Black Canvas or Paper: The dark background really makes the colors pop!
- Palette: For mixing your paints
- Water and Paper Towels: To clean your brushes
Step-by-Step Instructions 🖌️
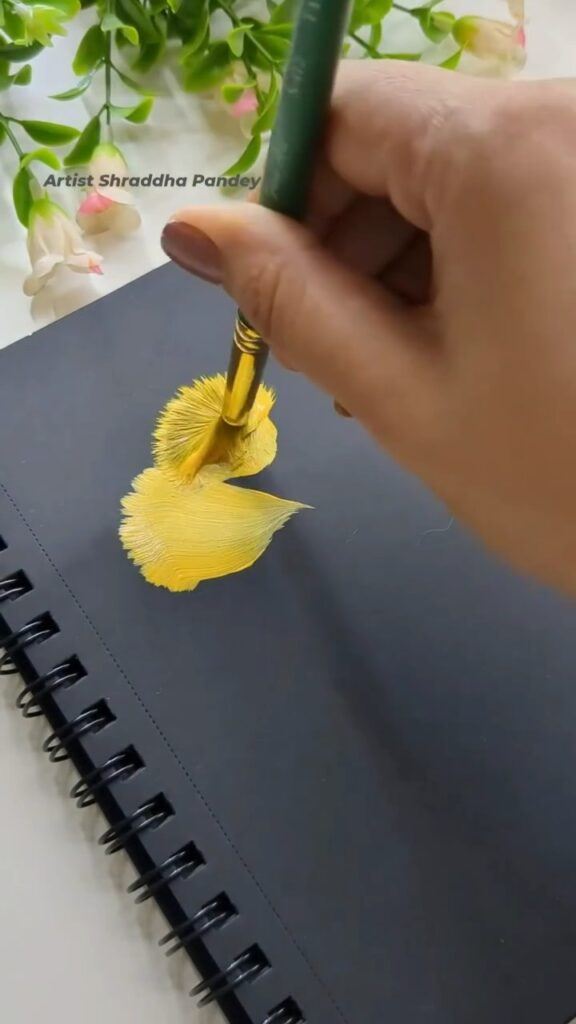
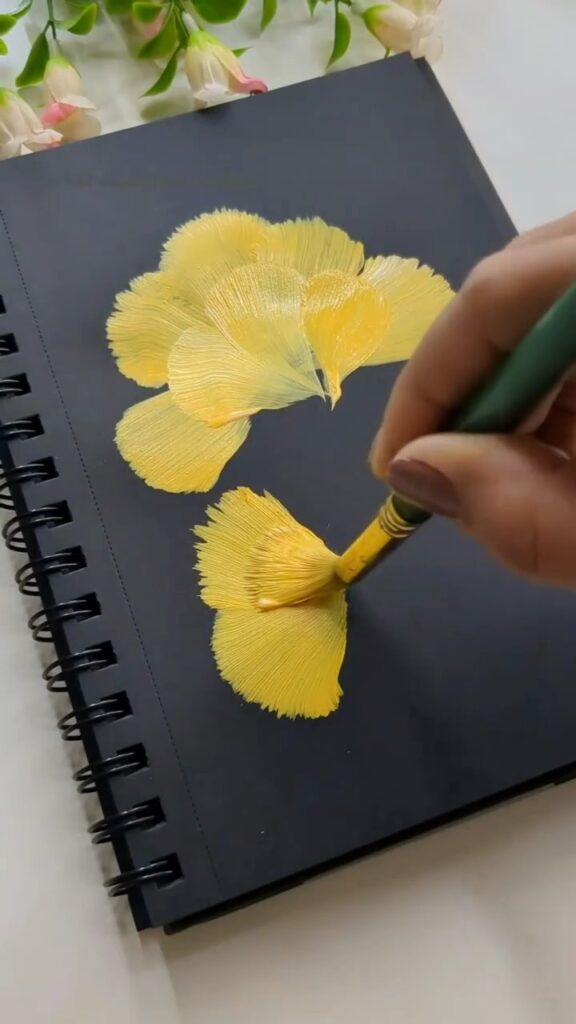
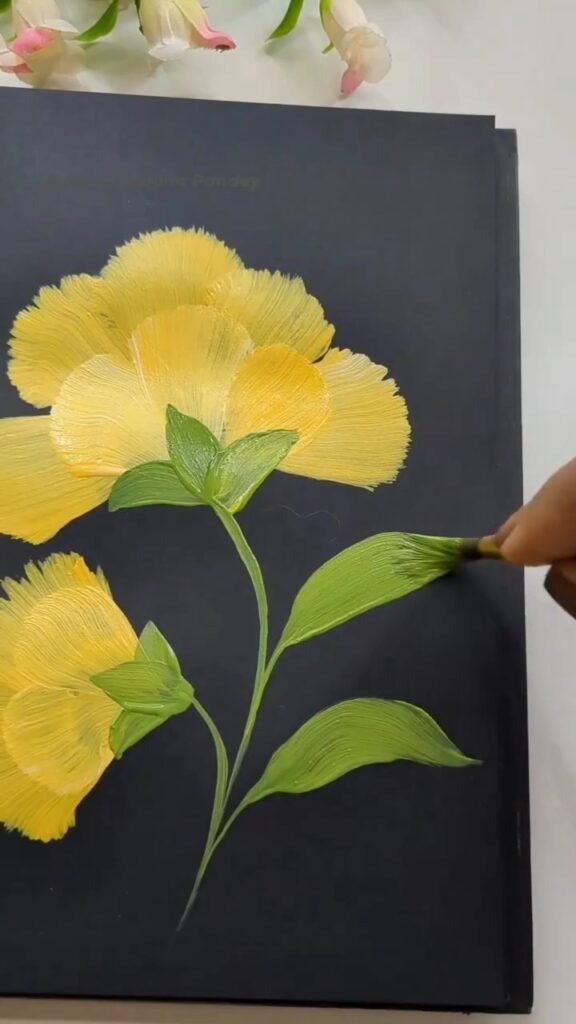
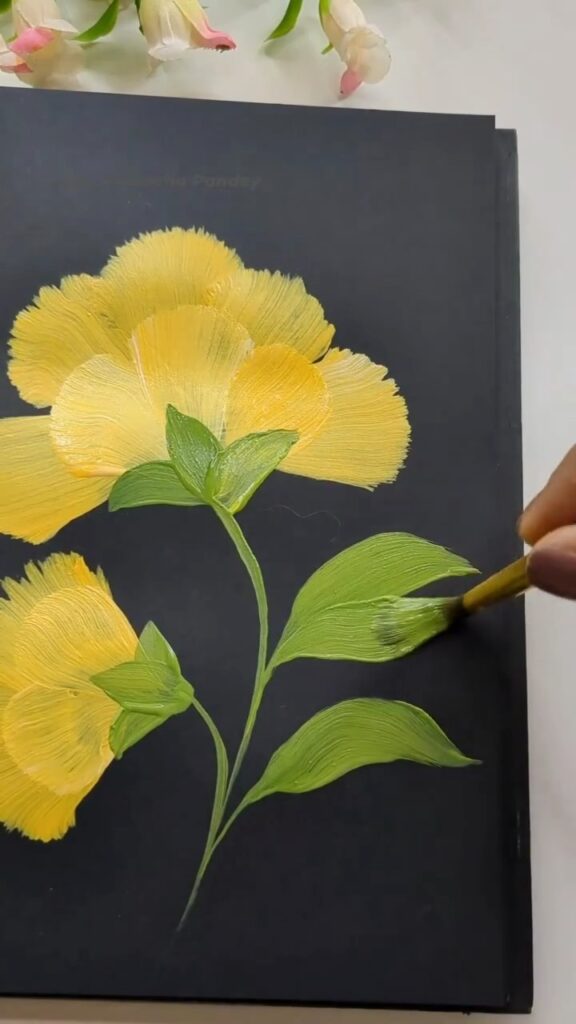
Step 1: Paint the Petals 🌼
Start by loading your flat brush with yellow paint.
1️⃣ Begin with the First Petal:
Place your brush on the canvas and gently press down, pulling the paint outward to form a petal shape. The key here is to apply enough pressure to create a wide base and then gradually lift the brush to taper the petal’s edge.
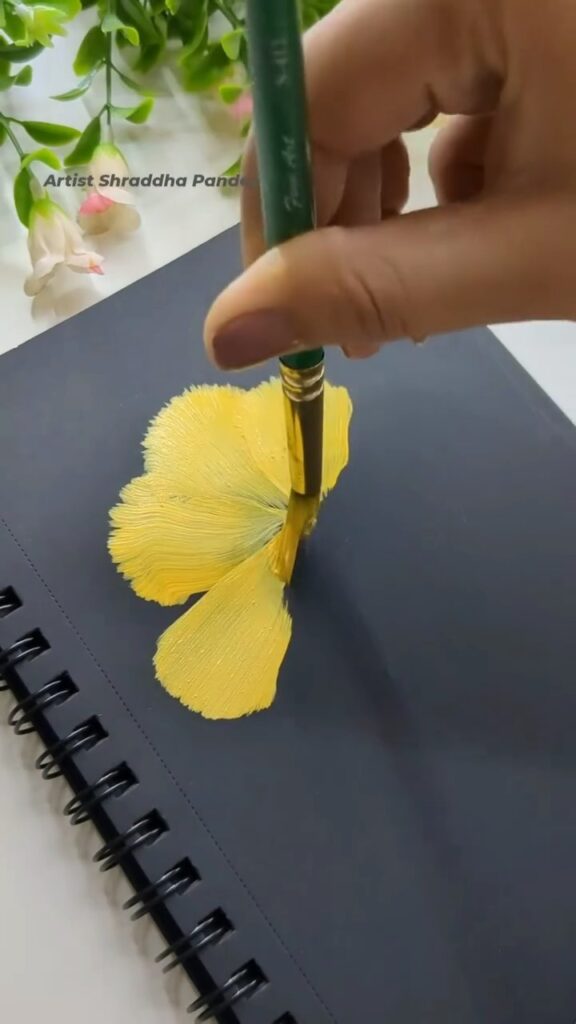
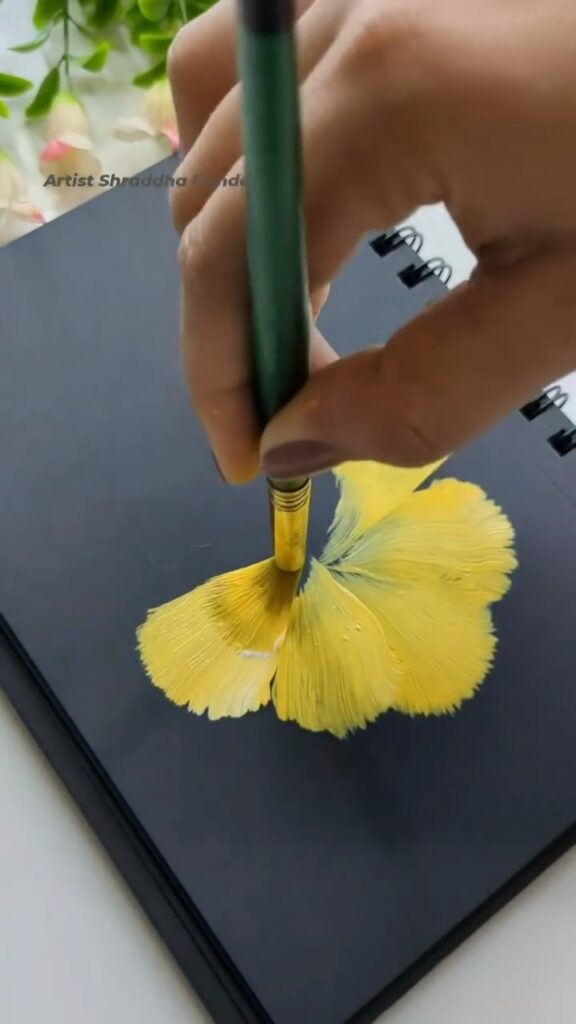
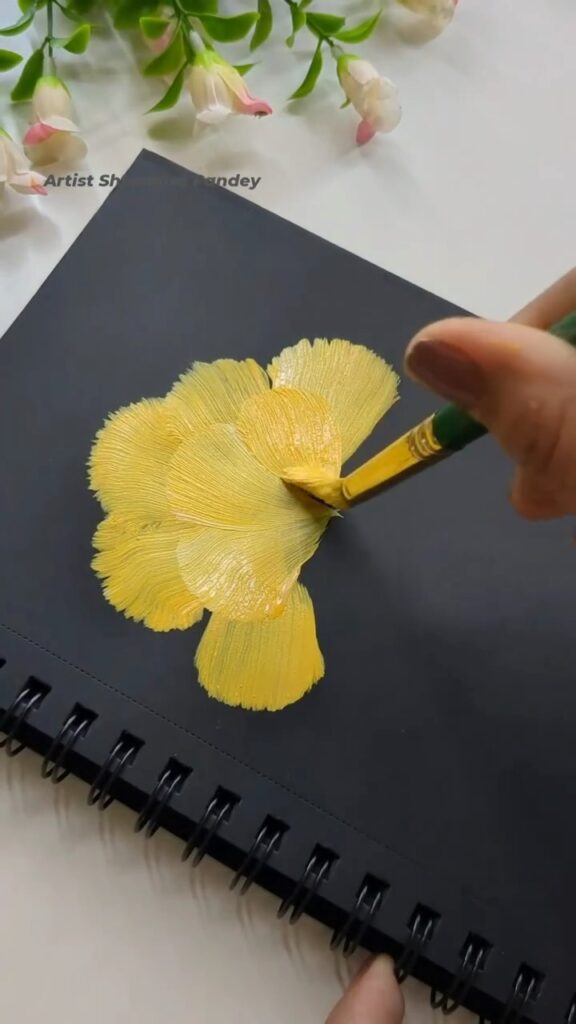
2️⃣ Add More Petals:
Continue adding petals around the first one, slightly overlapping them to create a natural look. Repeat the same technique, ensuring each petal radiates from the center. The result should be a full, blossoming flower, as shown in the first few frames.
Pro Tip:
If you’re like me and sometimes find it hard to get the petals just right, don’t worry! Imperfections add character to your artwork, so embrace them! 💛
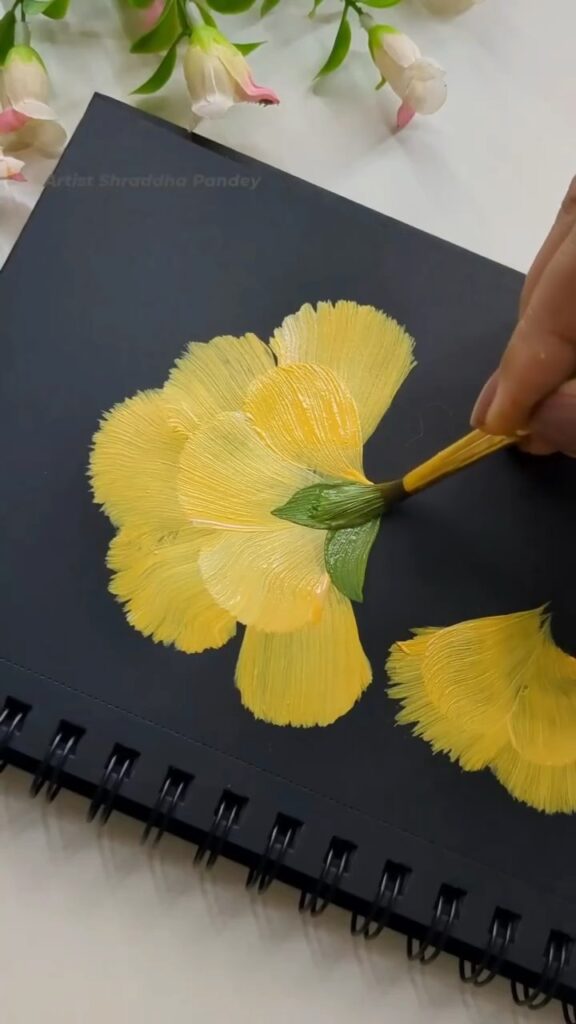
Step 2: Enhance the Flower Center 🌟
1️⃣ Blend for Depth:
Once your petals are complete, it’s time to add depth to your flower. Take your round detail brush and lightly blend in some darker shades of yellow or even a hint of orange at the base of each petal. This will give your flower a more dimensional and lifelike appearance.
2️⃣ Refine the Center:
Using the same detail brush, add subtle strokes in the center of the flower to create the illusion of tightly packed petals.
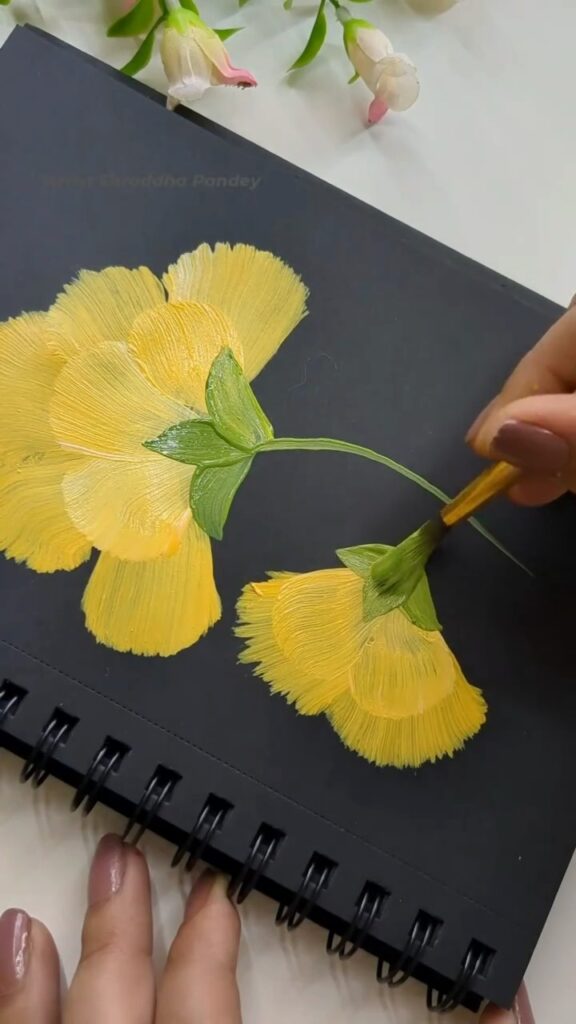
Step 3: Paint the Stem and Leaves 🌿
1️⃣ Create the Stem:
Switch to green paint and use your round brush to draw a slender stem starting from the base of your flower. Make sure it’s slightly curved for a more natural look.
2️⃣ Add the Leaves:
With the same green paint, start painting the leaves by pressing the brush down and pulling outward, just like you did with the petals. The leaves should be long and slightly curved, as seen in the final frames. Add a bit of shading to the leaves to give them depth.
Pro Tip:
I love how the leaves seem to flow naturally from the stem—almost like they’re dancing in the breeze. Adding a bit of darker green at the base of each leaf can make them look more realistic.
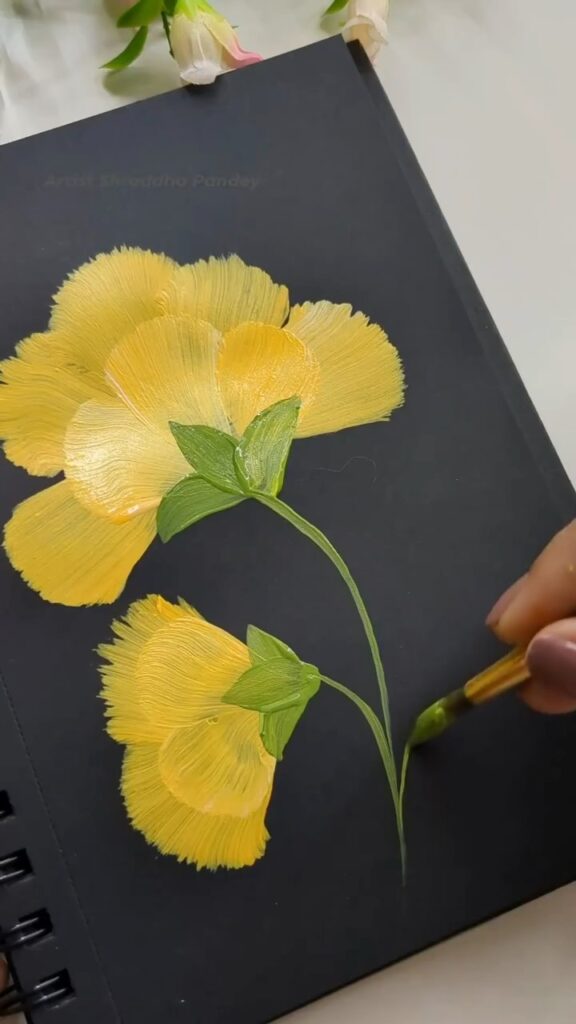
Final Touches and Displaying Your Art 🌟
Once your painting is complete, let it dry completely. You can add a personal touch by signing your name at the corner. Frame your artwork or display it as-is on an easel to brighten up your living space.
FAQs 🙋♀️
Q: Can I use different colors?
Absolutely! Feel free to experiment with different colors to match your decor or personal taste.
Q: What if I don’t have a black canvas?
You can use any color background you like. However, if you want to achieve the same vibrant contrast, try using dark paper or painting your canvas black before starting.
Q: I’ve never painted before. Will this be hard?
Not at all! This project is beginner-friendly. Just take your time, and enjoy the process. Remember, art is about expressing yourself, not perfection!


Leave a Reply