If you’re anything like me, you love finding new ways to bring a splash of creativity into your life. Recently, I discovered an amazing art technique that combines vibrant colors, simple tools, and a touch of magic—water marbling! This art form is not only mesmerizing to watch but also incredibly rewarding to create.
Water marbling is a technique that allows you to create stunning, one-of-a-kind designs on paper, fabric, and even ceramics. The best part? You don’t need to be a professional artist to create something beautiful! All you need are a few basic supplies and a little bit of patience. 😊
Whether you’re looking to add some flair to your home décor, make personalized gifts, or just spend a fun afternoon with the kids, this floral water marbling project is perfect for you.

What You’ll Need
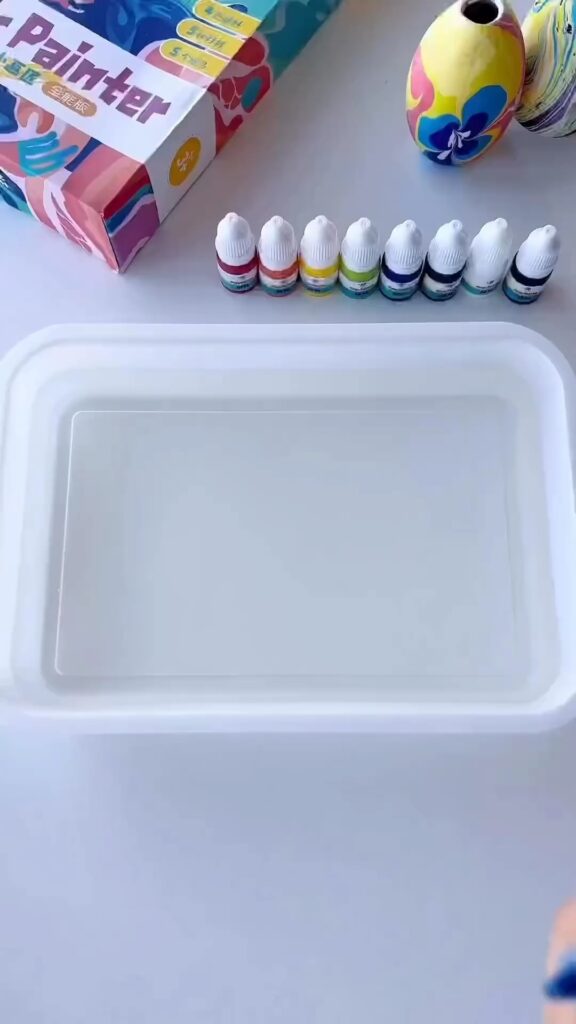
- A tray or shallow container (large enough to fit your paper)
- Water marbling paints in various colors (yellow, purple, blue, etc.)
- Acrylic or watercolor paper (cut to size)
- A marbling tool or toothpick (for swirling the paint)
- Water (to fill your tray)
- Paper towels (for blotting excess water)
Step-by-Step Instructions
Step 1: Prepare Your Workspace
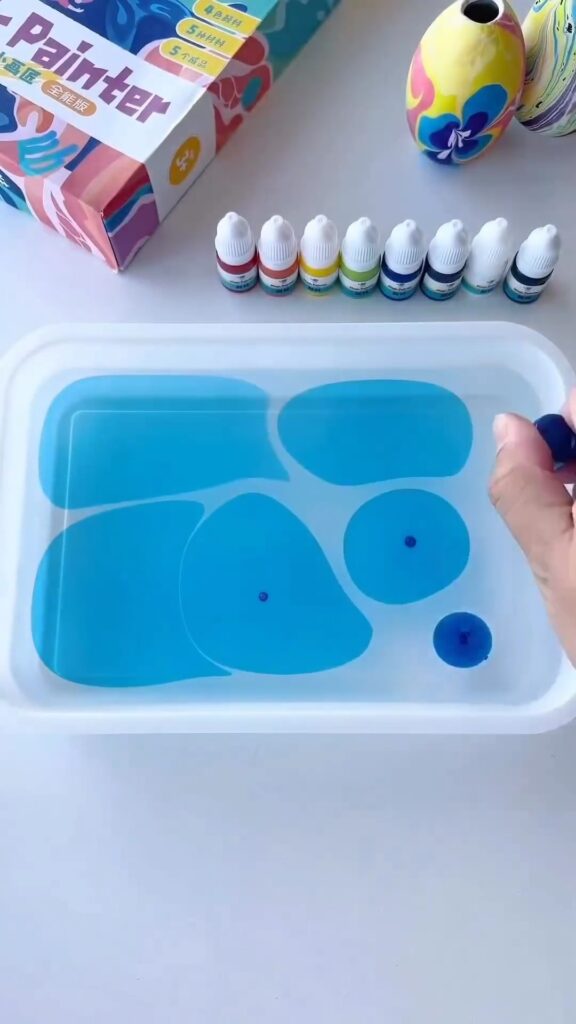
First things first, make sure your workspace is clean and free of clutter. Fill your tray with enough water to cover the surface of your paper when you dip it in later. Having everything laid out neatly helps make the process smooth and enjoyable. Trust me, it’s easier to be creative when you’re not searching for supplies! 😉
Step 2: Drop the Paint
Now comes the fun part! Begin by adding drops of your marbling paints onto the surface of the water. Start with one color—I recommend a base color like blue—and drop it in different spots around the tray. The paint will naturally spread out in beautiful, organic shapes.
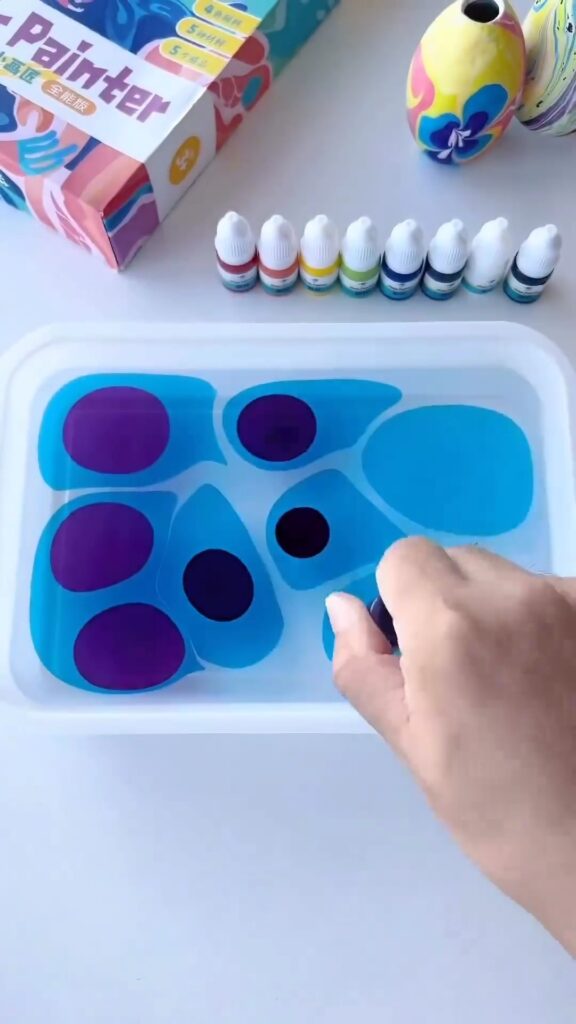
Step 3: Add More Colors
Continue adding more colors to the water. Here, we’ve used vibrant purples, yellows, and greens. Layering colors is key to creating that mesmerizing floral effect. Don’t be afraid to experiment with color combinations. It’s all about what speaks to you!
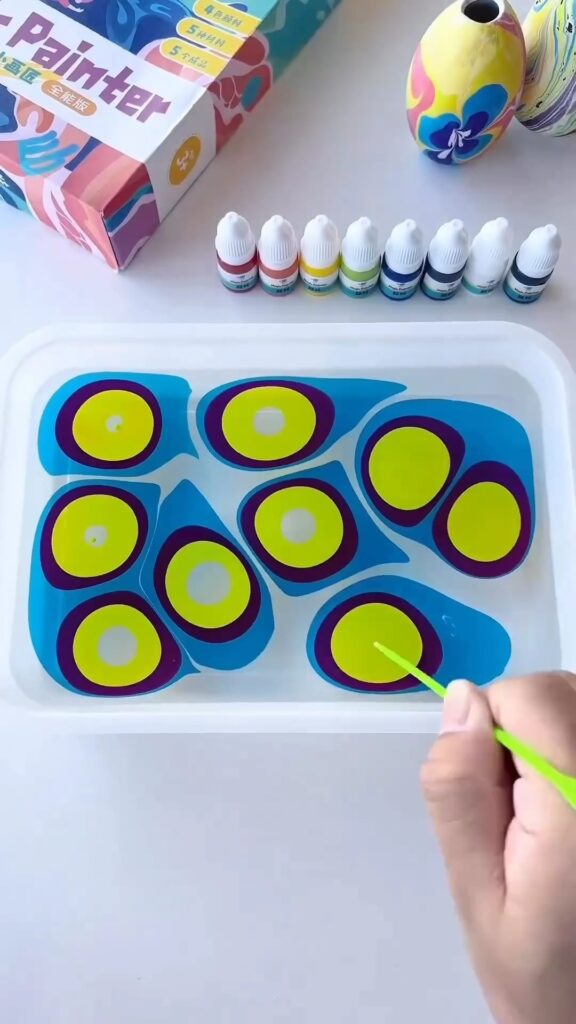
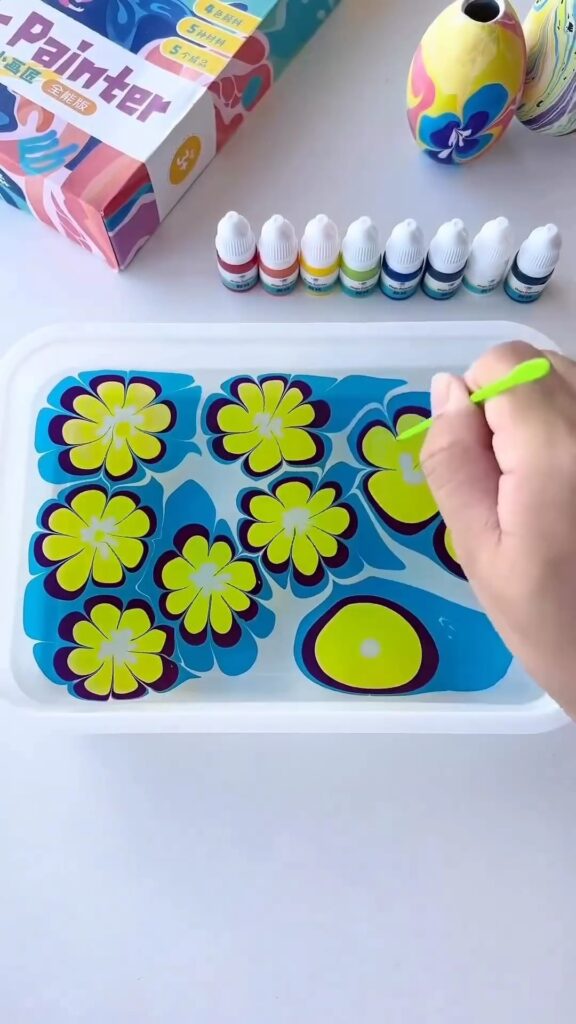
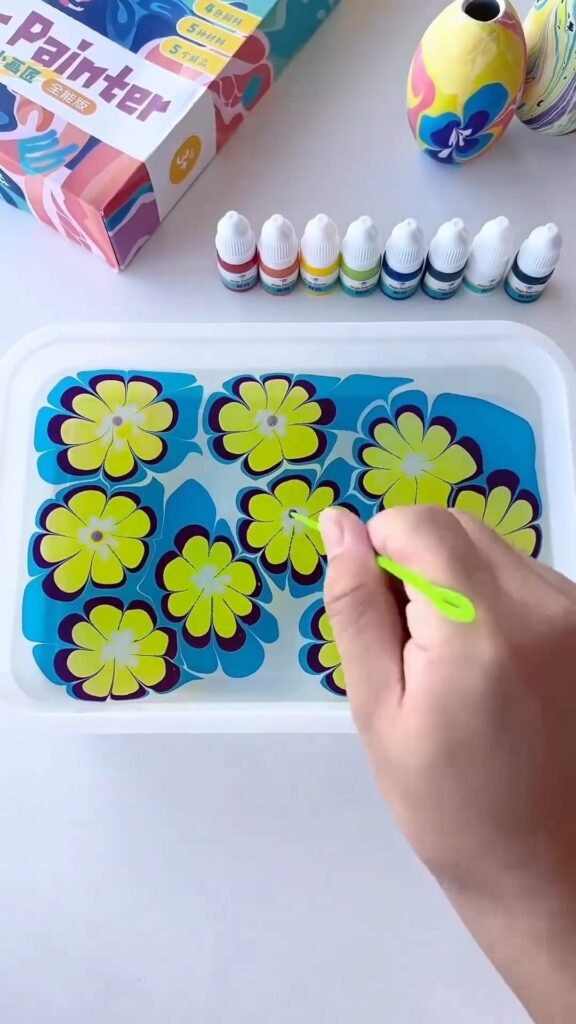
Step 4: Create Floral Patterns
Using your marbling tool or a simple toothpick, gently swirl the paint around to create patterns. To make floral designs, drag the tool from the center of each paint drop outward, creating petal-like shapes. Repeat this process until you have a garden of flowers blooming on the water’s surface. 🌼
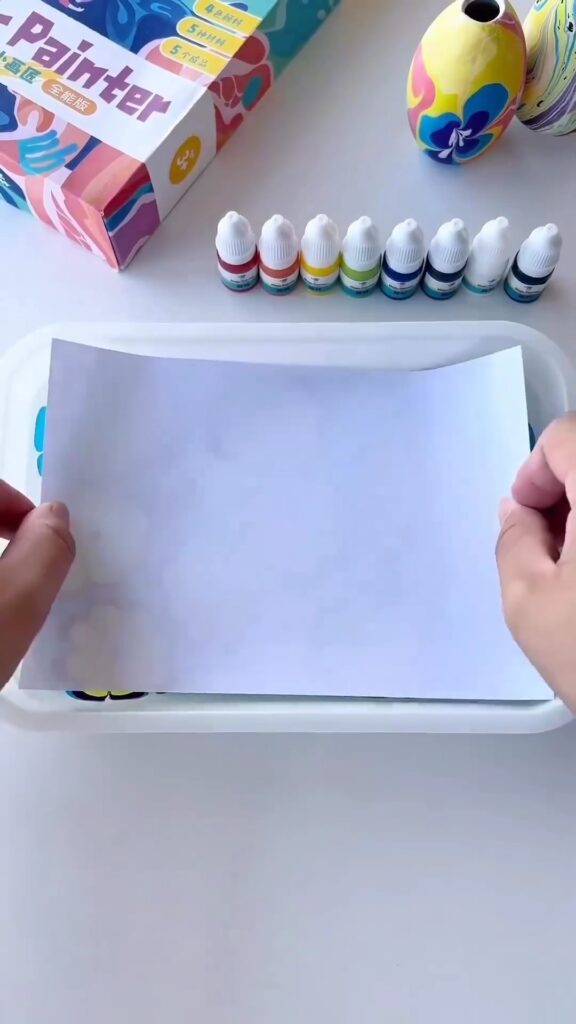
Step 5: Dip the Paper
Once your design is complete, it’s time to transfer it to paper. Carefully place a sheet of paper onto the water’s surface, allowing it to absorb the paint. Make sure to press down gently so the entire surface of the paper makes contact with the water.
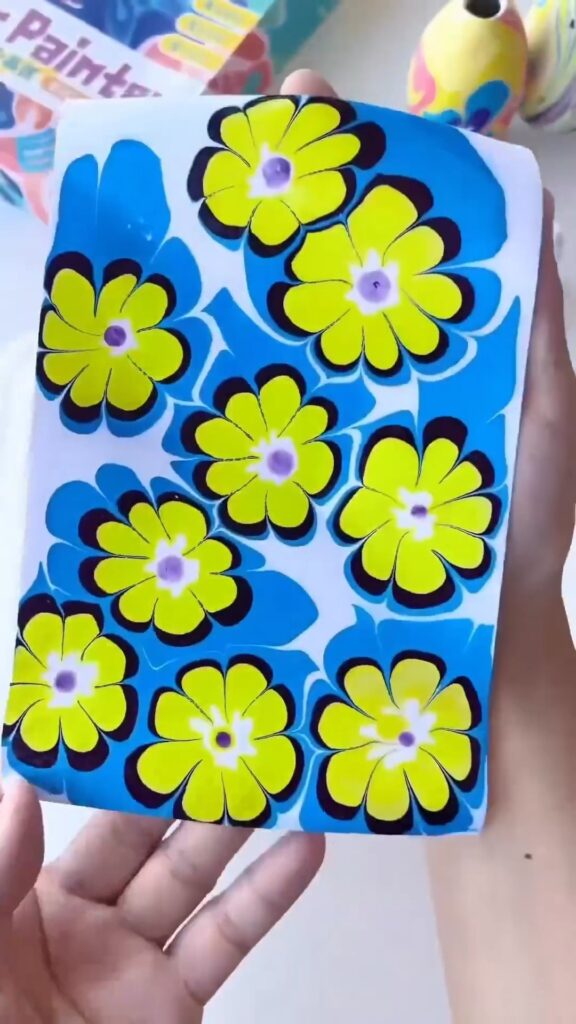
Step 6: Lift and Dry
Gently lift the paper out of the water, allowing the excess water to drip off. Lay the paper flat on a towel or drying rack to dry completely. The colors will be more vibrant once dried, revealing your unique floral masterpiece!
Crafting Tips & Tricks 🌟
- Color Selection: Choose colors that contrast well with each other to make your design pop. Yellow and blue make a stunning combo!
- Marbling Tool: If you don’t have a marbling tool, a toothpick works just as well. It’s all about how you swirl the colors that creates the magic.
- Patience: Give your paper enough time to dry completely before handling it. This prevents smudging and ensures your art looks its best.
Why I Love This Craft 🌸
Water marbling has become one of my go-to crafts, especially when I want to unwind and let my creativity flow. I remember the first time I tried this with my daughter—her eyes lit up as the colors swirled together to form the most beautiful designs. We spent hours experimenting, laughing, and just enjoying the process. It’s these little moments of joy that make crafting so special.
Plus, the final product is always a delightful surprise! Each piece is unique, just like a real flower, and I love how these marbled florals add a touch of whimsy to our home. They also make great personalized gifts for friends and family.
Final Thoughts
There’s something truly magical about watching colors dance across the water’s surface and transform into a beautiful piece of art. Whether you’re an experienced crafter or just starting out, this floral water marbling project is sure to inspire your creativity and bring a little joy into your day.
So why not give it a try? You never know—you might just discover your new favorite hobby! 💖
If you try this project, I’d love to see how it turns out! Share your creations and let’s spread the crafty love together. 🌺
Leave a Reply