Create a delightful and charming bicycle using simple materials like a paper cup and straws. This step-by-step guide will help you craft a decorative bicycle that’s perfect for adding a touch of creativity to your space. Follow the detailed instructions based on the below images.


Materials Needed:
- Paper cup (pink)
- Yellow straws
- White cardboard or thick paper
- Scissors
- Glue
- Black marker
- Skewers or thin sticks
Step-by-Step Instructions:
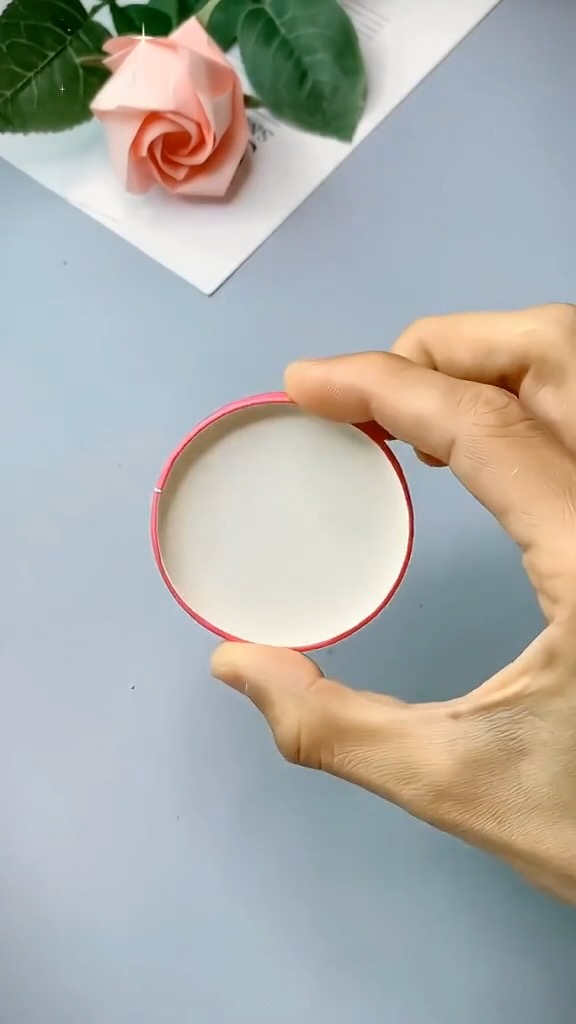
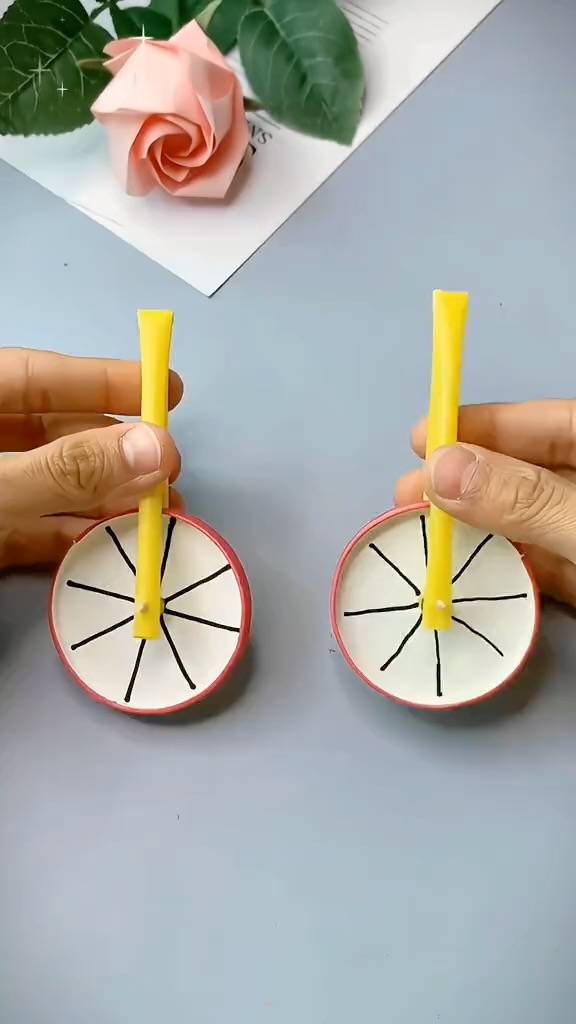
Step 1: Prepare the Wheels
- Cut the Bottom Part of the Paper Cup
- Cut the bottom of the pink paper cup to create two circular pieces for the wheels.
- Images 1-2: Cutting the bottom of the paper cup to get the circular pieces.
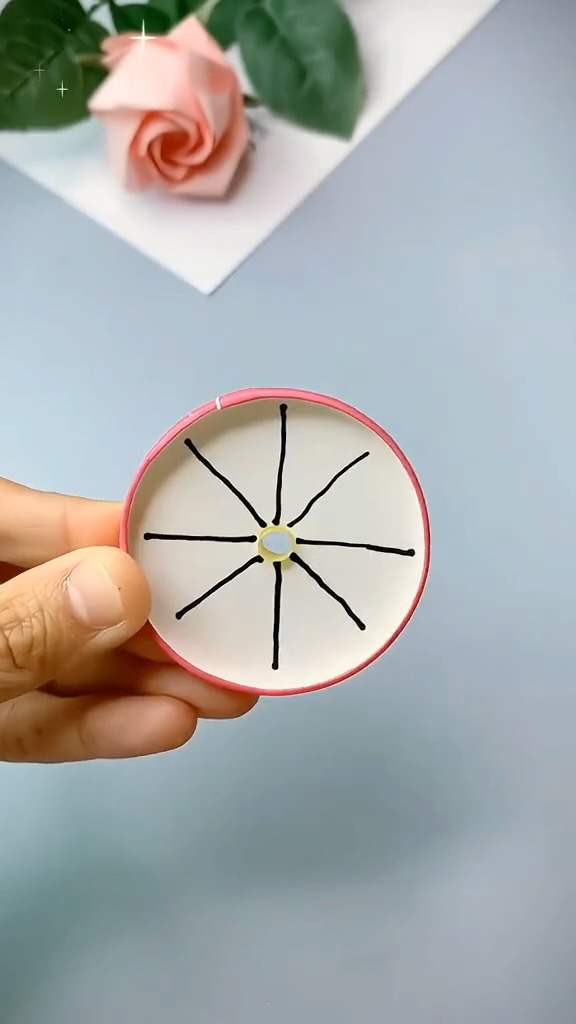
- Draw Spokes on the Wheels
- Draw spokes on the white cardboard circles using a black marker, then glue the pink rims onto the edges of the circles.
- Images 3-4: Drawing the spokes on the wheels and attaching the pink rims.
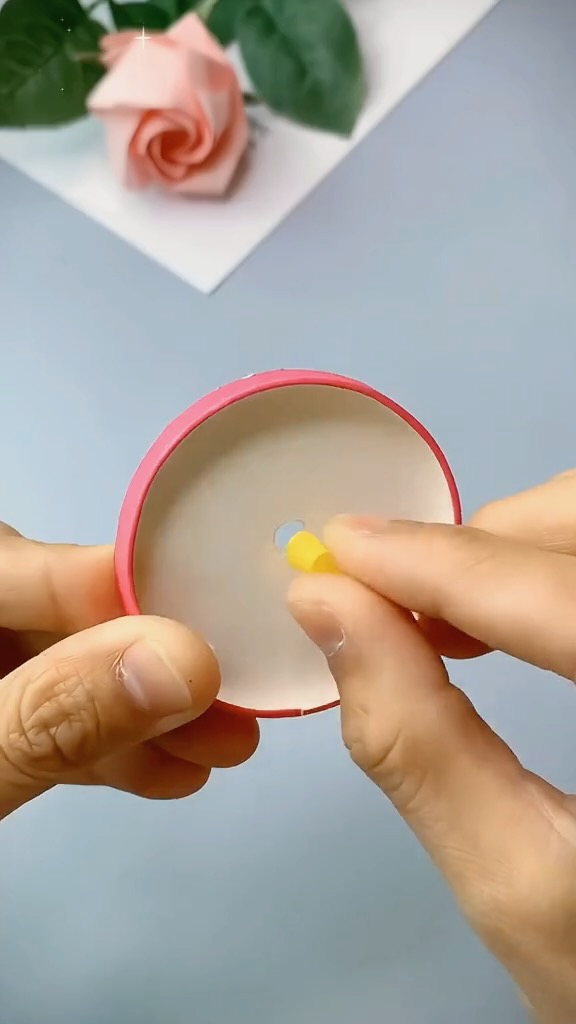
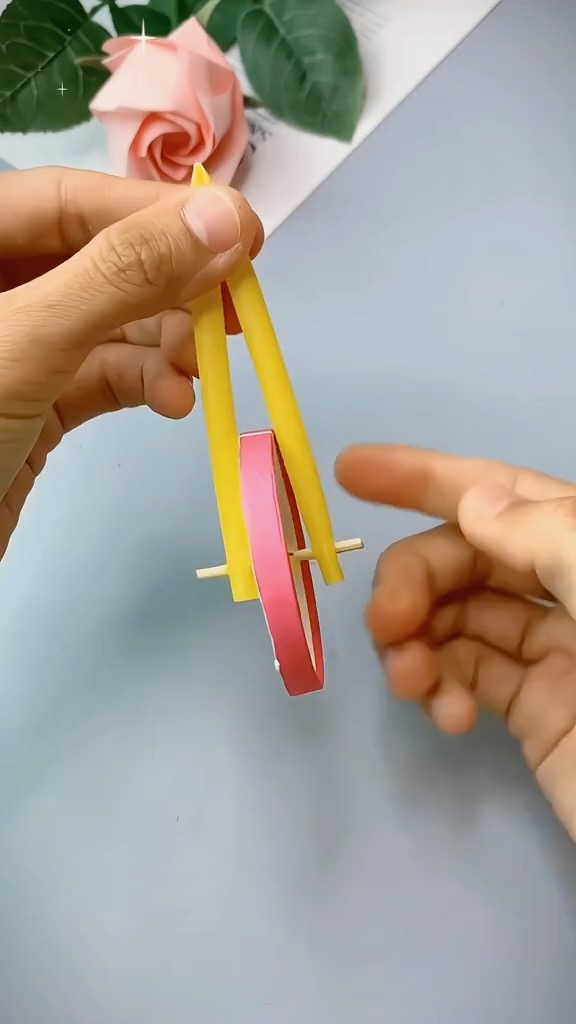
Step 2: Create the Wheel Axles
- Insert Skewers through the Wheels
- Insert a skewer through the center of each wheel.
- Image 5: Inserting skewers through the wheels.
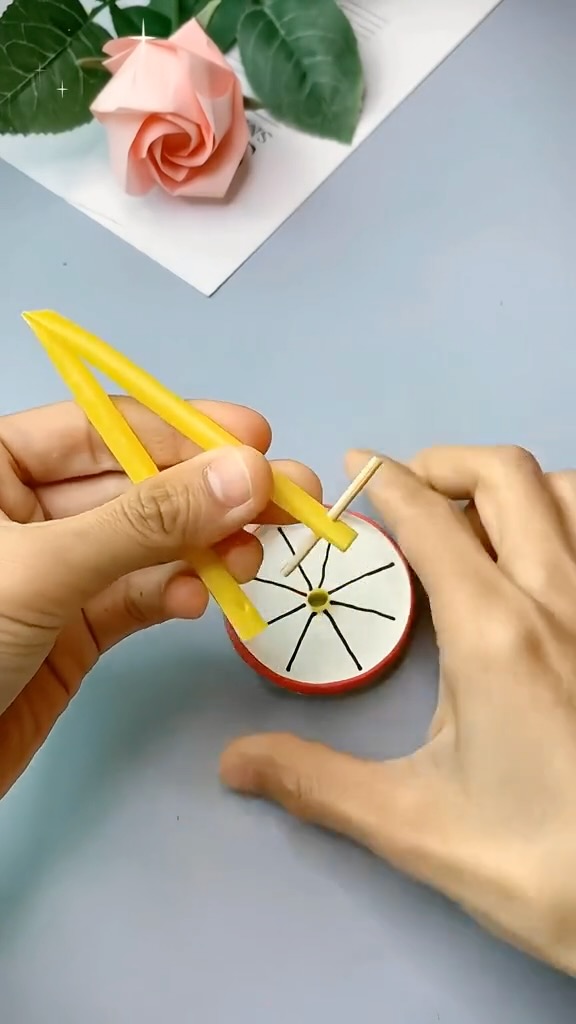
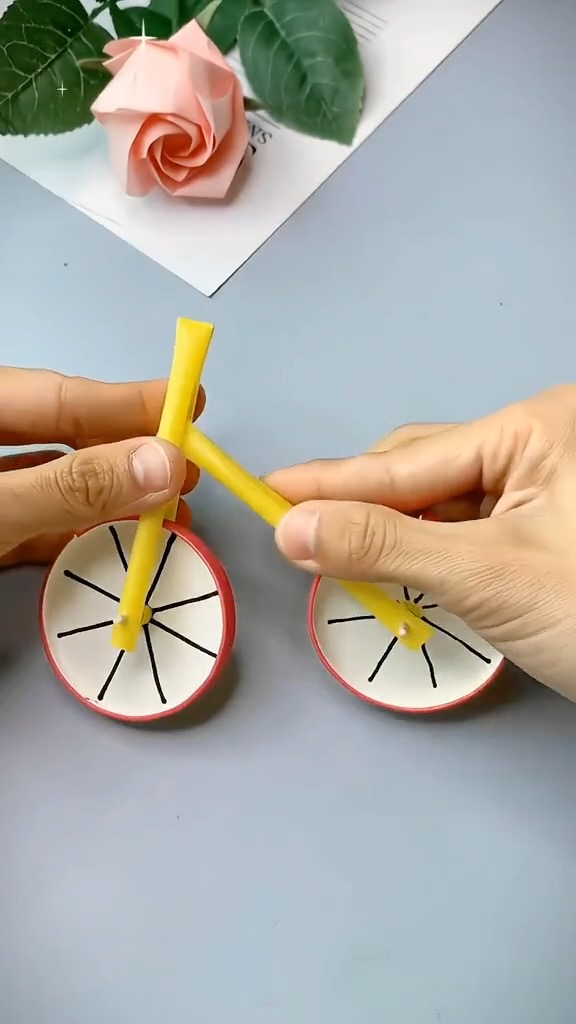
Step 3: Construct the Bicycle Frame
- Cut Yellow Straws for the Frame
- Cut two yellow straws for the bicycle frame.
- Images 6-7: Cutting the yellow straws to the required lengths.
- Bend One Straw into an L Shape
- Bend one straw into an L shape to form the main frame of the bicycle.
- Image 8: Bending the straw into shape.
- Attach the First Wheel to the Frame
- Attach the first wheel to the bottom of the L-shaped frame using glue.
- Image 9: Attaching the first wheel to the frame.
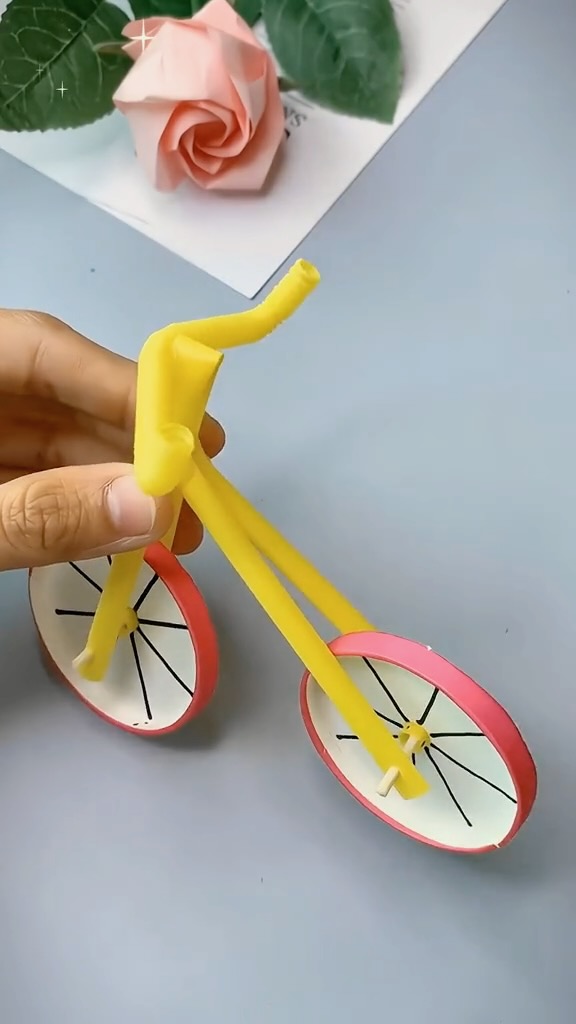
- Secure the Second Wheel to the Frame
- Glue the second wheel to the other end of the frame, ensuring both wheels are aligned properly.
- Images 10-11: Securing the second wheel to the frame.
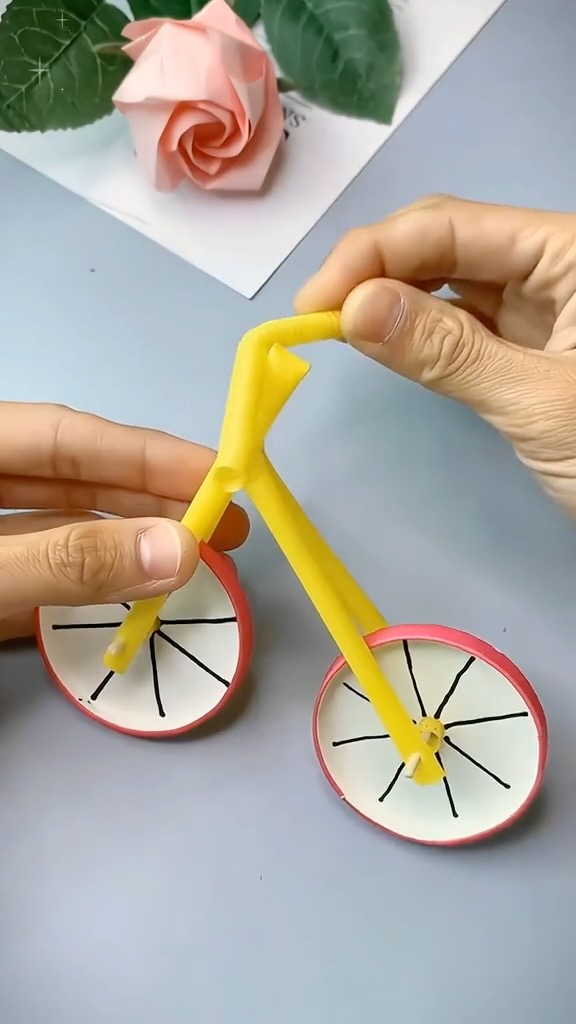
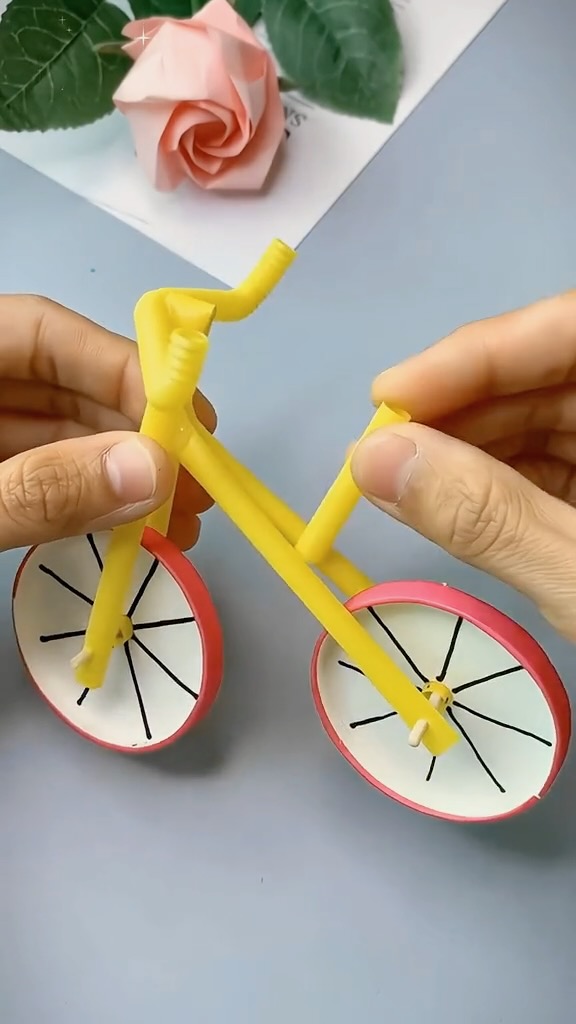
Step 4: Create the Handlebars
- Attach a Horizontal Straw for Handlebars
- Cut a small piece of yellow straw and attach it horizontally to the top of the vertical part of the frame to form the handlebars.
- Image 12: Positioning and gluing the handlebars.
- Add a Vertical Straw for Handlebars
- Add another piece of straw vertically on the handlebar piece to complete the handlebar design.
- Image 13: Finalizing the handlebars.
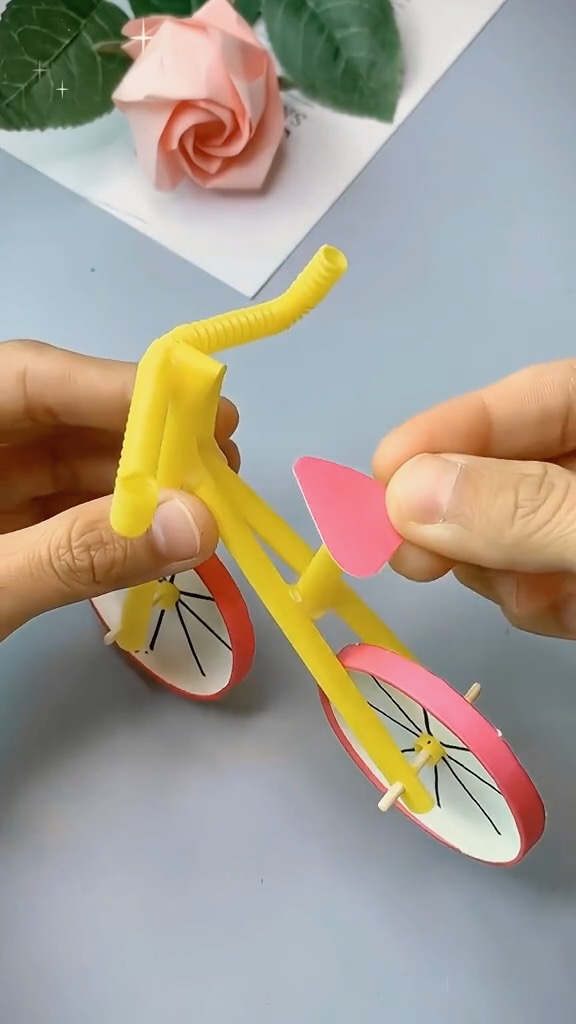
Step 5: Add the Seat
- Cut a Triangular Piece for the Seat
- Cut a small triangular piece from the remaining paper cup to create the bicycle seat.
- Image 14: Cutting the seat piece.
- Glue the Seat to the Frame
- Glue the seat onto the top part of the frame, just below the handlebars.
- Image 15: Attaching the seat to the frame.
Final Touches
- Check All Connections
- Check all connections to ensure the bicycle is sturdy and well-constructed.
- Image 16: Final inspection of the bicycle.
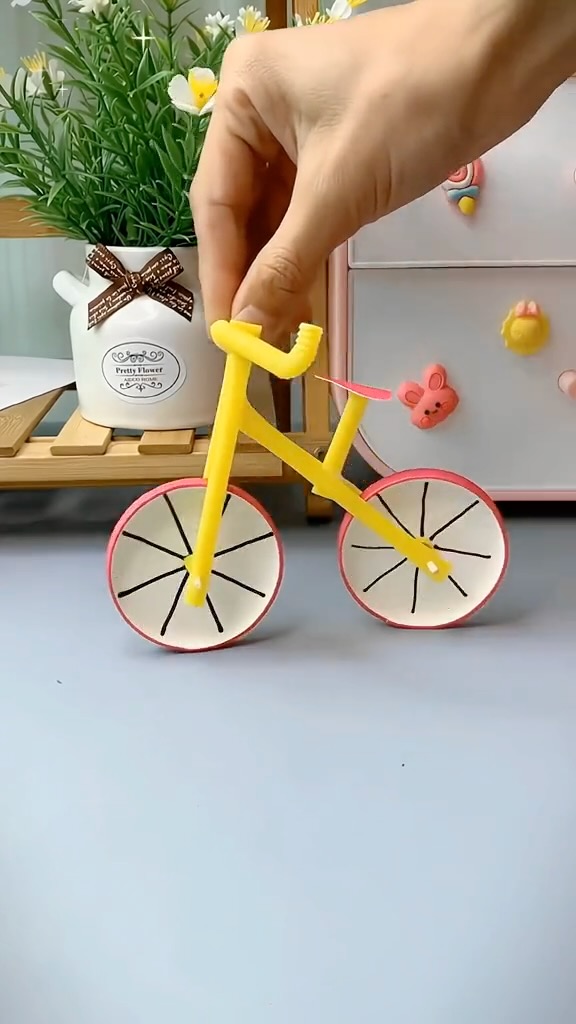
- Decorate as Desired
- Decorate the bicycle as desired to add a personal touch.
- Images 17-18: Displaying the finished bicycle.
Conclusion
By following these steps, you can create a charming paper cup bicycle. This project is a great way to enhance your crafting skills and create a delightful decoration. Enjoy your creation!
Leave a Reply