
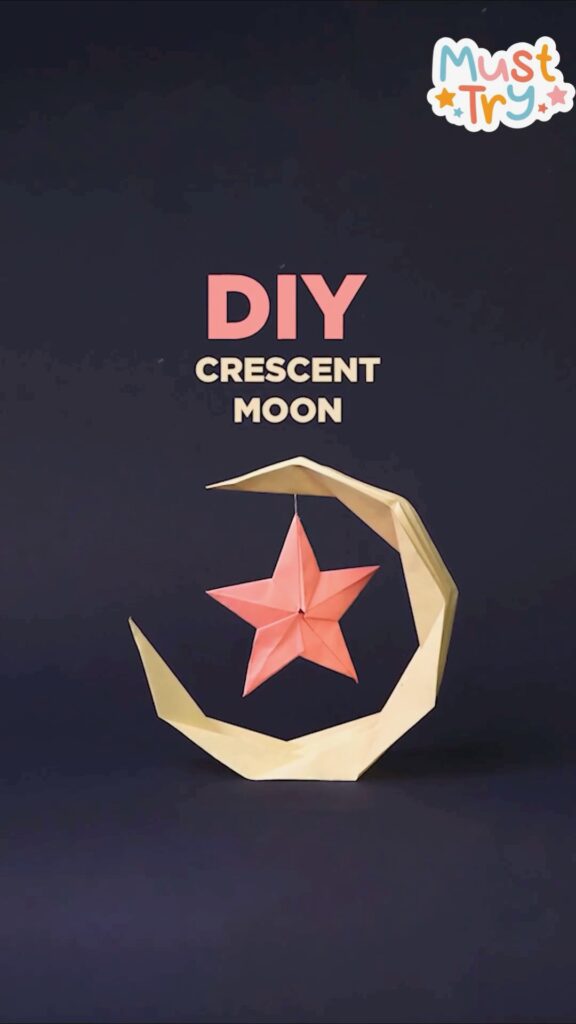
As a mom, I’m always on the lookout for fun, creative projects that I can do with my kids, or just something calming for myself.
This DIY Paper Origami Crescent Moon is one of those projects that’s simple yet so beautiful! 💛
Whether you’re looking for a cute room décor piece or just a way to unwind while folding paper, this crescent moon craft is a must-try. Plus, it’s perfect for crafting with kids!

Materials You’ll Need 📝
- 2 sheets of origami paper (one yellow for the moon, one orange/pink for the star)
- Scissors ✂️
- Glue (if needed)
- String (optional, if you want to hang it up)
Now, let’s break this down into simple and easy steps so you can make your own paper crescent moon with a lovely star in the middle. 🌟
Step 1: Starting the Base of the Moon 🌙
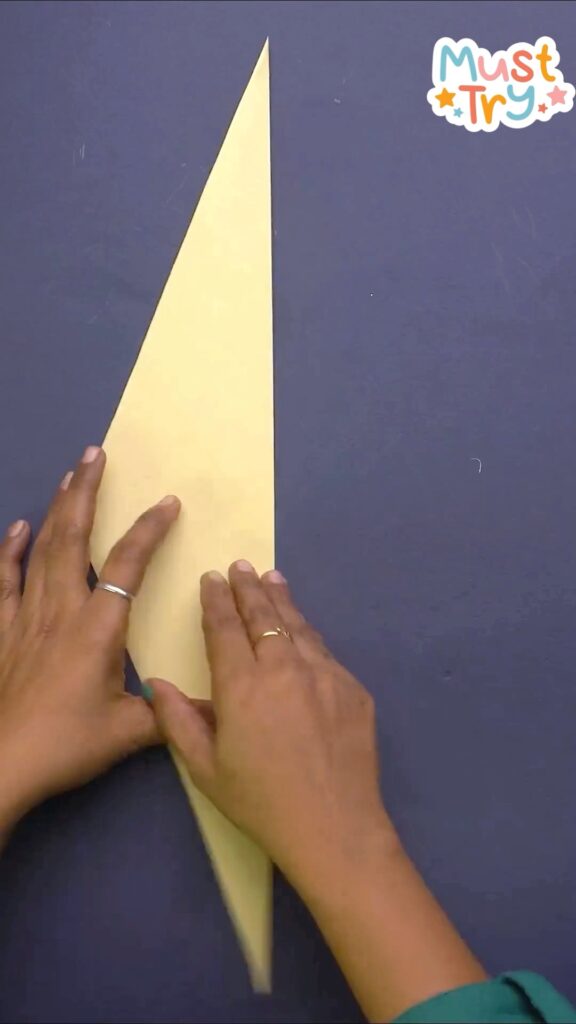
- Take a square sheet of yellow paper (the bigger, the better for a larger crescent moon).
- Begin by folding the paper in half diagonally, creating a neat triangle shape. Make sure to press down on the edges to get sharp creases.
This first fold is important, so give it a good, firm press. It’s like setting the foundation for the whole project! 👐
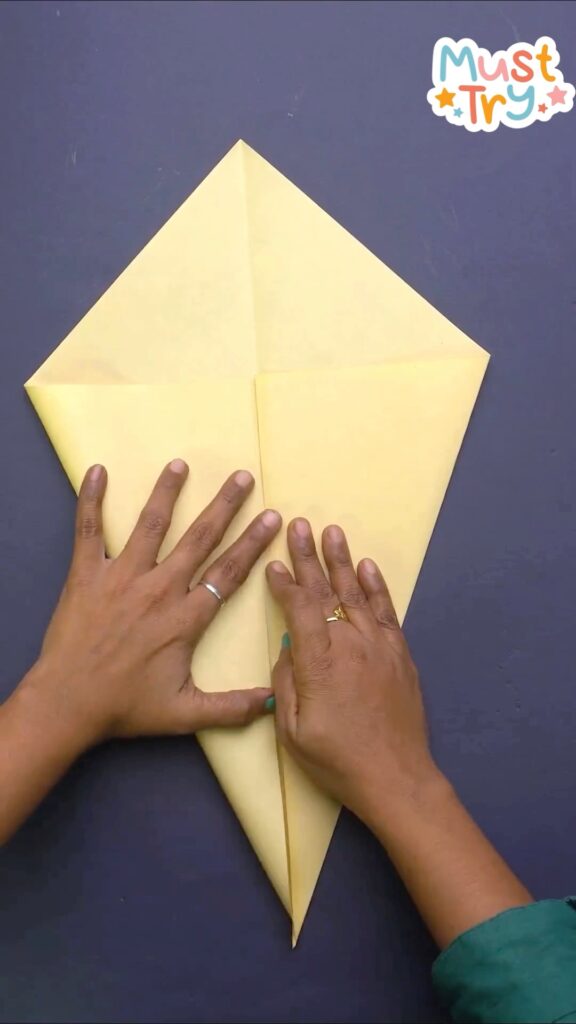
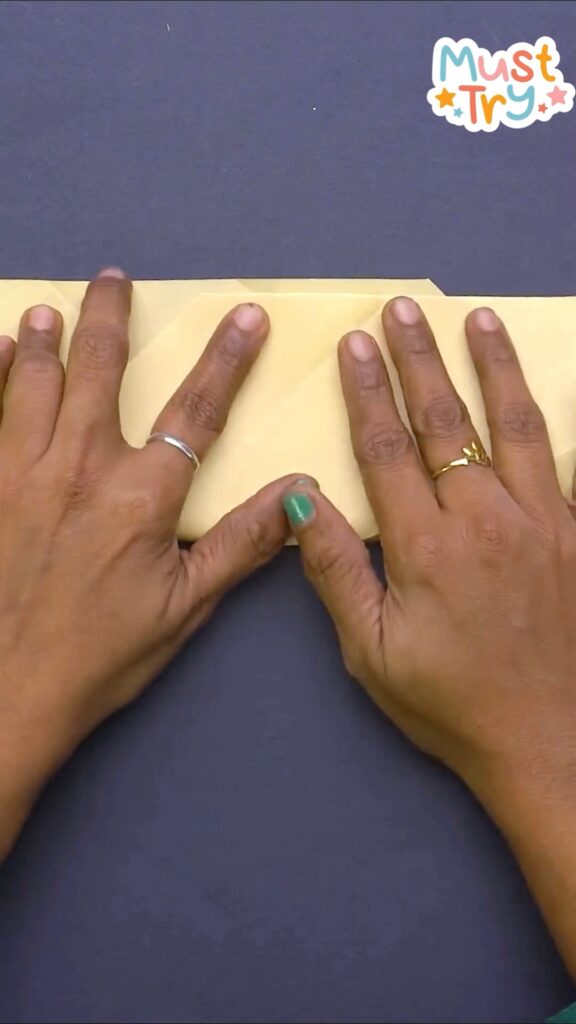
Step 2: Create Diamond Fold 💎
- With the triangle in front of you, fold both corners of the triangle inward, meeting in the center to form a diamond shape.
- Press down on each fold to make the paper stay in place.
This fold creates the base form of our crescent moon, giving it structure and a nice flow. The neat diamond shape will eventually fold into that beautiful moon curve.
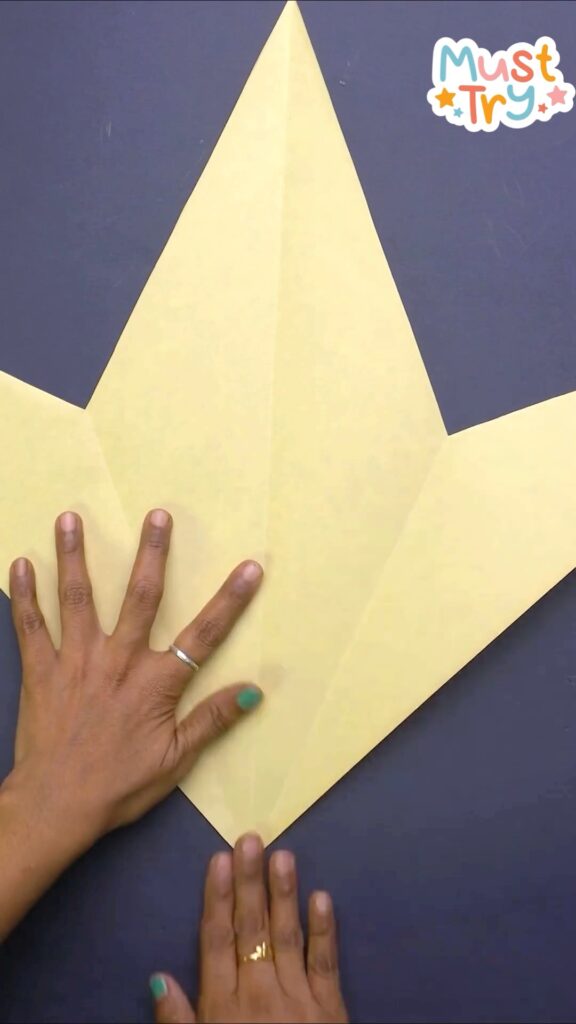
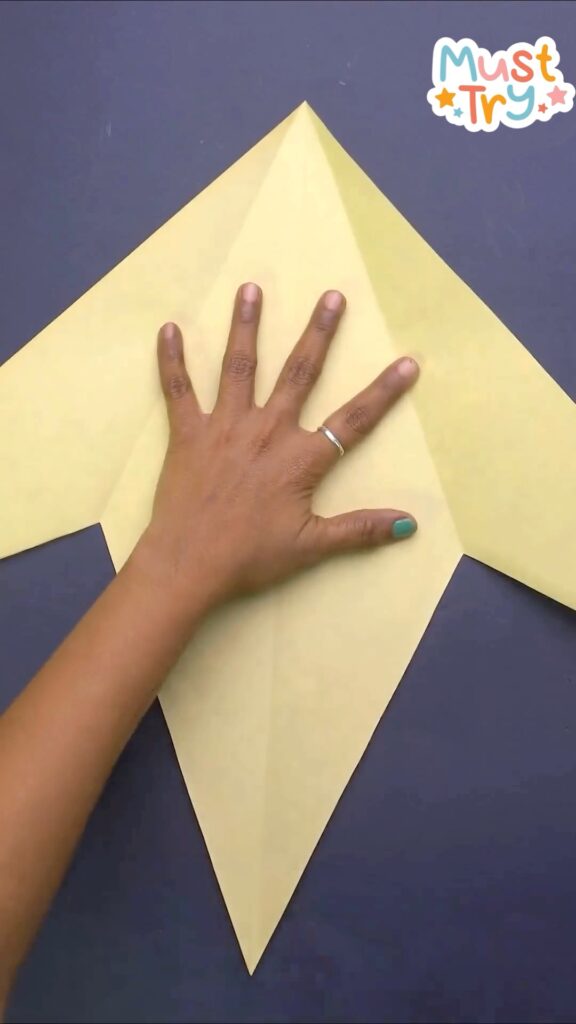
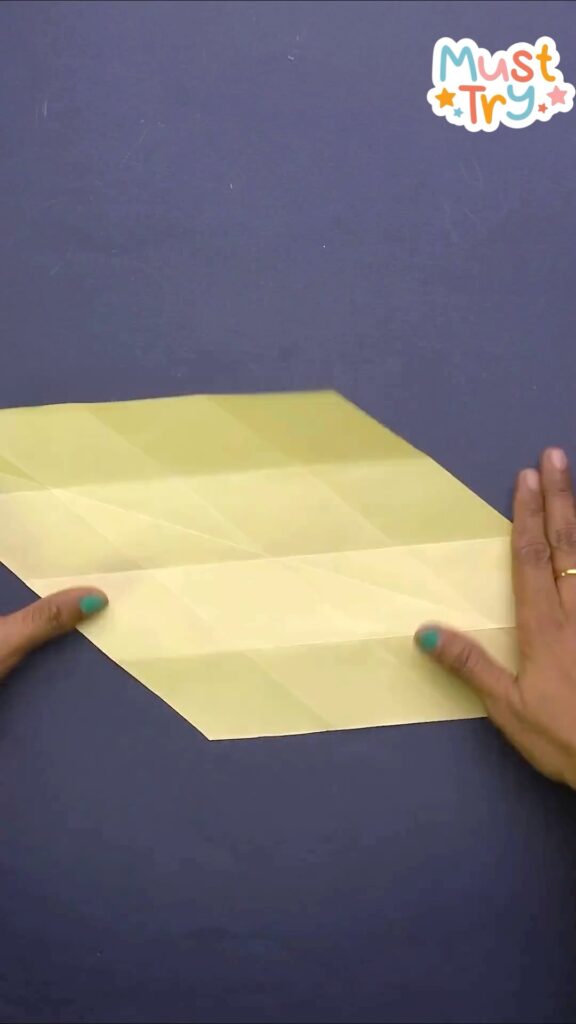
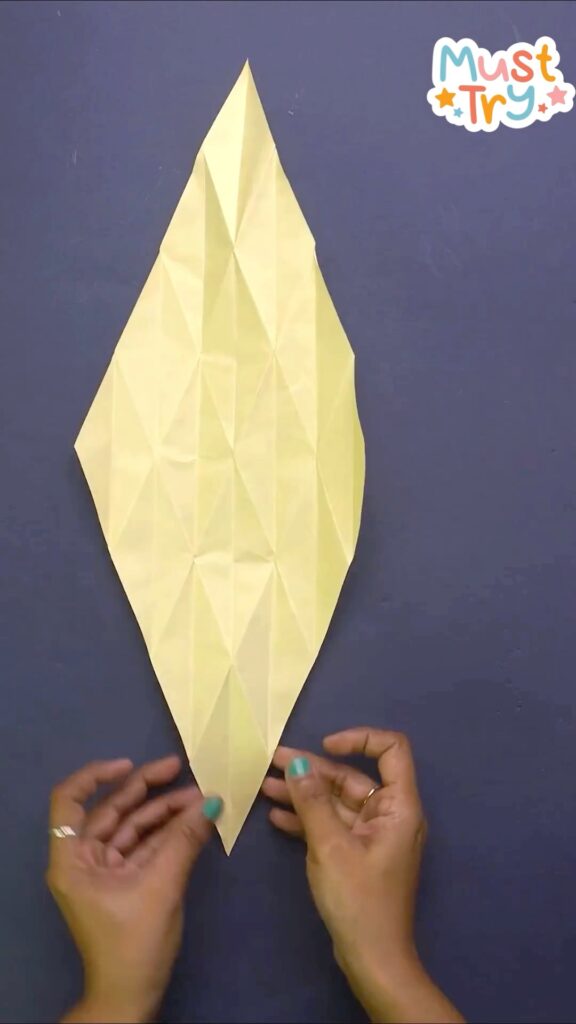
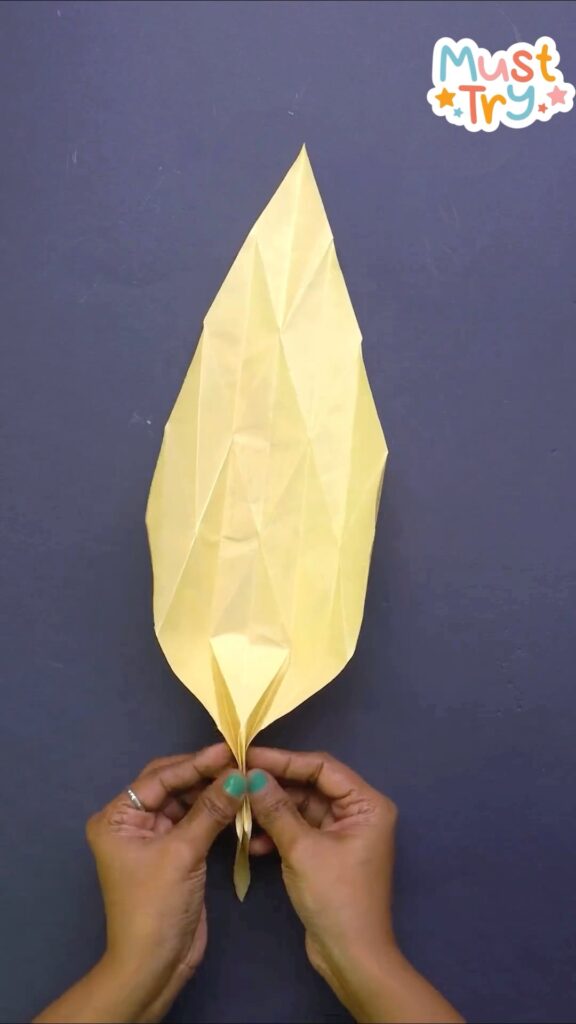
Step 3: Shaping the Moon 🌙
- Unfold the diamond and fold the paper in a zigzag pattern, accordion-style.
- This may take a bit of time, but it’s super satisfying as you see the shape coming together!
Keep the folds sharp and even. Tip: Take a deep breath—it’s like folding the day’s stress away. 😌
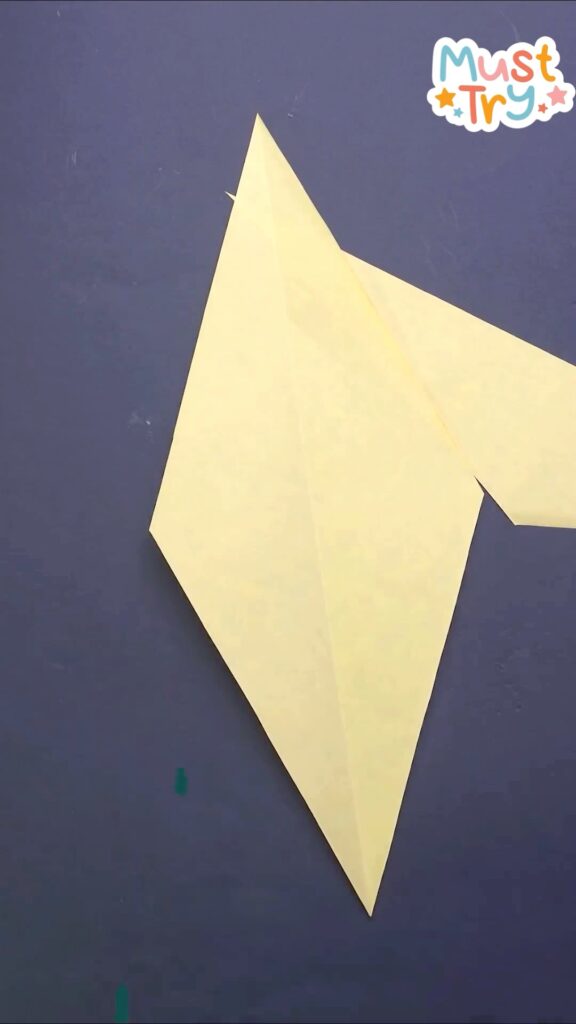
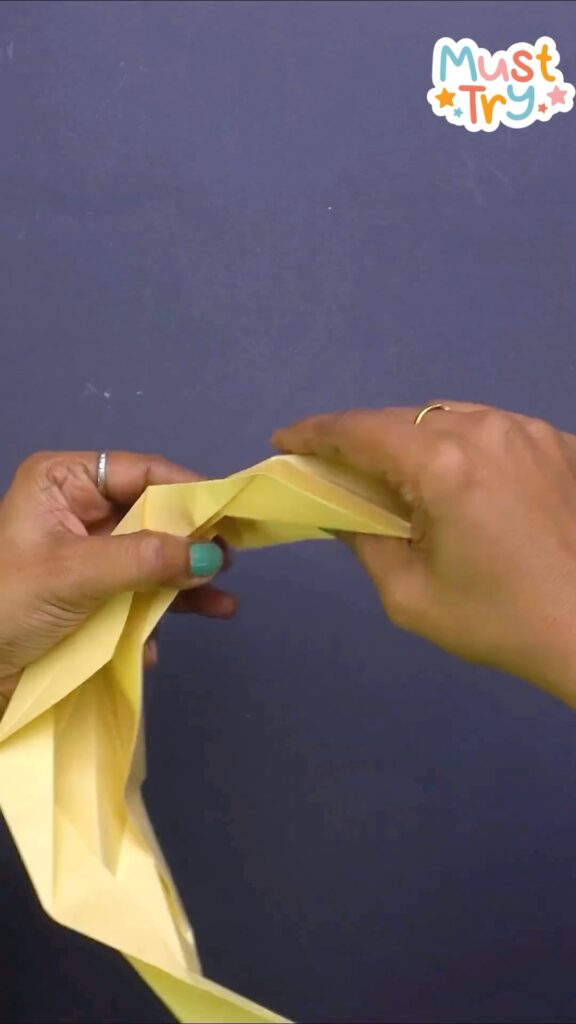
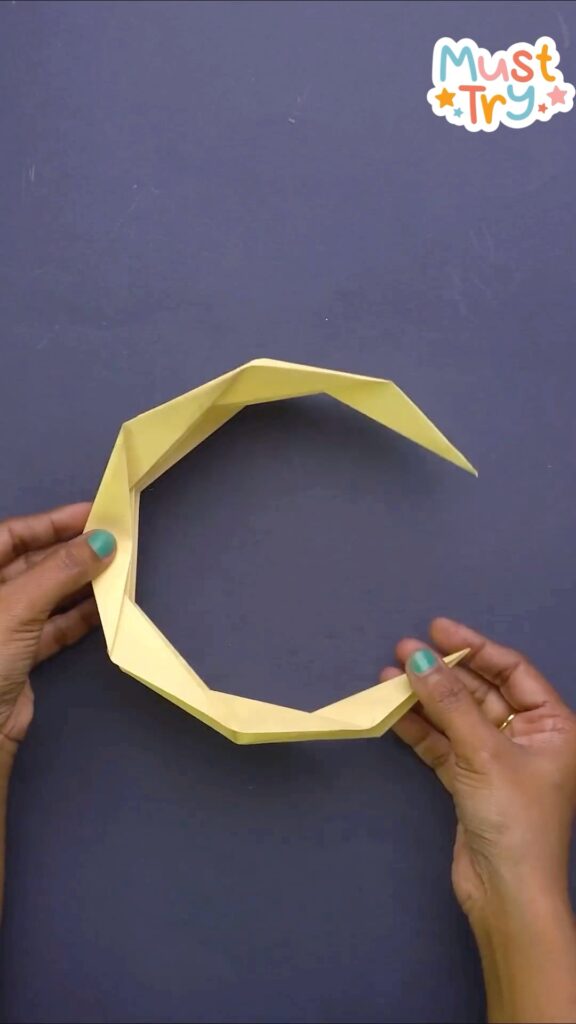
Step 4: Curl into Crescent
- Now comes the magic! Carefully start curling the folded paper into a round shape, guiding it into a crescent.
- Don’t worry if it doesn’t look perfect yet—just adjust it little by little until you’re happy with the shape.
This is my favorite part. It reminds me of when I used to craft under the moonlight while the kids were asleep—such a peaceful time! 🌙💫
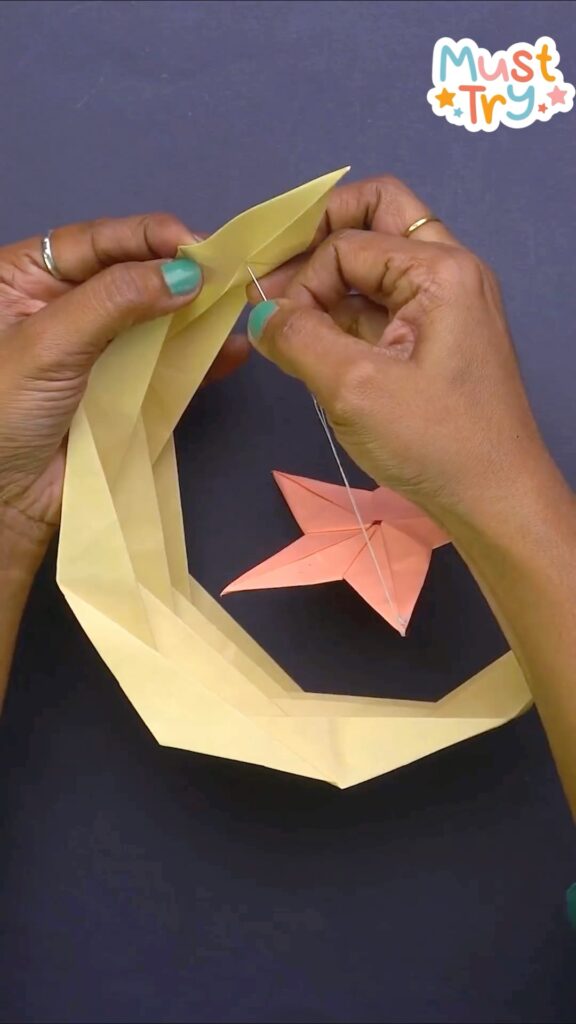
Step 5: Make the Star ⭐
- Grab a sheet of orange or pink origami paper.
- Fold it into a star shape—you can follow a simple origami star pattern or use your favorite method.
Pro tip: This star will be the shining center of your moon, so make it bright and cheerful. 🌟
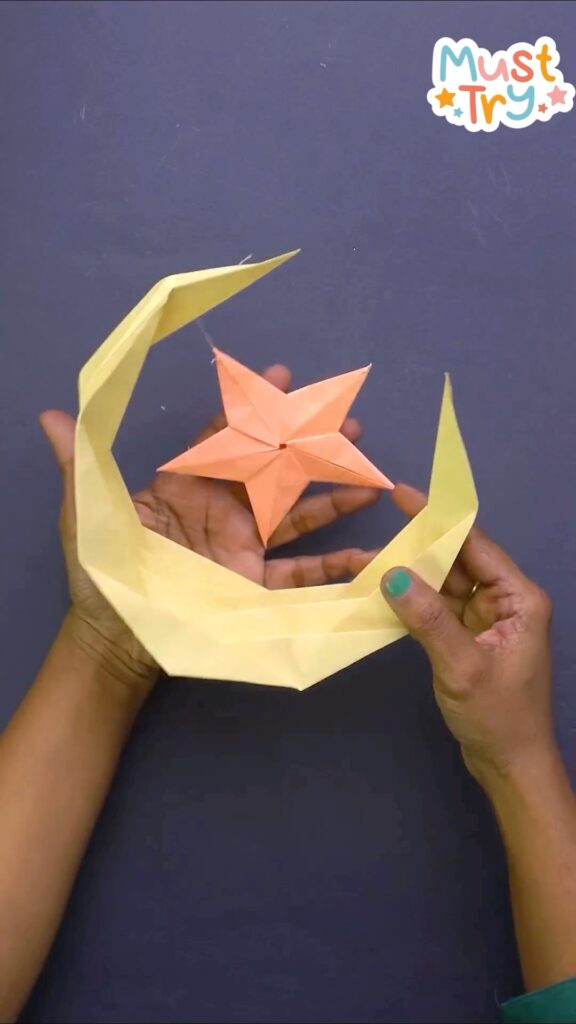
Step 6: Attach the Star to the Moon 🌙
- Once your crescent moon and star are complete, it’s time to put them together.
- You can either glue the star to the middle of the moon, or if you’re feeling fancy, use a piece of string to hang the star in the center of the crescent.
This little detail just makes the whole craft pop! It reminds me of those clear night skies where the crescent moon and bright star are just the perfect duo. 🌜✨
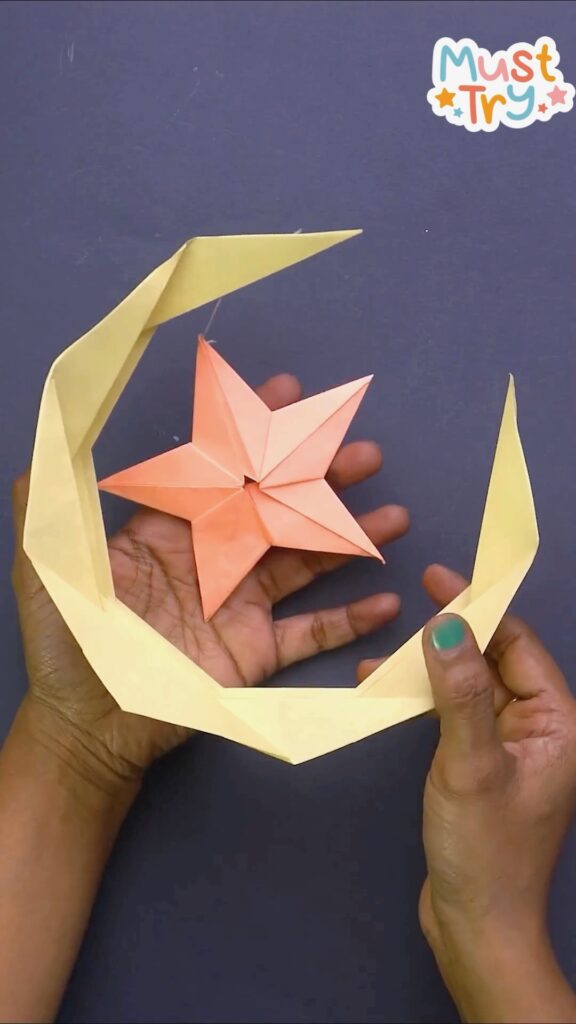
Step 7: Finishing Touches
- Your beautiful crescent moon is done! 🎉 You can now display it on your desk, hang it on a wall, or use it as part of your room décor.
- If you want to go the extra mile, try adding glitter or a splash of color to make it even more unique.
Voilà! Now you’ve got a stunning crescent moon with a star—a craft that’s perfect for any season. 🌙✨ This is such a lovely way to decorate a nursery, bedroom, or even a cozy corner in your living room. And it’s a great bonding activity to do with kids too!
Leave a Reply