Hey there, lovely ladies! 🌸 If you’re like me, you probably love giving gifts that feel a bit more personal. But let’s face it, sometimes the best gift really is money or a gift card—it’s versatile, practical, and lets the recipient get exactly what they want! But just because it’s practical doesn’t mean it has to be boring, right?
Today, I’m going to show you a delightful way to wrap money or gift cards using a beautiful origami-style envelope. It’s super easy, looks incredibly thoughtful, and adds that special touch to your gift-giving. Plus, it’s a fun little project that you can whip up in just a few minutes.
What You’ll Need
- A crisp dollar bill or gift card
- A sheet of decorative paper (around 8×8 inches works best)
- Optional: Embellishments like small flowers, stickers, or ribbons 🎀
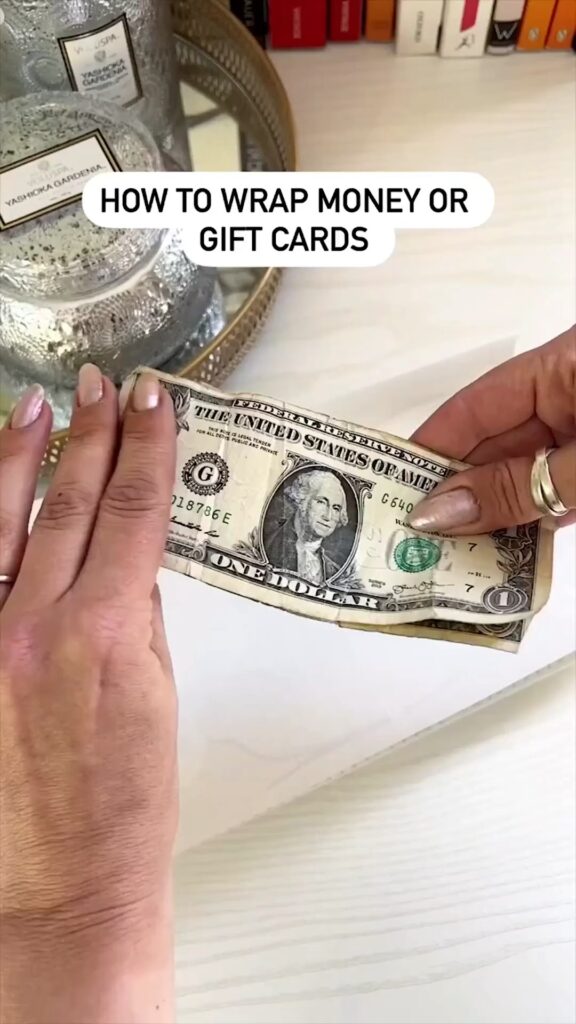
Step 1: Fold the Money
Start by folding your dollar bill in half, then fold it again into a smaller rectangle. This will make it easier to wrap, and it ensures that the money stays securely tucked inside the envelope.
Personal Tip: I always make sure the bill is crisp and clean. A quick press with a book can make it look extra neat. My kids always giggle when I tell them about how their grandma used to iron her money to keep it straight—talk about dedication! 😊
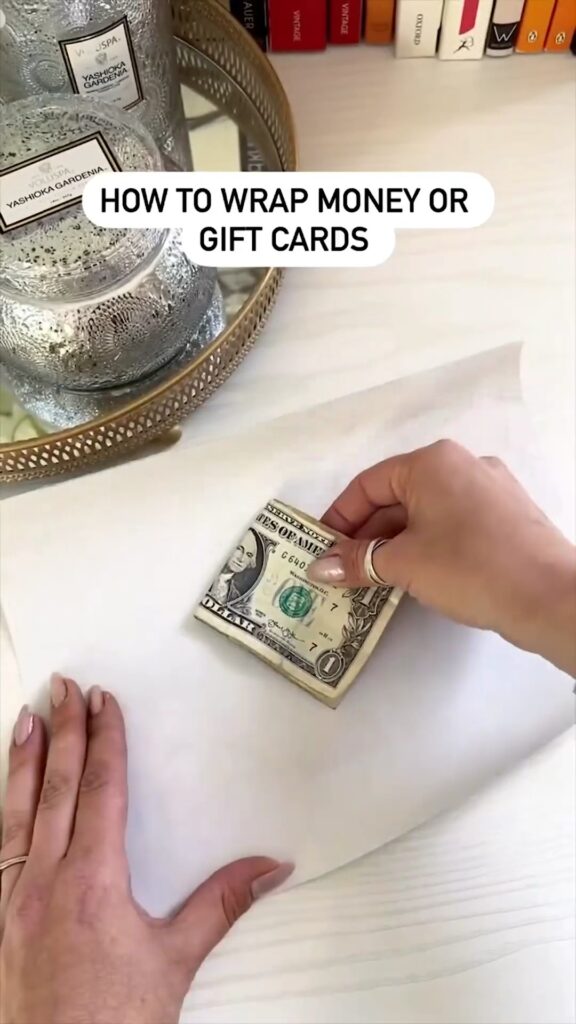
Step 2: Prepare Your Decorative Paper
Next, lay out your decorative paper flat on the table. Place the folded dollar bill or gift card in the center. I love using paper with floral prints or vintage patterns—it just adds that extra bit of charm.
Why Decorative Paper?
Using decorative paper instead of plain white not only makes the envelope look more festive, but it also shows that you put thought into the presentation. After all, we eat with our eyes first, right? 🍽️
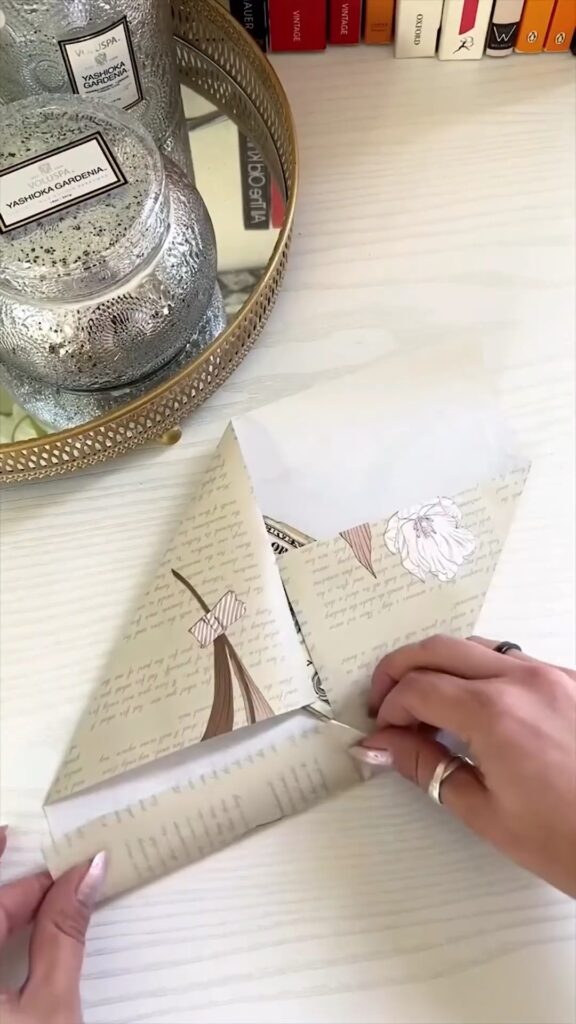
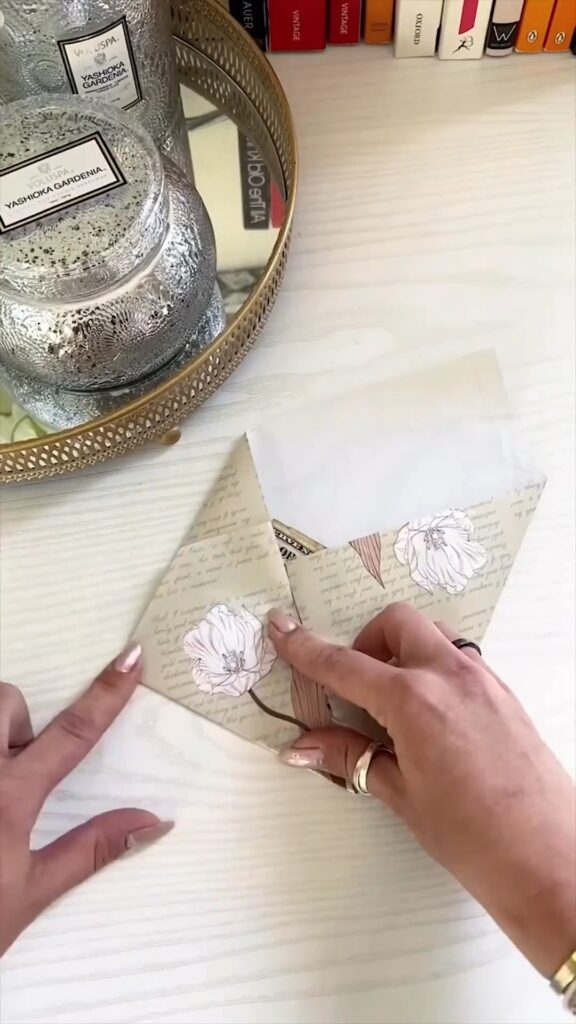
Step 3: Start Folding
Fold the bottom corner of the paper up over the bill or gift card, followed by the top corner. Then, fold the left and right corners towards the center, overlapping them slightly to form a neat envelope shape. It’s like you’re wrapping a little present!
Pro Tip: Use a bone folder or the edge of a ruler to make your creases sharp and clean. This really helps the envelope hold its shape.
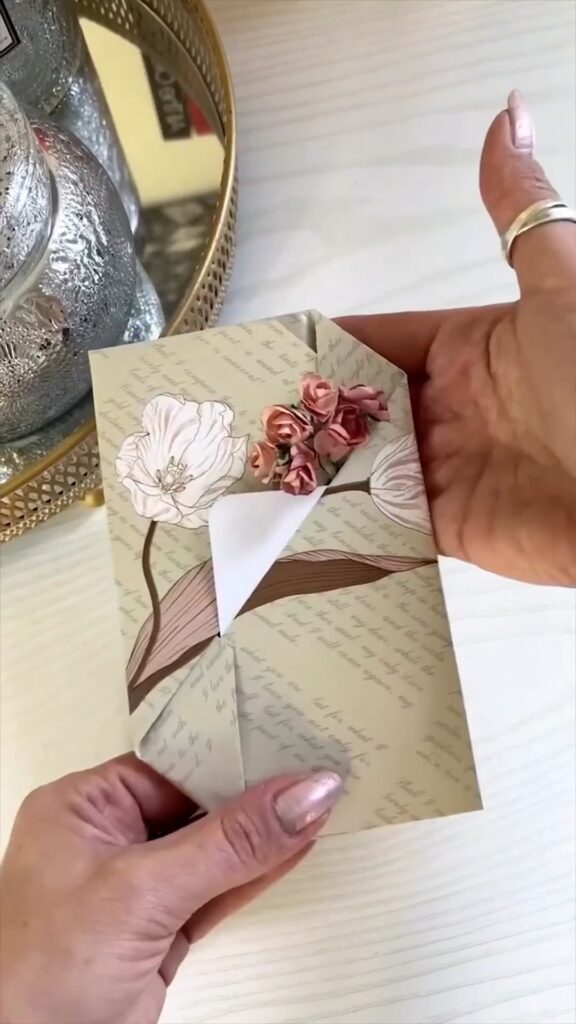
Step 4: Secure the Envelope
Now that you’ve folded the paper into an envelope shape, it’s time to secure it. You can use a small piece of tape or a cute sticker to hold the flaps together. This is where you can get creative with embellishments. I love adding a tiny flower or a bow to give it a more polished look.
Personal Note: I remember the first time I did this for my daughter’s birthday party. Her friends were so impressed with the cute little envelopes! And honestly, it made me feel like Super Mom for a day. 🌟
Step 5: Present with Pride!
And there you have it—your beautifully wrapped money or gift card, ready to be gifted. Whether it’s for a birthday, graduation, or just because, this origami envelope adds that special touch that makes any gift feel extra thoughtful.
Pro Tip: If you want to get really fancy, you can personalize the envelope with the recipient’s name or a sweet message on the inside. It’s those little details that make all the difference. 💖
I hope you enjoyed this quick and easy tutorial! I’m always on the lookout for new ways to make my gifts stand out, and this little origami envelope has become a go-to for me. Give it a try the next time you’re in a pinch or just want to add a personal touch to your gift-giving. Trust me, it’s those small gestures that leave a lasting impression. ✨
Happy crafting, my dear friends! And don’t forget to share your creations—I’d love to see how you make this idea your own. 🌸

Leave a Reply