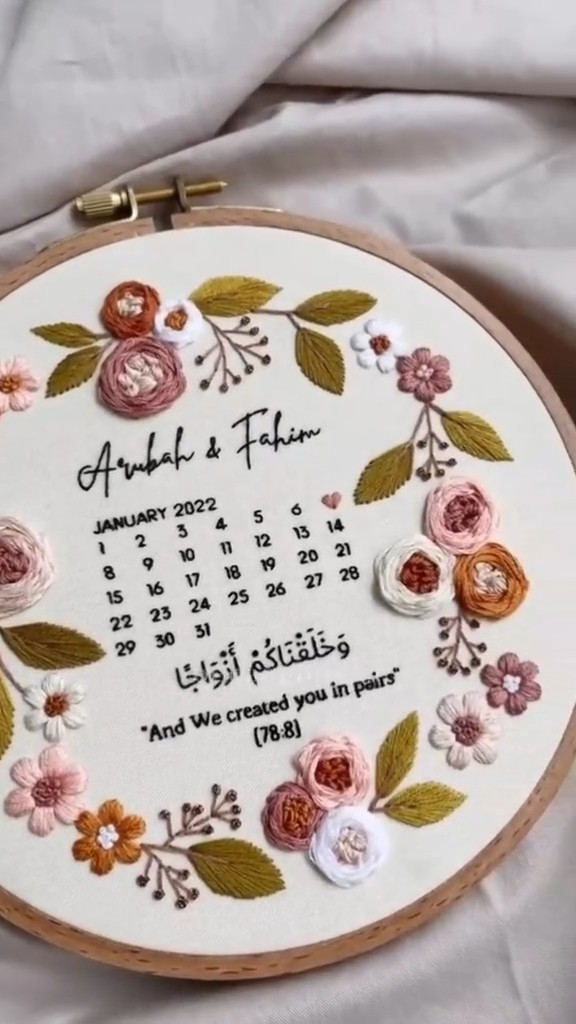
Creating a handcraft calendar embroidery is a wonderful way to commemorate a special date in your life. This personalized piece not only serves as a beautiful keepsake but also as a thoughtful gift for someone dear to you. In this tutorial, I’ll guide you step by step through creating your own embroidered calendar, inspired by the gorgeous design in the image you provided.

Materials You’ll Need 🛠️
Before diving into the crafting process, let’s make sure you have all the necessary materials:
- Embroidery Hoop: A medium-sized hoop (about 6-8 inches) works well.
- Embroidery Fabric: Choose a sturdy, light-colored fabric that allows for easy stitching.
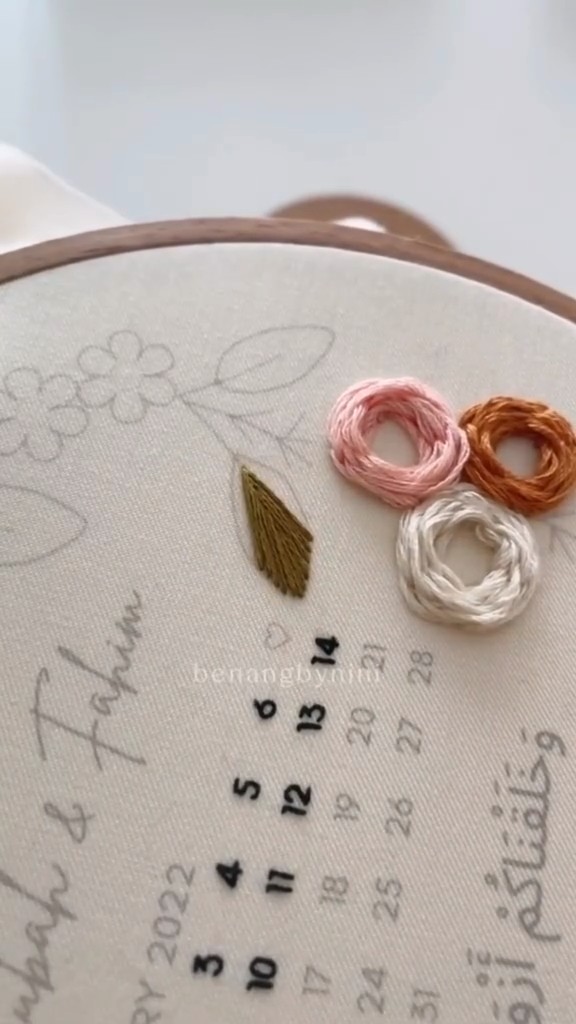
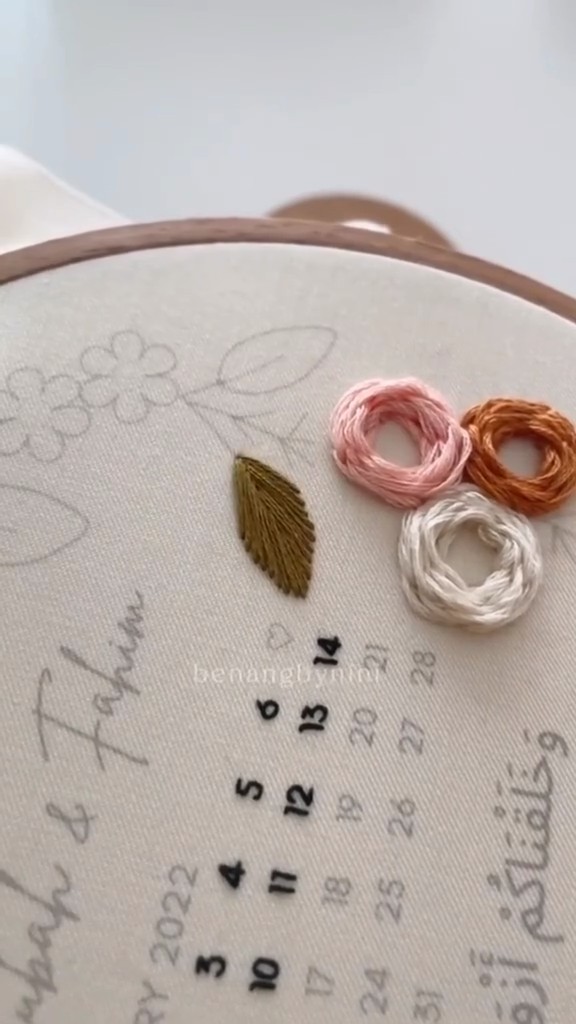
- Embroidery Floss: Pick colors that resonate with your theme. The design in the image uses soft pinks, white, earthy browns, and greens.
- Embroidery Needle: A sharp needle suitable for the thickness of your floss.
- Scissors: Sharp scissors for trimming threads.
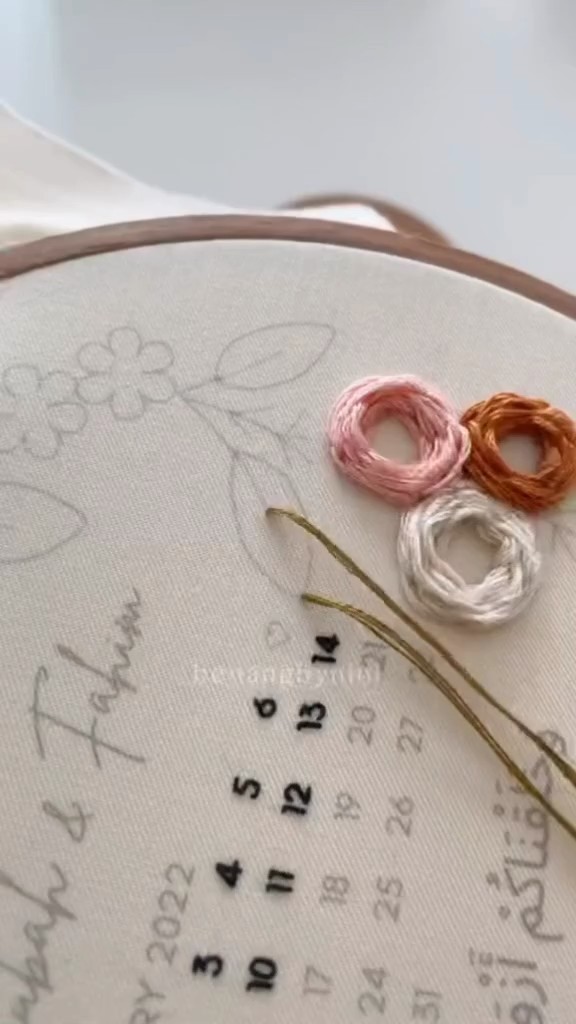
- Printed Calendar Template: You can either print a calendar with the date you want to highlight or use pre-printed fabric like the one in the image.
- Pencil or Water-Soluble Marker: For tracing the design onto your fabric.
Step 1: Preparing the Fabric 🧶
Start by securing your fabric in the embroidery hoop. Make sure the fabric is taut and wrinkle-free. If you’re using a printed calendar template, place it in the center of the hoop. If not, lightly trace a calendar and any additional designs onto your fabric using a pencil or a water-soluble marker.
Pro Tip: If your fabric is delicate, consider ironing it first to remove any creases. This will give you a smooth surface to work on.
Step 2: Outlining the Calendar 🗓️
The calendar is the focal point of this piece. Use a simple backstitch to outline the numbers and the month. A backstitch is a basic stitch that’s perfect for creating clean, straight lines.
How to do a Backstitch:
- Bring your needle up through the fabric at your starting point.
- Move forward a short distance and push the needle back through the fabric.
- Bring the needle up again a stitch length away from the previous exit point, then go back into the fabric at the end of the last stitch.
This stitch will help you create the tidy, precise lines seen in the image.
Step 3: Crafting the Roses 🌸
The image showcases stunning embroidered roses, which are created using a combination of woven wheel and French knot stitches. These roses add a touch of elegance and softness to the design.
How to Create a Woven Wheel Rose:
- Start by making a small five-pointed star with straight stitches where you want your rose to be.
- Bring your needle up near the center of the star.
- Weave the thread over and under the spokes of the star, working in a circular motion.
- Continue weaving until you reach the desired fullness, then secure the thread at the back.
How to Add French Knots:
- Bring your needle up at the point where you want the knot.
- Wrap the thread around the needle two to three times.
- Keeping the thread taut, push the needle back through the fabric near the entry point.
These techniques create the lush, textured roses seen in the image. Use varying shades of pink, white, and brown for a natural, varied look.
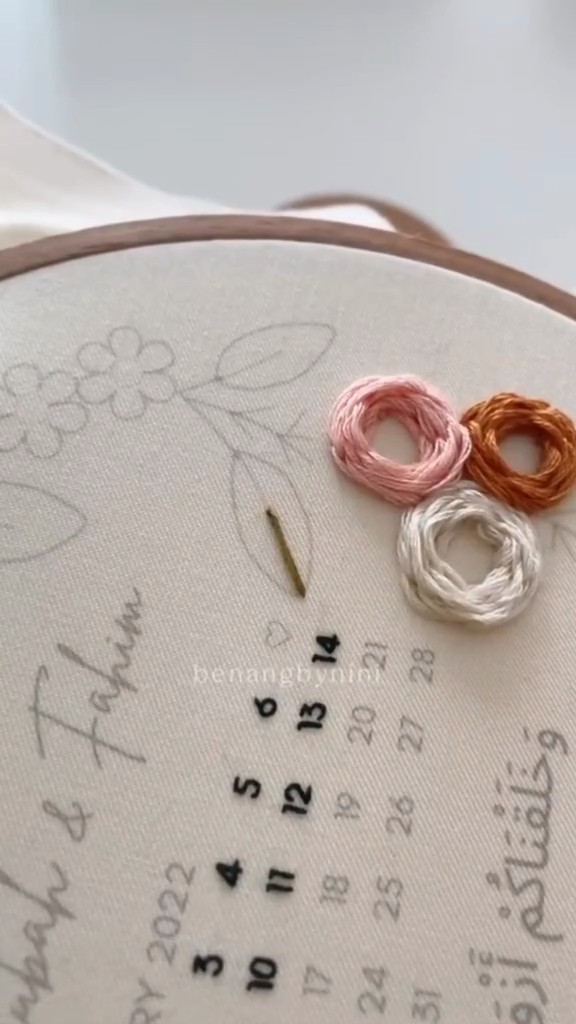
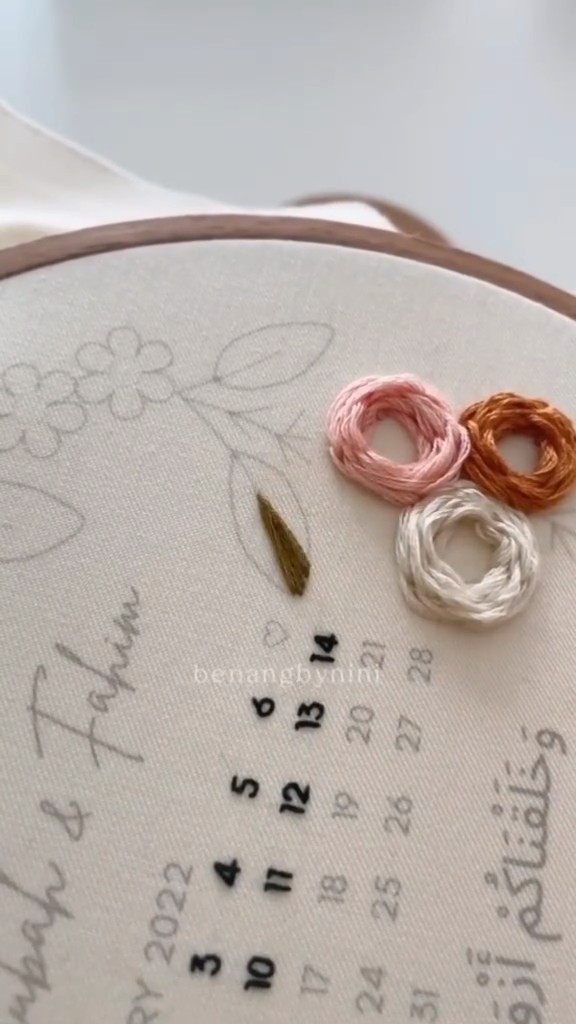
Step 4: Stitching the Leaves 🍃
The leaves in the image are made using the satin stitch, which gives them a smooth, filled appearance.
How to do a Satin Stitch:
- Bring the needle up at the edge of the leaf.
- Insert the needle back into the fabric on the opposite side of the leaf and bring it up again at the starting point.
- Continue this process, making parallel stitches until the leaf is completely filled.
Use different shades of green to give your leaves depth, as shown in the image.
Step 5: Embroidering the Branches and Small Flowers 🌿
In addition to the roses and leaves, the design includes delicate branches and smaller flowers. These elements add intricacy to the piece, making it visually rich.
How to Create the Branches:
- Use a stem stitch to create the thin branches.
- For the small flowers, use a combination of lazy daisy stitches and French knots to replicate the tiny blooms seen in the image.
Step 6: Adding Personal Details ✍️
To make your calendar embroidery truly special, consider adding names, dates, or a meaningful quote, as shown in the image. Use a simple backstitch or split stitch for the text. In the image, the names “Arubah & Fahim” and a quote in English and Arabic add a deeply personal touch to the piece.
How to do a Split Stitch:
- Bring the needle up through the fabric at the start of your line.
- Push the needle down to create a short stitch, then bring it up again in the middle of the previous stitch, splitting the thread.
- Repeat this process to create a textured line.
Step 7: Finishing Touches and Display ✨
Once you’ve completed all your embroidery, step back and admire your work. Remove the fabric from the hoop, gently rinse it to remove any pencil marks, and let it dry. Iron the fabric carefully to remove any wrinkles, avoiding the stitches.
Place the fabric back in the hoop and tighten it securely. You can trim any excess fabric or neatly tuck it behind the hoop. Your personalized handcraft calendar embroidery is now ready to be displayed or gifted!
Conclusion
Creating a handcraft calendar embroidery is not just about stitching; it’s about capturing a moment in time and preserving it with love. Whether you’re crafting this as a gift or a personal keepsake, each stitch tells a story. I hope this tutorial inspires you to pick up your needle and thread and create something truly meaningful. Happy stitching! 🧵❤️
FAQs
Q: Can I use different colors for the flowers and leaves?
A: Absolutely! Feel free to customize the colors to suit your personal style or the theme of your home decor.
Q: What if I make a mistake in my stitching?
A: Don’t worry! Carefully snip the thread with small scissors and gently remove the stitches. You can then re-stitch the area.
Q: How do I keep my stitches even?
A: Practice makes perfect! Try to keep the tension consistent as you pull the thread through the fabric. Using a light hand will help you maintain even stitches.

Leave a Reply