
Looking to add a pop of color to your desk or give a sweet handmade gift? This origami rose flower made from sticky notes is just the thing! 🌸 It’s not only fun and easy to make but also a great way to relax and let your creativity bloom. Let’s dive into this step-by-step tutorial and create something beautiful together! 💕
What You’ll Need
- Sticky notes (square-shaped, any color you like)
- Scissors
- Glue stick or craft glue
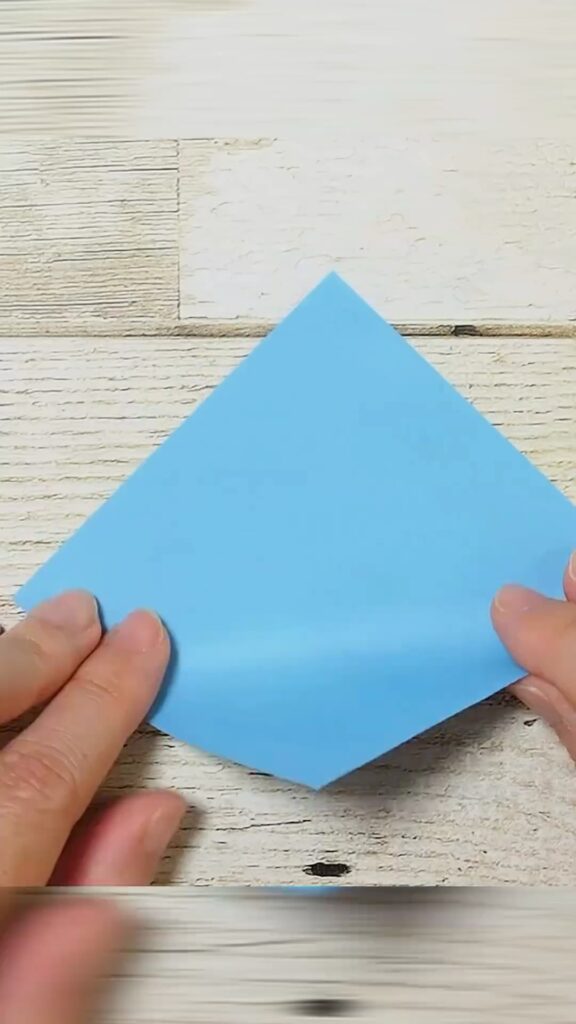


Step 1: Preparing the Sticky Note
Start with a square sticky note, sticky side up. Fold the note diagonally to create a triangle. This fold will help shape the petals of your rose. Then, fold the triangle in half again to create a smaller triangle.
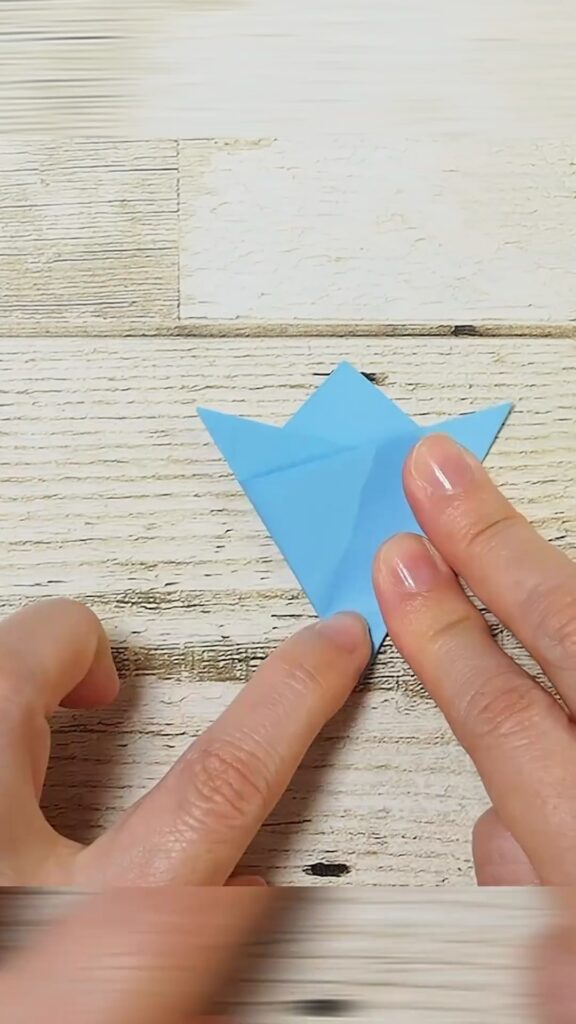
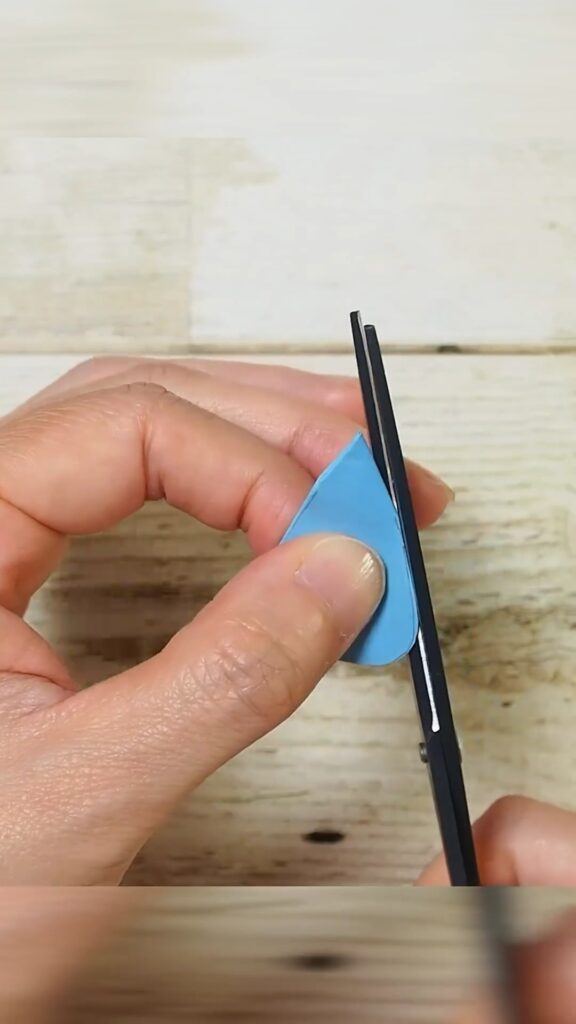
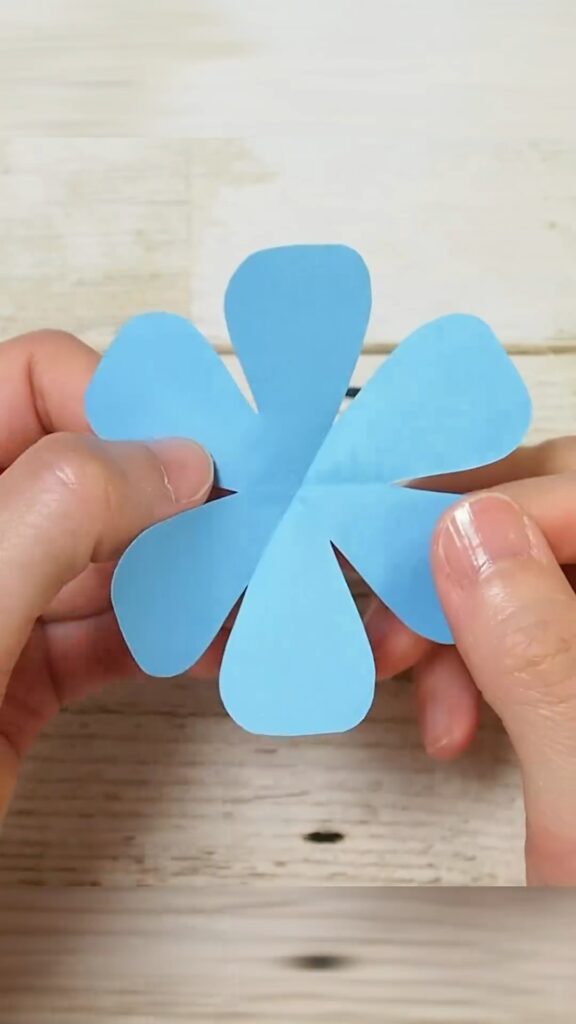
Step 2: Shaping the Petals
With the smaller triangle in hand, use your scissors to round off the open edge by cutting it into a semi-circle. When you unfold the paper, you’ll have a flower shape with rounded petals.
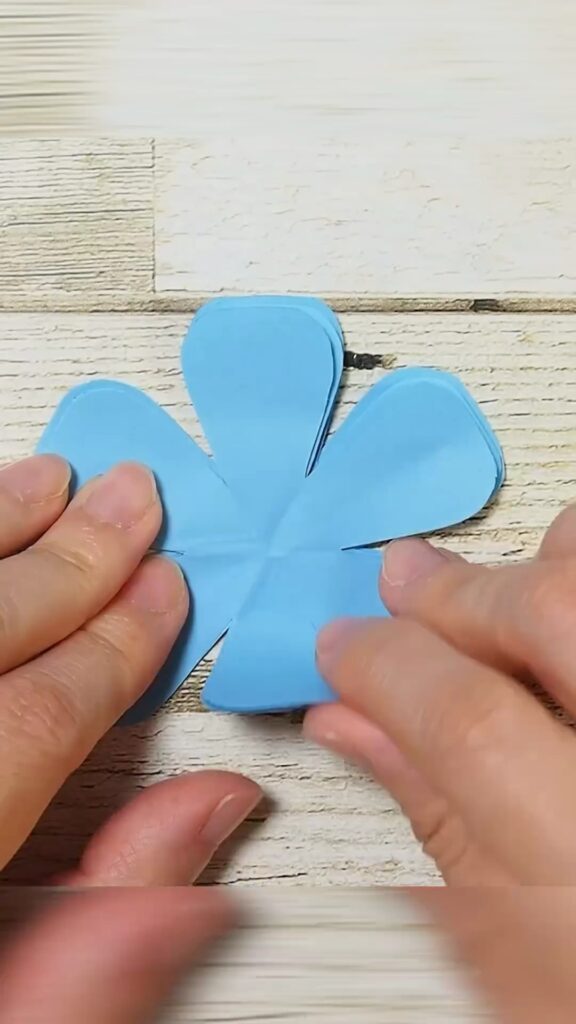
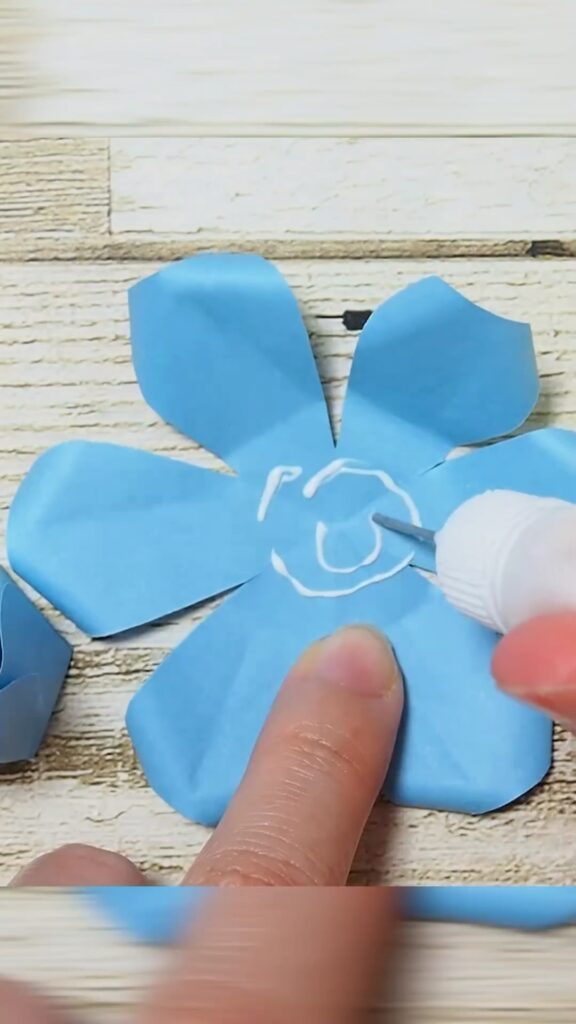
Step 3: Creating the Layers
Now, take the flower shape and make a small cut between each petal, stopping just before the center. Gently fold each petal inward, giving them a slight curve. This will help your rose take on a more realistic look.
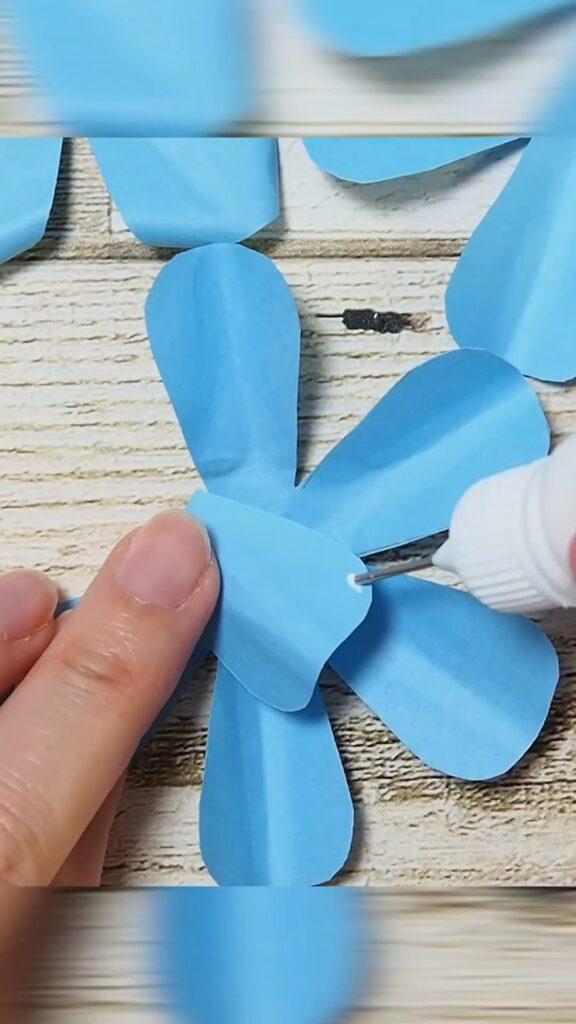
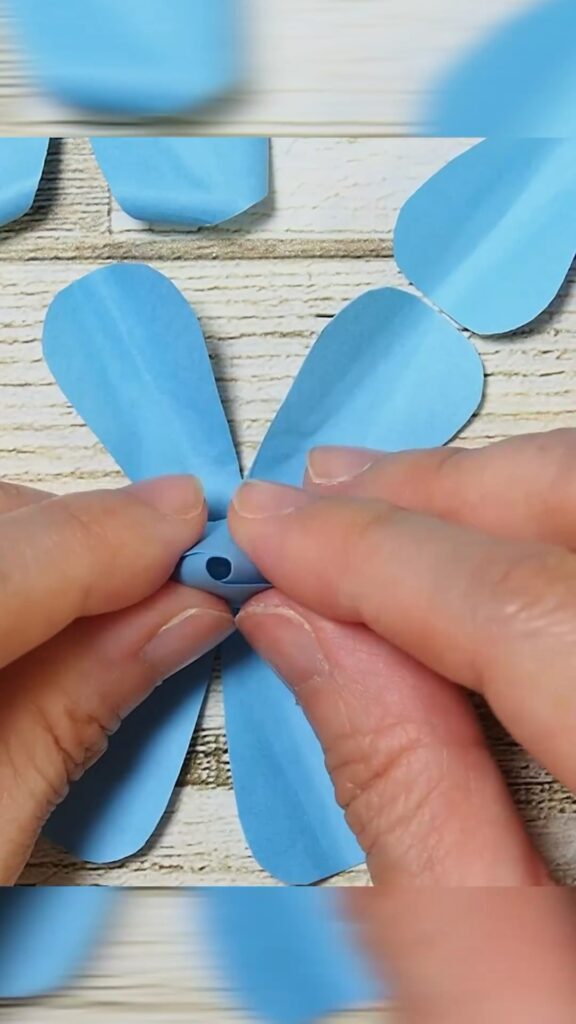
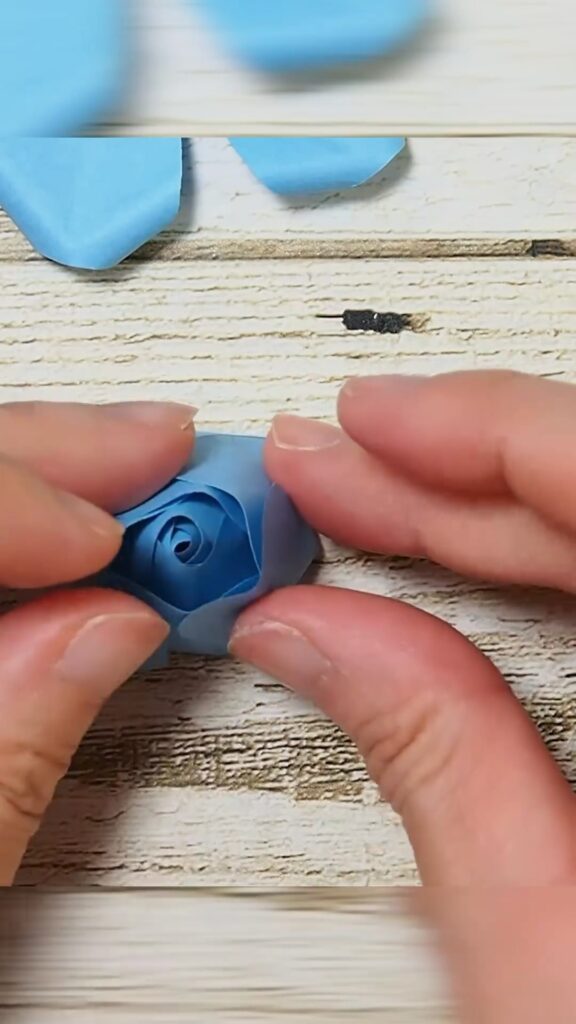
Step 4: Building the Rose
To start building the rose, create a small, tight roll from another sticky note to form the center of the flower. Secure the roll with a bit of glue so it doesn’t unravel. This will serve as the core around which the petals are wrapped.
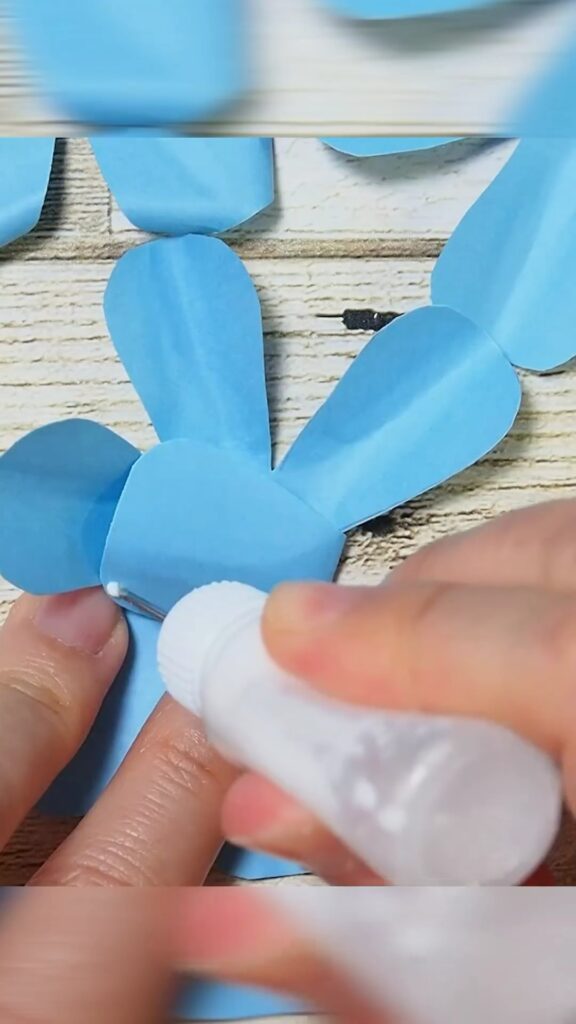
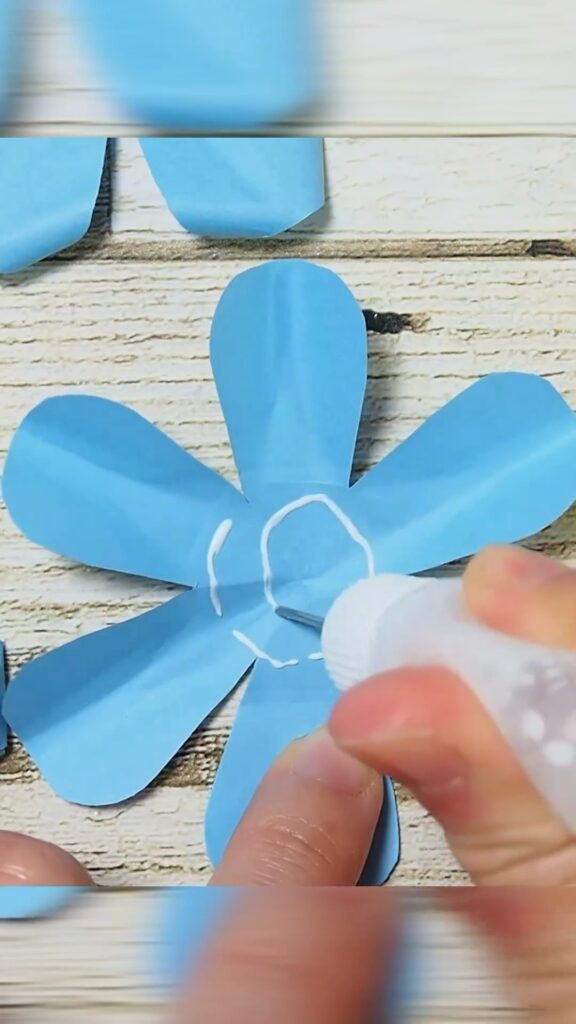
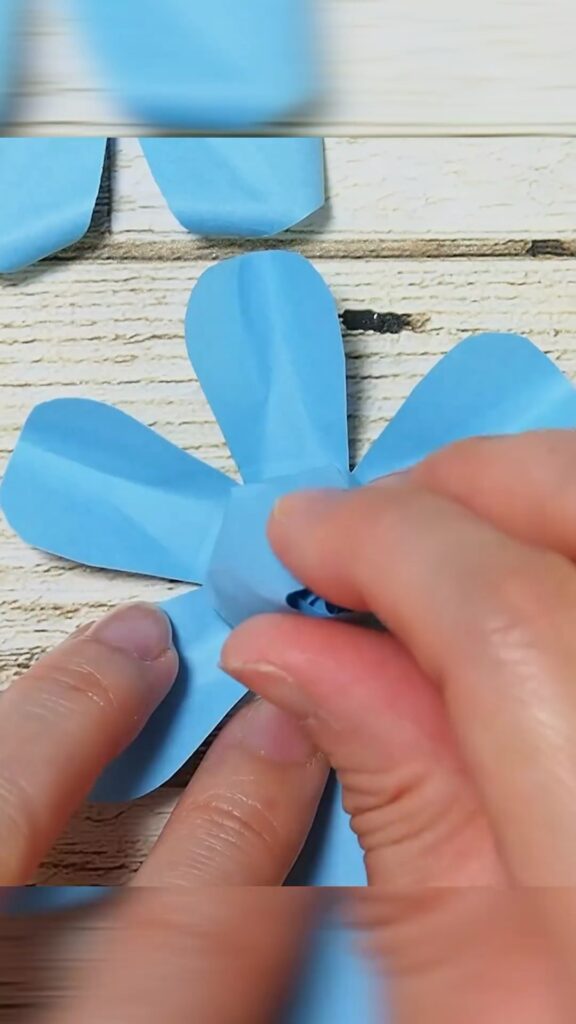
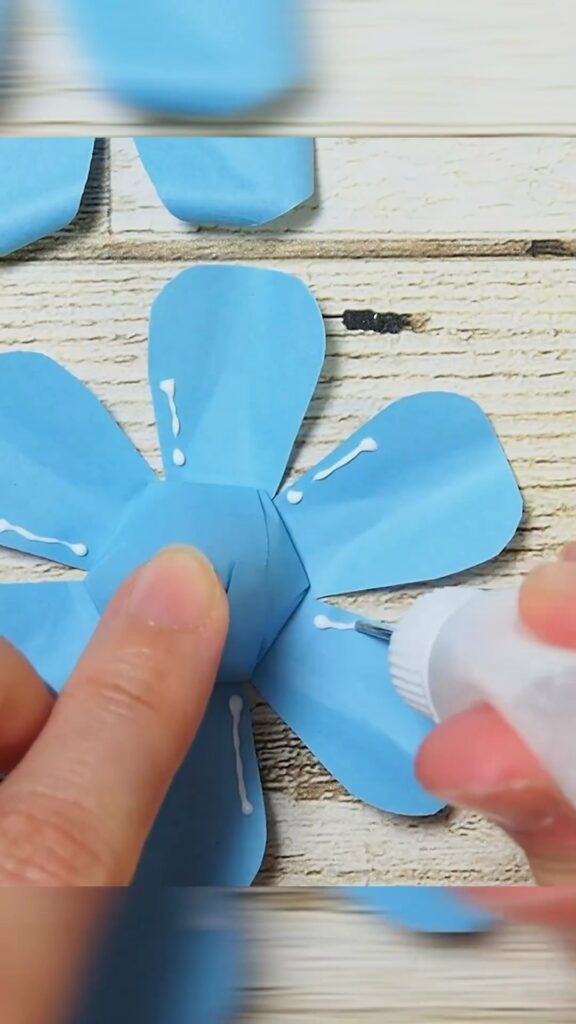
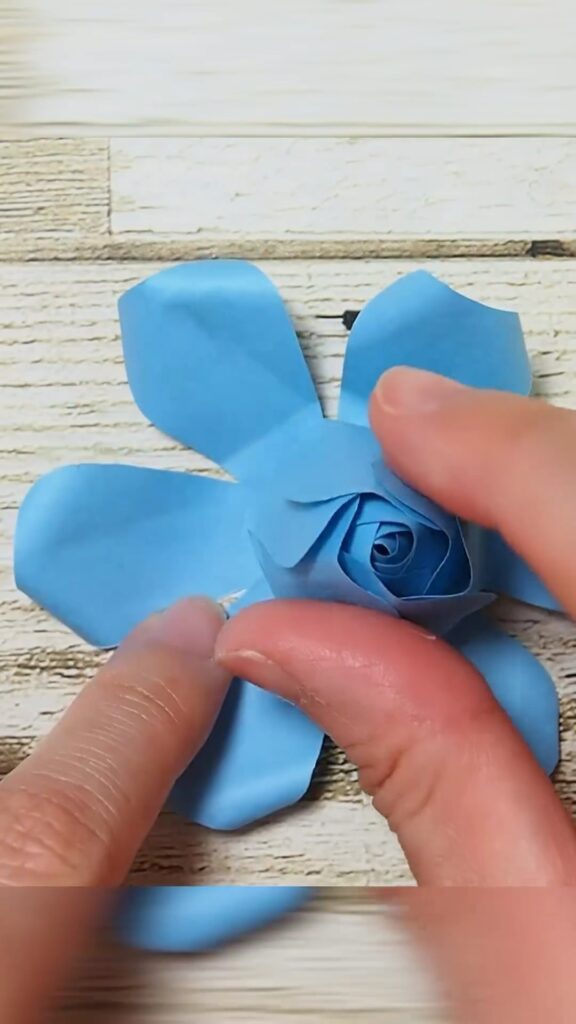
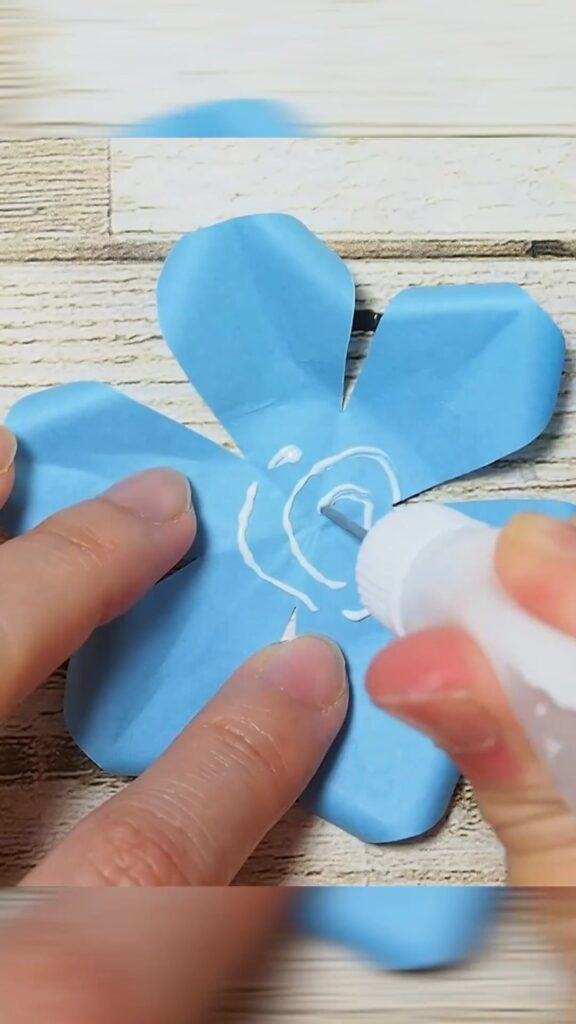
Step 5: Attaching the Petals
Begin attaching the curved petals around the rolled center. Apply a small amount of glue to the base of each petal and press it gently around the core. Overlap the petals slightly as you go to create a full, layered look.
Step 6: Adding More Petals
Continue adding more petals until your rose has the desired fullness. You can add as many layers as you like to achieve the look you’re going for. The more layers, the fuller and more beautiful your rose will be!
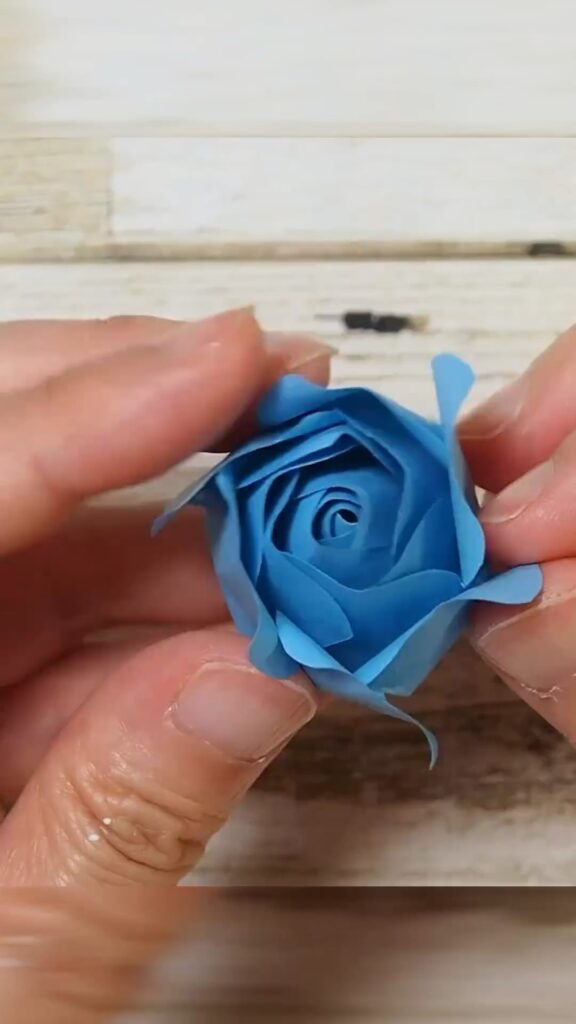
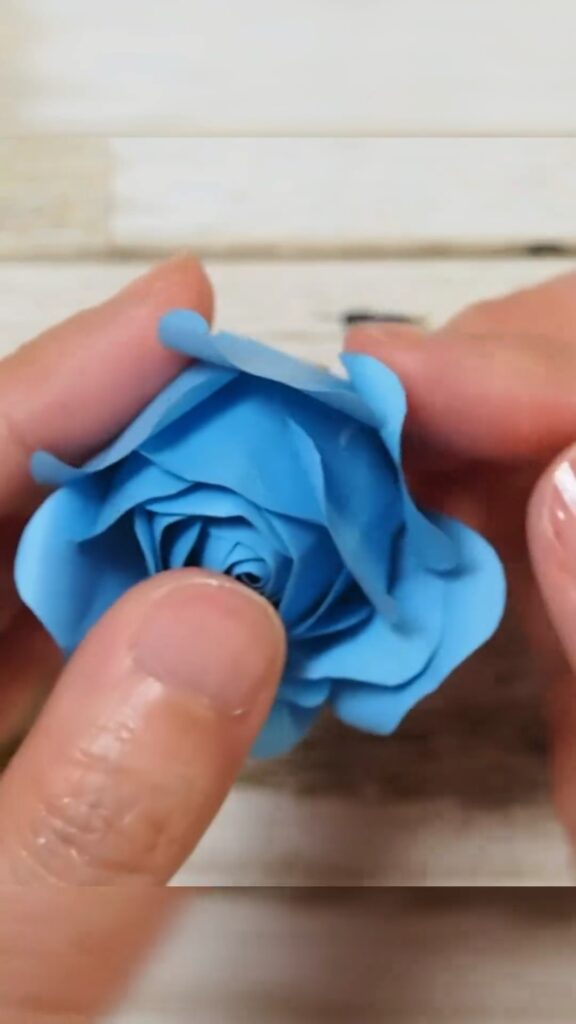
Step 7: Finishing Touches
Once all the petals are in place, give your rose a gentle fluffing to ensure the petals have a natural, open look. If needed, add a little more glue to secure any loose petals.
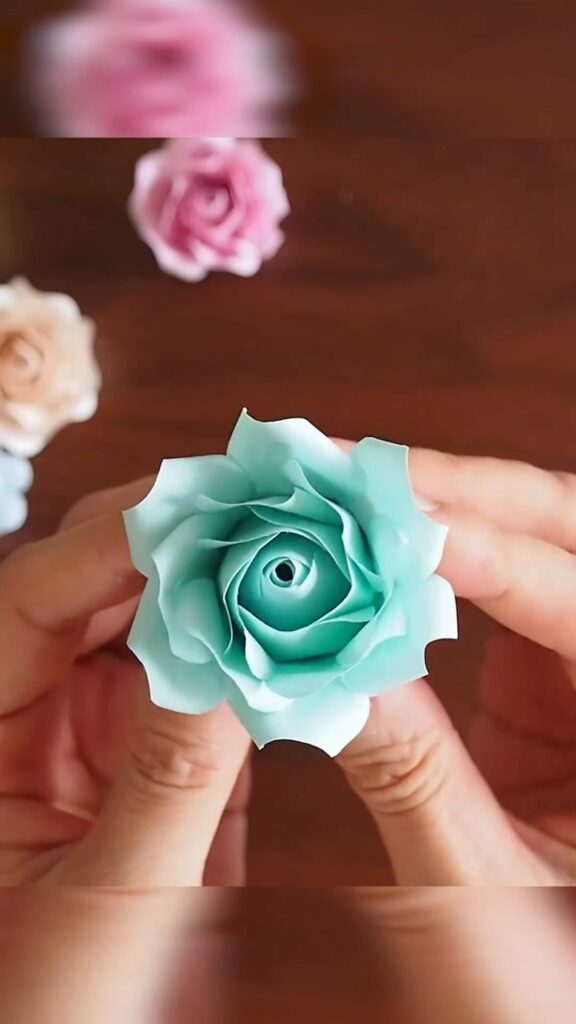
Step 8: Display Your Rose!
Your beautiful origami rose is now complete! 🌹 Place it in a small vase, attach it to a card, or even make a bouquet of these paper flowers to gift to someone special.
Why You’ll Love This Craft
This origami rose isn’t just pretty—it’s also a lovely way to unwind and get crafty. Perfect for a girls’ night in or as a quick and thoughtful gift. Plus, the fact that it’s made from sticky notes makes it even more adorable and creative! 🌸
FAQs
Q: Can I use any type of sticky notes for this craft?
A: Yes! Standard square sticky notes work best, but feel free to experiment with different sizes and colors.
Q: How long does it take to make one rose?
A: It usually takes about 10-15 minutes, depending on your experience with origami and how detailed you want your rose to be.
Q: Can I make this rose without glue?
A: While glue helps secure the petals, you can try without it by carefully tucking the petals in place. However, glue ensures that your rose stays intact.
Now that you have all the steps, it’s time to grab your sticky notes and start crafting these delightful roses! 🌹✨ They’re the perfect little project to brighten up your day or someone else’s. Happy folding!


Leave a Reply